App Store Distribution
Overview
Your app is almost ready to launch, but there’s one final step: getting it on the App Store. From providing a Privacy Policy URL to ensuring your app store screenshots are optimized, several details need to be in order before you can successfully submit your app.
Prerequisites
Access to Apple Developer Account - Without a developer account, you won’t be able to go through the app certification process.
Access to Appstore Connect - Right after you create a developer account, you get access to App Store Connect, where you can manage your apps and access all the information about them.
Assign the app build to your account - You need to assign the latest app build to your Apple developer account before sending out the app for review. Learn how
Prepare all the promotional materials - To help drive the discovery of your app and draw in as many early users as possible, your app will need an attractive marketing image.
Meet all legal requirements - Apple pays particular attention to user data. Your iOS app must also comply with the legal requirements in the target country. Learn more
We reccomend going through our iOS configuration and iOS Distribution guides before you get started with distributing your app to App Store.
Submit your iOS app to the App Store
Login to your Apple Developer account and access App Store Connect
Create a new app and fill in the product page

You’ll need to provide the following details on your Product Page:
Platforms: Indicate which Apple platforms your app will support.
App Name: A name of up to 30 characters that users will see in the App Store. It must be unique as it will be verified by the platform.
Primary Language: Specify the main language used for your app’s information.
Bundle ID: Choose from the app identifiers registered in your developer account.
SKU: A Stock Keeping Unit, used internally for identification. It’s optional and invisible to users but can be helpful for your organization.
User Access: Define whether your app should be accessible to all members of your App Store Connect organization or limited to specific groups.
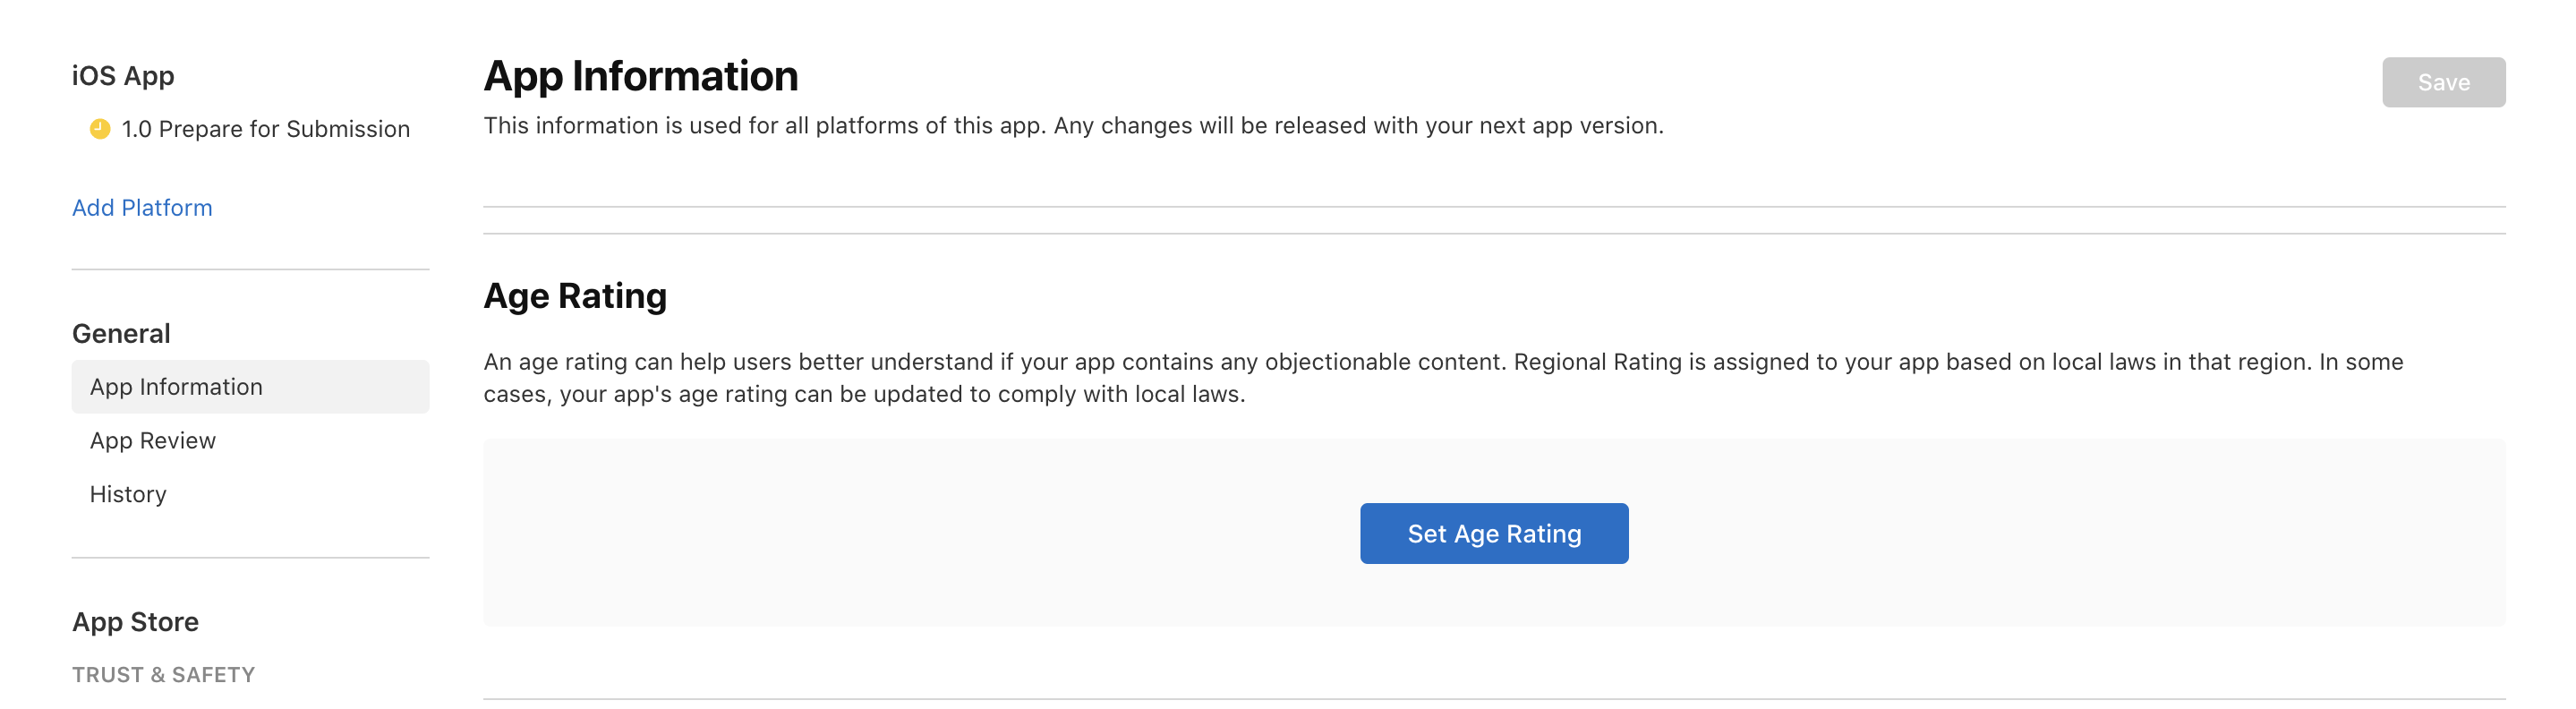
Now you are in App Information section
Fill in the App Information
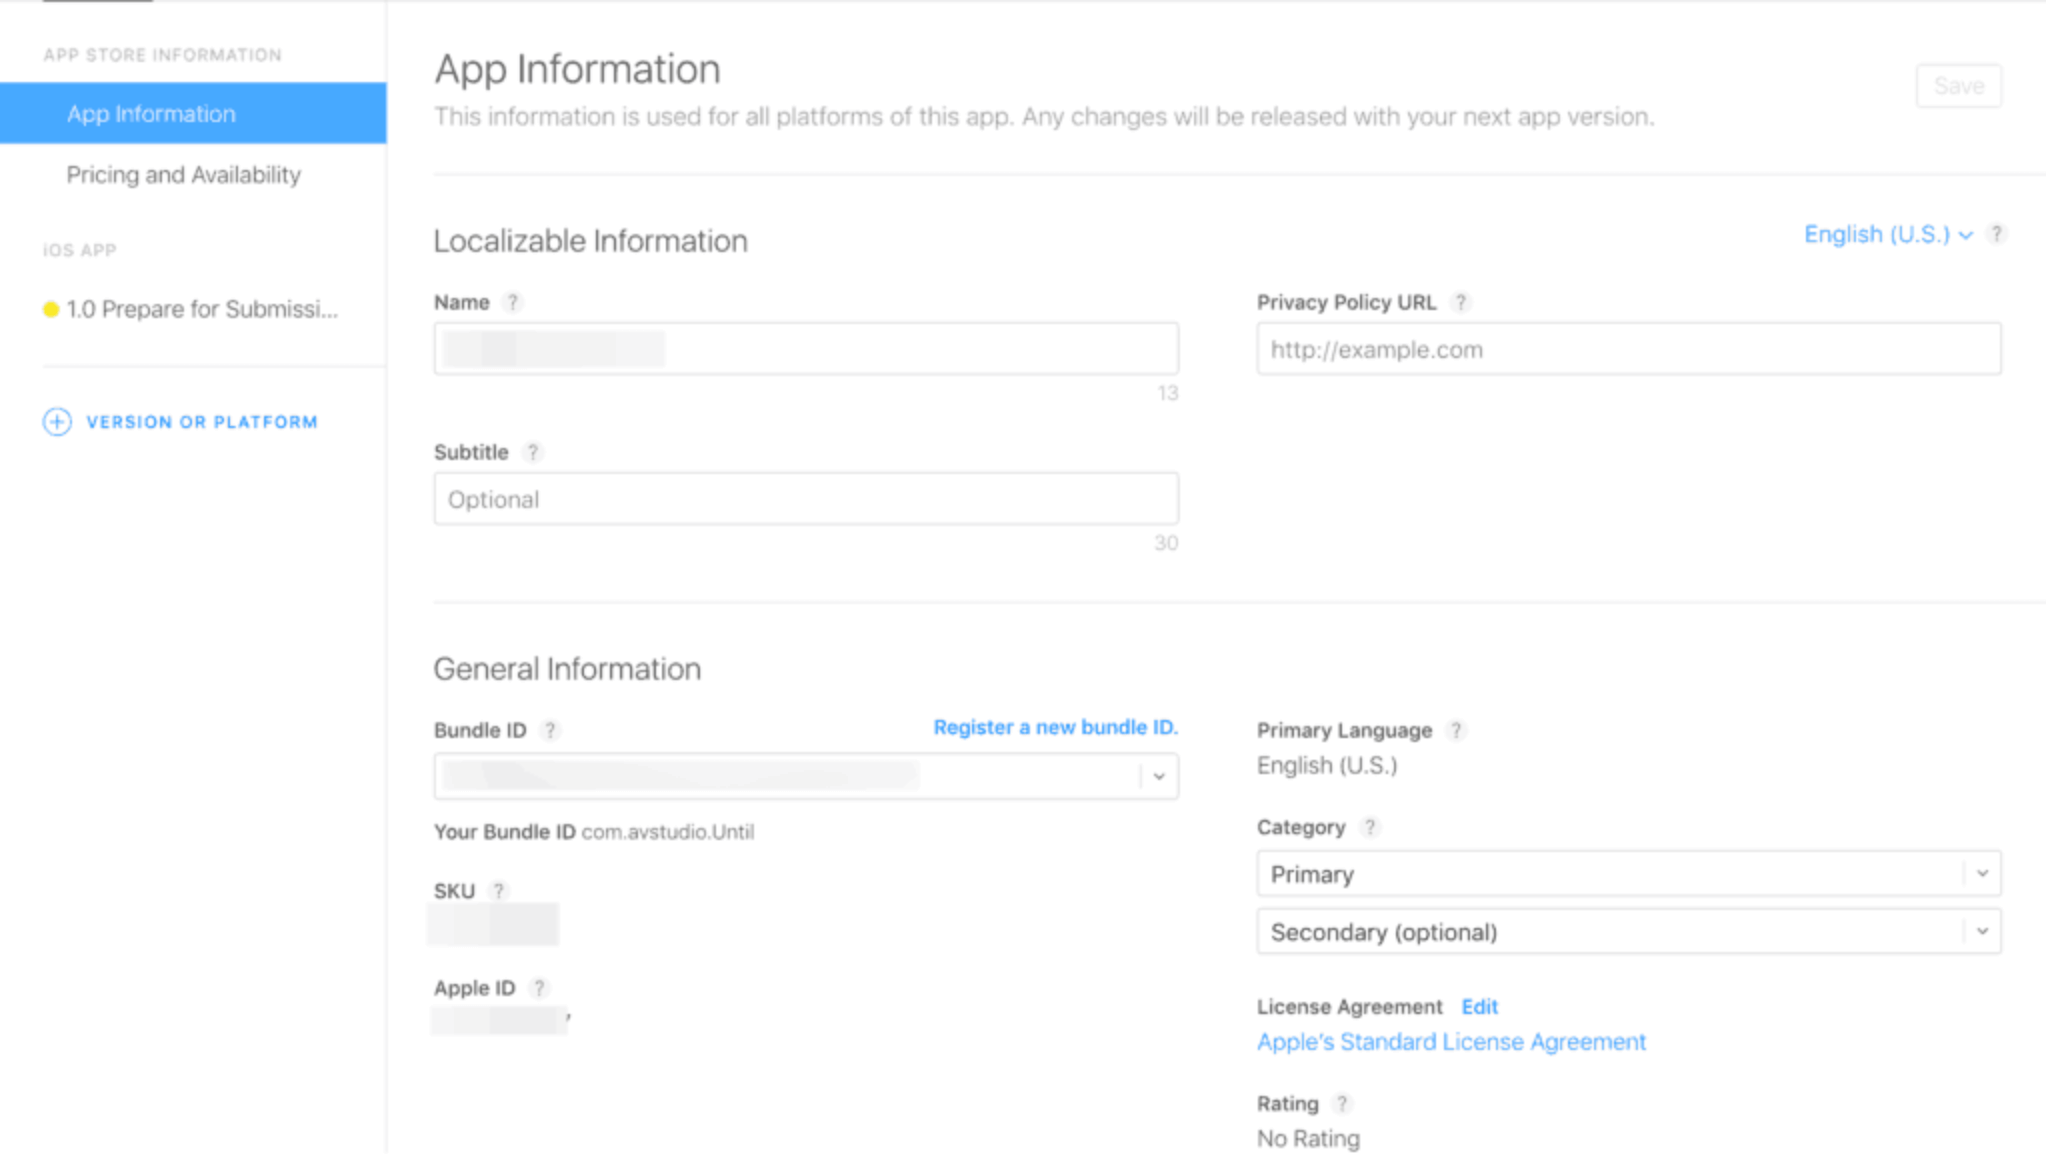
You’ll also need to choose an app category. Pick a primary category, and if your app fits more than one, you can select a secondary category as well.
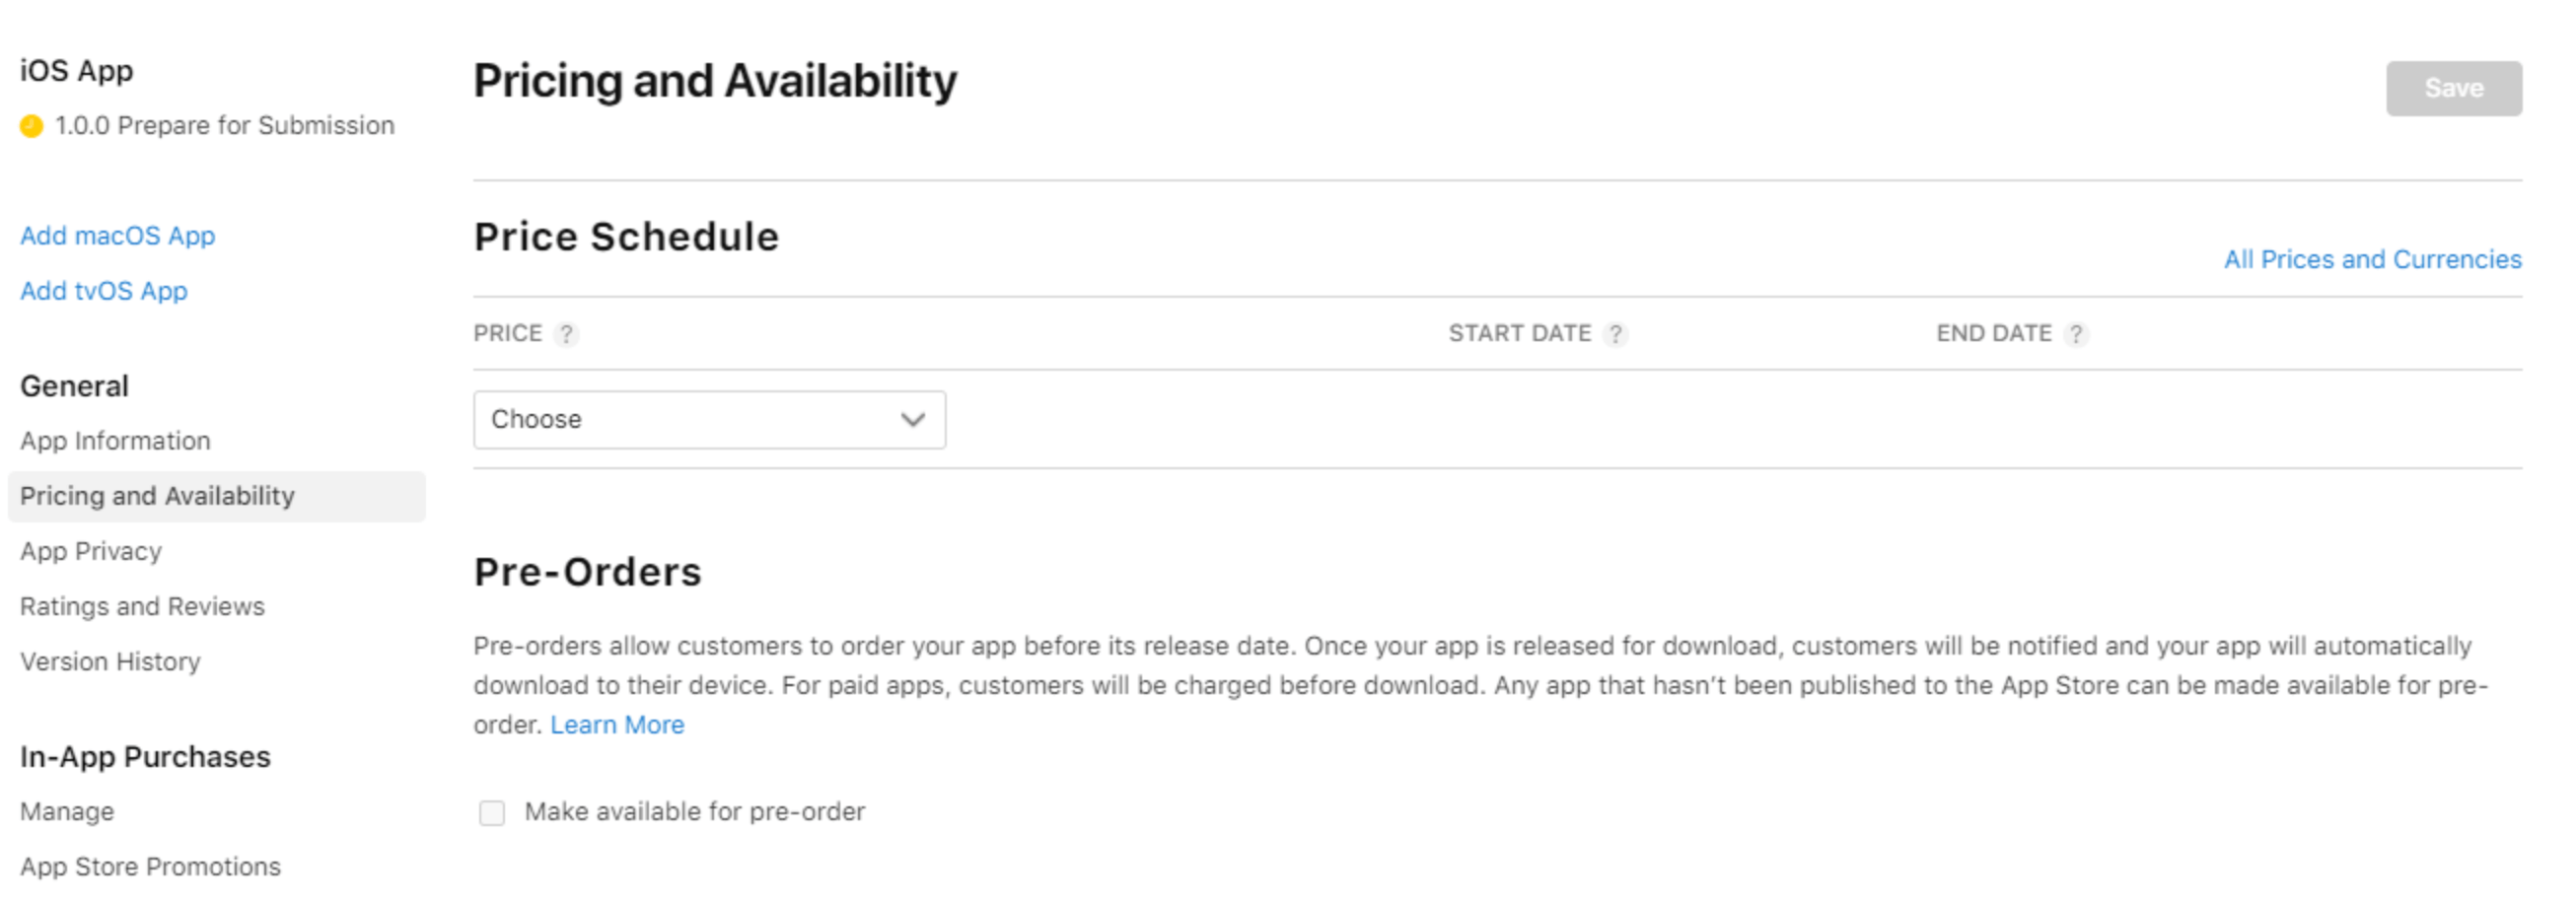
If your app is paid, set the pricing in the Pricing and Availability section. You can also control where your app is available, which is useful for soft launches in specific countries.
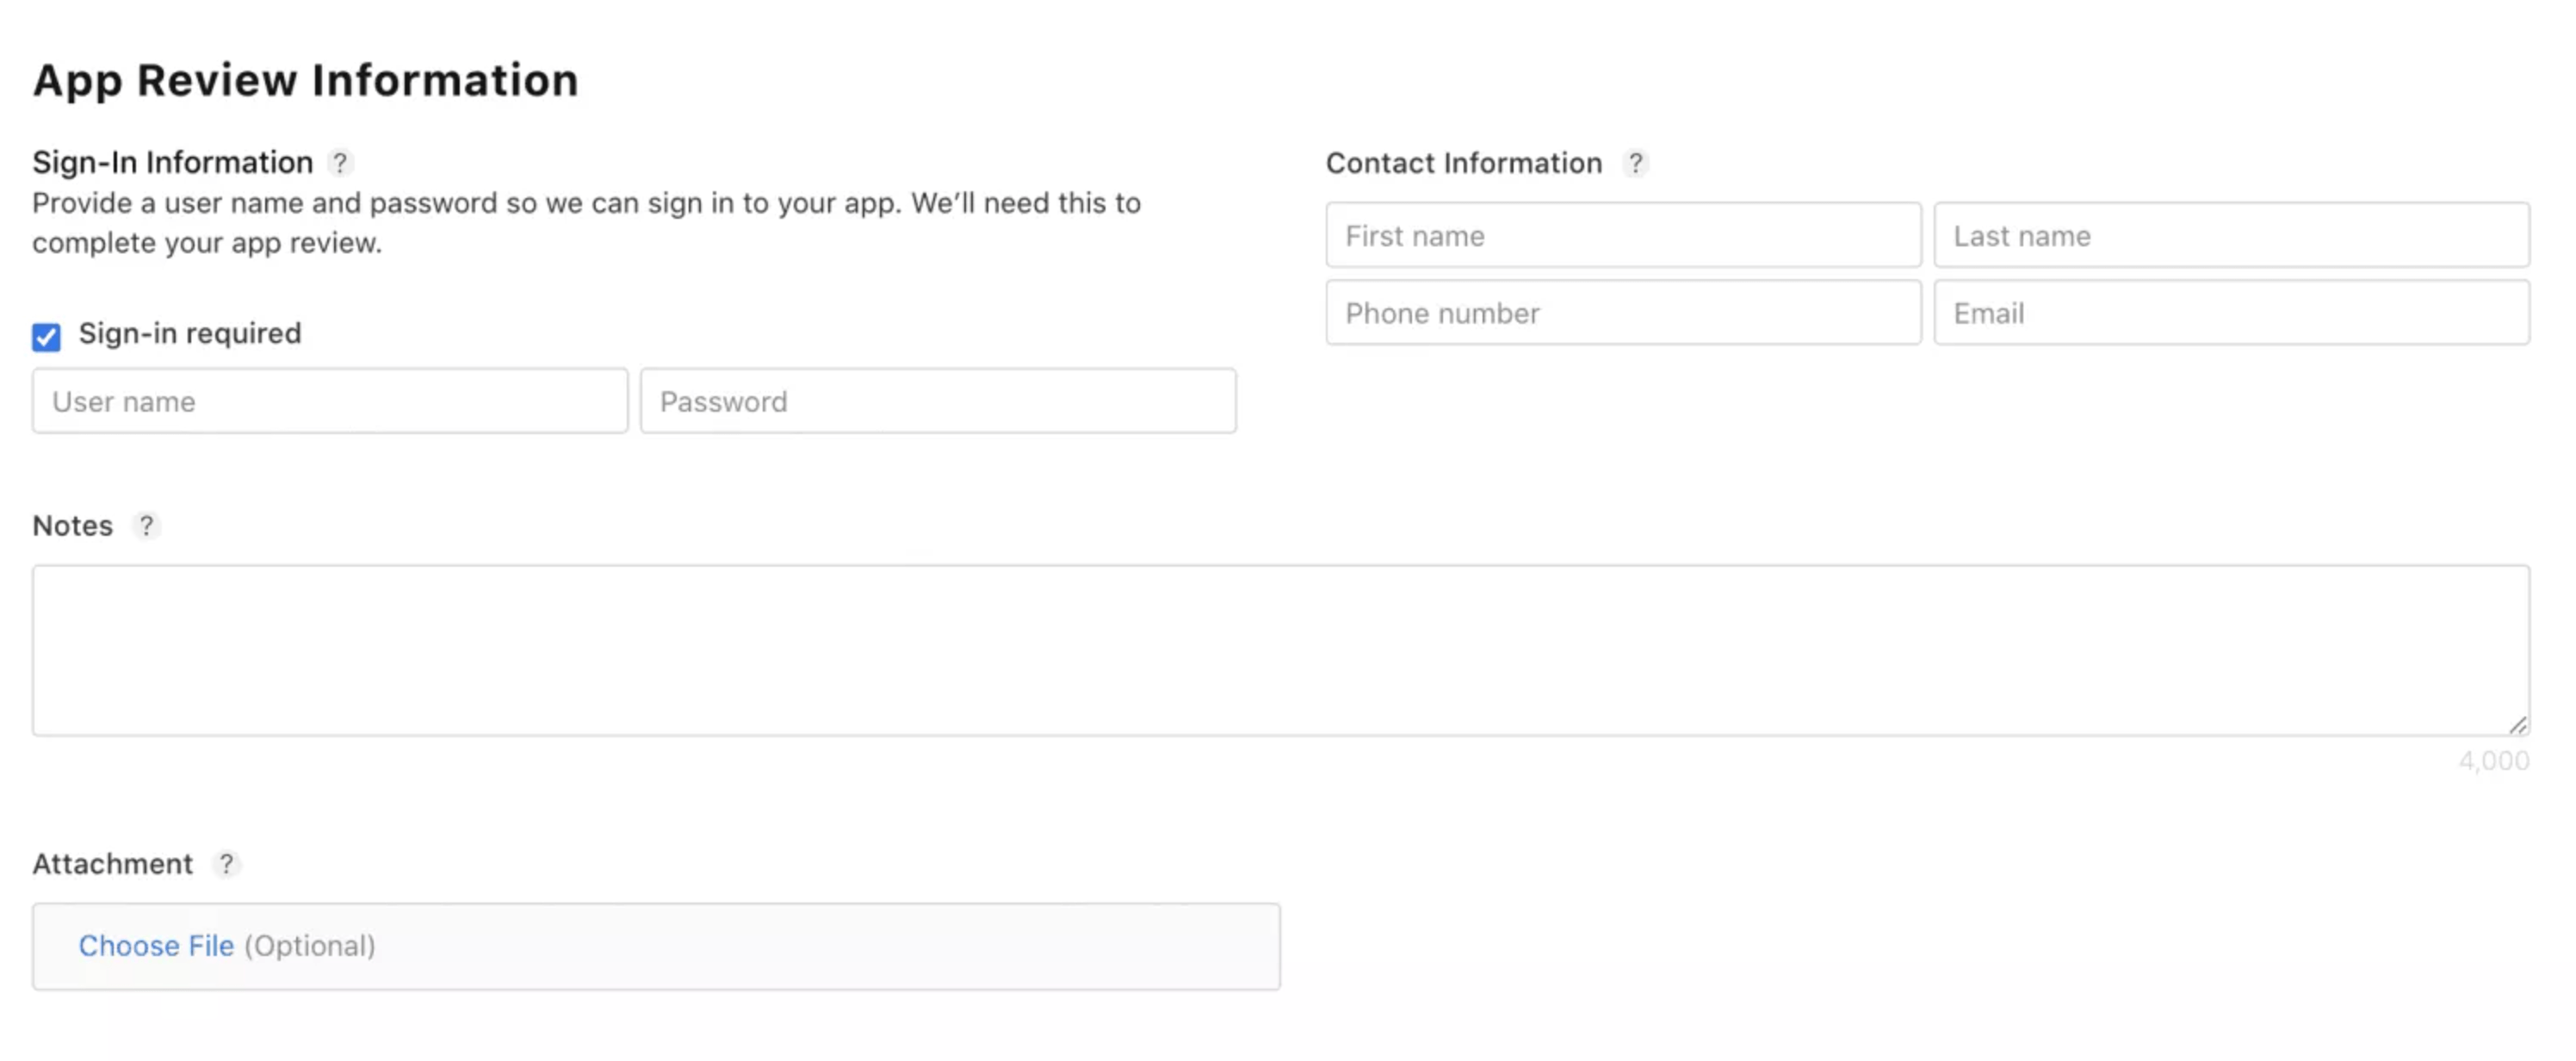
If your app requires a sign-in, you have to provide test credentials for the Apple reviewer and fill in contact information
Click on the App Privacy Section
Provide the Privacy Policy URL.
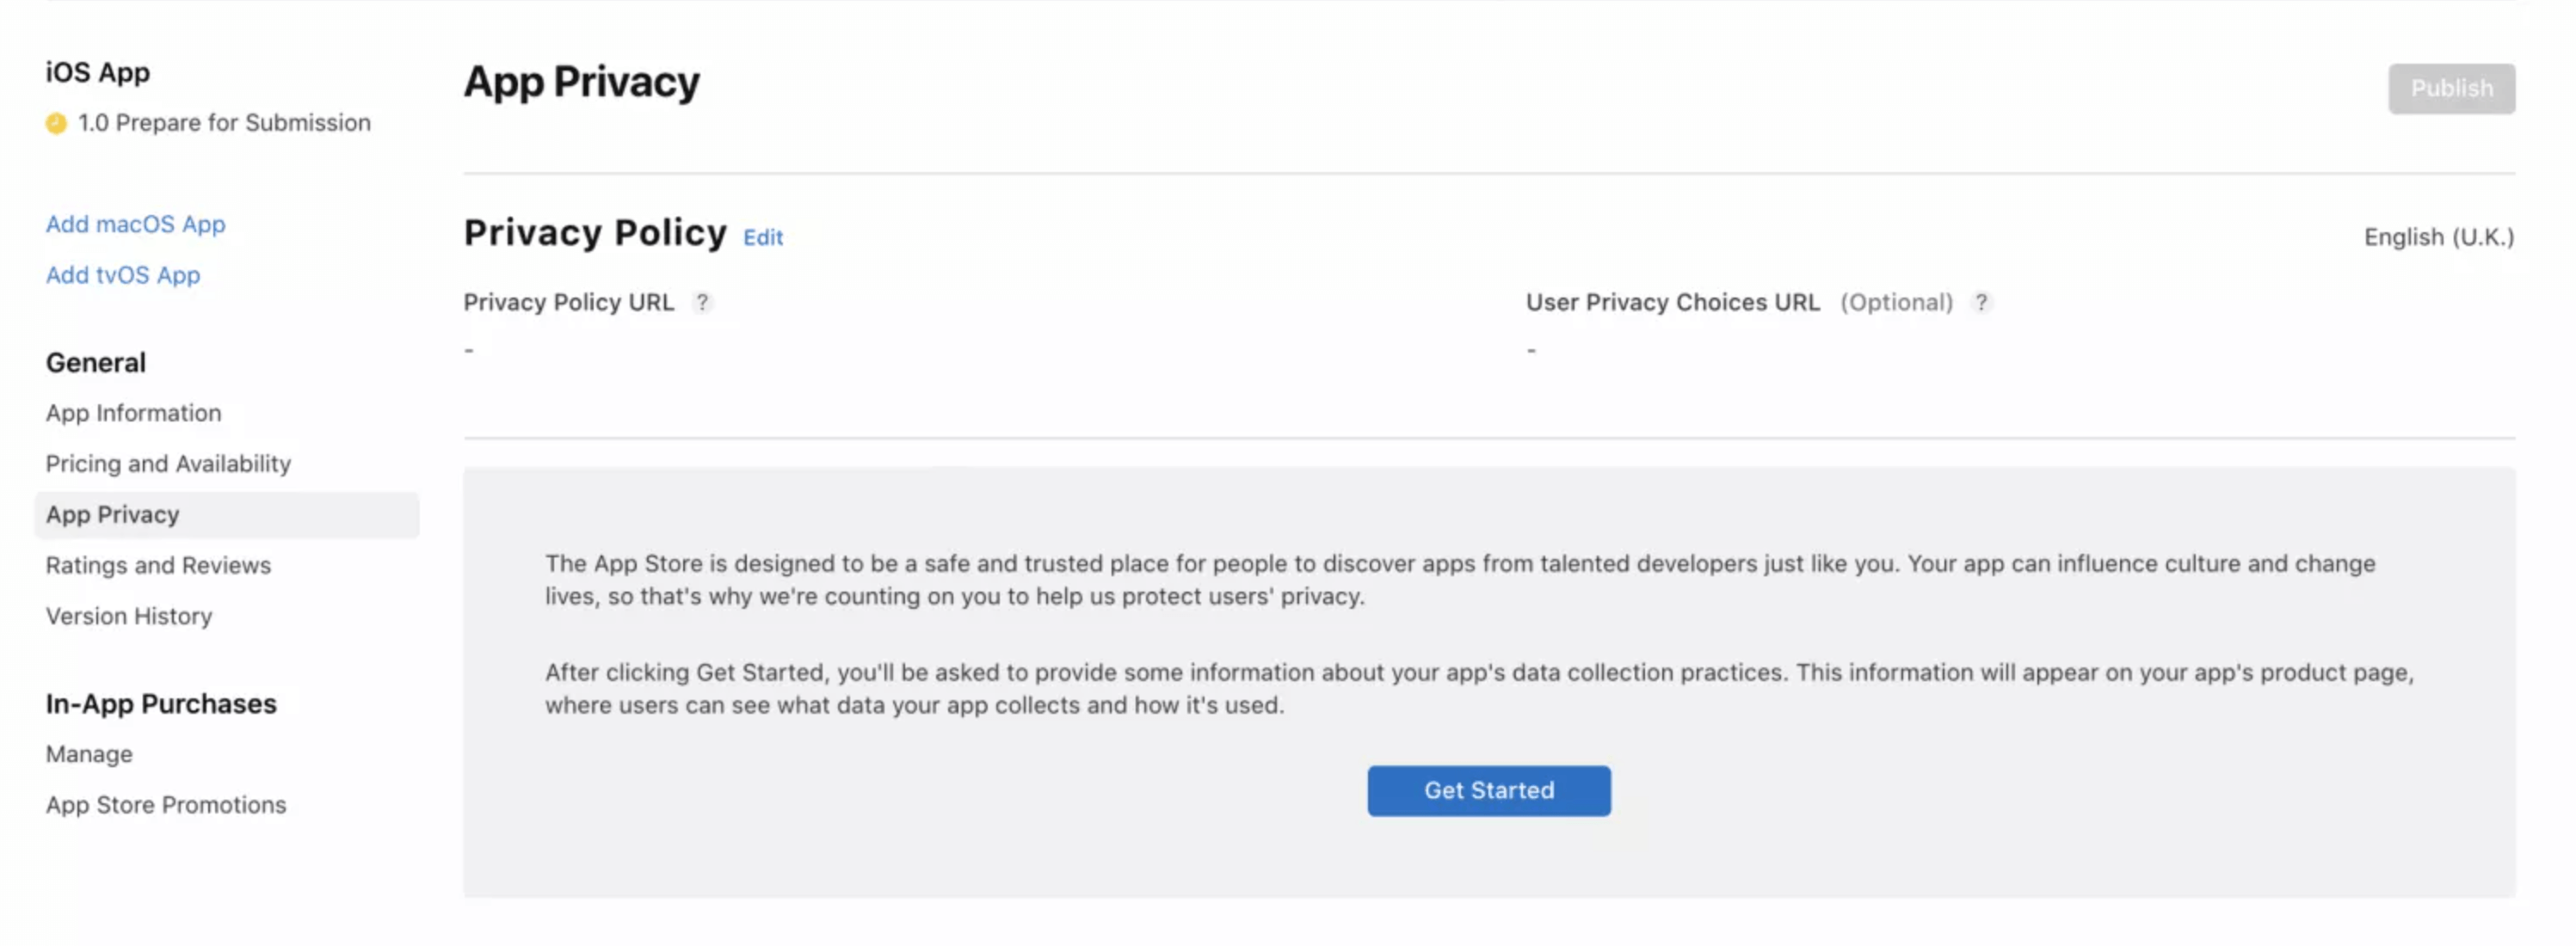
It will be visible on your app’s page and can either be a link to a PDF file or a web page.
Set the roles, certificates, identifiers and profiles
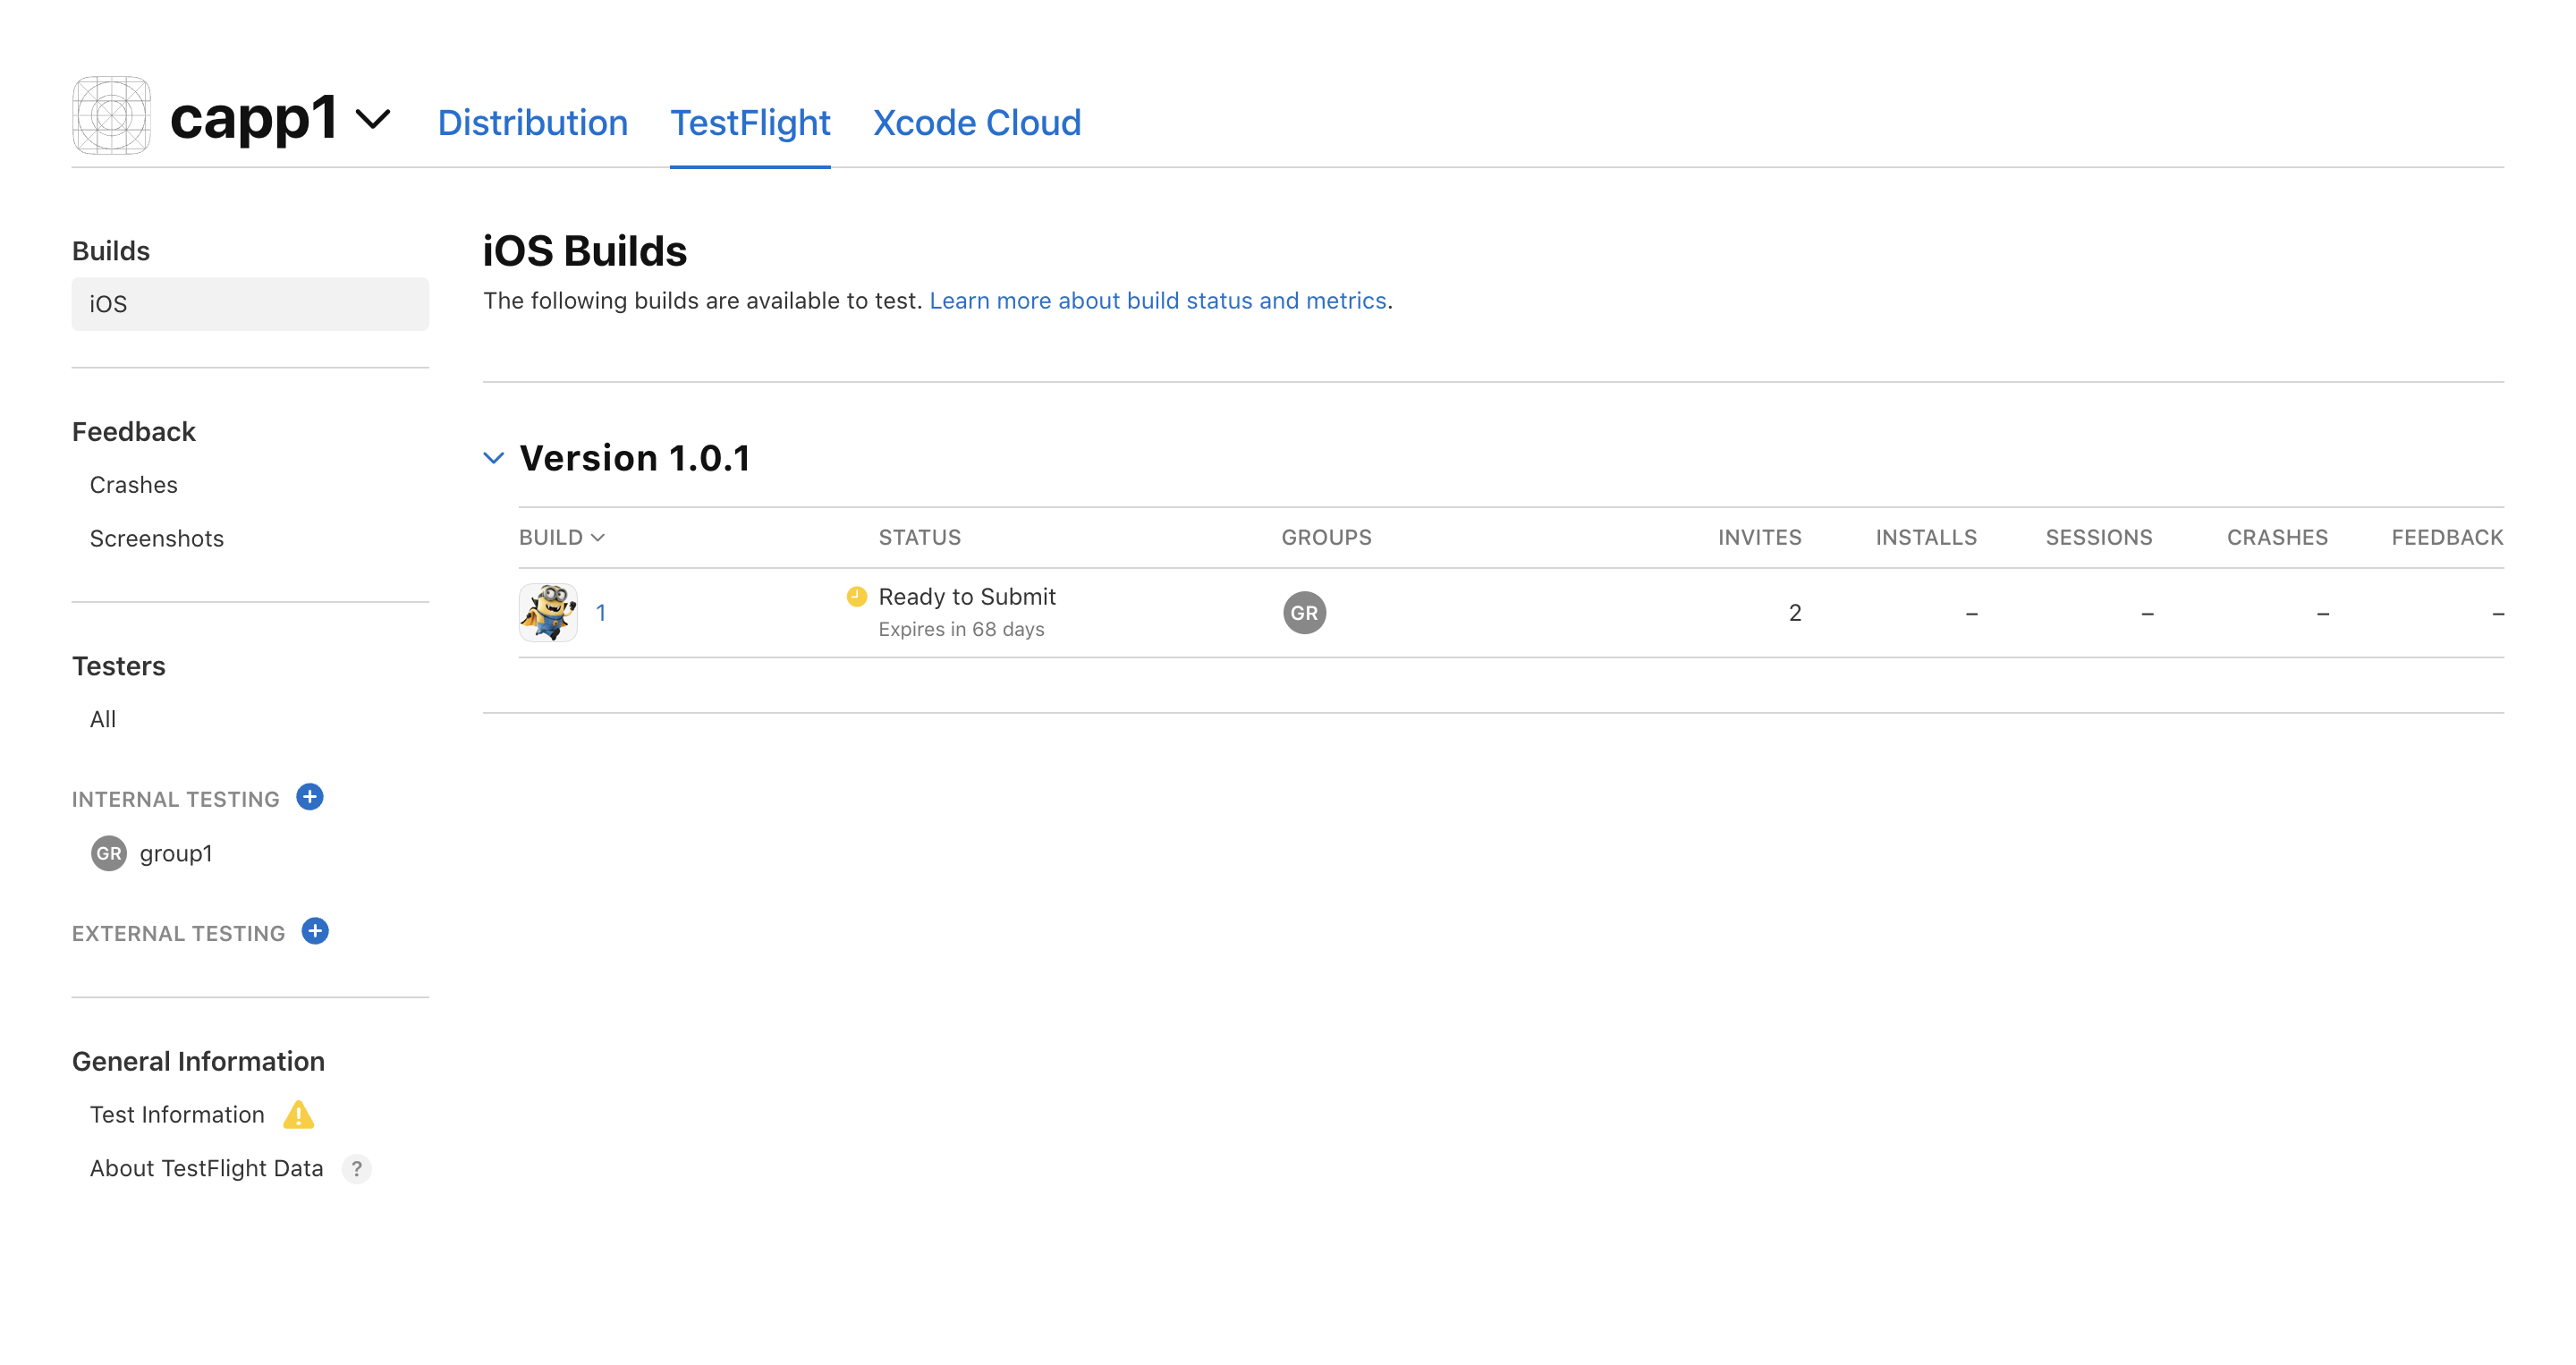
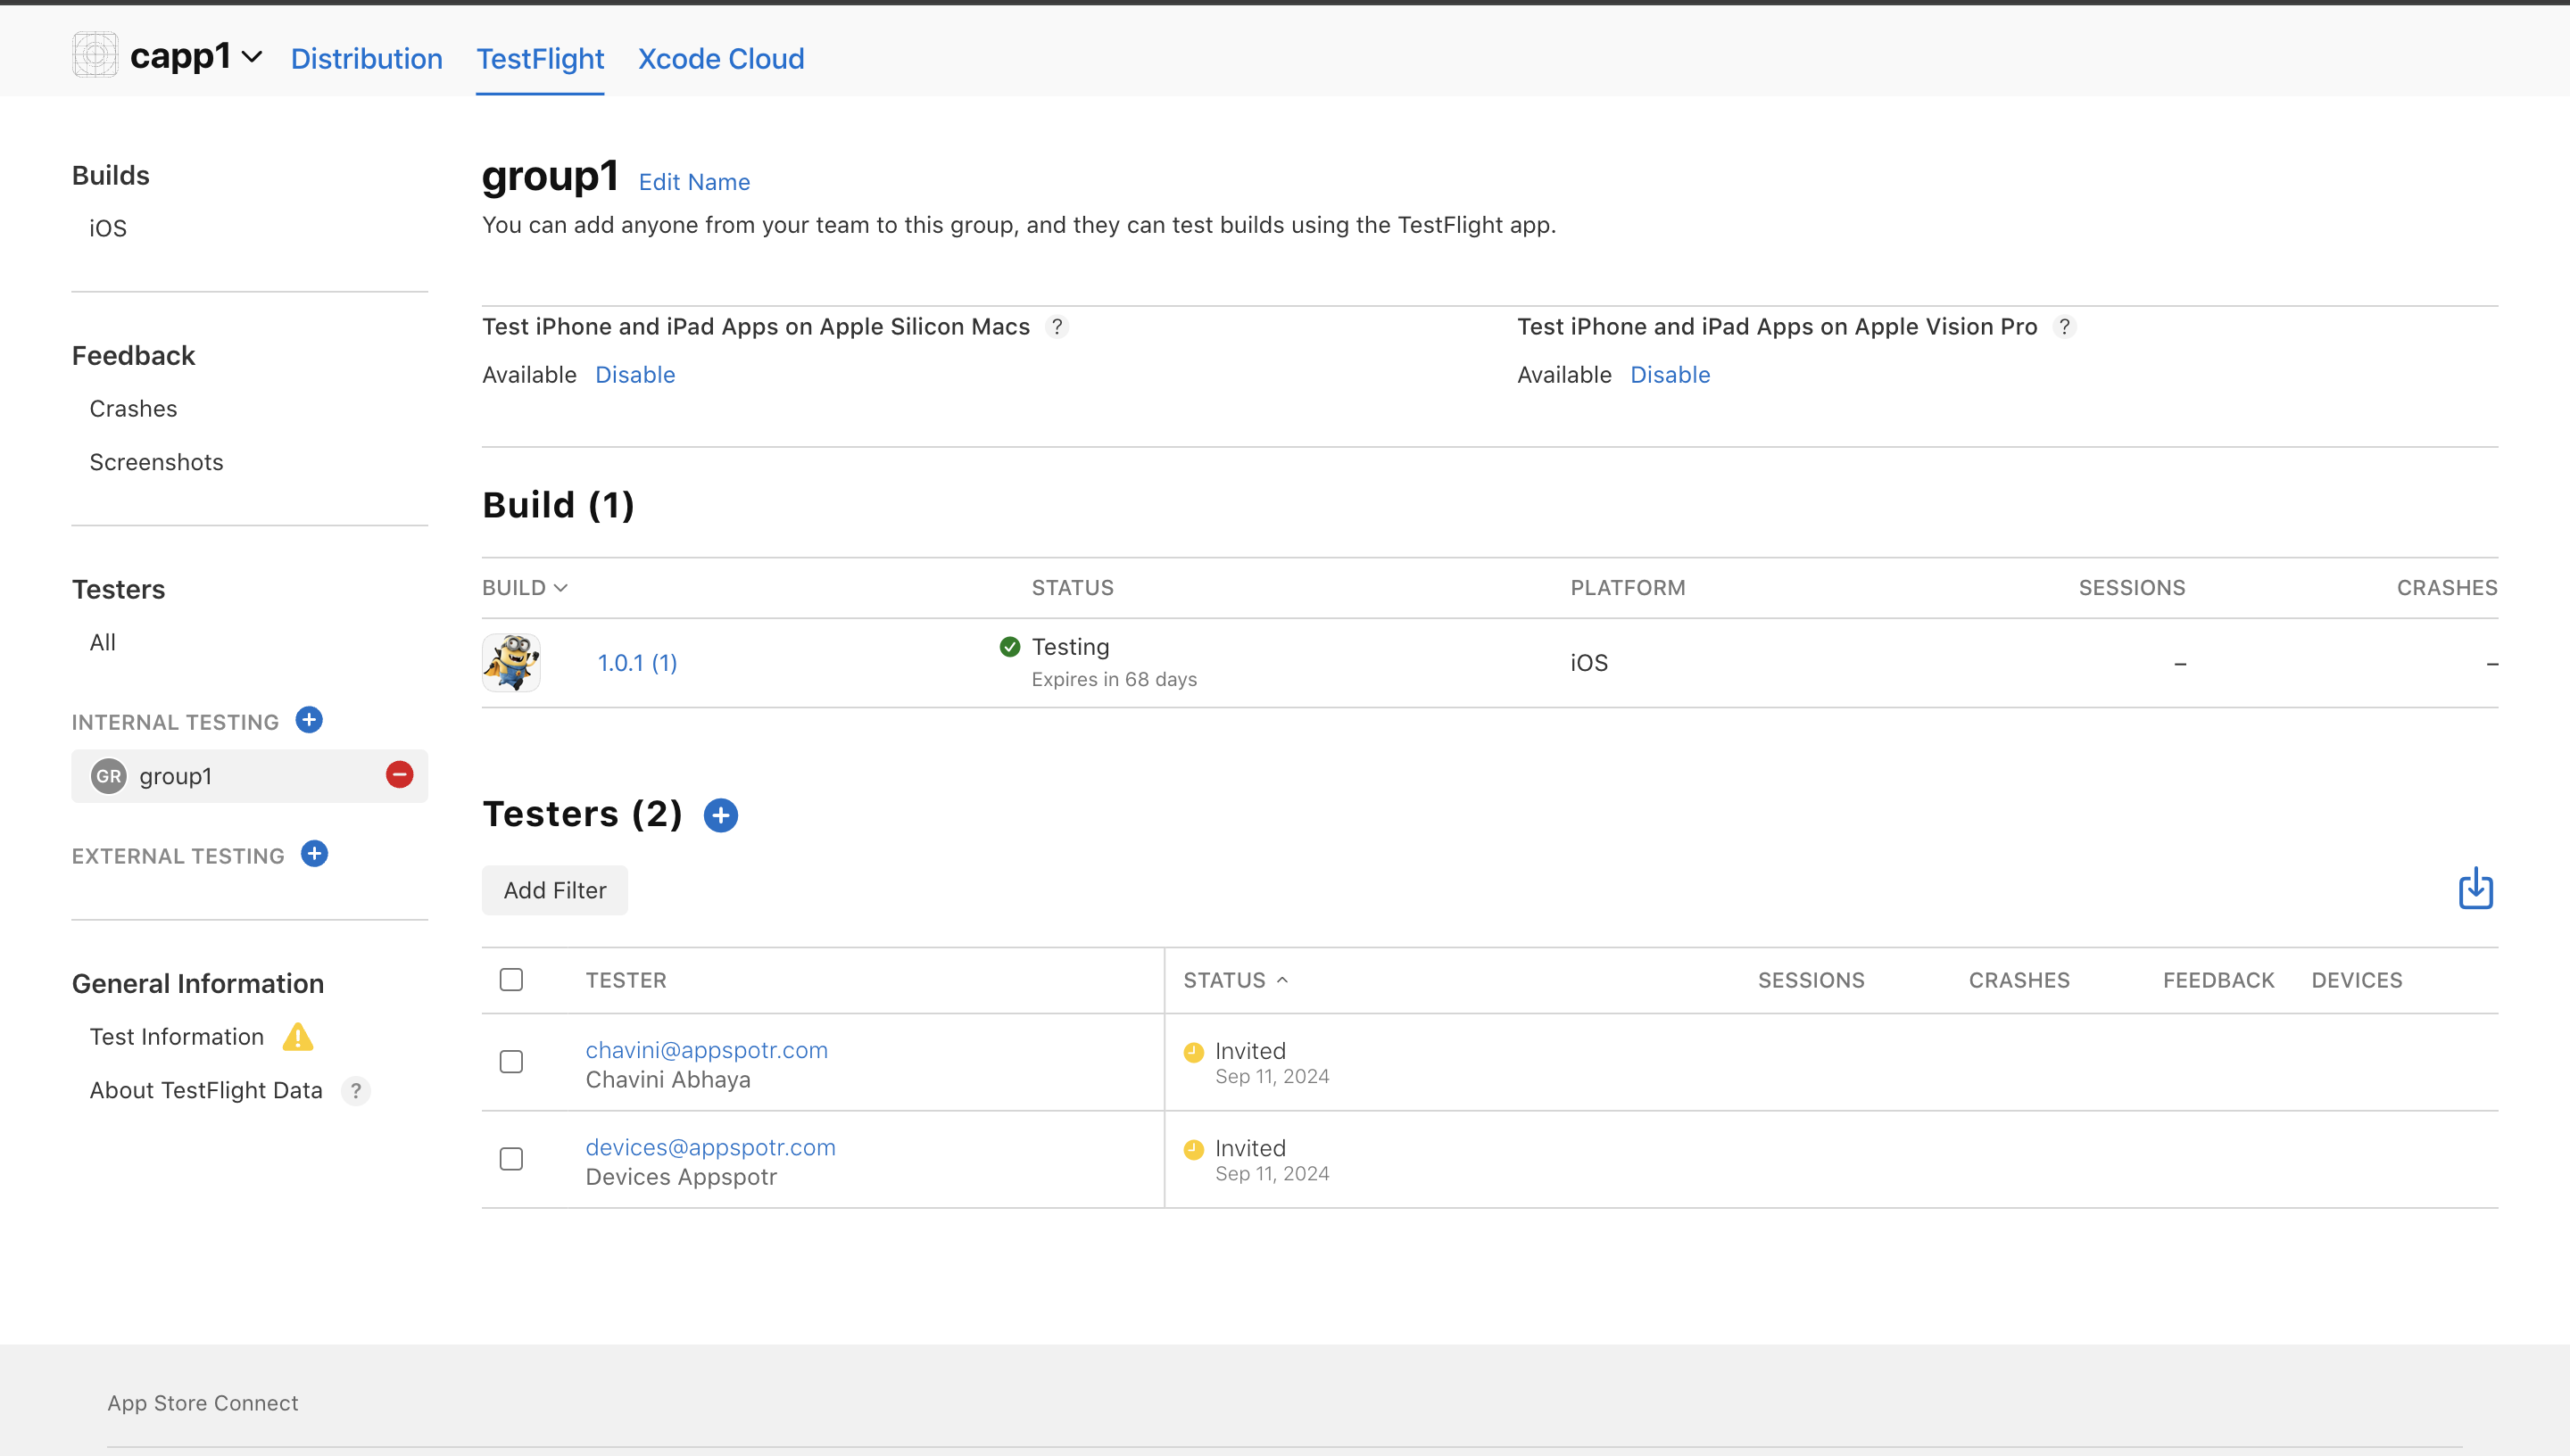
Test your app
Once your app is uploaded to the App Store Connect, you need to open the TestFlight section and add QA engineers to your Apple team so that they can test the app and detect any bugs.
Click on the Distrubution tab
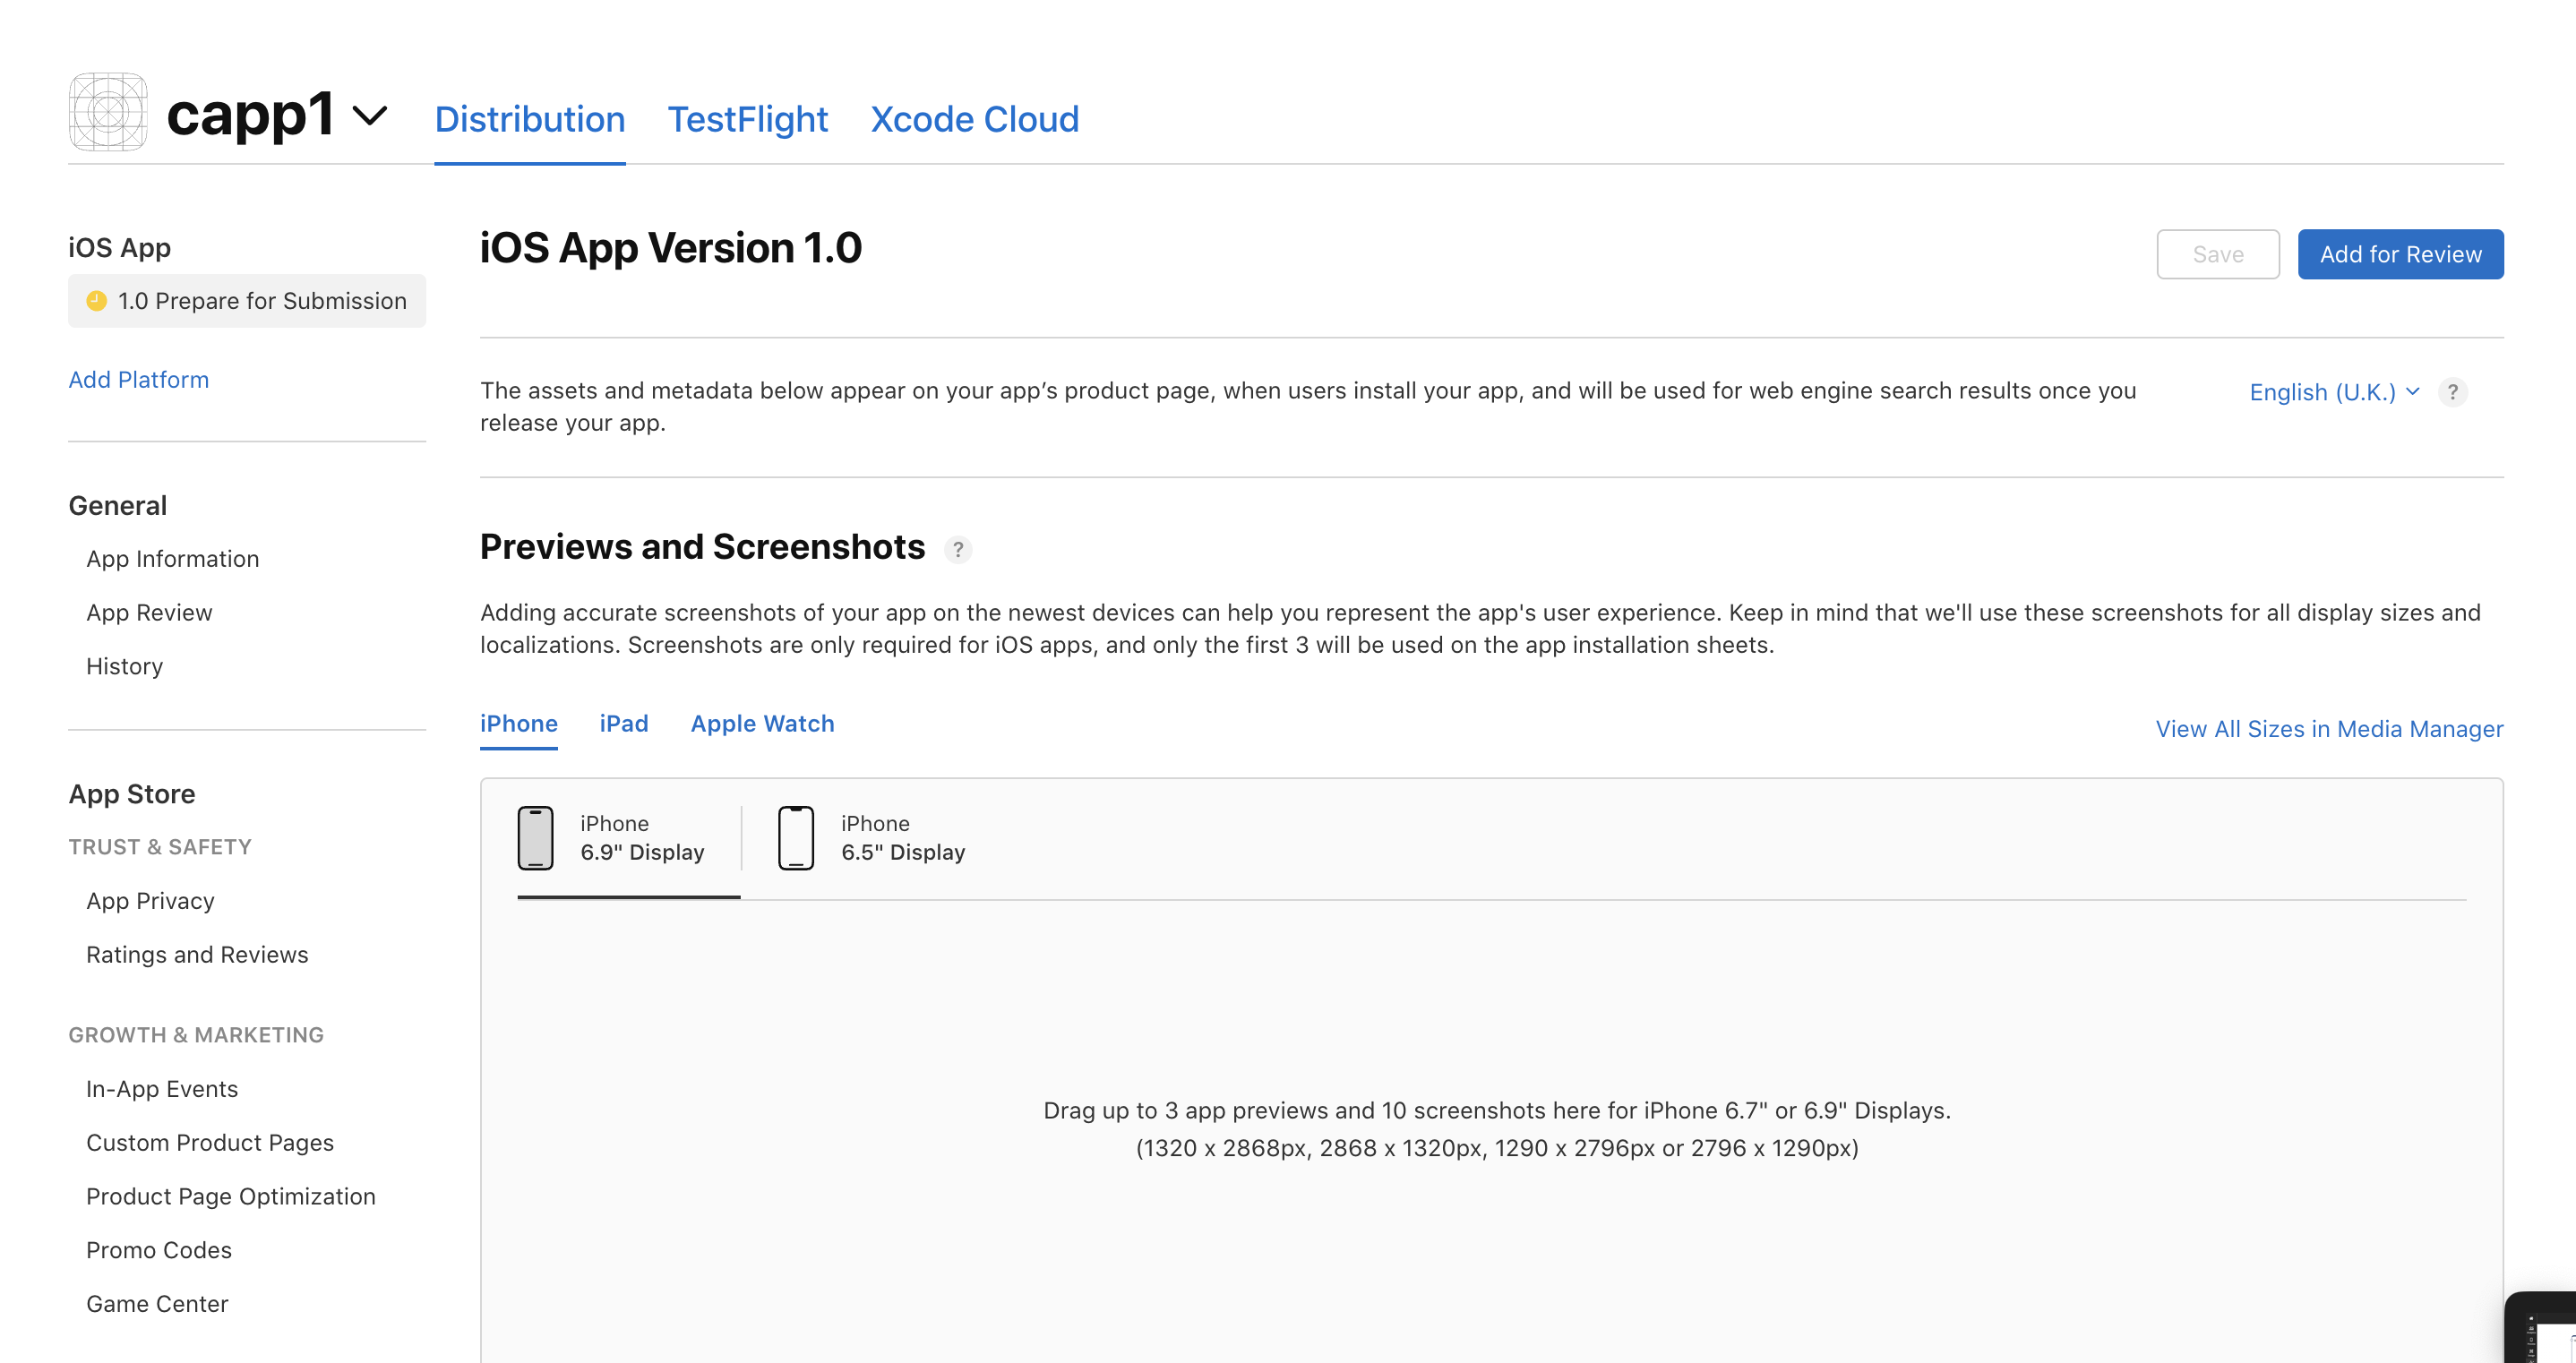
Fill in the version information
Screenshots : You can upload up to ten screenshots. Apple requires uploading screenshots for 6.5-inch and 5.5-inch iPhones. Check out the Screenshot specifications for Apple’s requirements.
App previews : An app preview is an optional short video demonstrating the core app features. It can be up to 30 seconds long, and you can add up to 3 app previews.
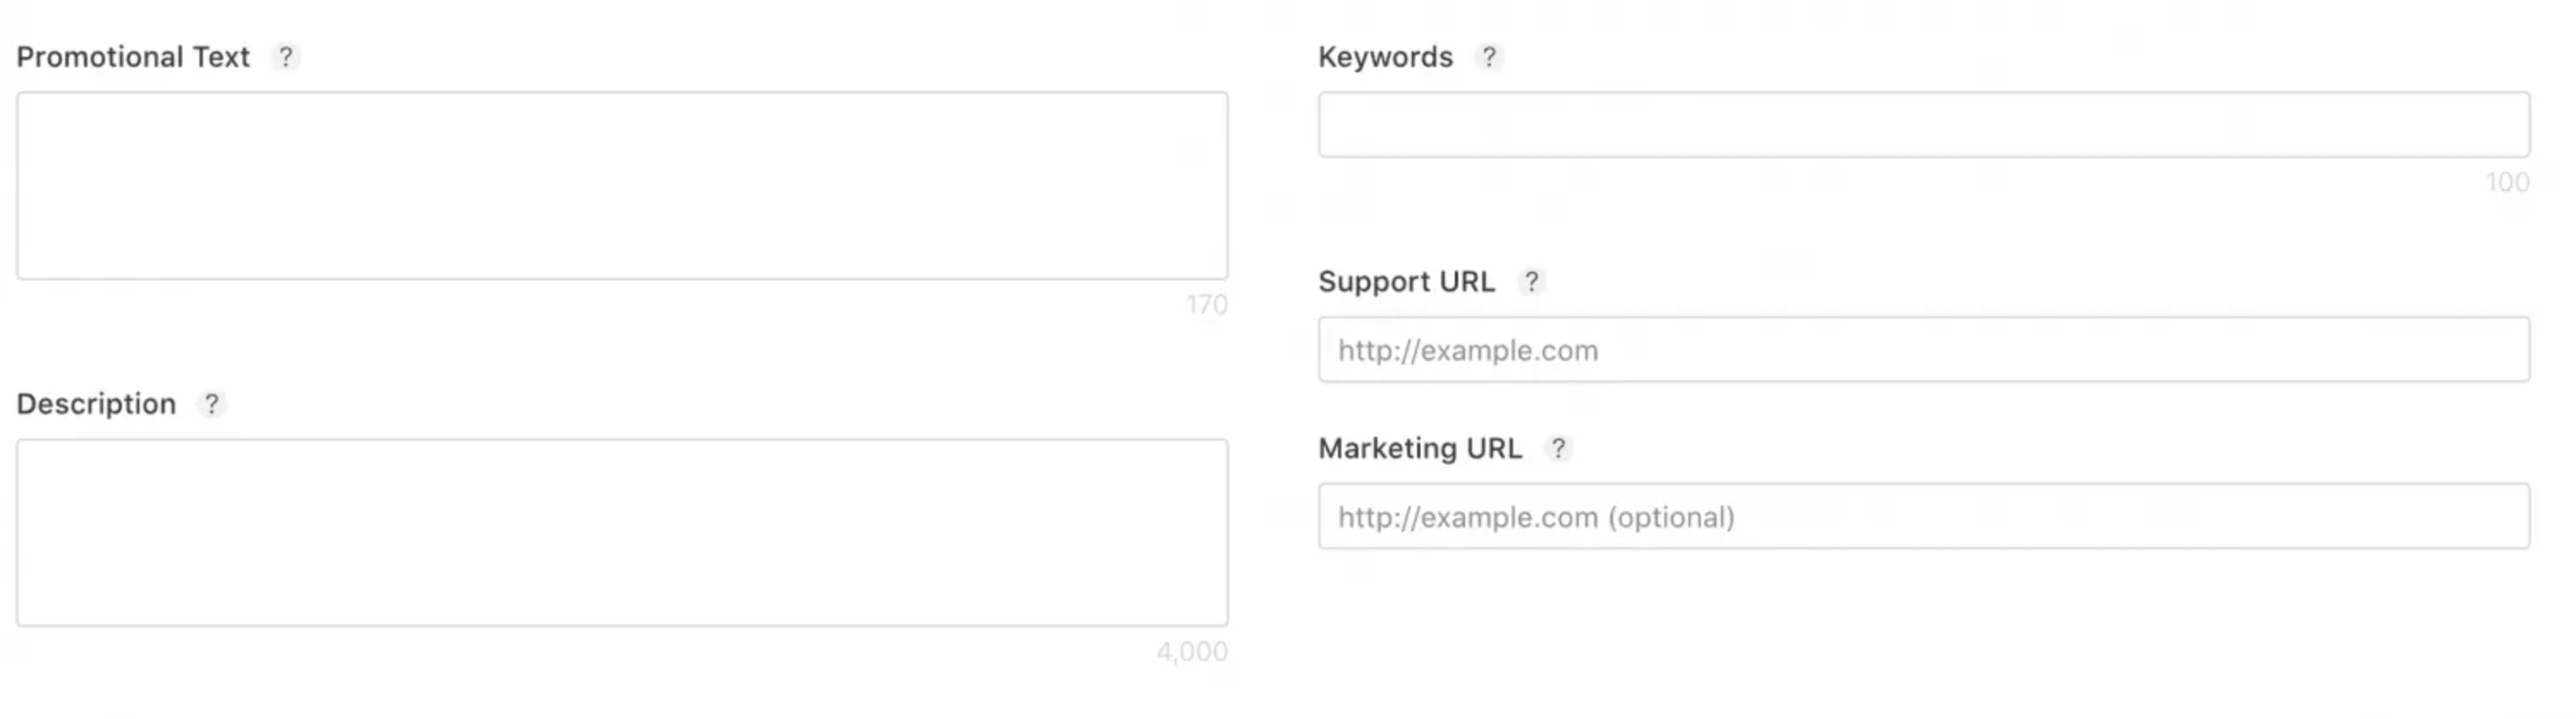
Promotional text : The promotional text is the only field you can update without adding a new version of the app to the App Store. Users can see the promotional field before they press the “Read More” button. This is an optional field.
Description: The description field contains all the information about app features. It should not exceed 4000 symbols.
Keywords : Keywords make your app more searchable, help users discover it in the App Store, and boost your App Store listing.
Support URL : This is the URL where users can get help. It is a required field. It is best that you have a website, so you can put a proper link here. Otherwise, you can use one of many free website creators.
Marketing URL : This is the URL where users can find marketing information about the app.
Icons : Your app icon should be unique since it is an important part of the user experience on all Apple devices. Learn more
Note: You cannot change the app information in the App Store Connect right after publishing. All the information, except for the promotional text, can only be changed with version updates. So, check all the fields before submitting the app.
Choose the release date
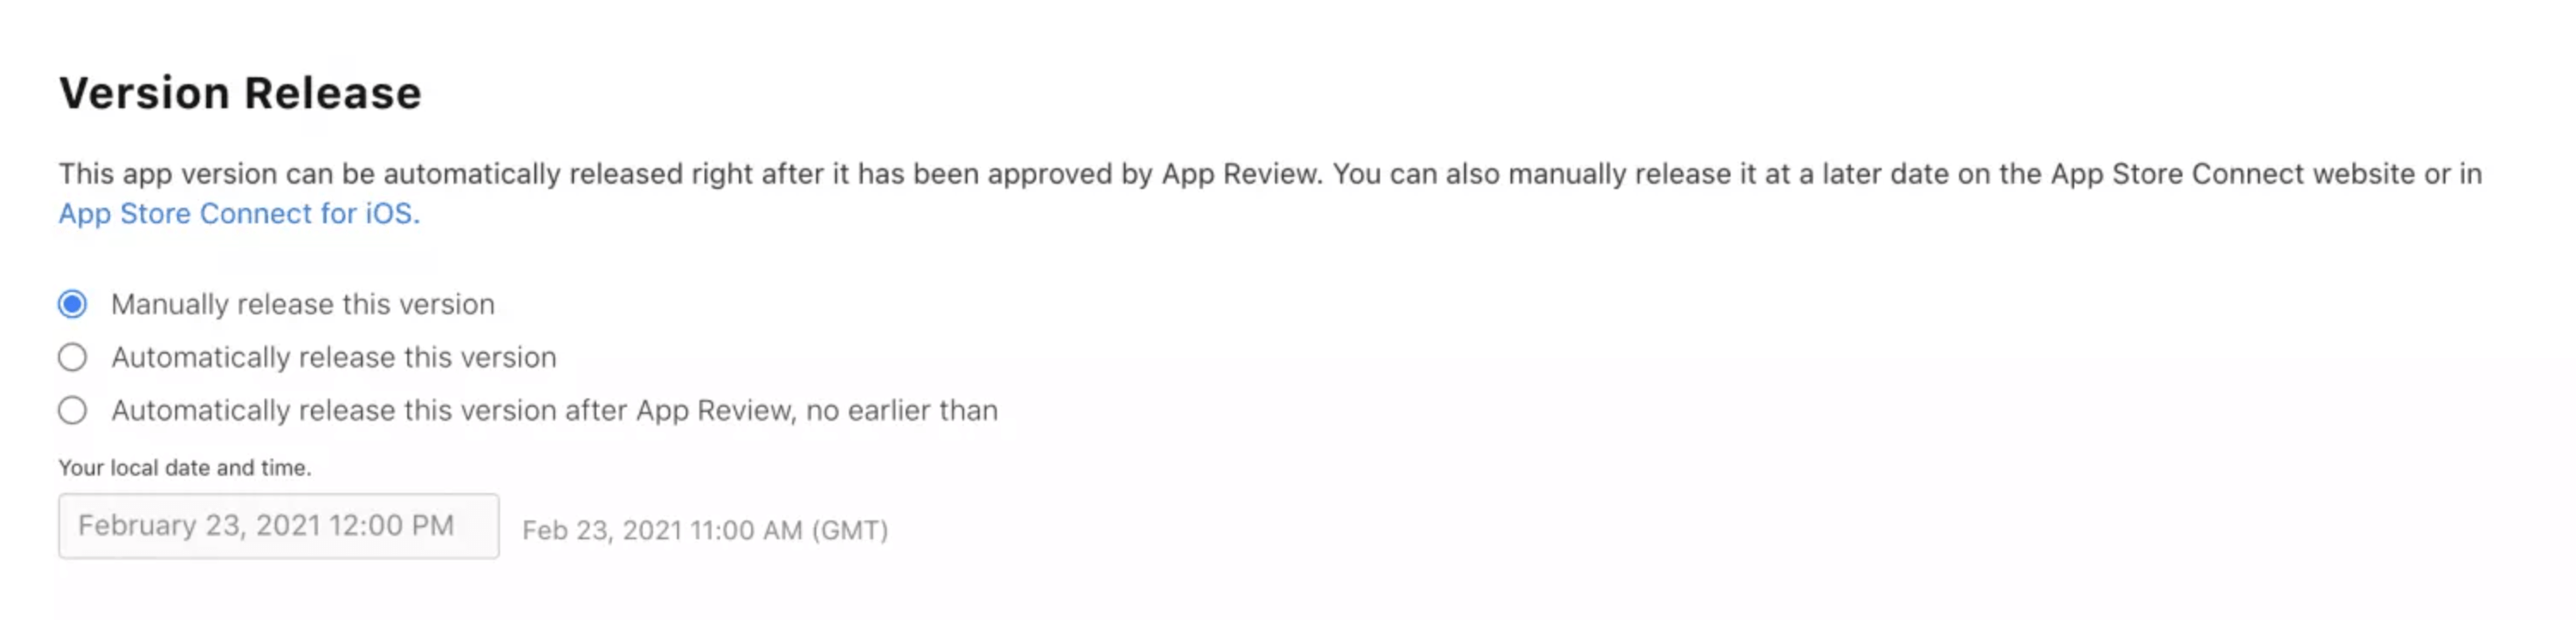
You can choose the release mode for your app:
Manually - You will need to click the “Release” button after the positive review
Automatically - Your app will be automatically released right after the positive review
Automatically with date restriction - The app will be released on a specific date after the positive review
After you submit the app for review, your app will be on the waiting list for Apple’s review and certification team.