OAuth Logic Blocks
Overview
Appspotr supports the authorization of access using external systems that follow OAuth 2.0 standards, such as Apple, Azure AD, Google, Github, AWS Cognito, Slack, etc.
OAuth 2.0 is an authorization protocol and NOT an authentication protocol. As such, it is designed primarily as a means of granting access to a set of resources, for example, remote APIs or user data.
OAuth 2.0 uses Access Tokens. An Access Token is a piece of data that represents the authorization to access resources on behalf of the end-user. OAuth 2.0 doesn’t define a specific format for Access Tokens. However, in some contexts, the JSON Web Token (JWT) format is often used. This enables token issuers to include data in the token itself. Also, for security reasons, Access Tokens may have an expiration date.
OAuth 2.0 focuses on client developer simplicity while providing specific authorization flows for mobile and web applications. Most importantly, any functionality that you need to implement into your app can be supplemented through other external platforms. This allows you to use your own login system with Appspotr.
Read more about OAuth 2.0: [https://oauth.net/2/]
How Does OAuth 2.0 Work?
At the most basic level, before OAuth 2.0 can be used, the Client must acquire its own credentials, a client id and client secret, from the Authorization Server in order to identify and authenticate itself when requesting an Access Token.
Using OAuth 2.0, access requests are initiated by the Client, e.g., a mobile app, website, smart TV app, desktop application, etc. The token request, exchange, and response follow this general flow:
-
The Client requests authorization (authorization request) from the Authorization server, supplying the client id and secret as identification; it also provides the scopes and an endpoint URI (redirect URI) to send the Access Token or the Authorization Code to.
-
The Authorization server authenticates the Client and verifies that the requested scopes are permitted.
-
The Resource owner interacts with the Authorization server to grant access.
-
The Authorization server redirects back to the Client with either an Authorization Code or Access Token
-
With the Access Token, the Client requests access to the resource from the Resource server.
In this guide, we’ll discuss how to implement OAuth 2.0 Logic blocks in your app
-
Open your Appspotr App
-
Click on Patchwork
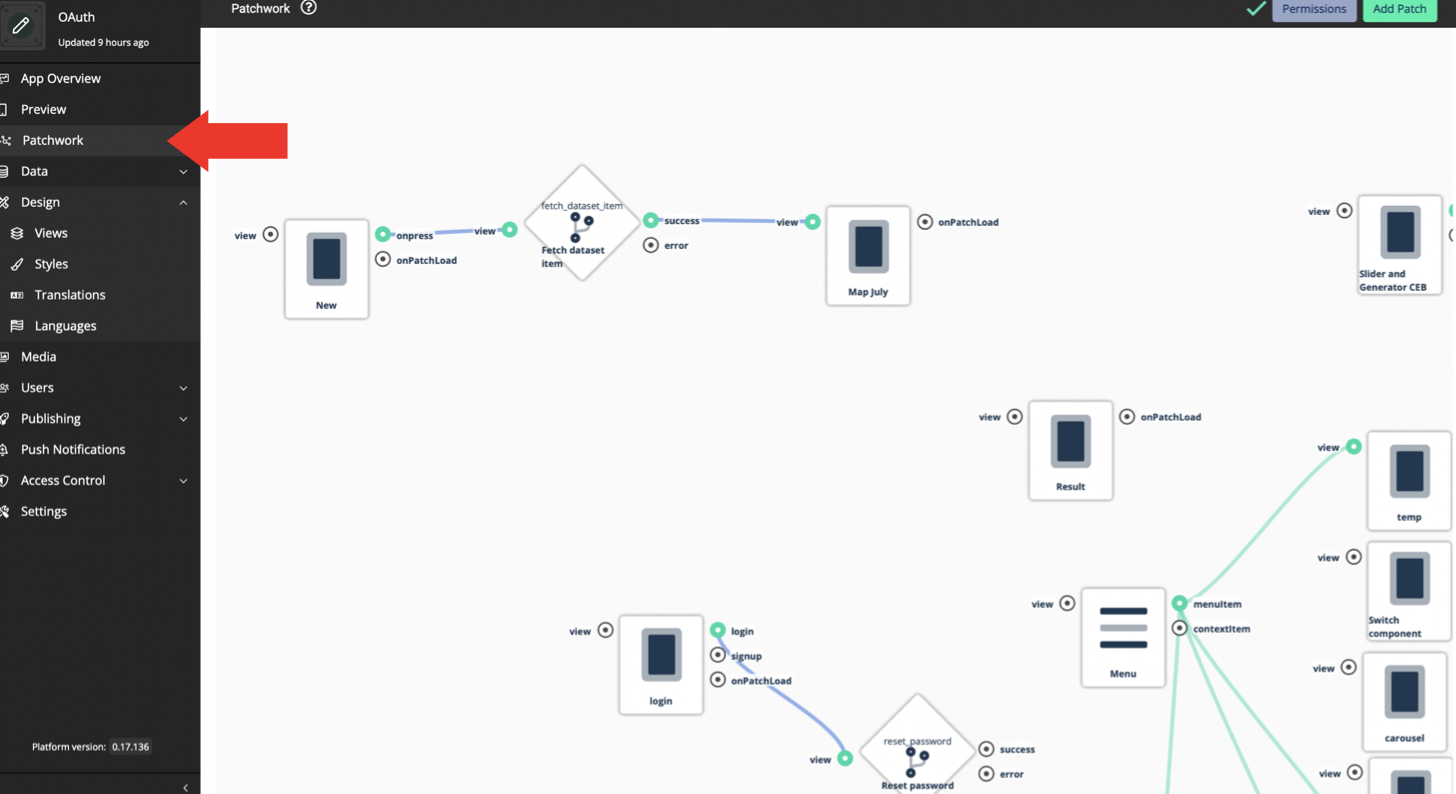
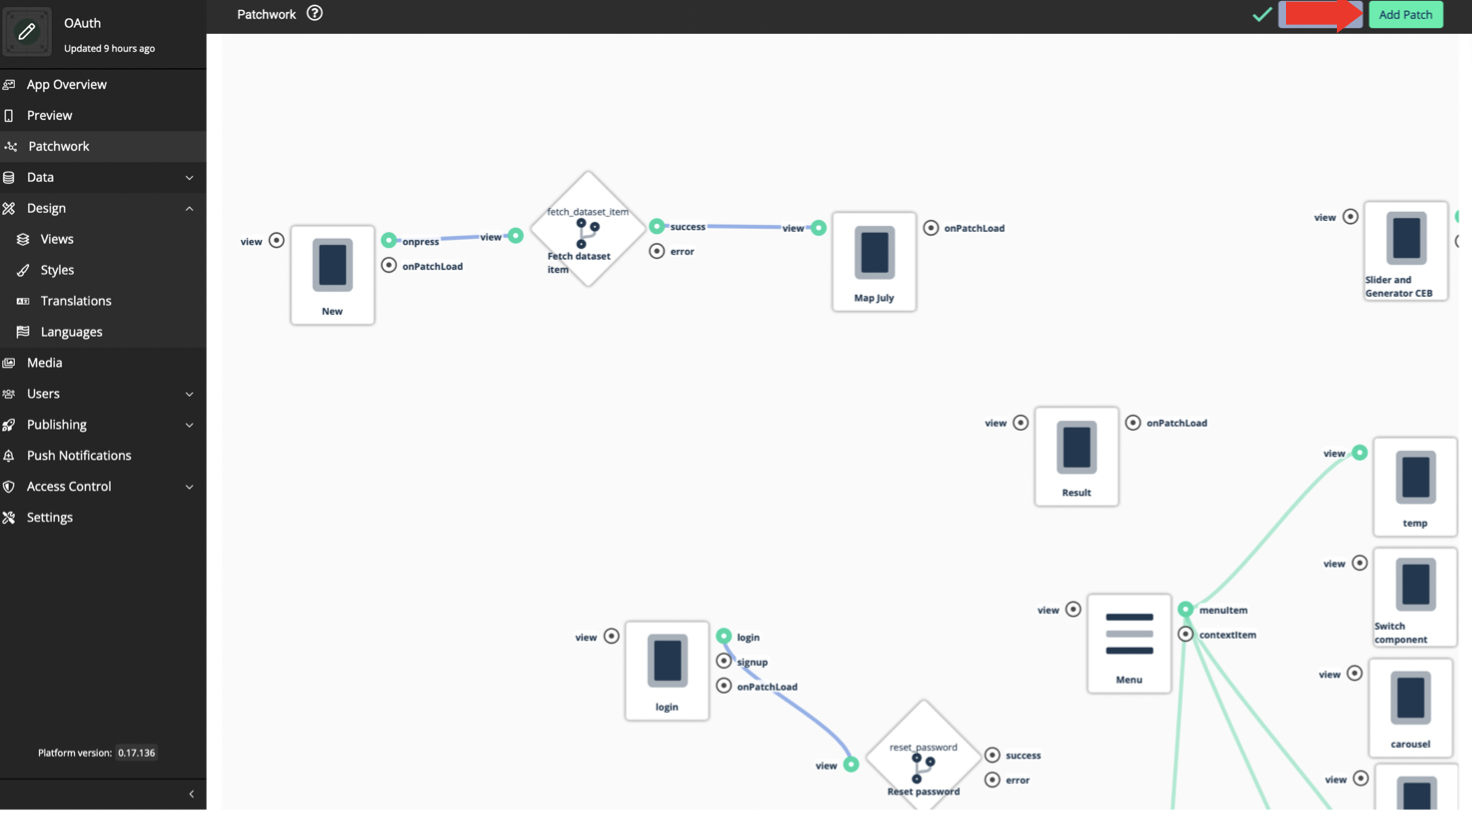
-
Click on Add Patch
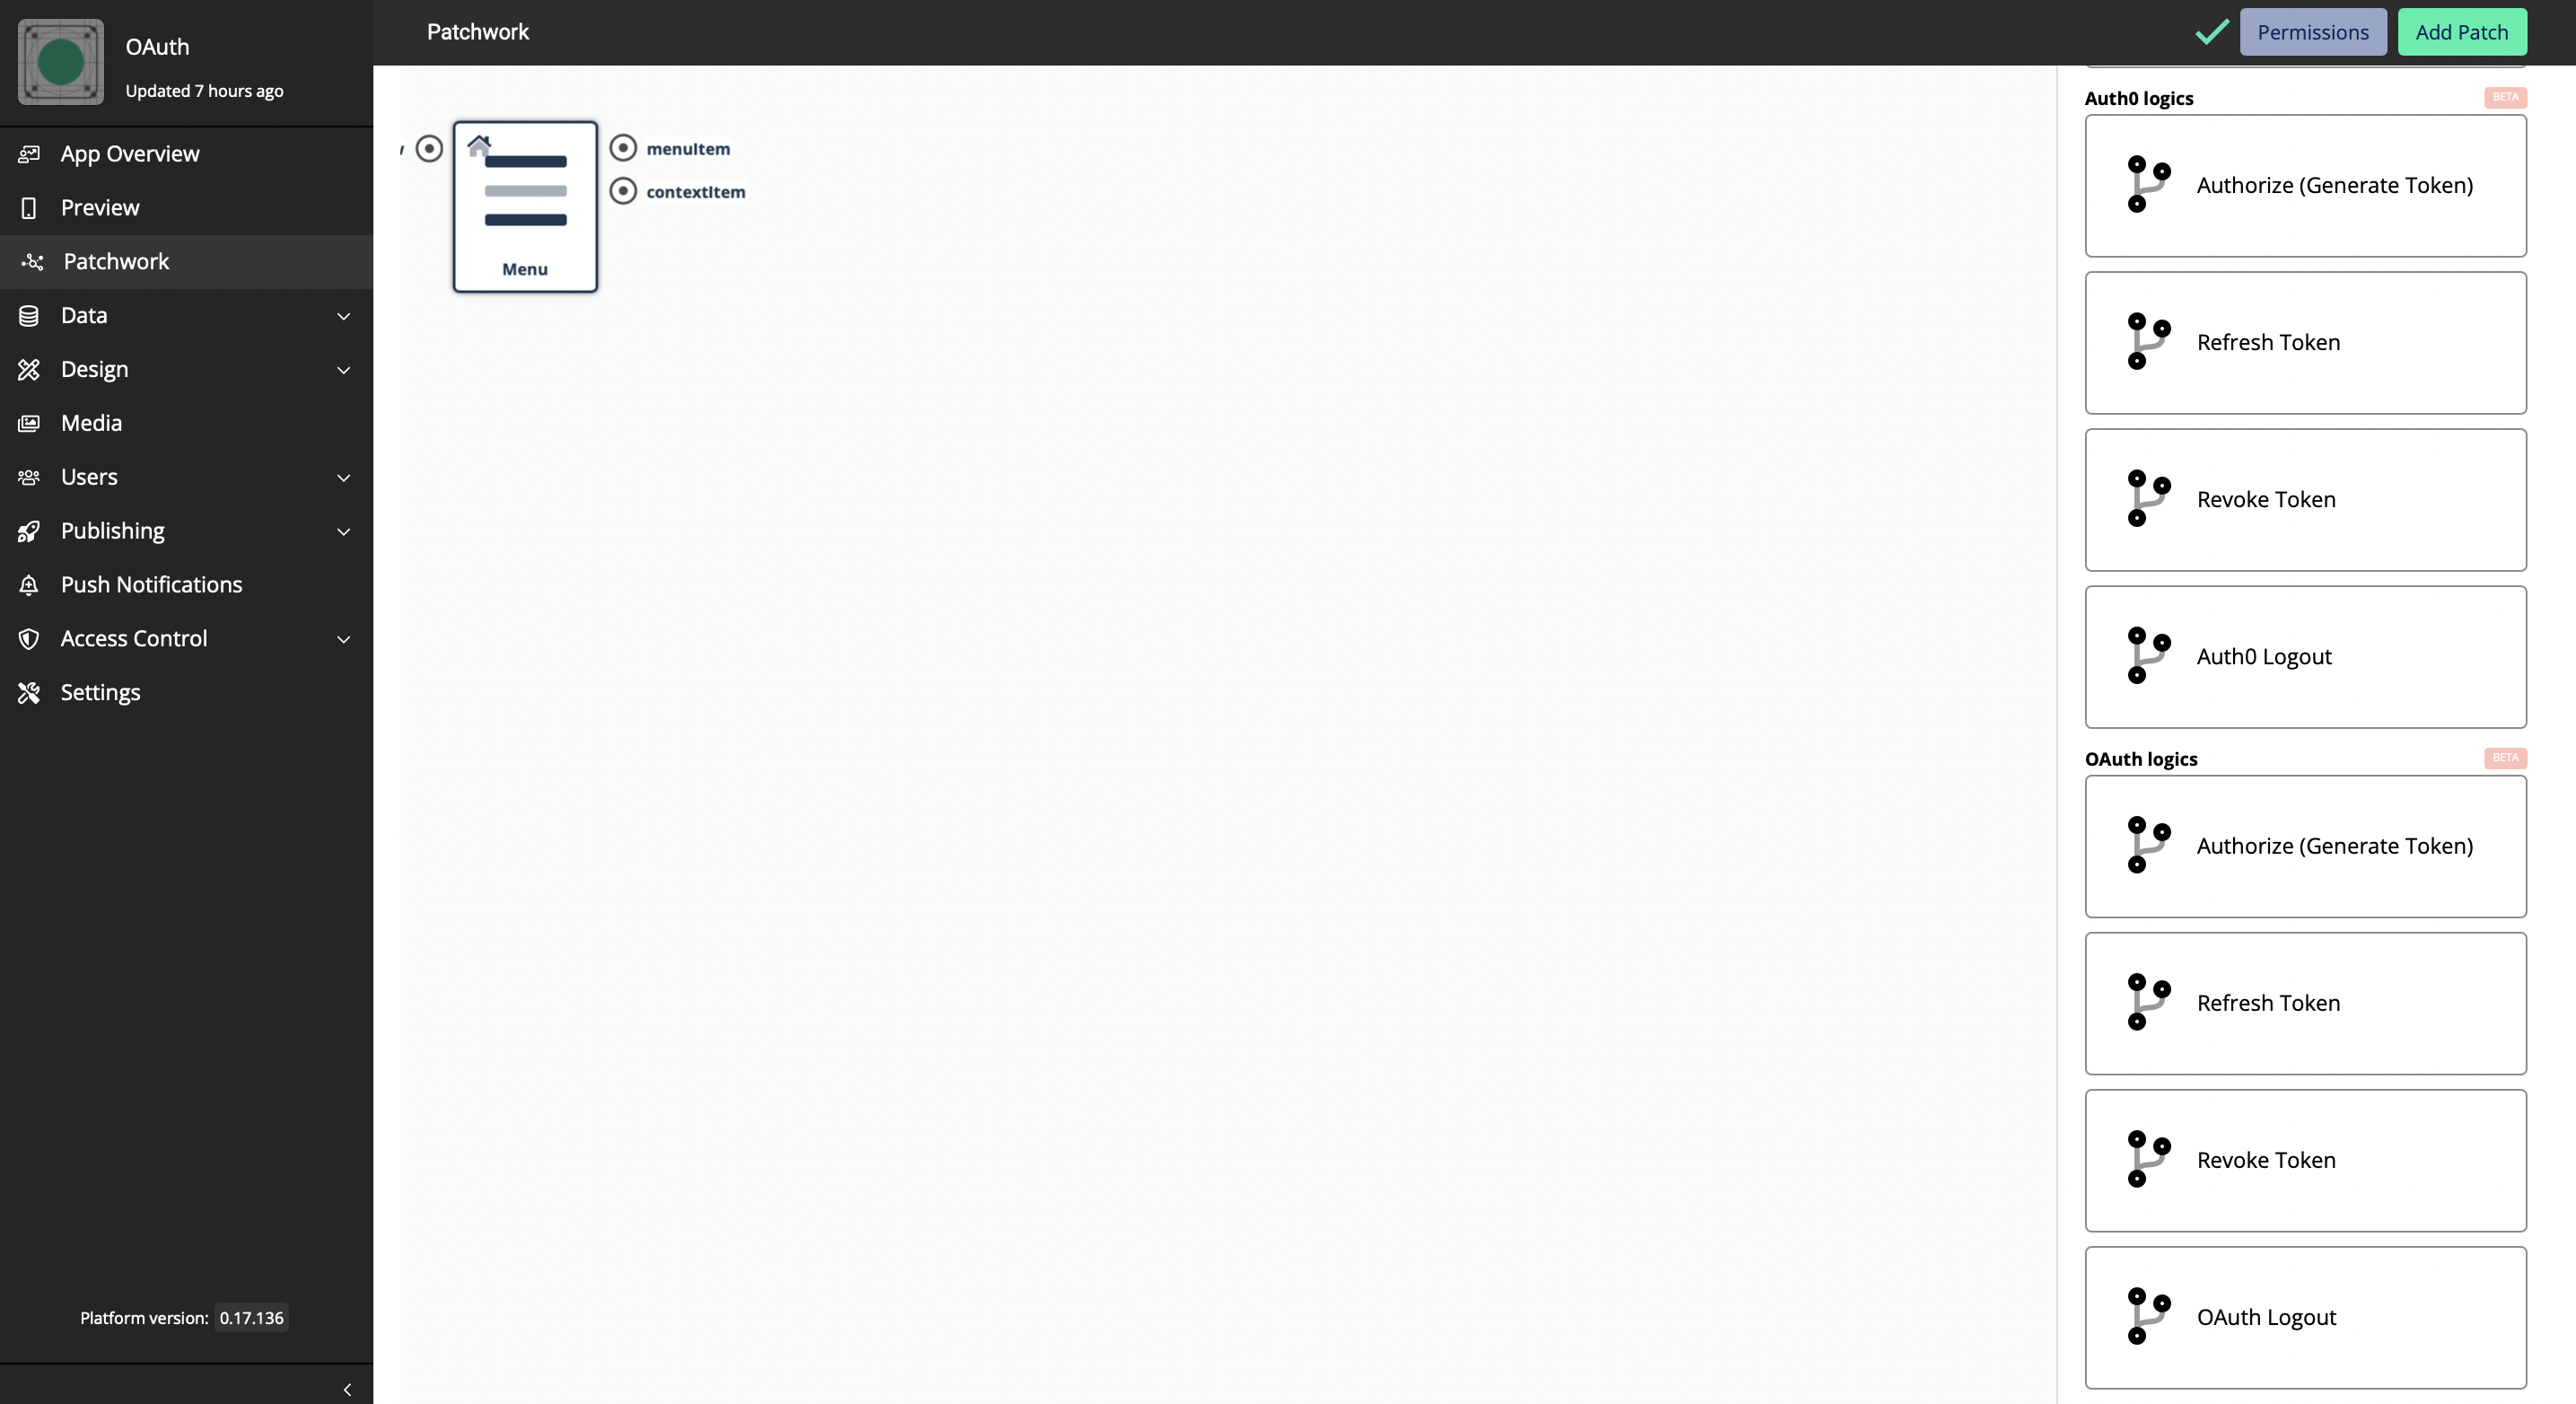
We have introduced 4 OAuth Tokens, which are;
-
Authorize - The tokens are the thing that applications use to make API requests on behalf of a user
-
Refresh Token - A string that the OAuth client can use to get a new access token without the user’s interaction
-
Revoke Token - Defines a mechanism for clients to indicate to the authorization server that an access token is no longer needed
-
OAuth Logout - A back-channel mechanism for notifying subscribed relying parties that an end-user has been logged out of the OpenID Connect provider.
Authorization
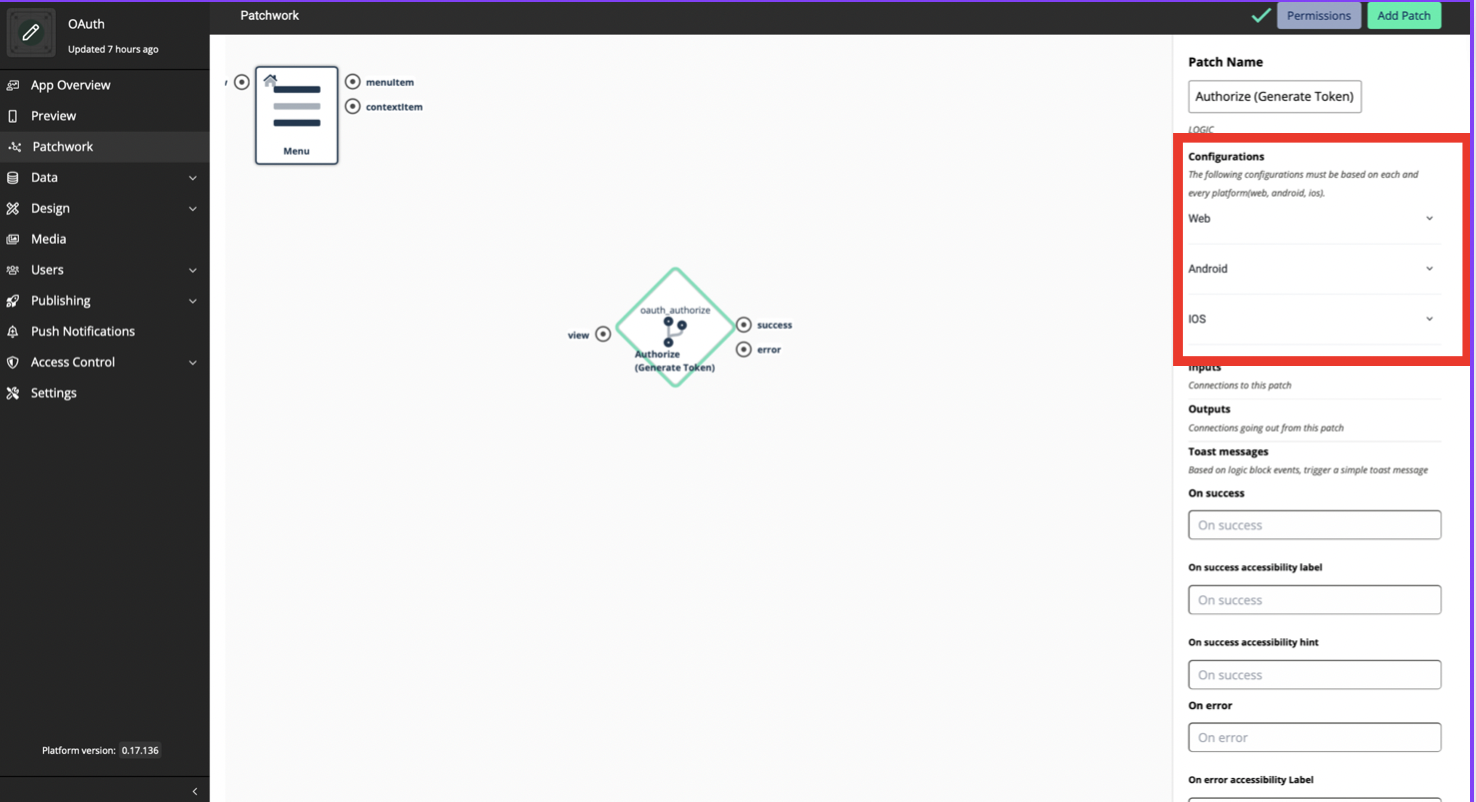
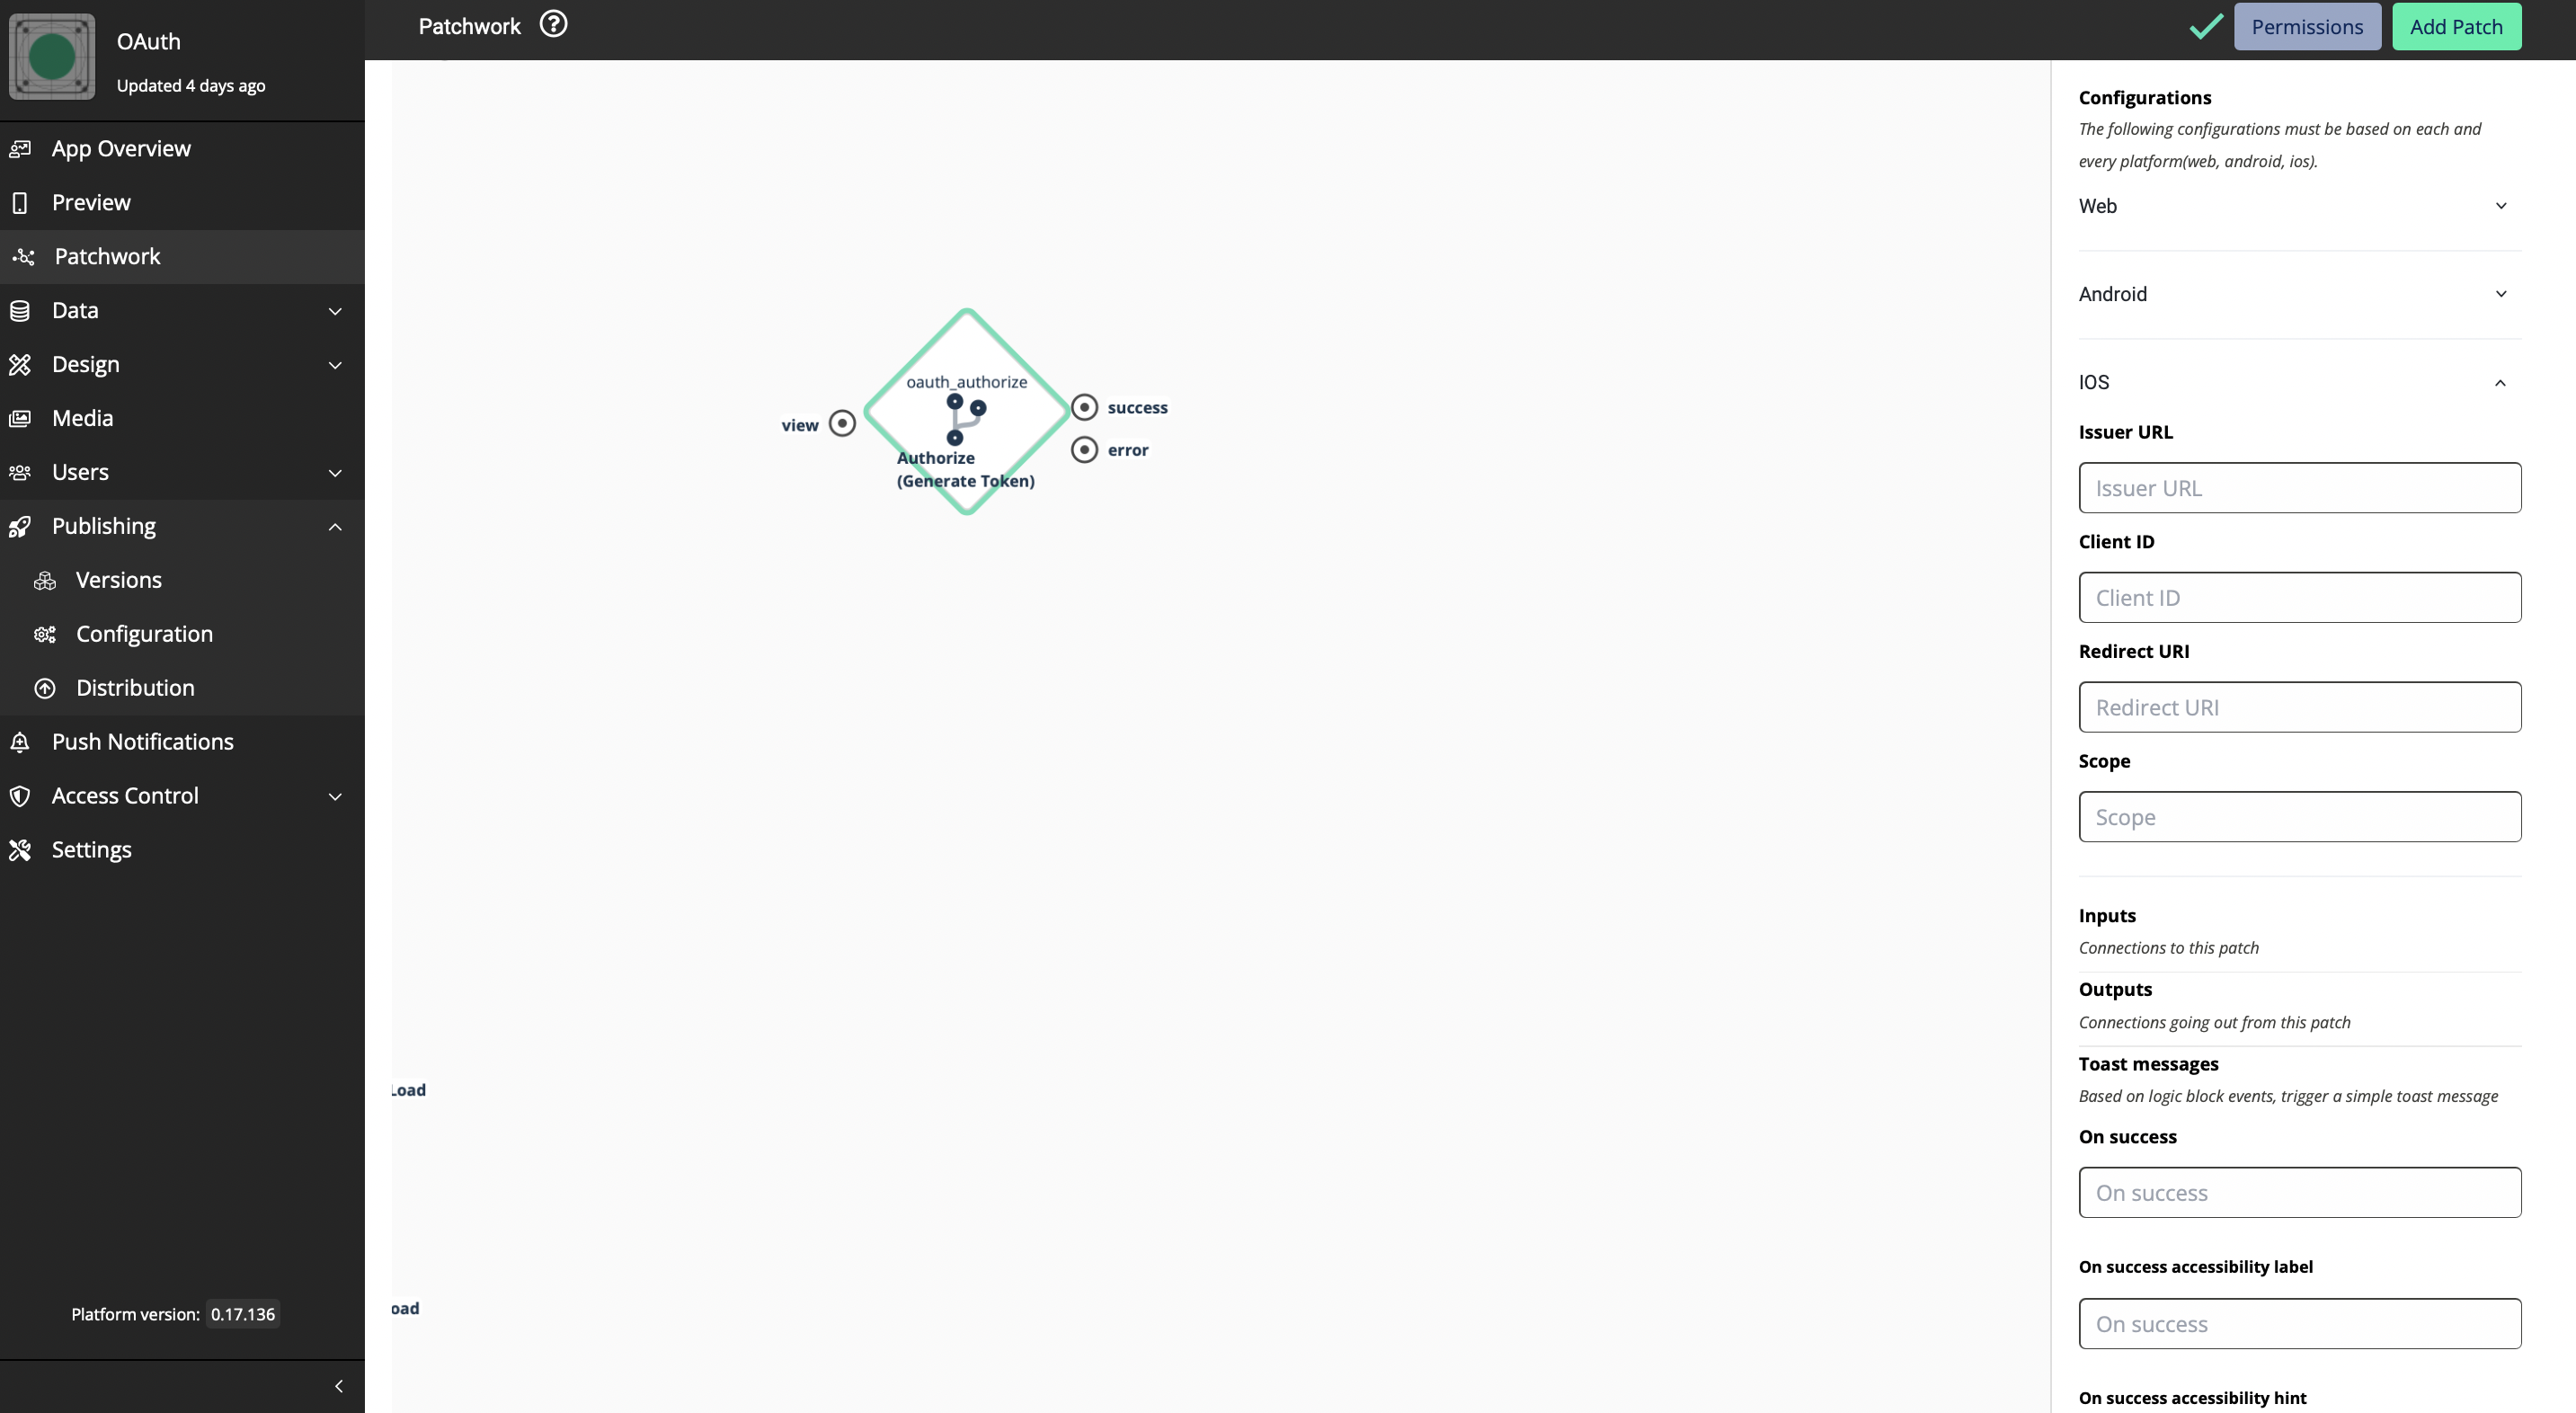
There are 3 platforms(Web, Android, iOS) that should be configured to set Authorization. These 3 platforms have different sets of data that should be configured. This is because that we are not going to create only one app that uses OAuth Logic blocks, more than one app is built based on the platform. The Client IDs for each app for platform will be different.
-
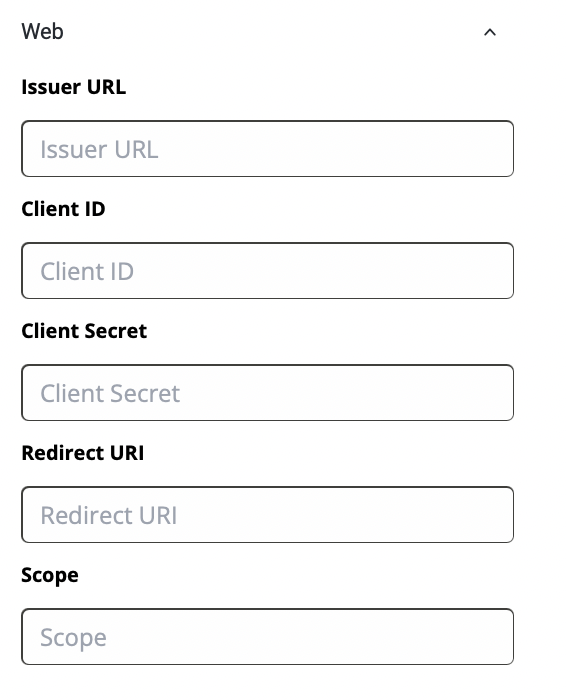
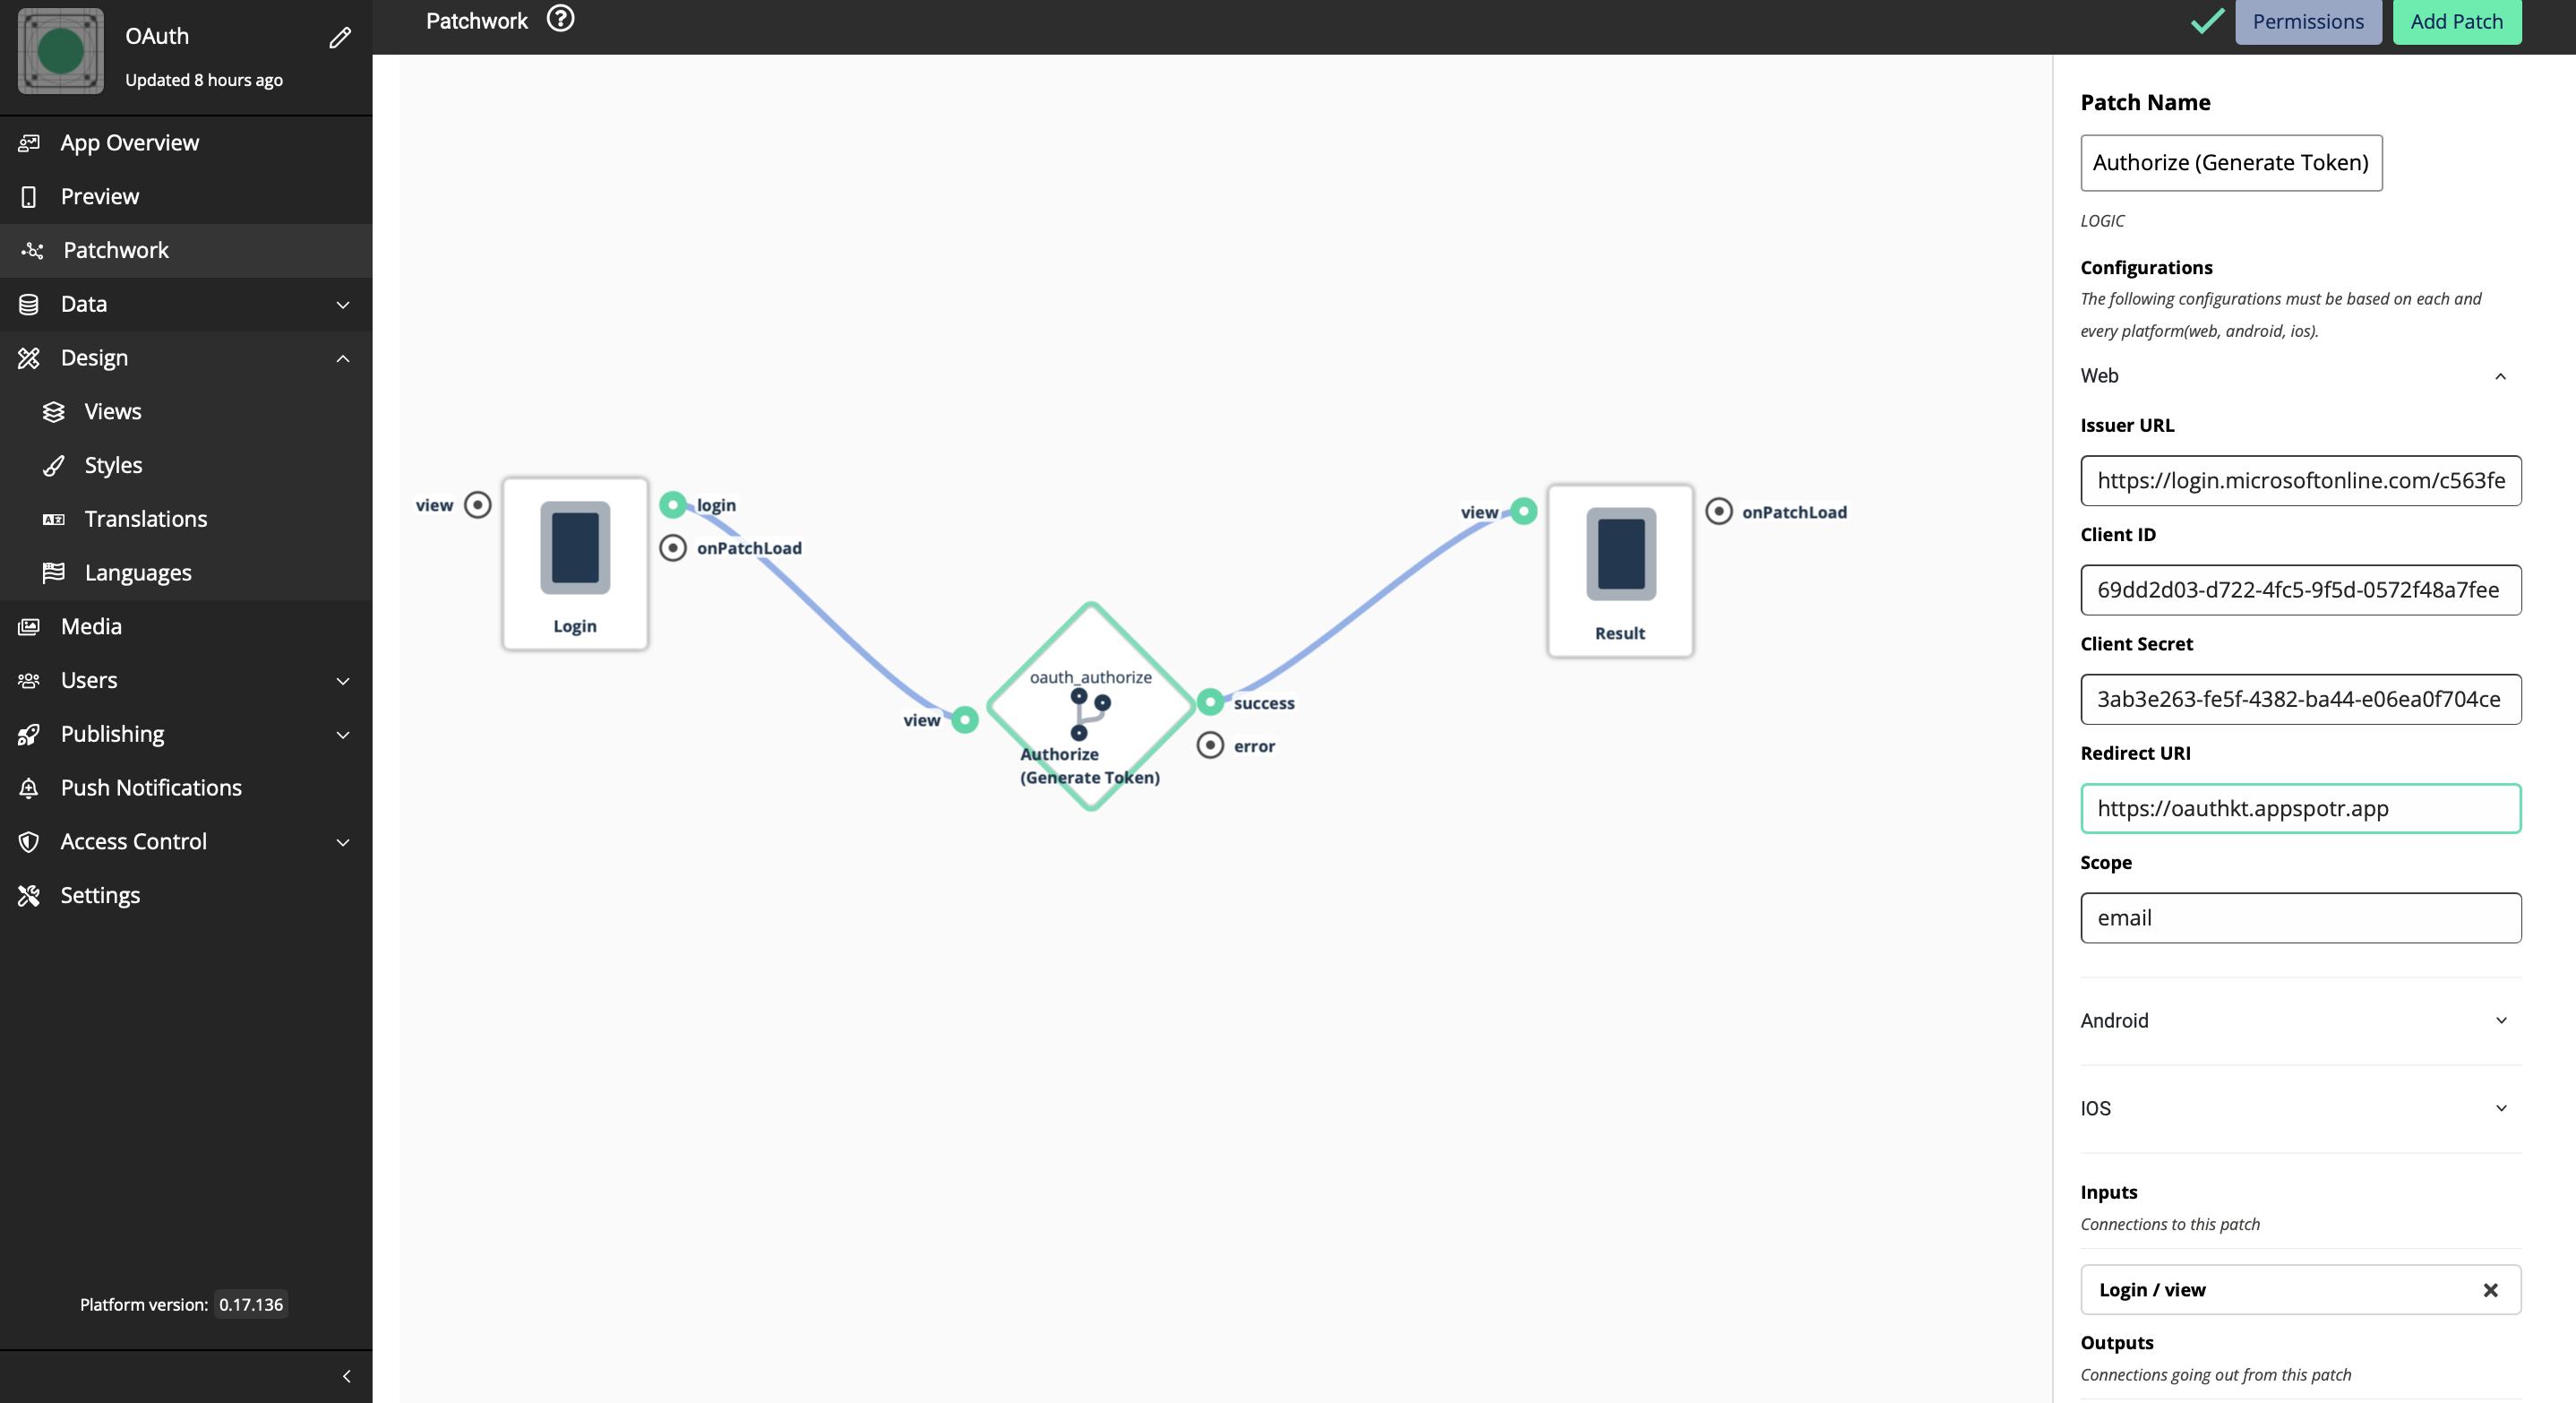
Web

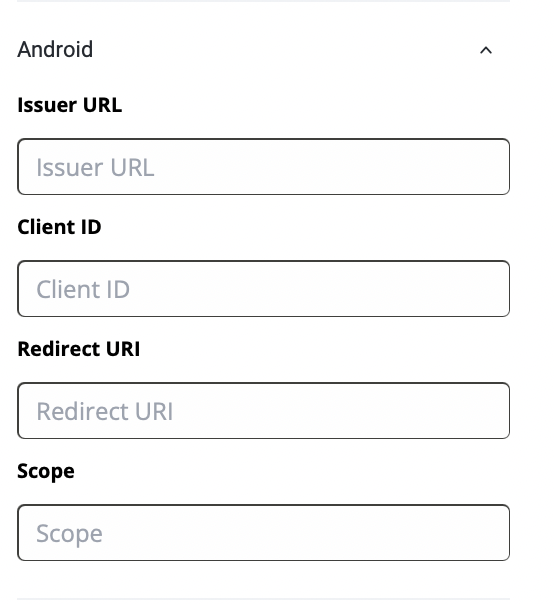
Issuer URL - Uniquely identifies a Connect2id server instance in the various tokens that it mints as OpenID provider / OAuth 2.0 authorisation server
Client ID - A public identifier **for apps
Client Secret - A secret known only to the application and the authorization server. It is essential to the application’s own password. It must be sufficiently random to not be guessable.
Redirect URI - The callback entry point of the app
Scope - A way to limit the amount of access that is granted to an access token. There are specific keywords that you have to mention here and those could be found by referring to [this](https://oauth.net/2/scope/).
-
Android
-
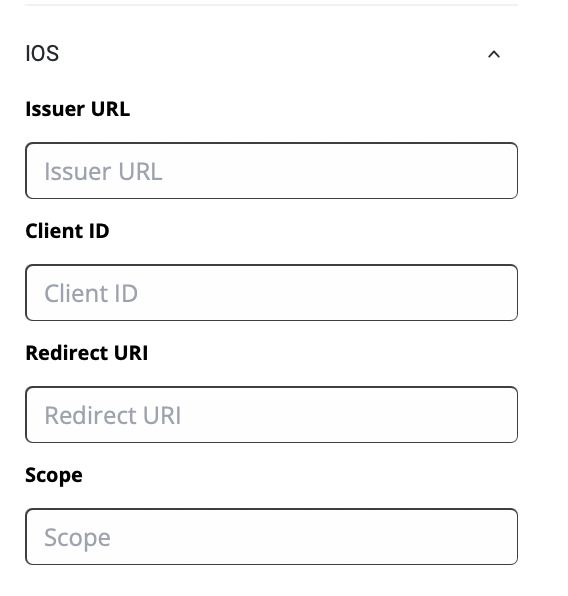
iOS
For this guide, we’ll discuss authorizing access through Microsoft Azure.
-
Set up your Microsoft Account
-
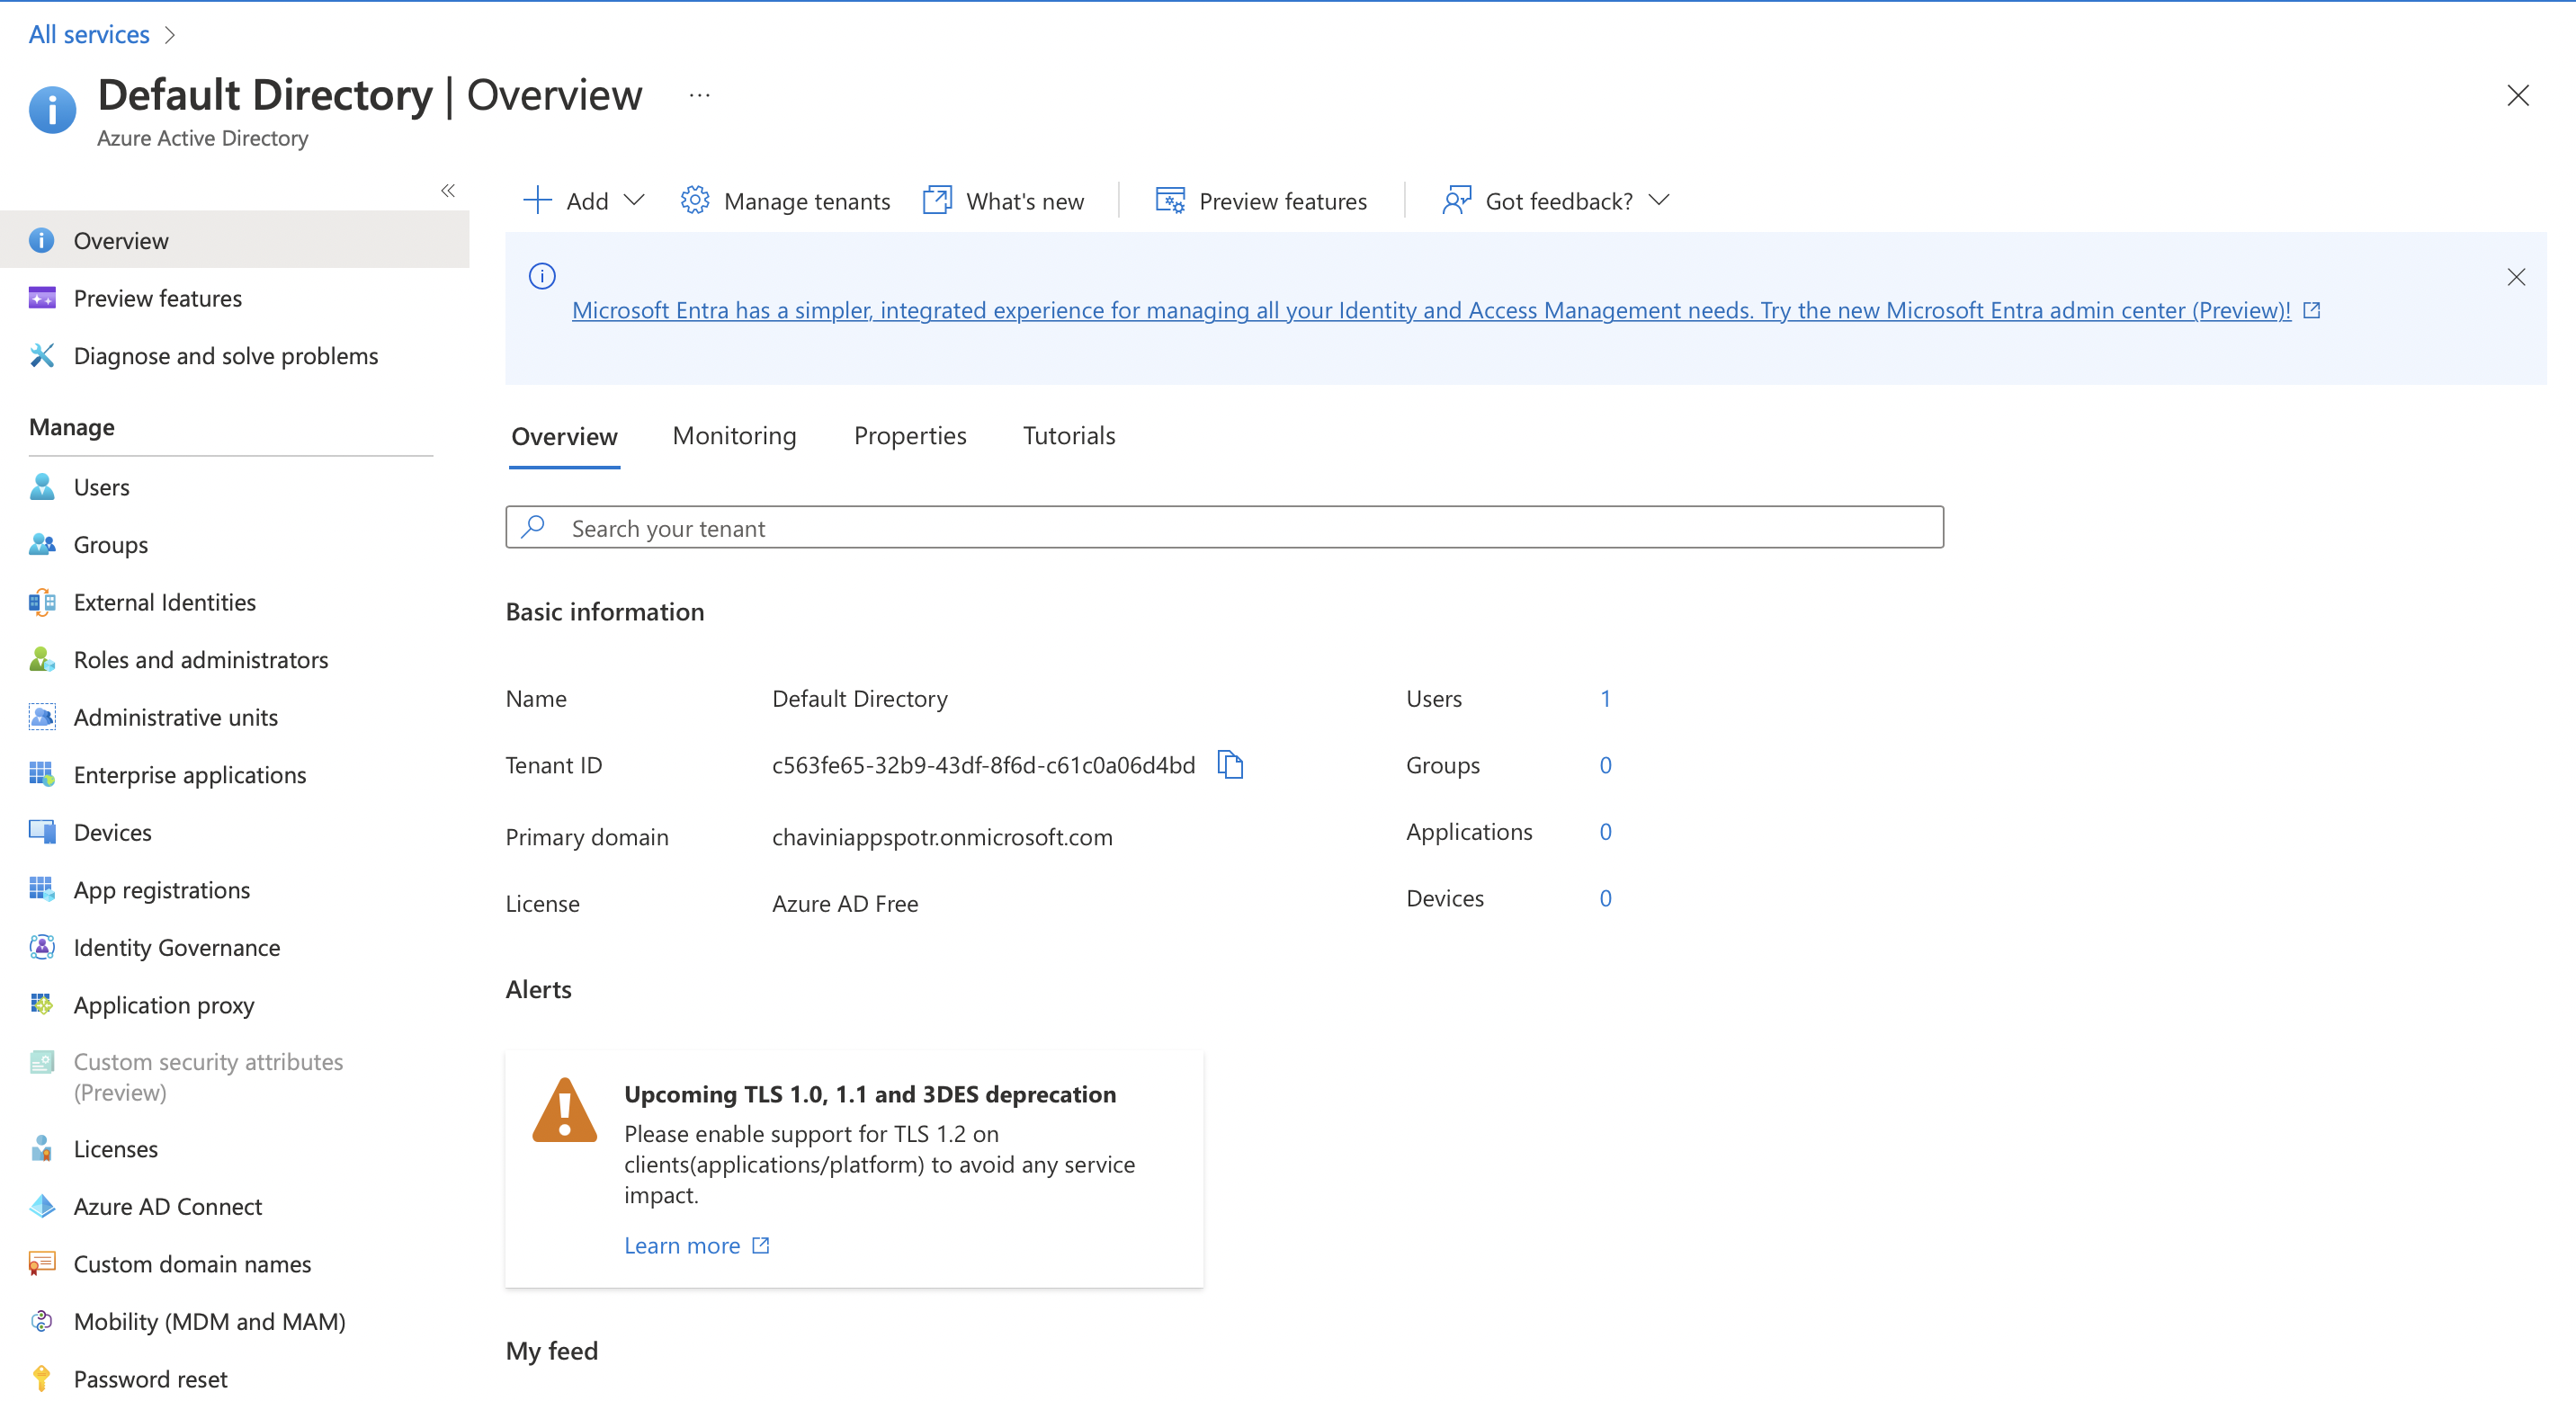
Log in to Microsoft Azure Portal
-
Click on Active Directory
Note : Azure Active Directory (Azure AD) is a cloud-based identity and access management service. This service helps you access external resources, such as Microsoft 365, the Azure portal, and thousands of other SaaS applications.

-
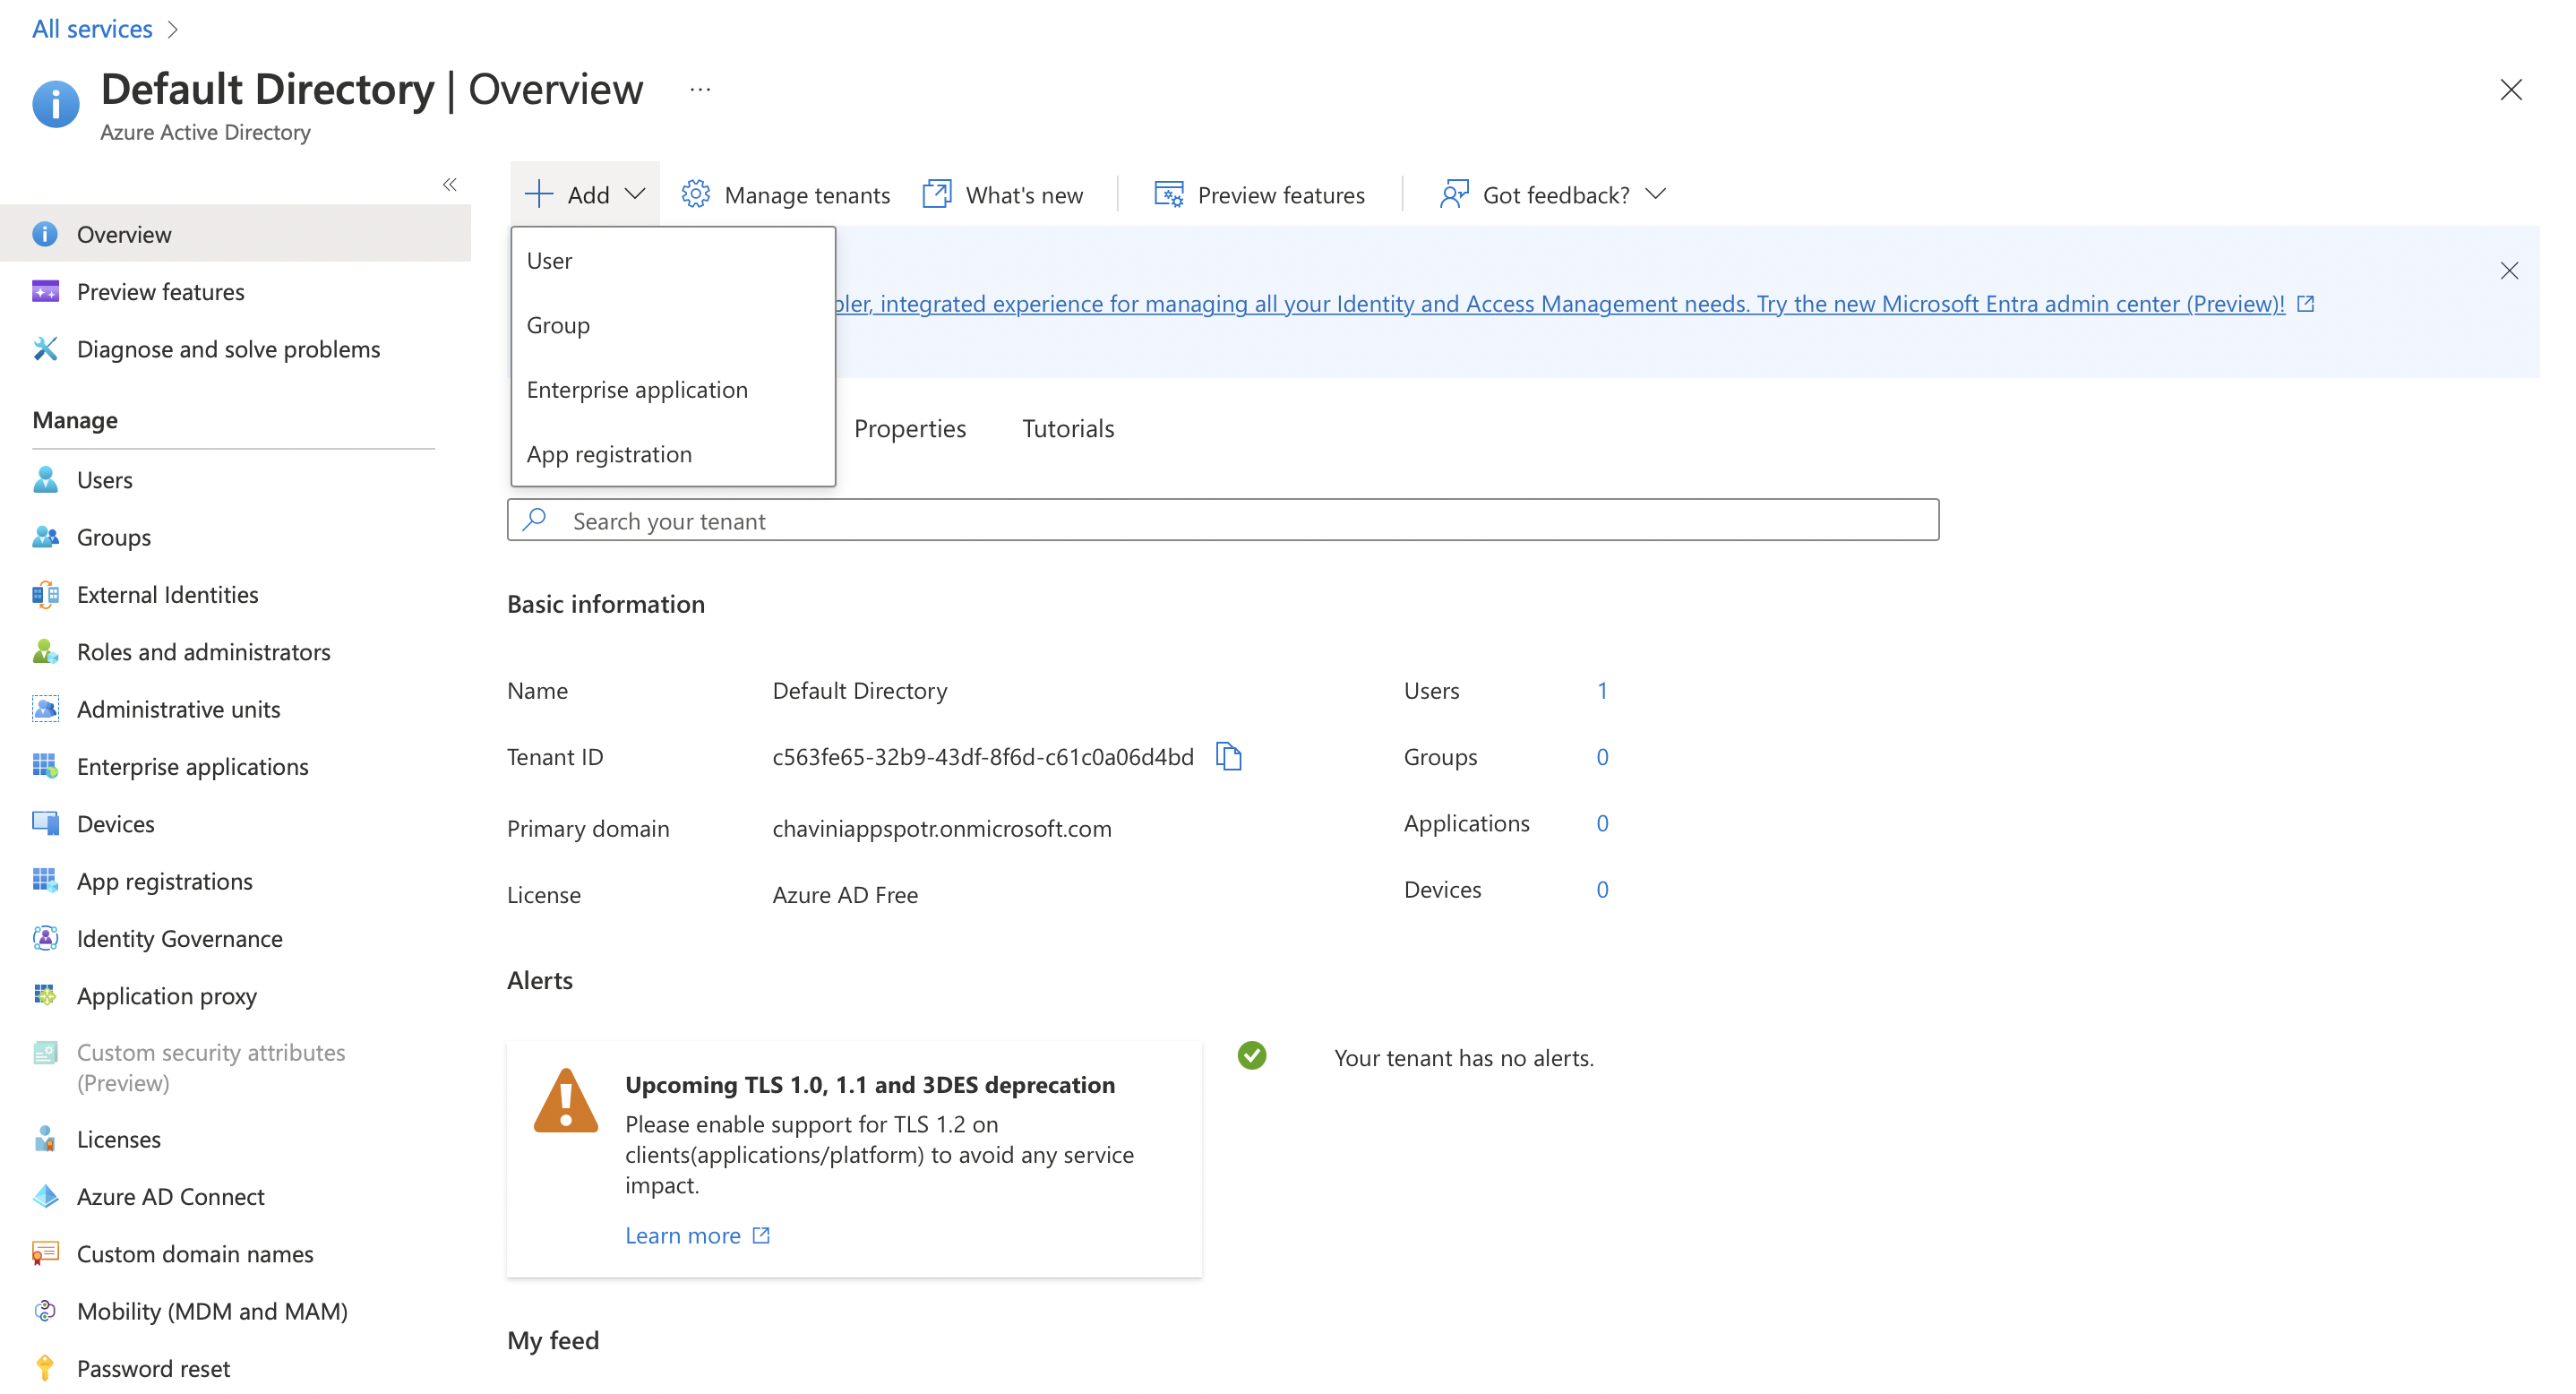
Click on Add to add a new Tenant and select App Registration
Note: A Tenant refers to a single instance of Azure Active Directory.
Fill in the fields according to your requirements
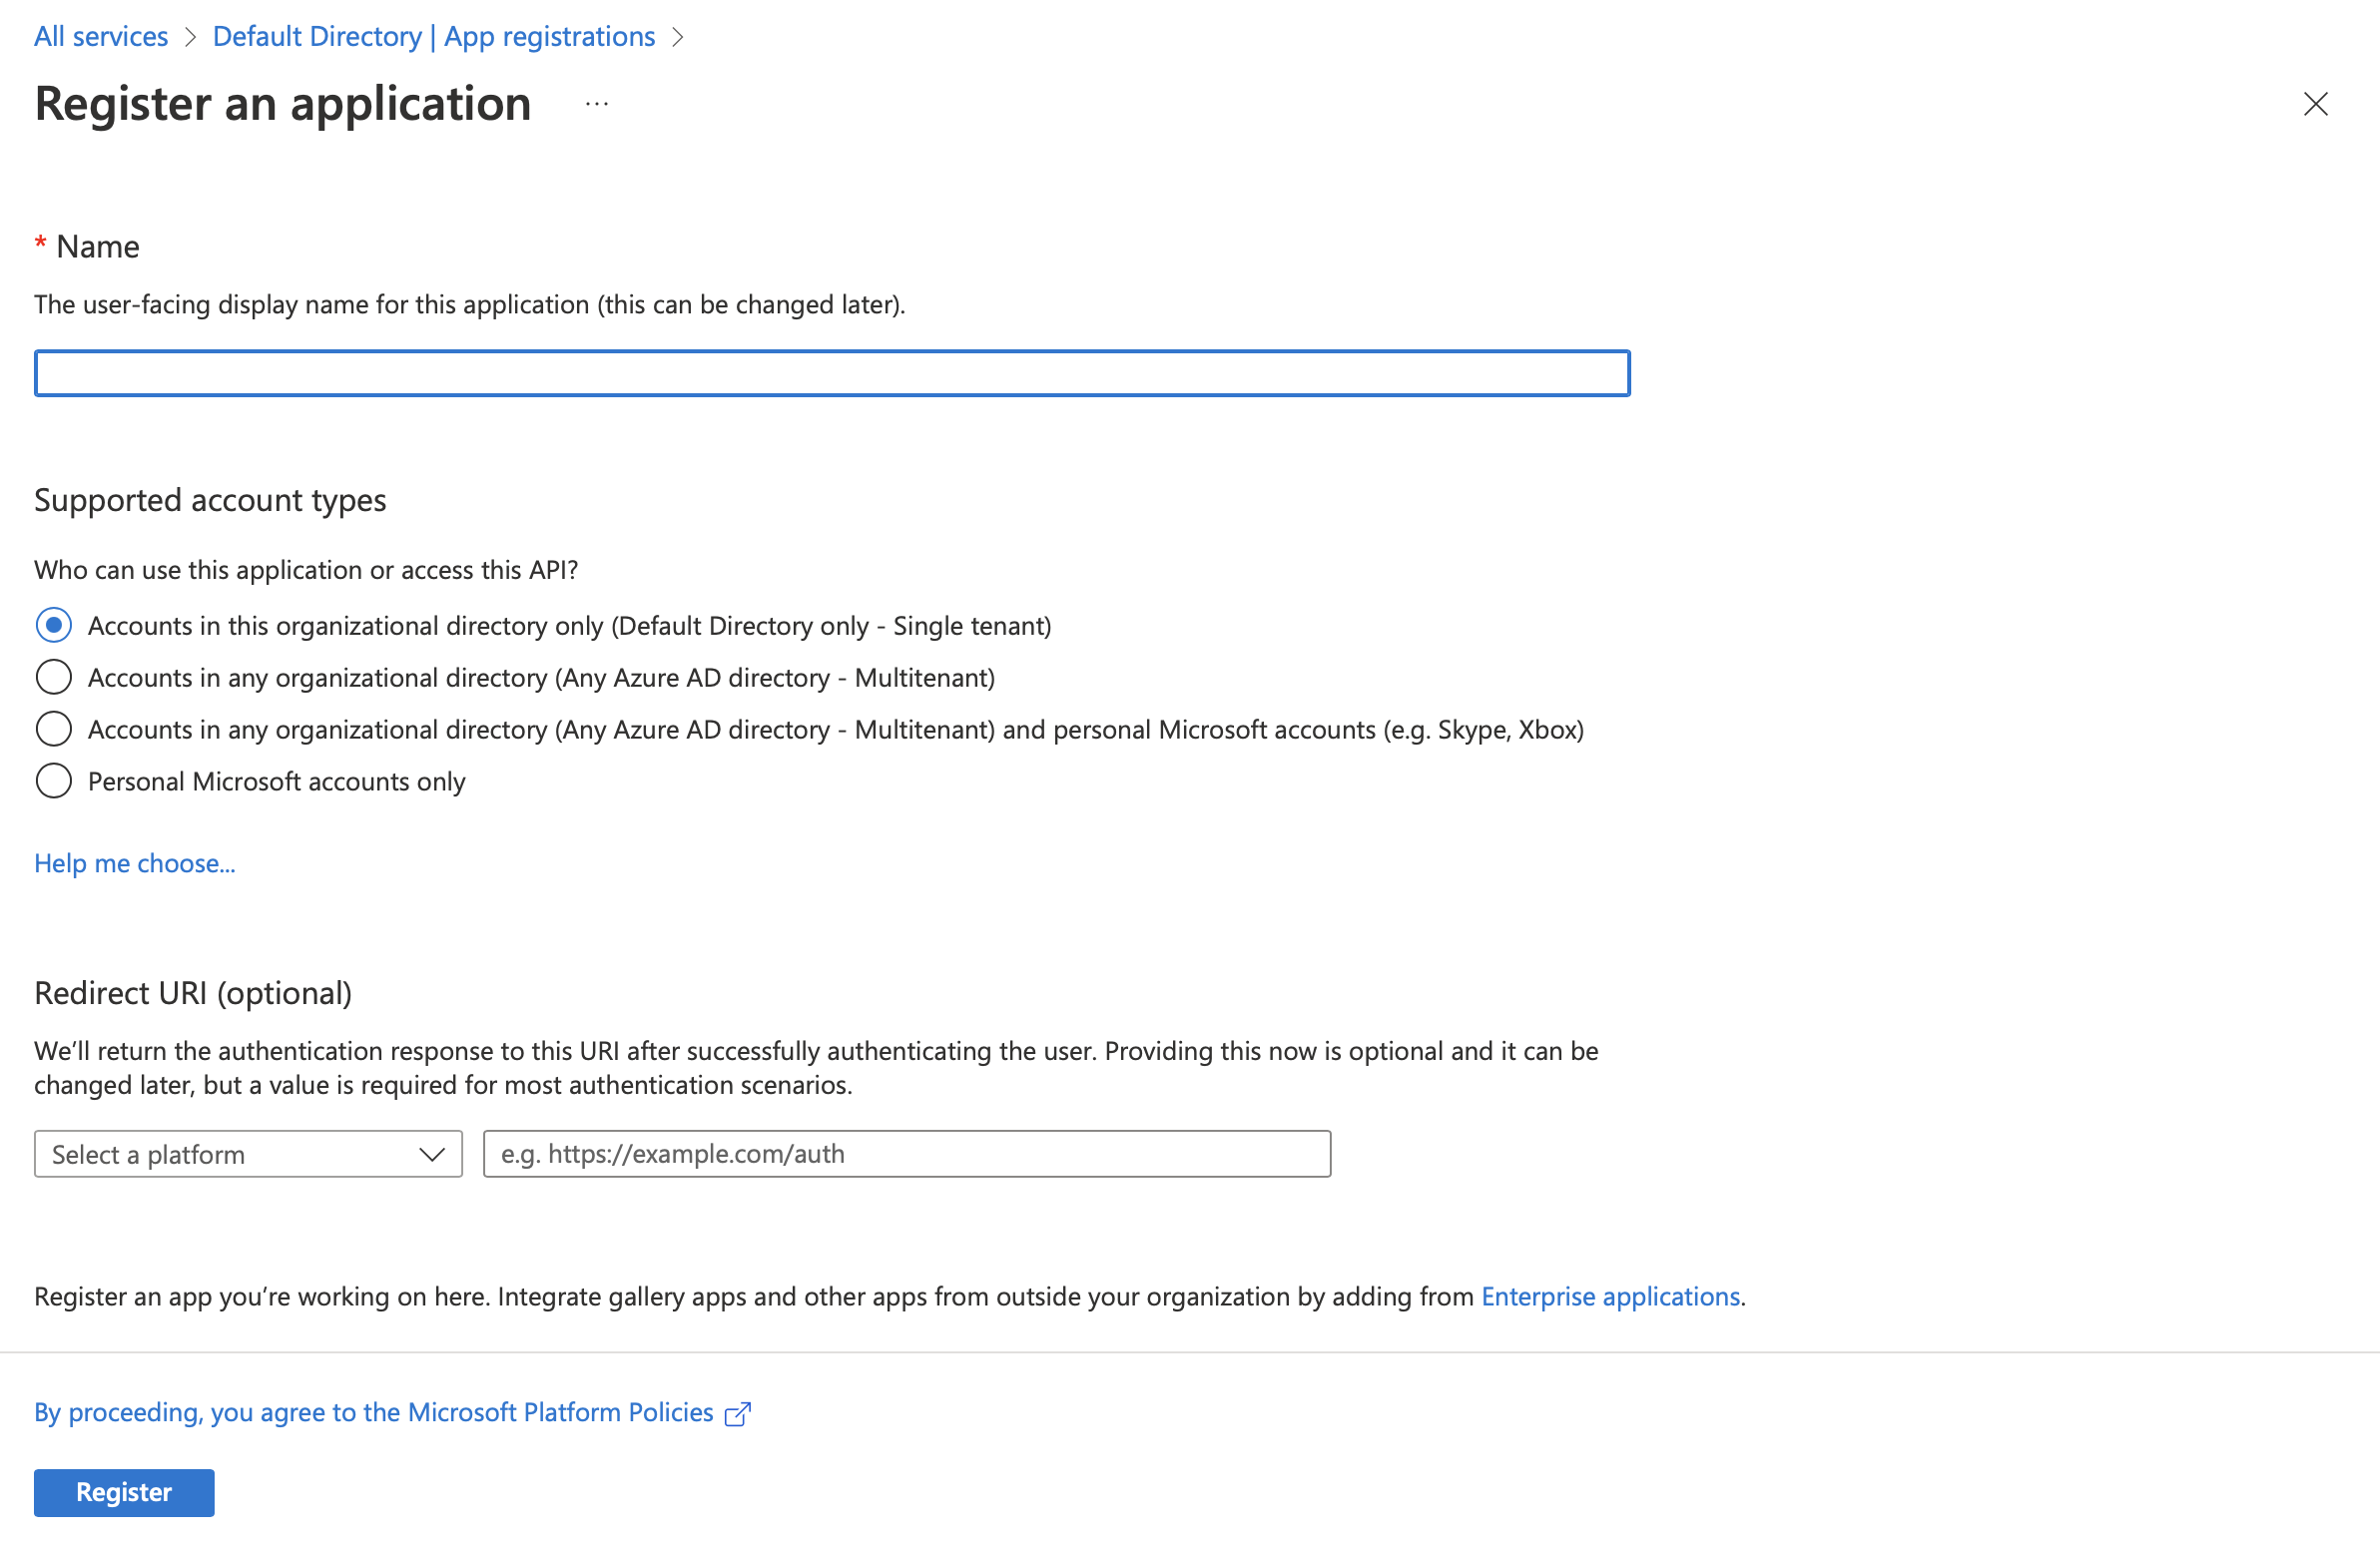
The Redirect URI should be configured according to the type of the app we are registering. You can select from Native apps, Web apps or Single Page apps
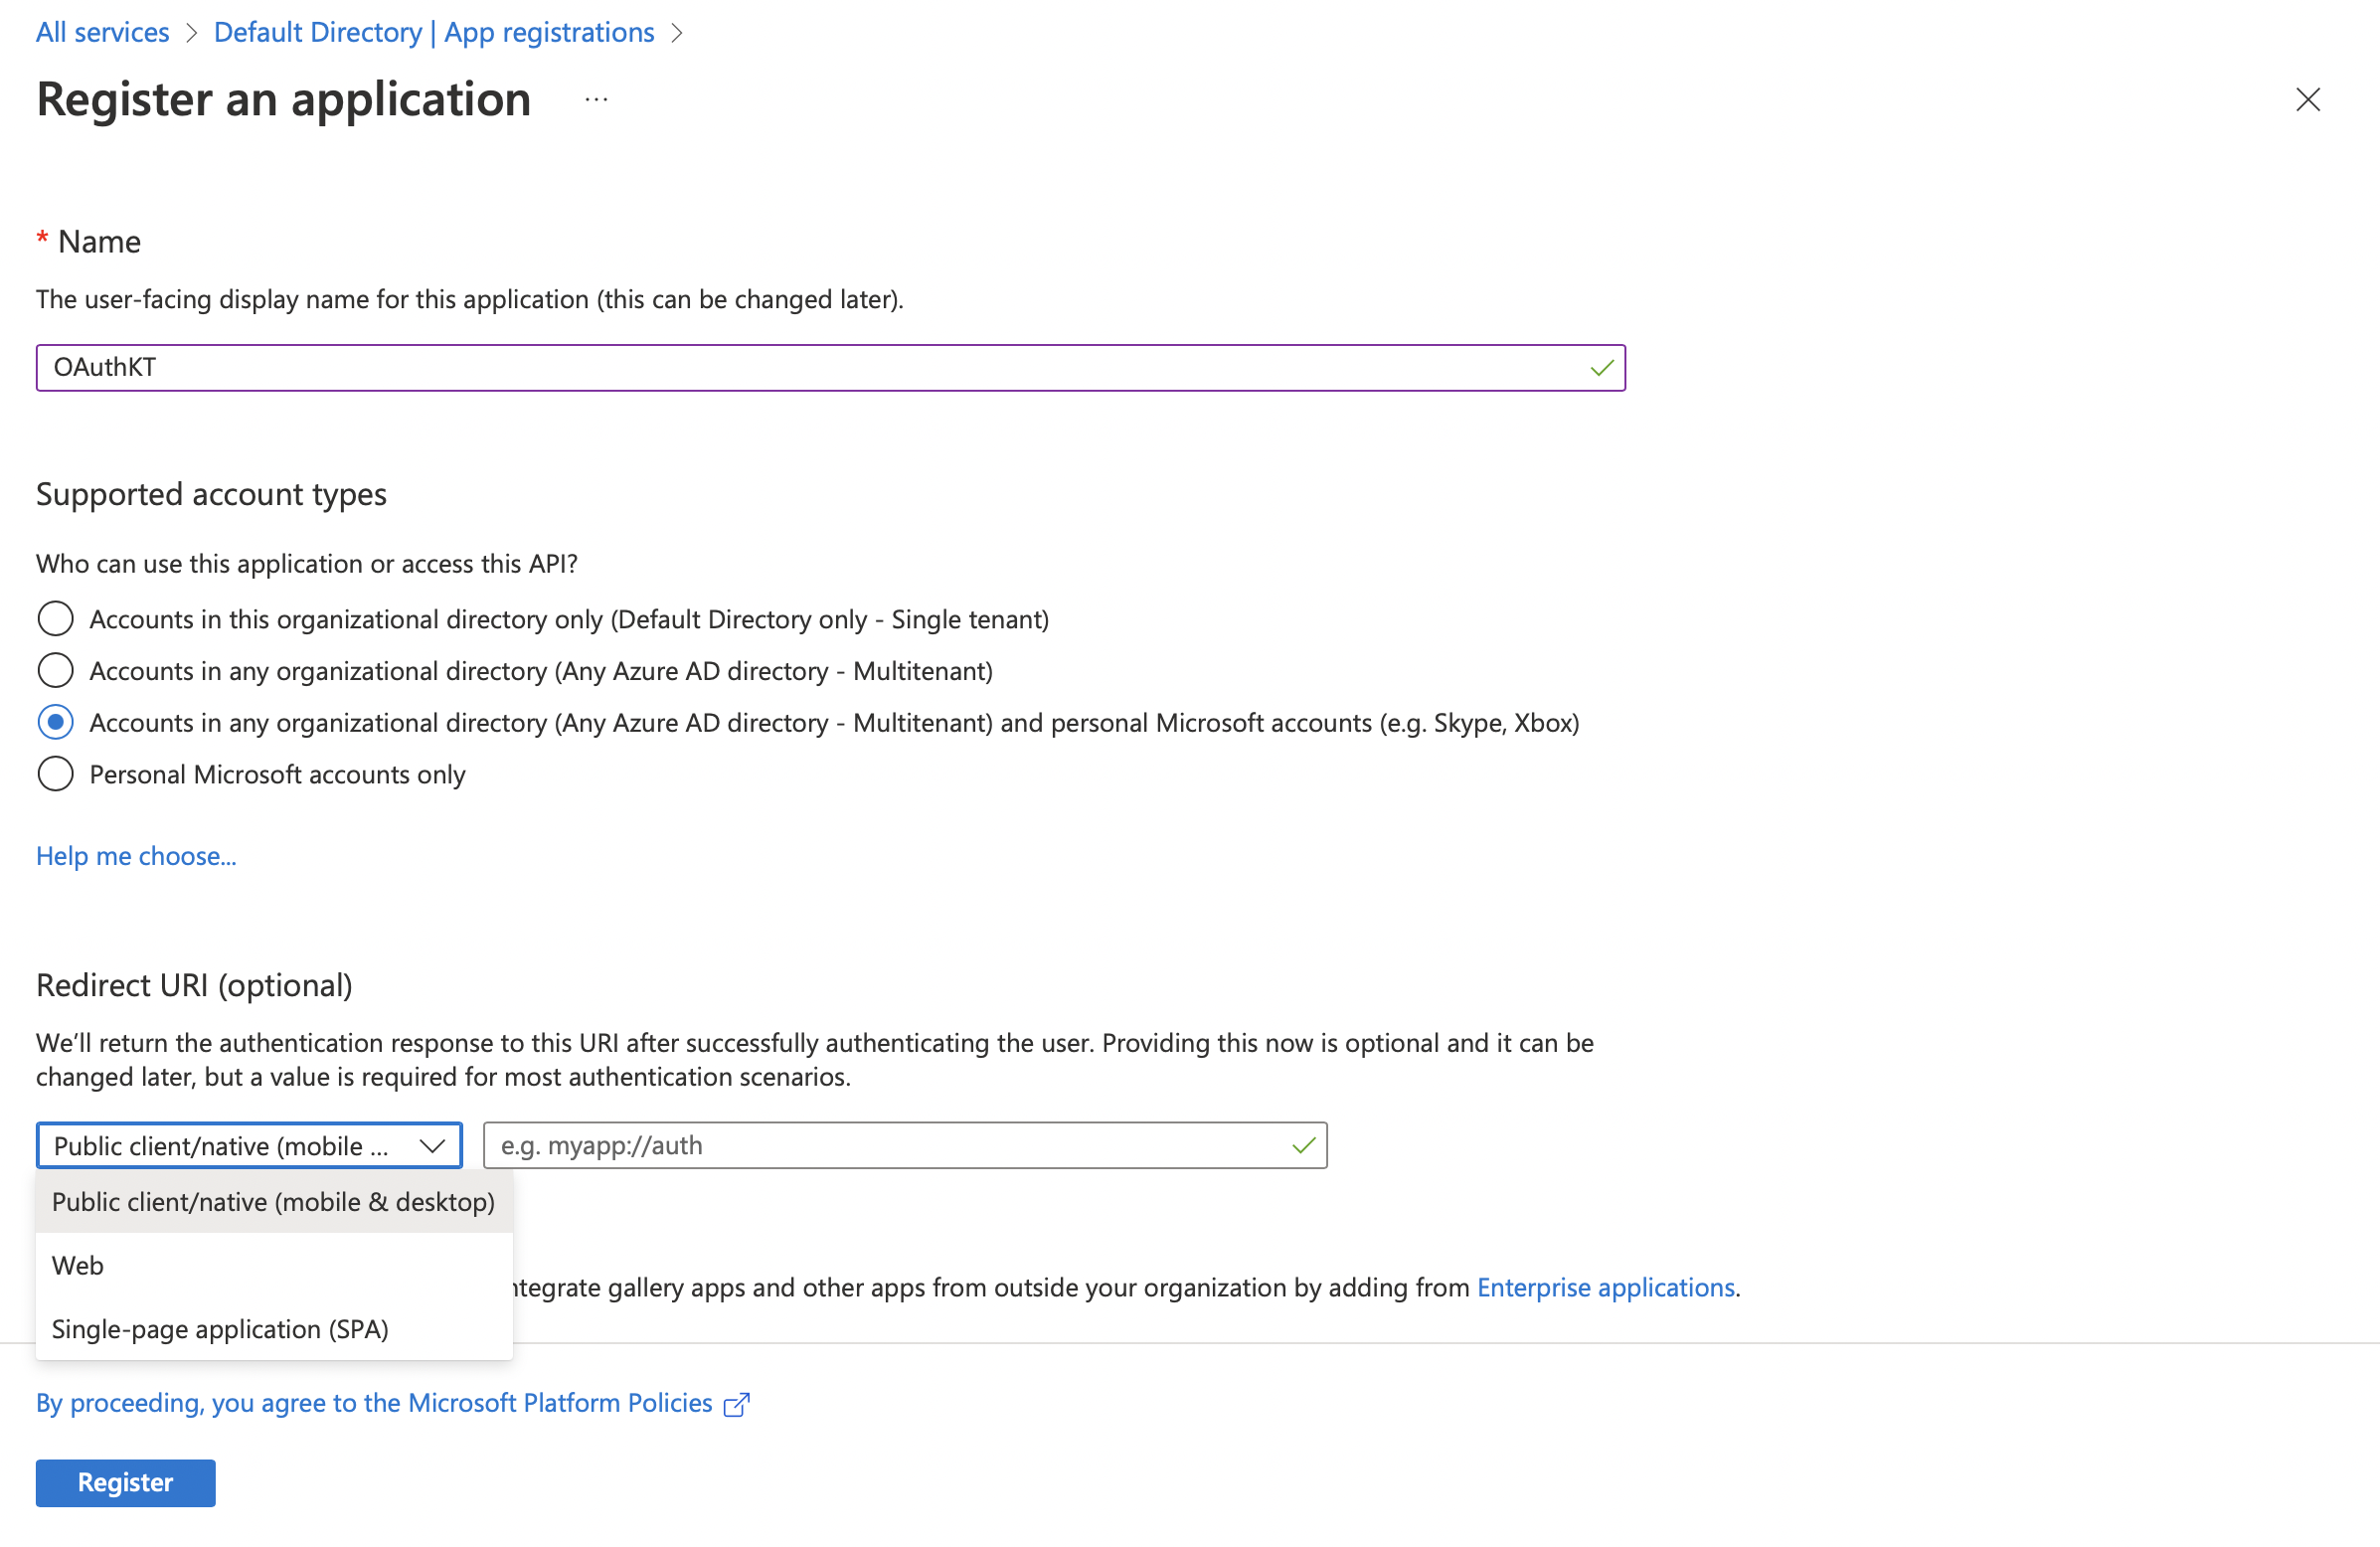
If you are registering a Web app, the redirect URI that you should select is Single-page application(SPA) and not Web. Because every PWA built through the Appspotr Platform is a Single-page application(SPA) which is not a multi page application.
In this guide, we are going to redirect to our Appspotr App which is a Native app
We have to add the URI to our App and the URI should be the bundle identifier or the package name of the application
How to find the bundle identifier of your app?
To have a bundle identifier, you have to [configure Firebase](https://academy.appspotr.com/academy/latest/getting-started/accounts/firebase/index.html) to your app.
-
Click on the required platform
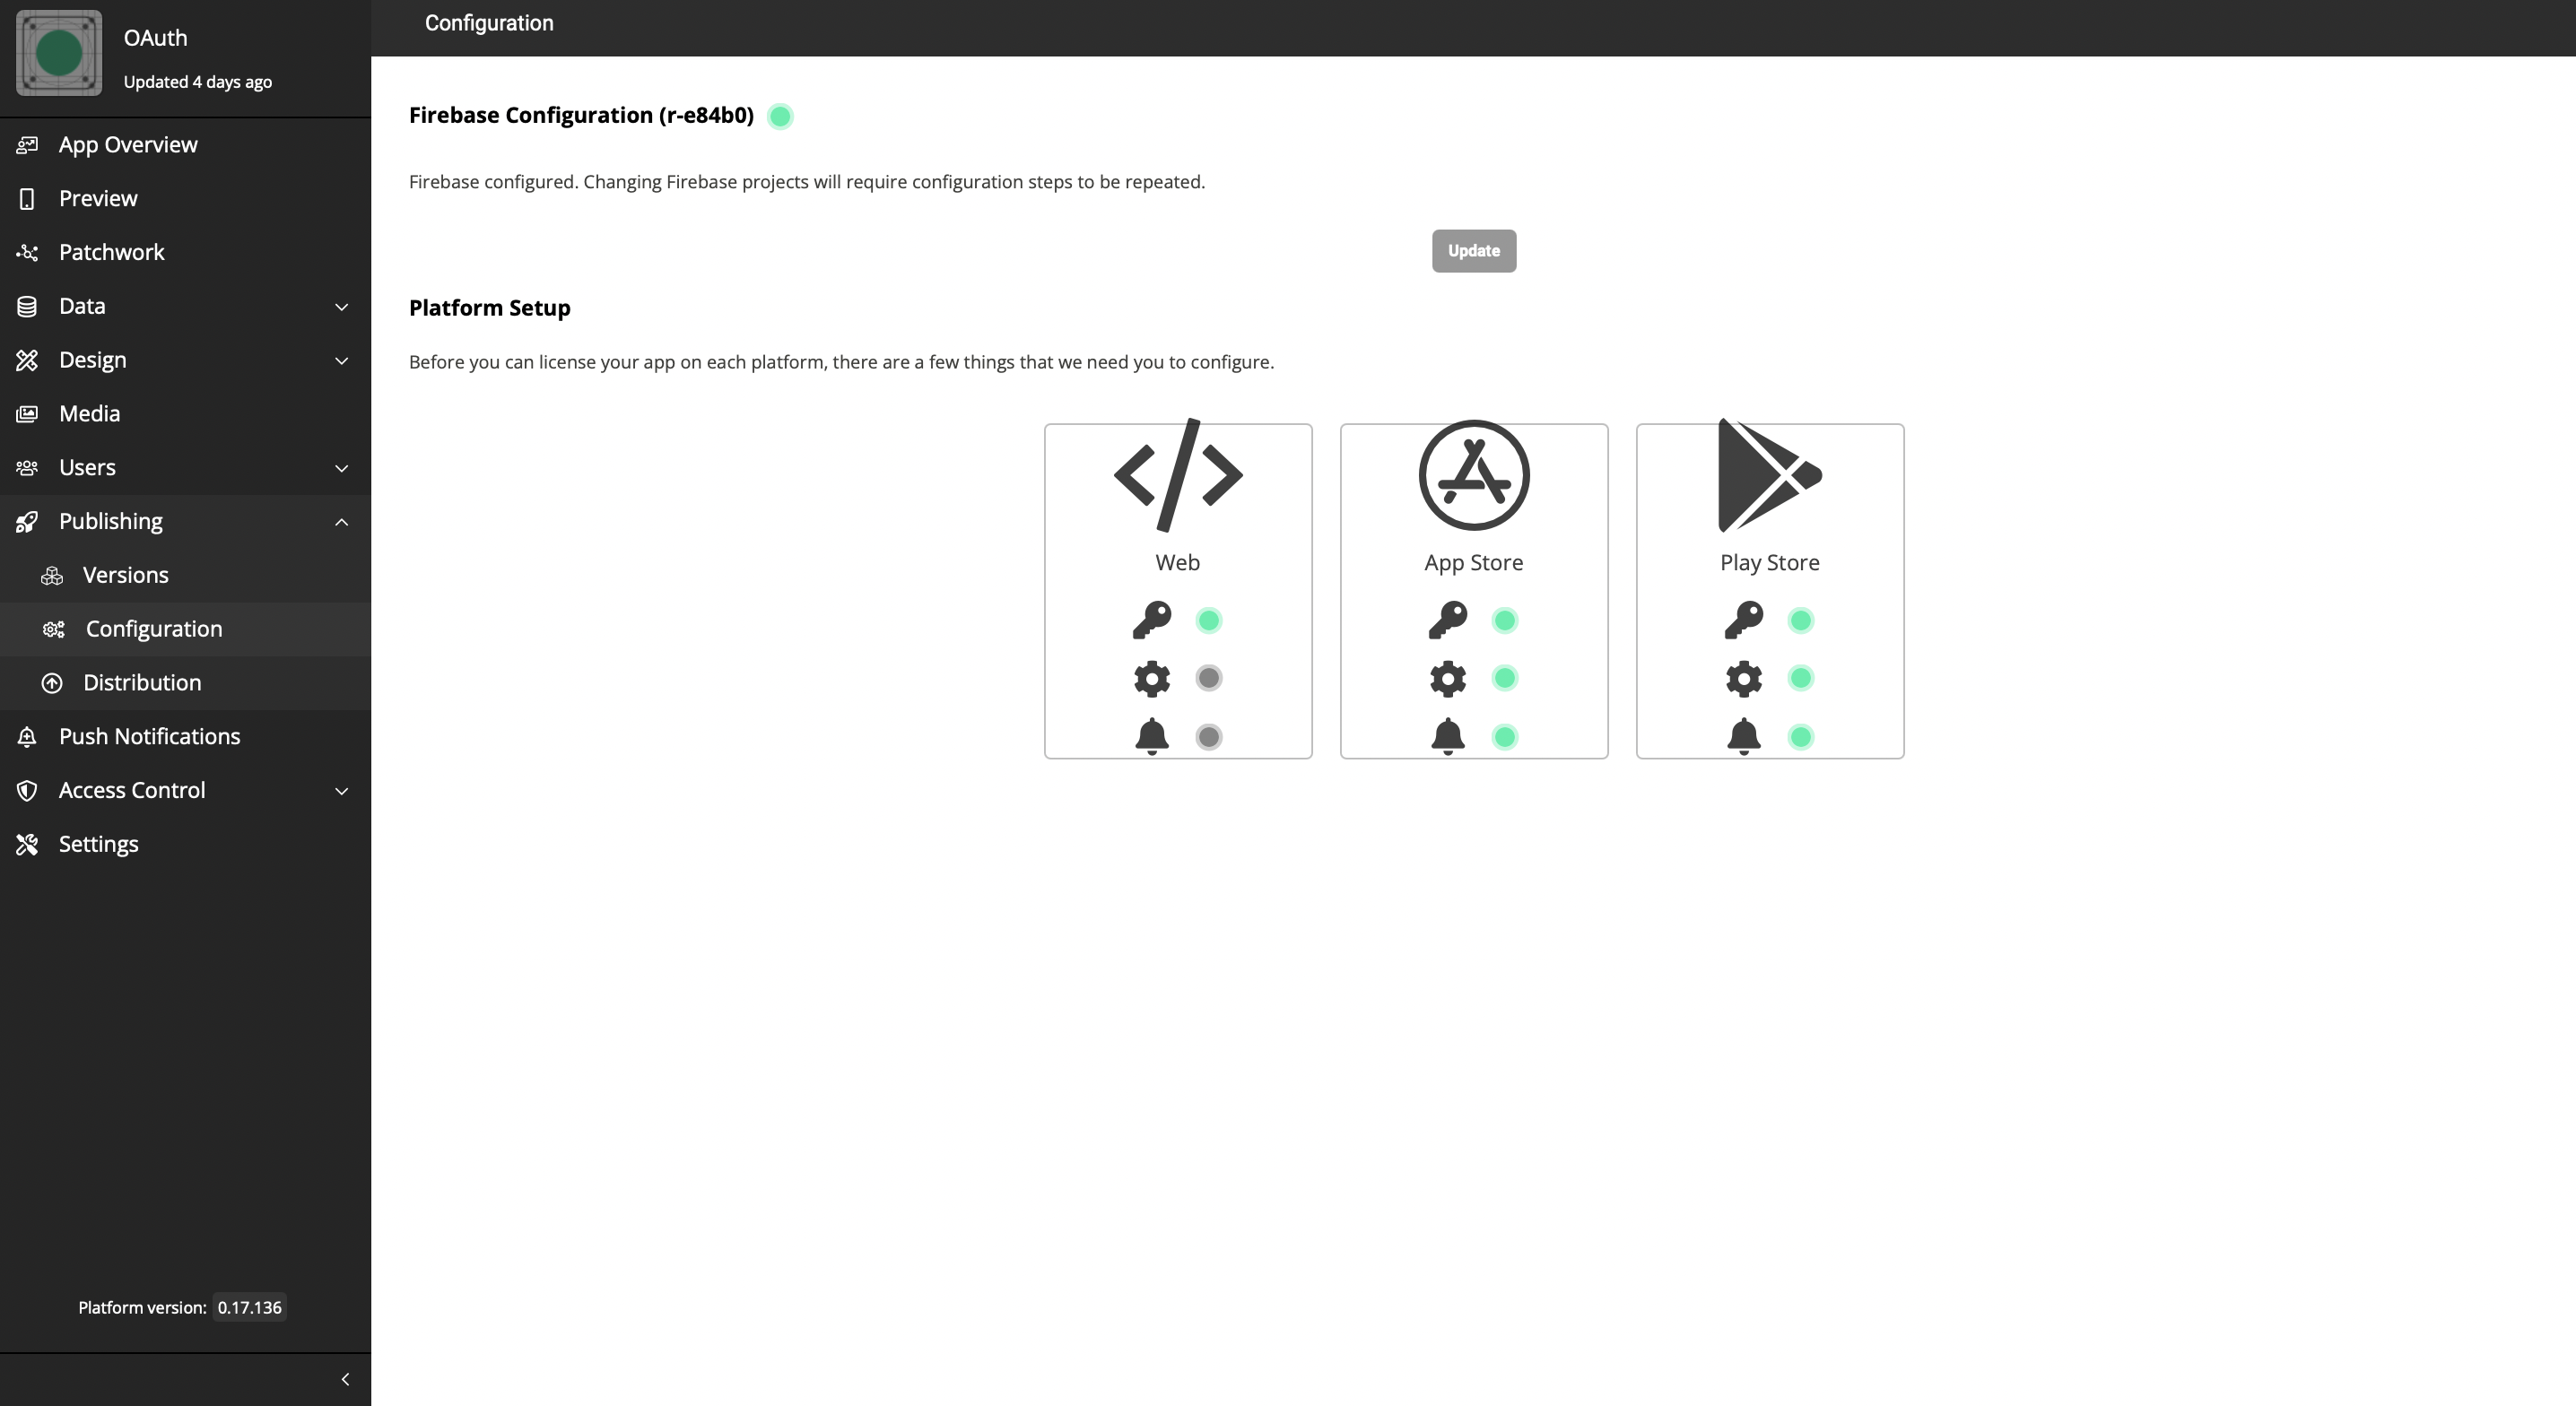
-
You will be able to find the Bundle Id there.
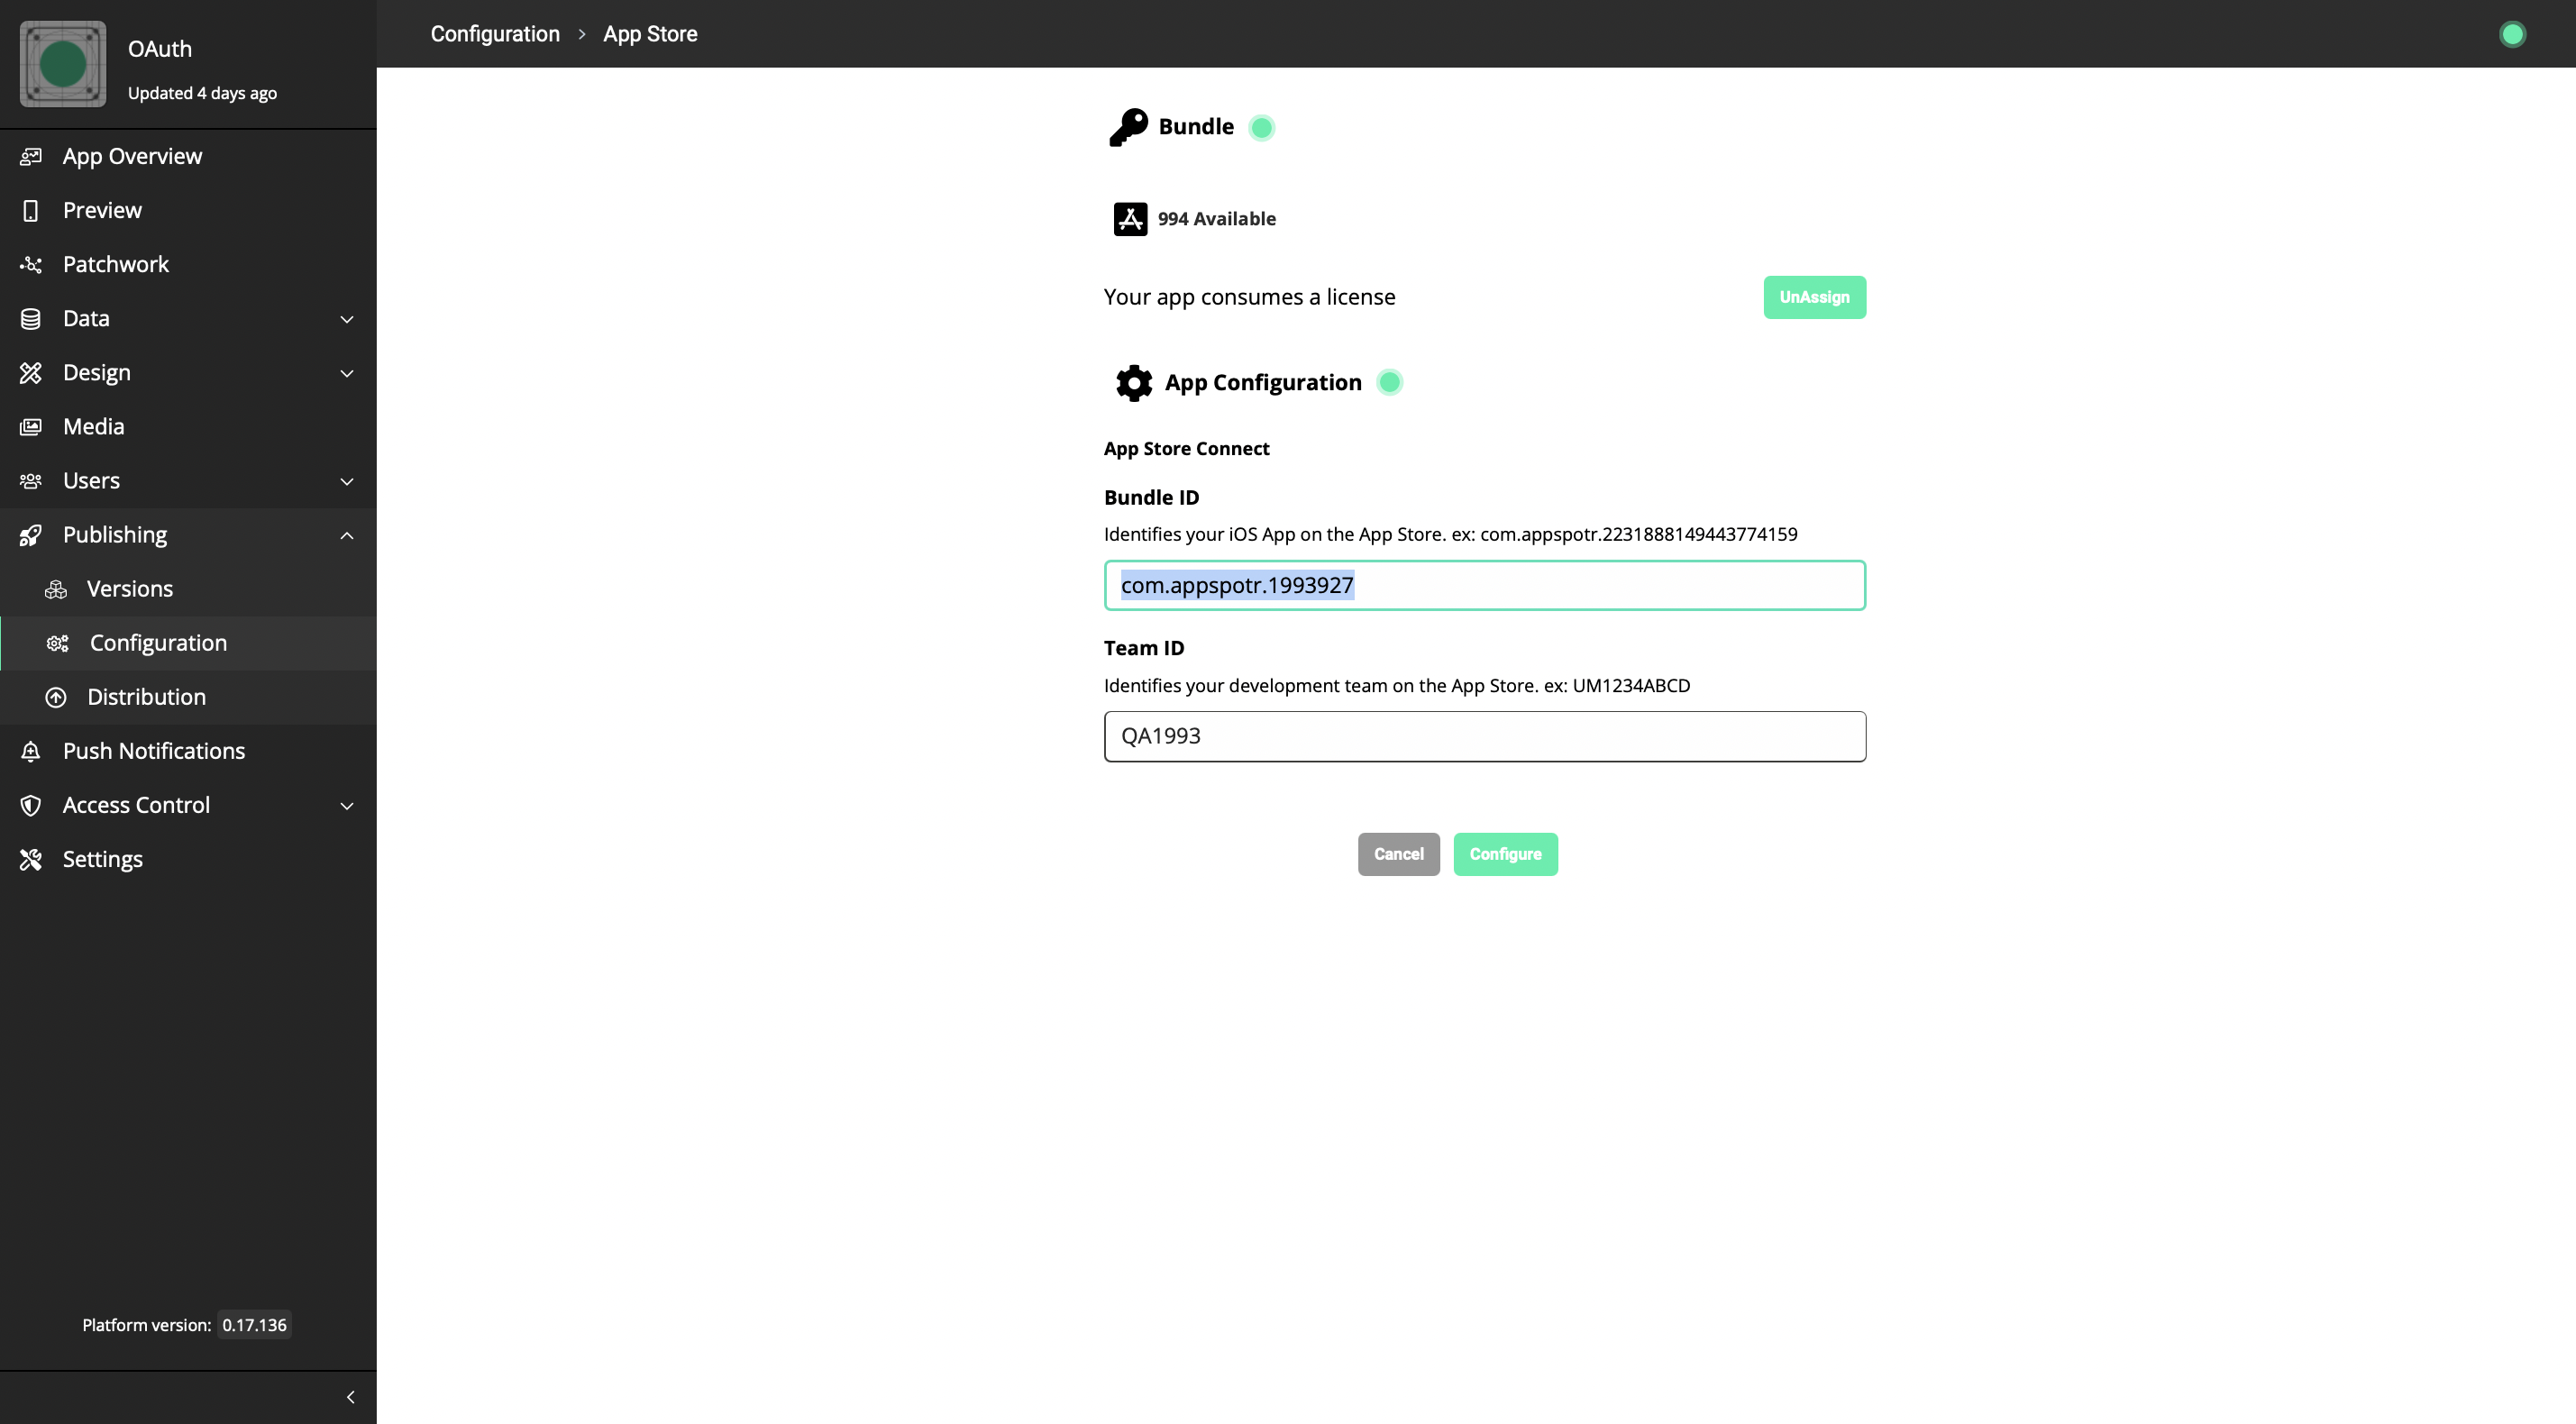
The Redirect URI should be equal to this Bundle ID. This is because when we access your app through the OAuth Logic blocks, some data is going to be returned. (Mostly tokens). For Microsoft to return the proper data, the Redirect URI should be your Bundle ID or the Package name.
-
Add the Redirect URI - The Redirect URI should follow the following pattern
<Bundle Id>;//auth
(Either remember or copy this URI as it has to be used in the future)
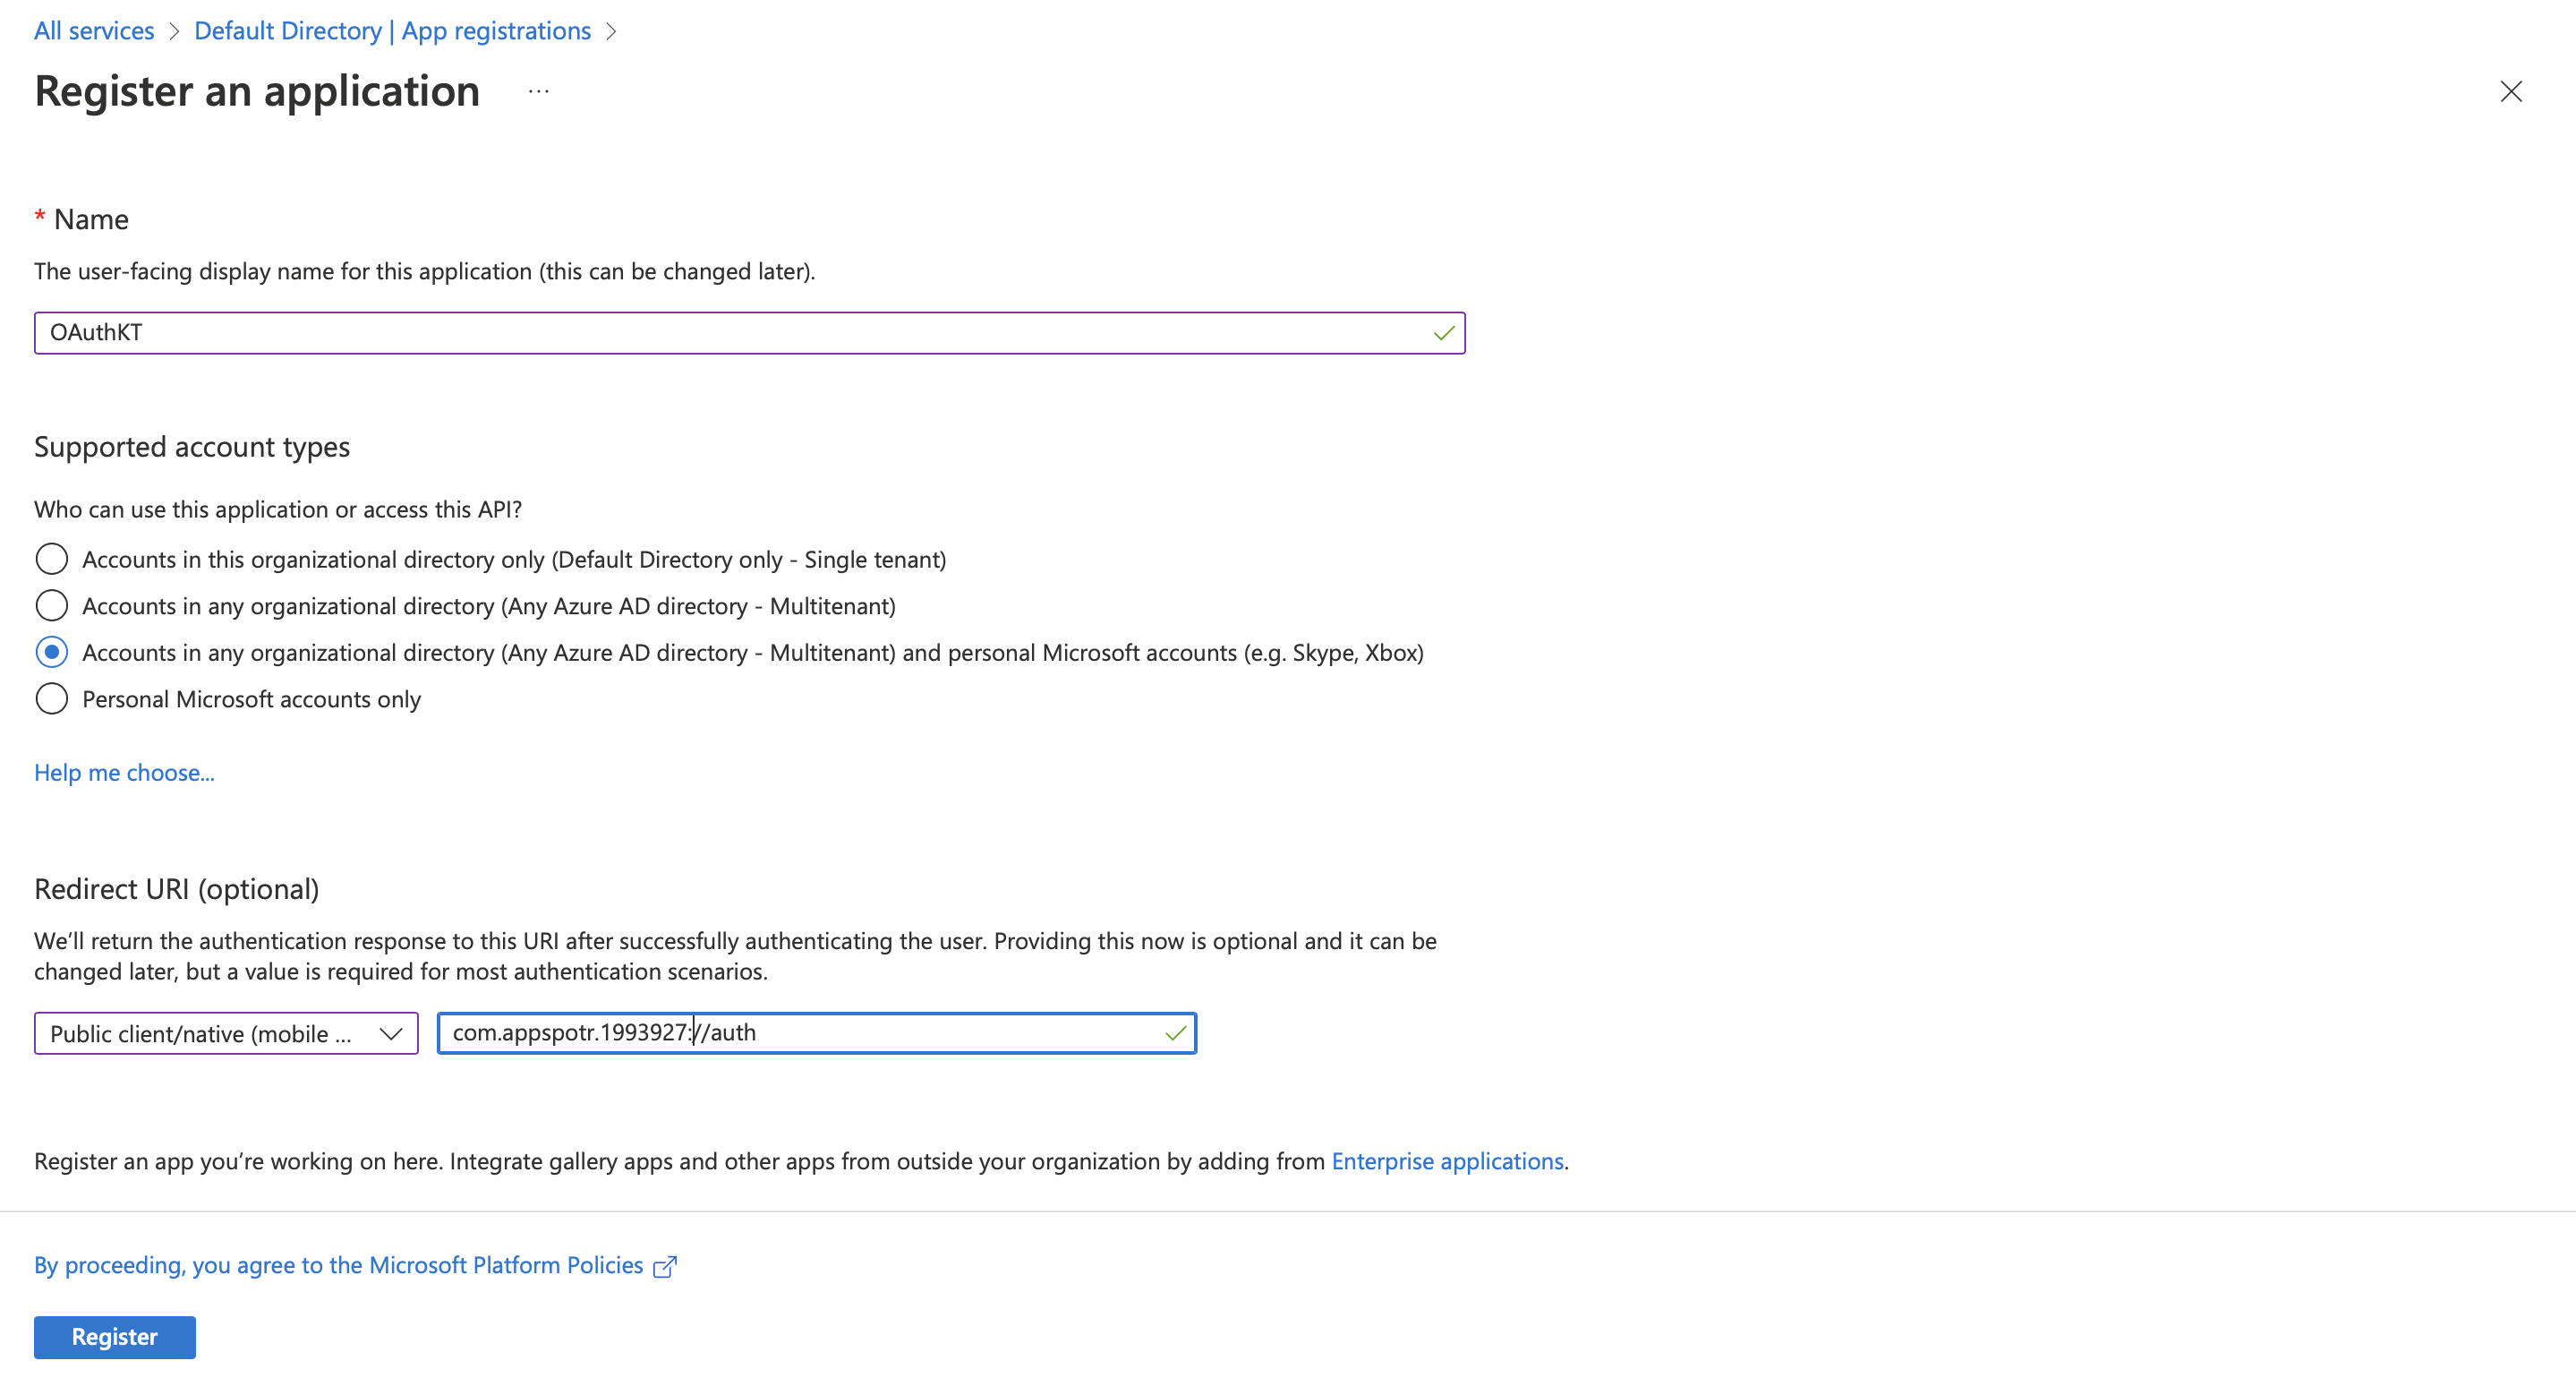
-
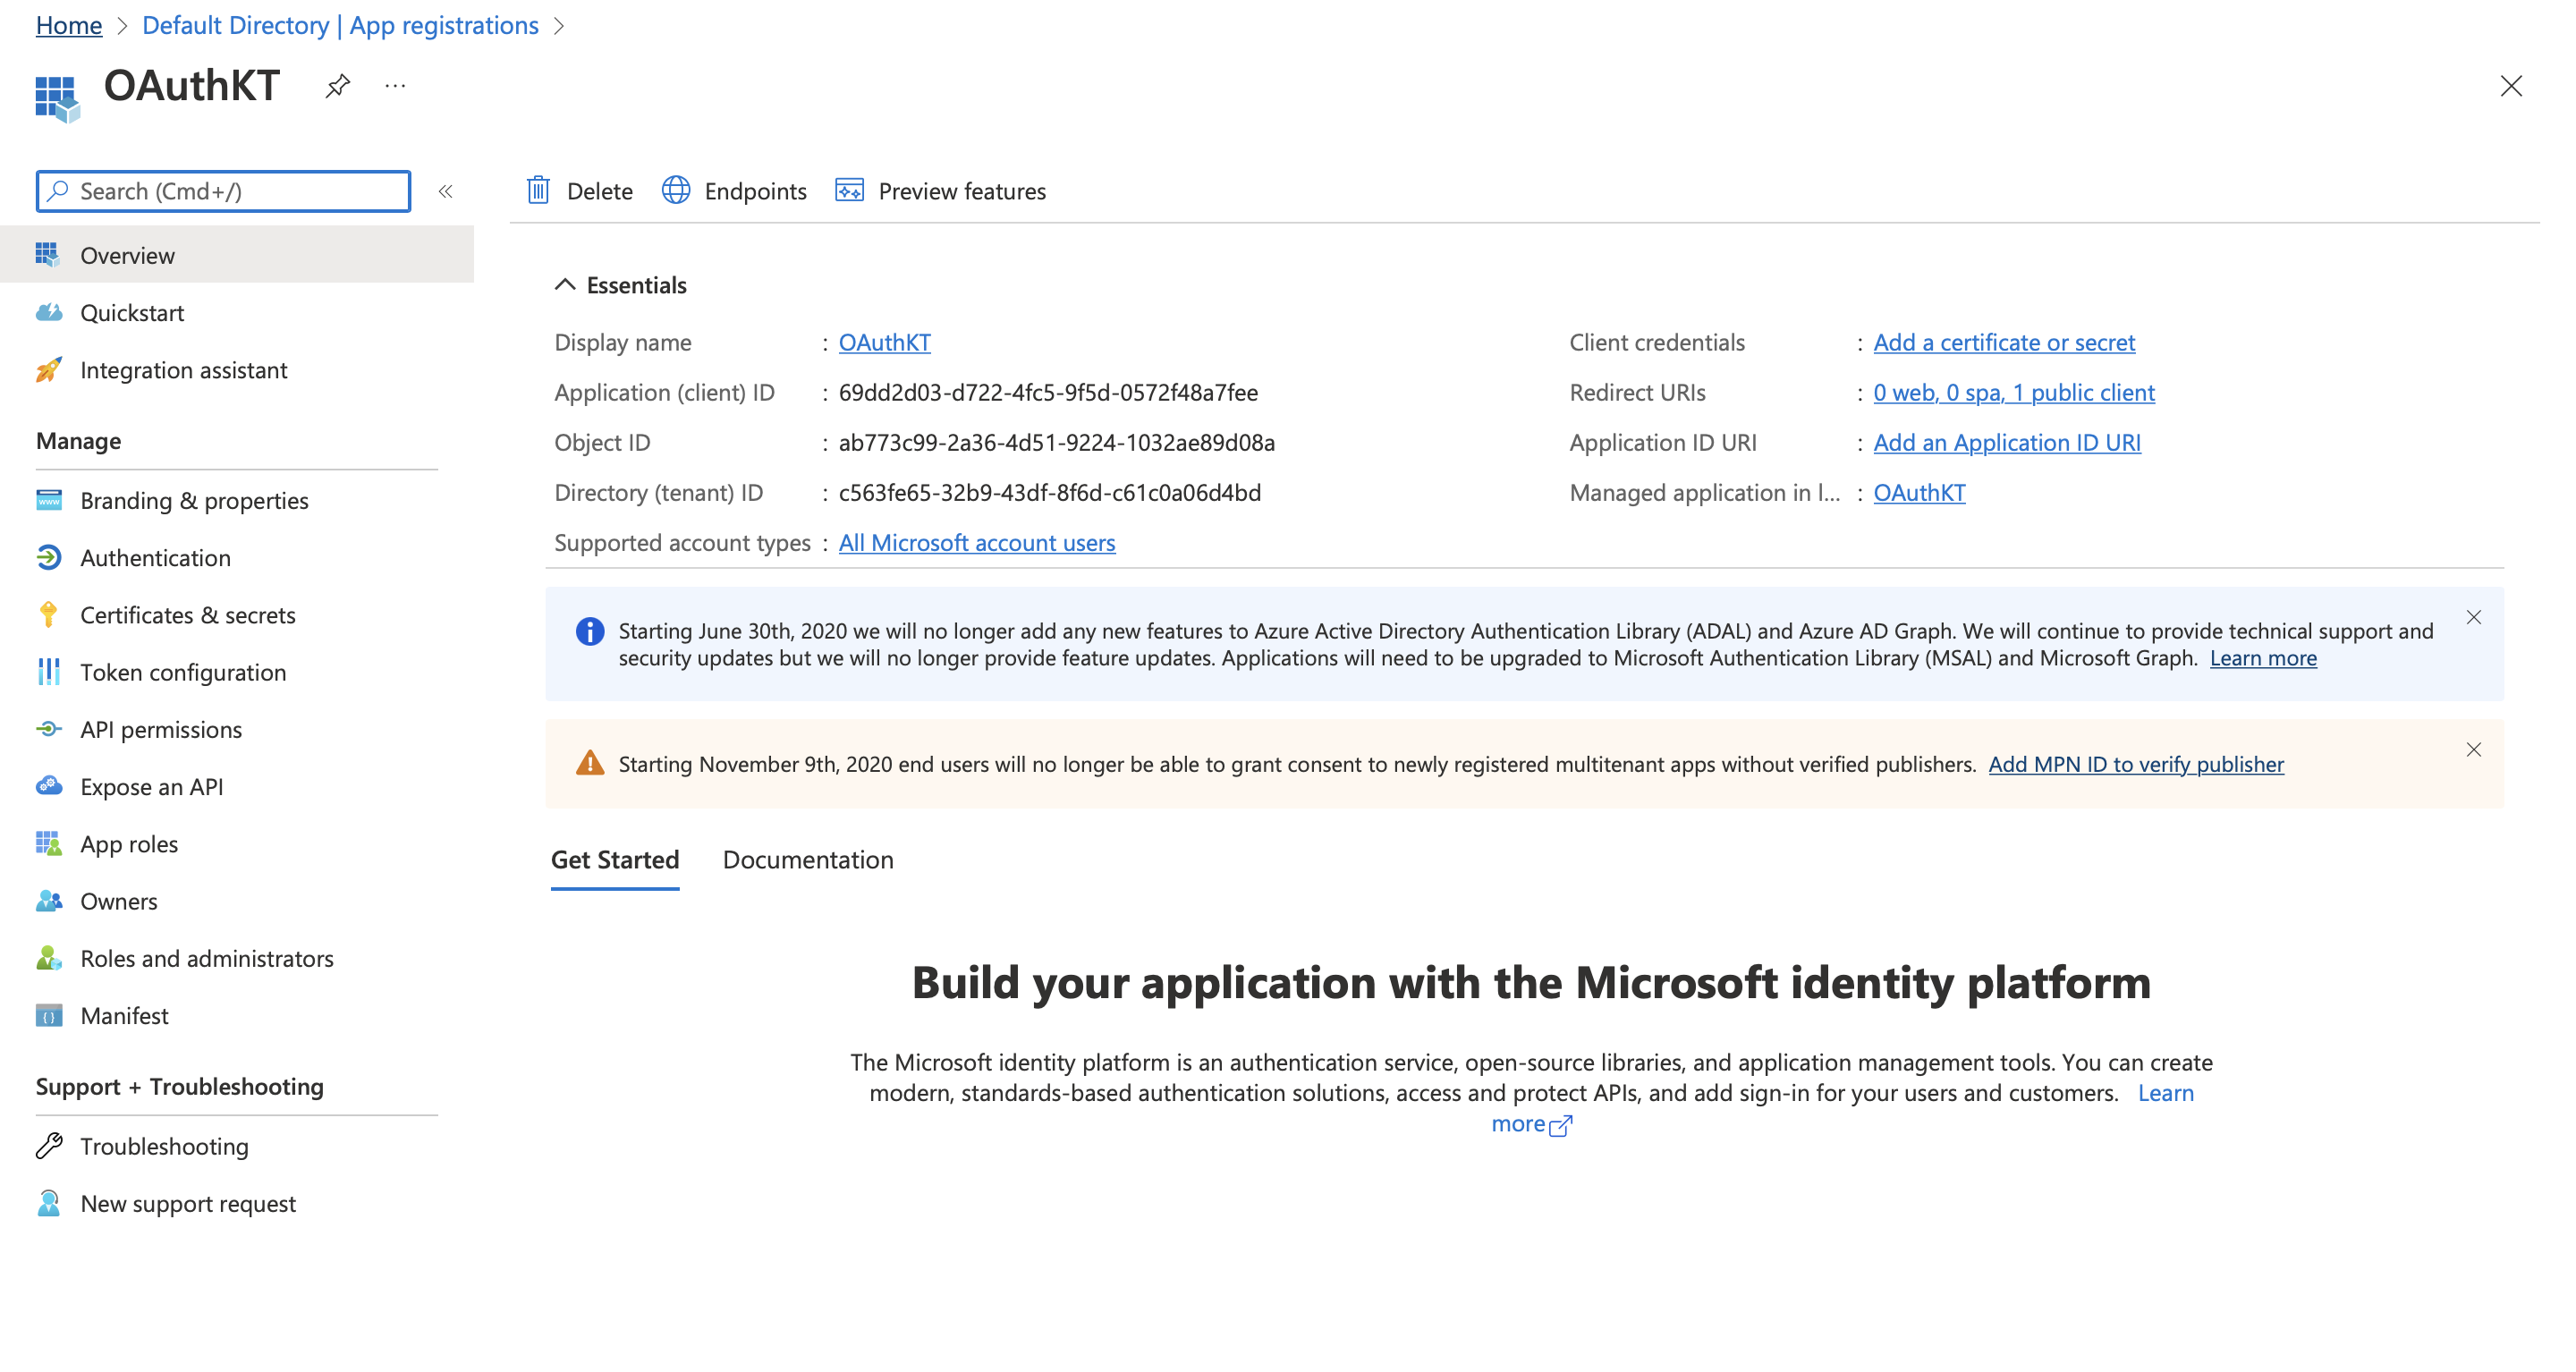
Click on Register.
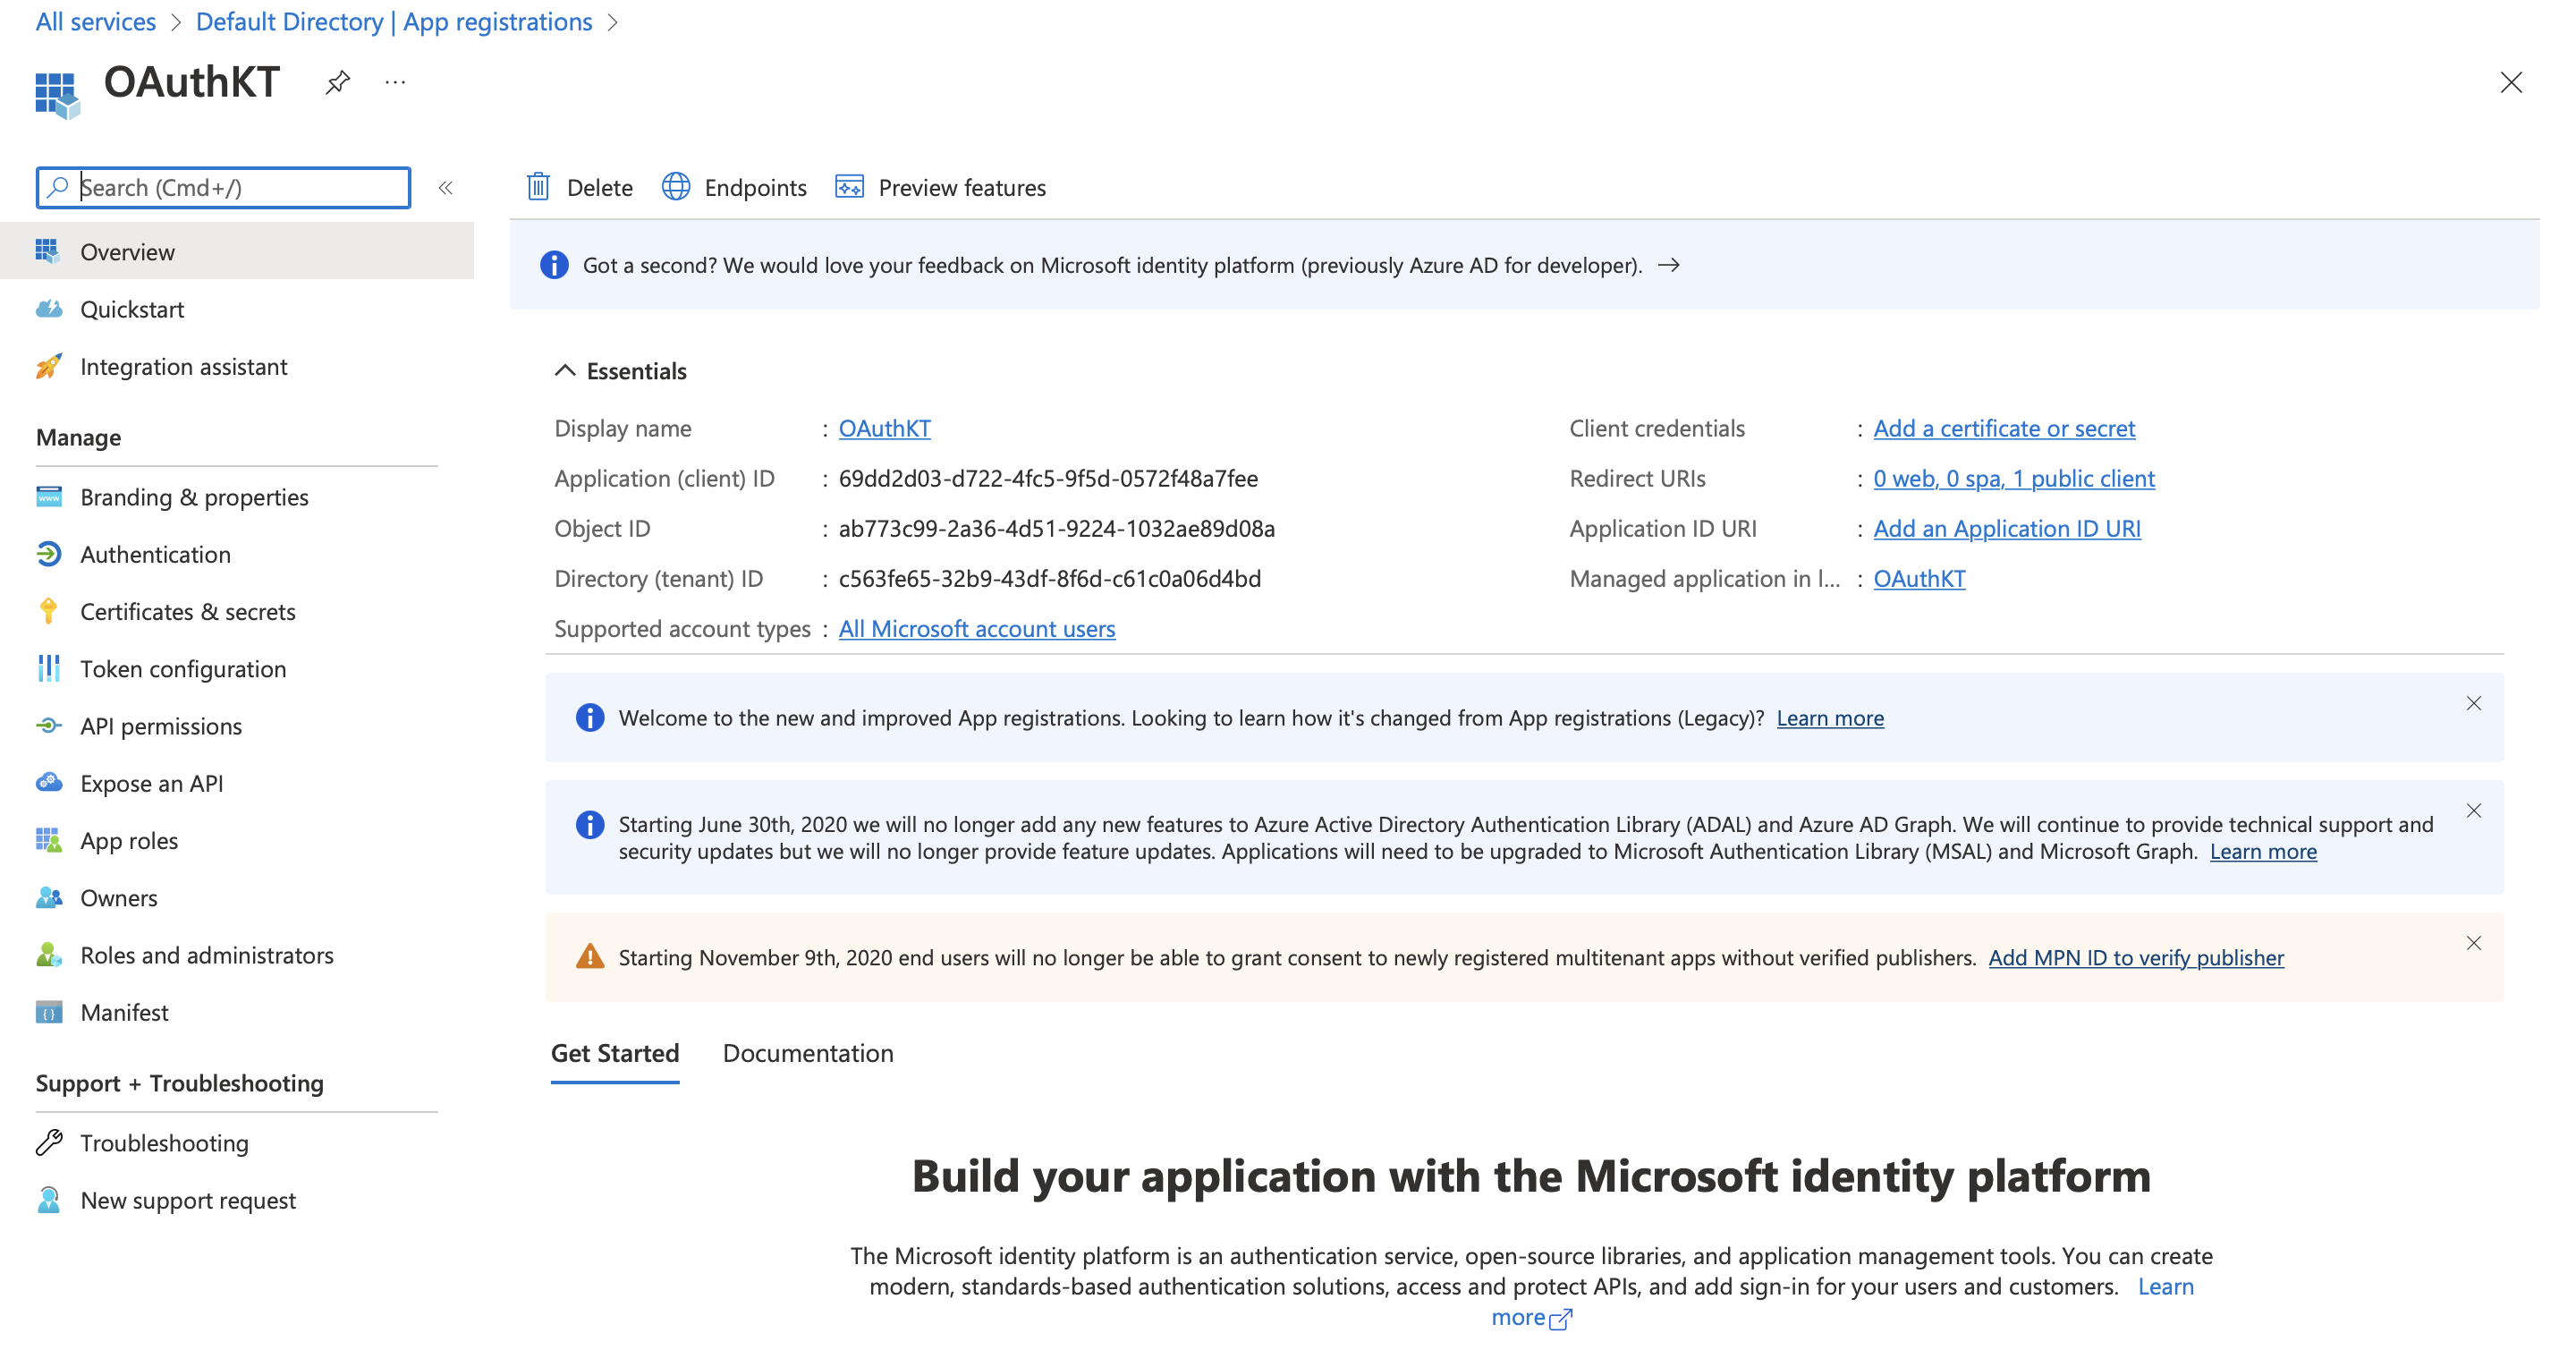
Now we have an application, which we can use for the data on the logic blocks.
-
Come back to your Appspotr App
Since we have registered the app as a native app for iOS we have to fill in the required data under the iOS platform.
-
Fill in the issuer URL
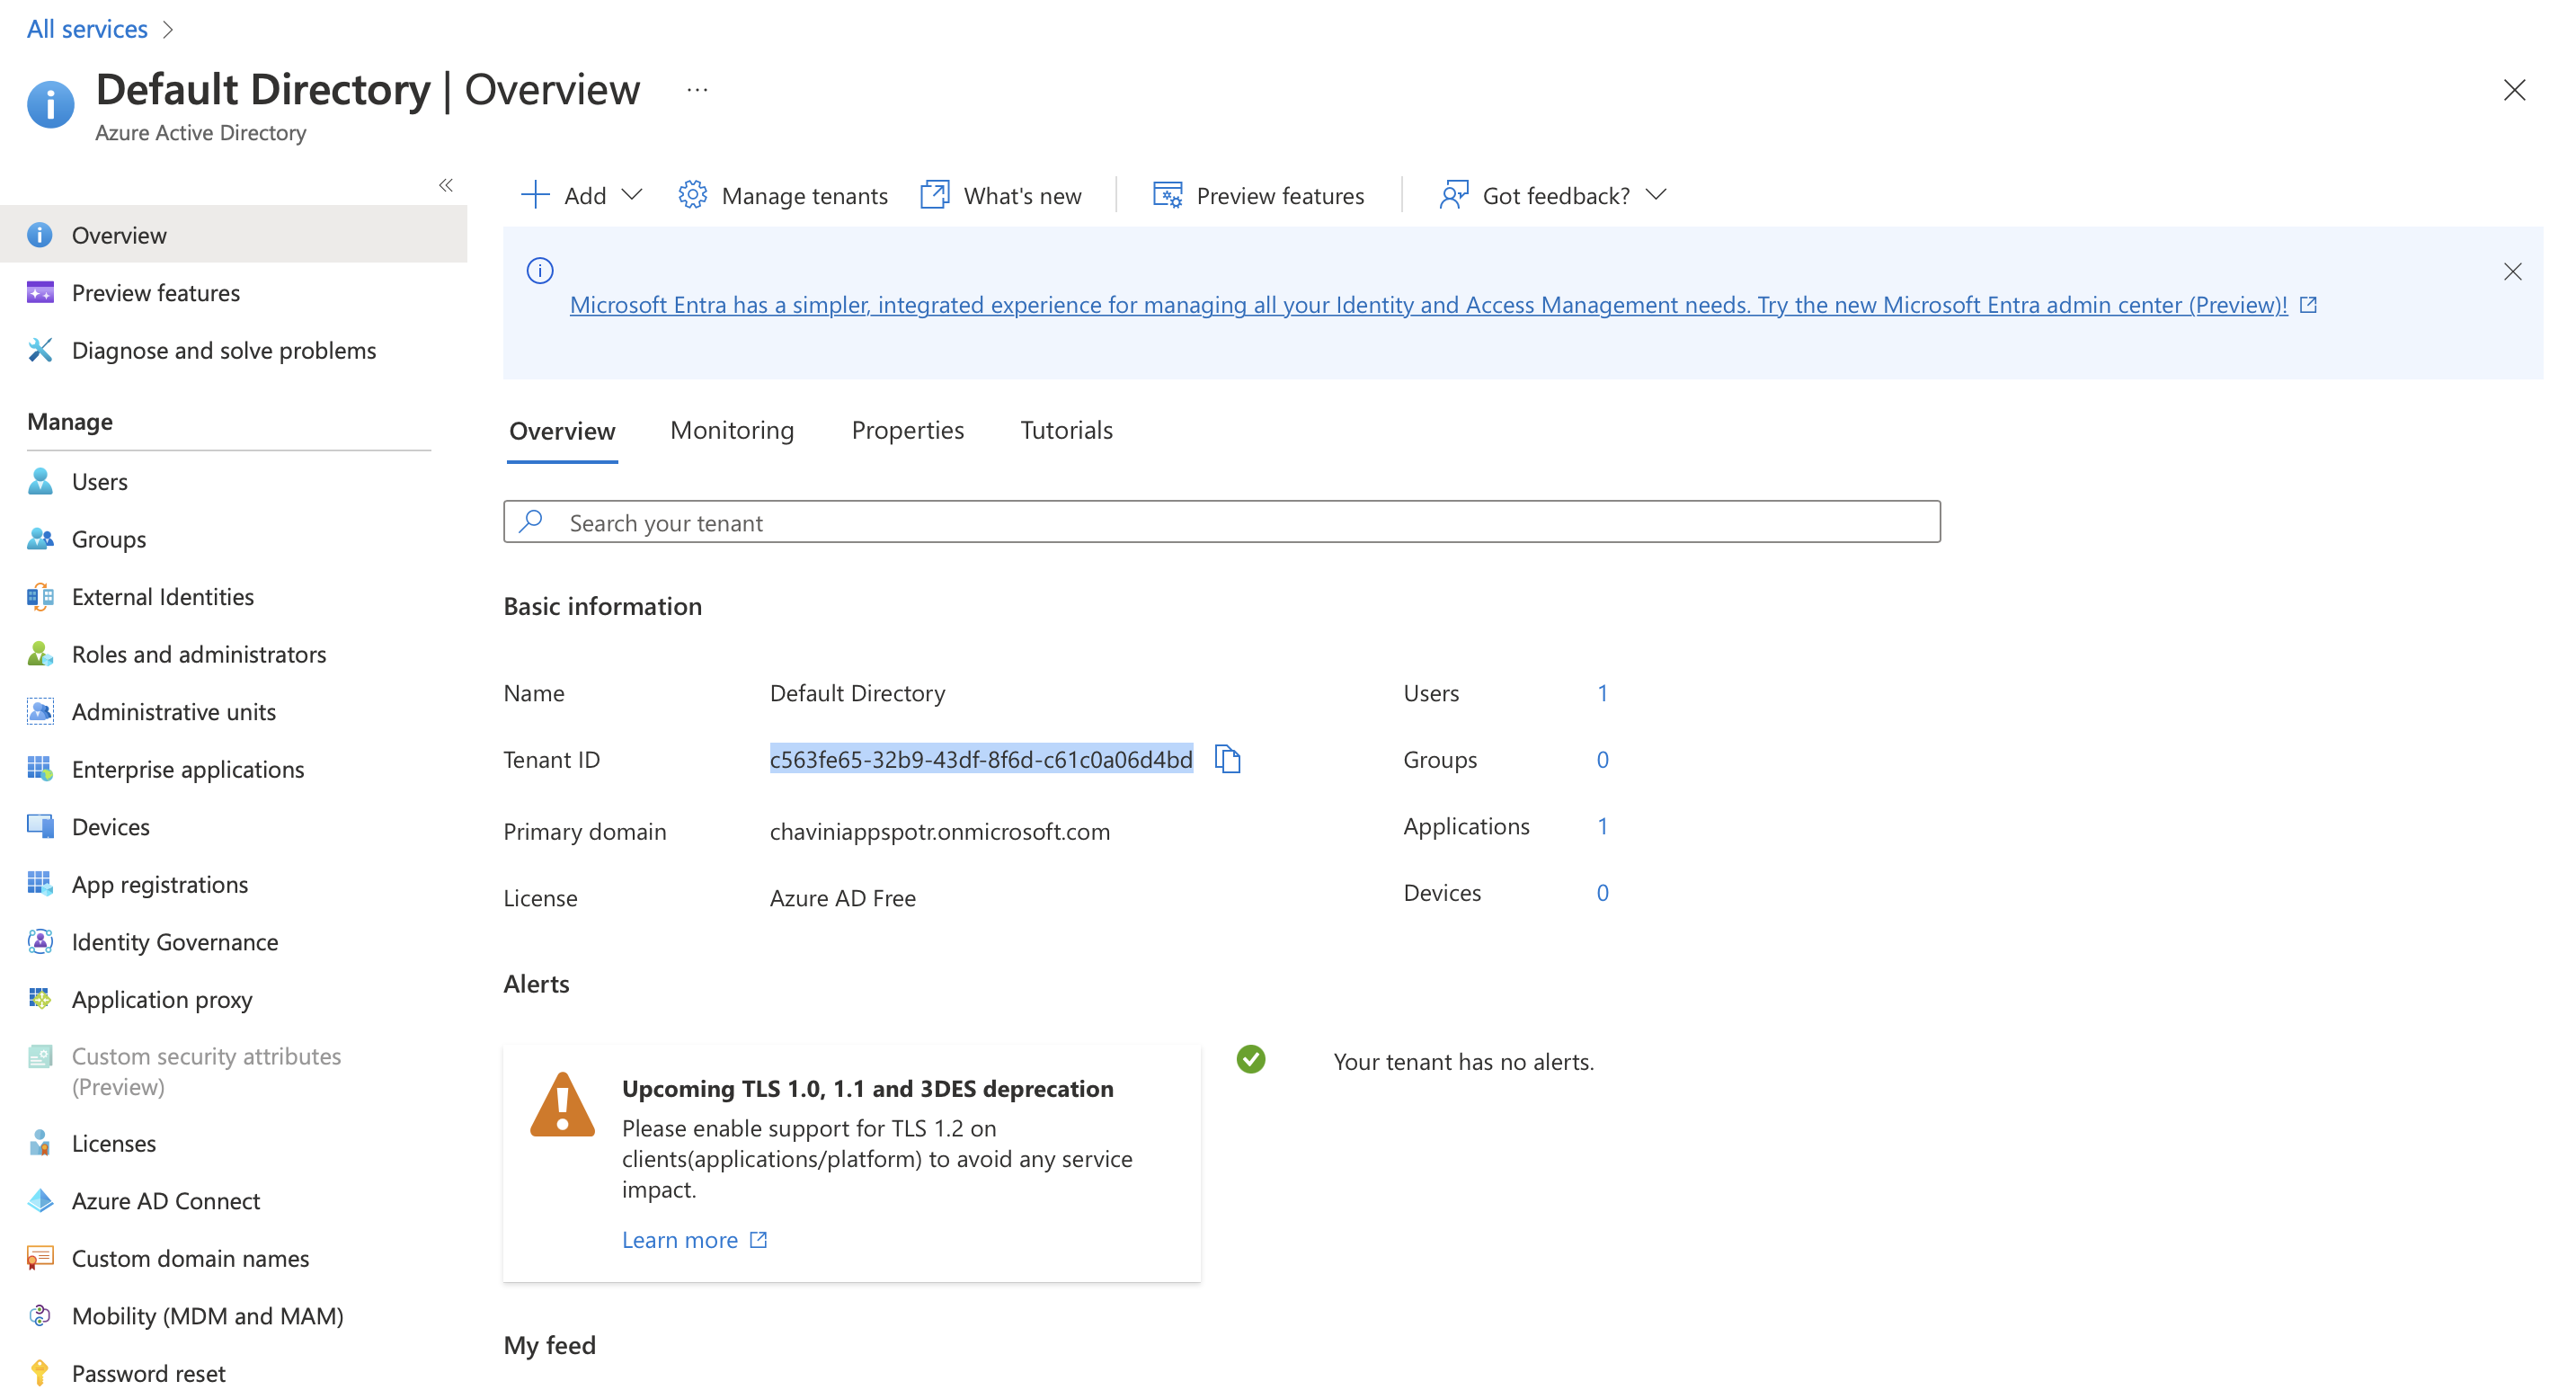
Azure has 2 versions for Active Directories; V1 and V2. If you are a new Microsoft Azure user, all your data and apps follow V2. Accordingly, you can copy your Issuer URL from here.
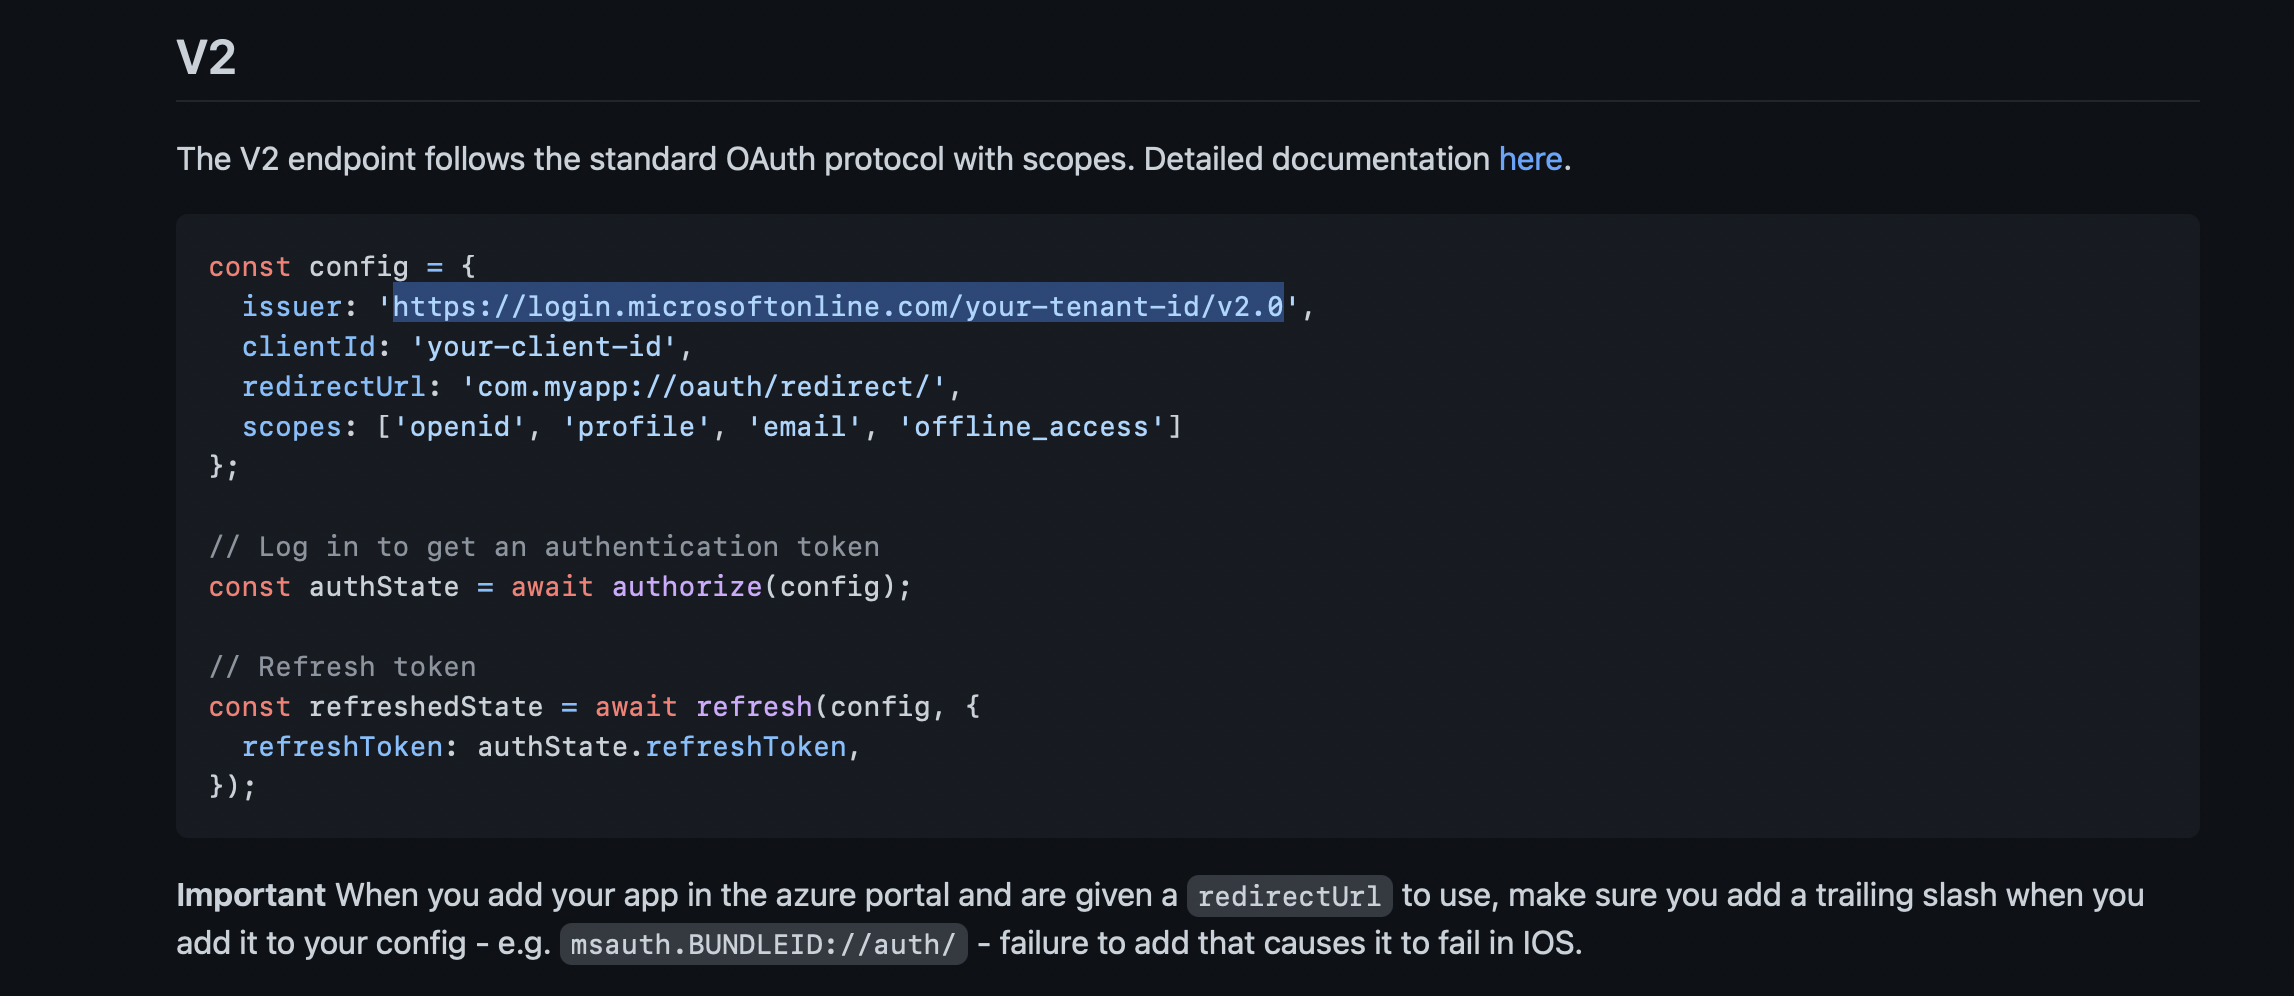
https://login.microsoftonline.com/your-tenant-id/v2.0
your-tenant-id should be replaced with your Tenant ID
-
Fill in the Client ID - Client ID is the Application ID of the Registered app.
-
Paste the copied Redirect URI
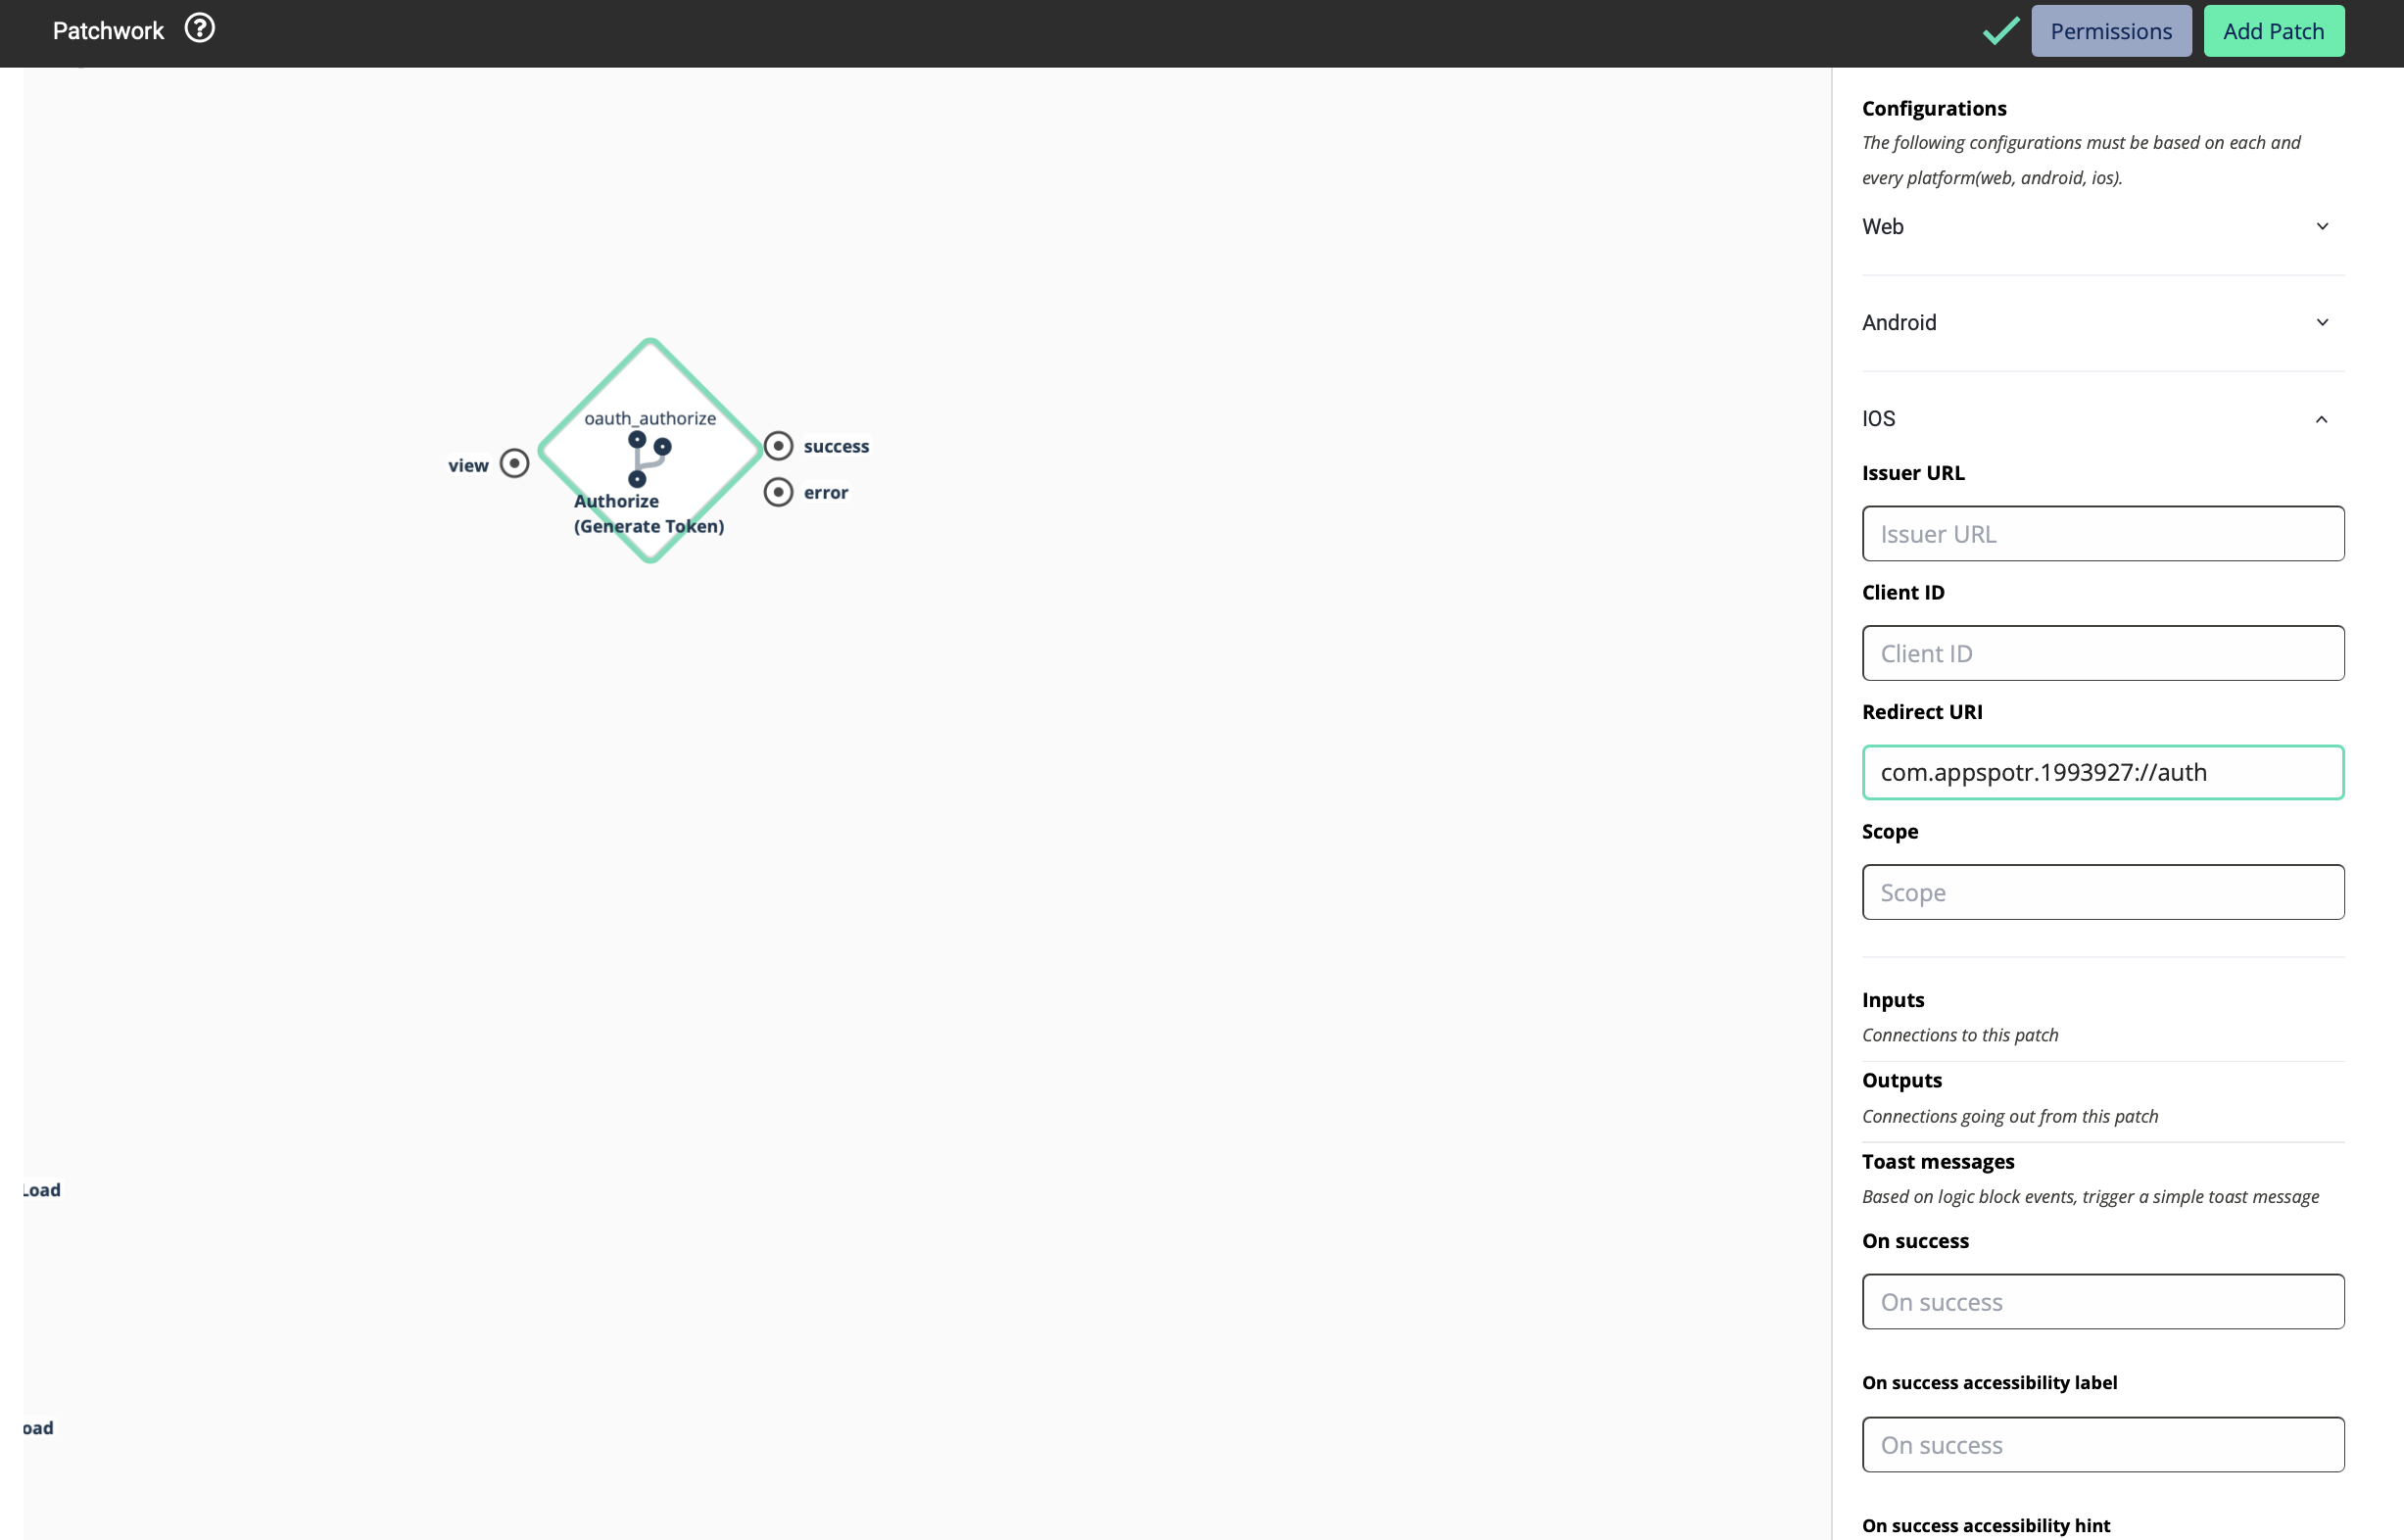
For this Redirect URI to work, the Bundle ID should match with it. You can edit and update it if those two do not match.
-
Fill in the Scope - The Scope defines what kind of services that the access token will be used for.
Ex: If you want to get the email of the user as the Token, we have to provide Email as the scope.
Then we’ll get a Token to access the email of a specific user
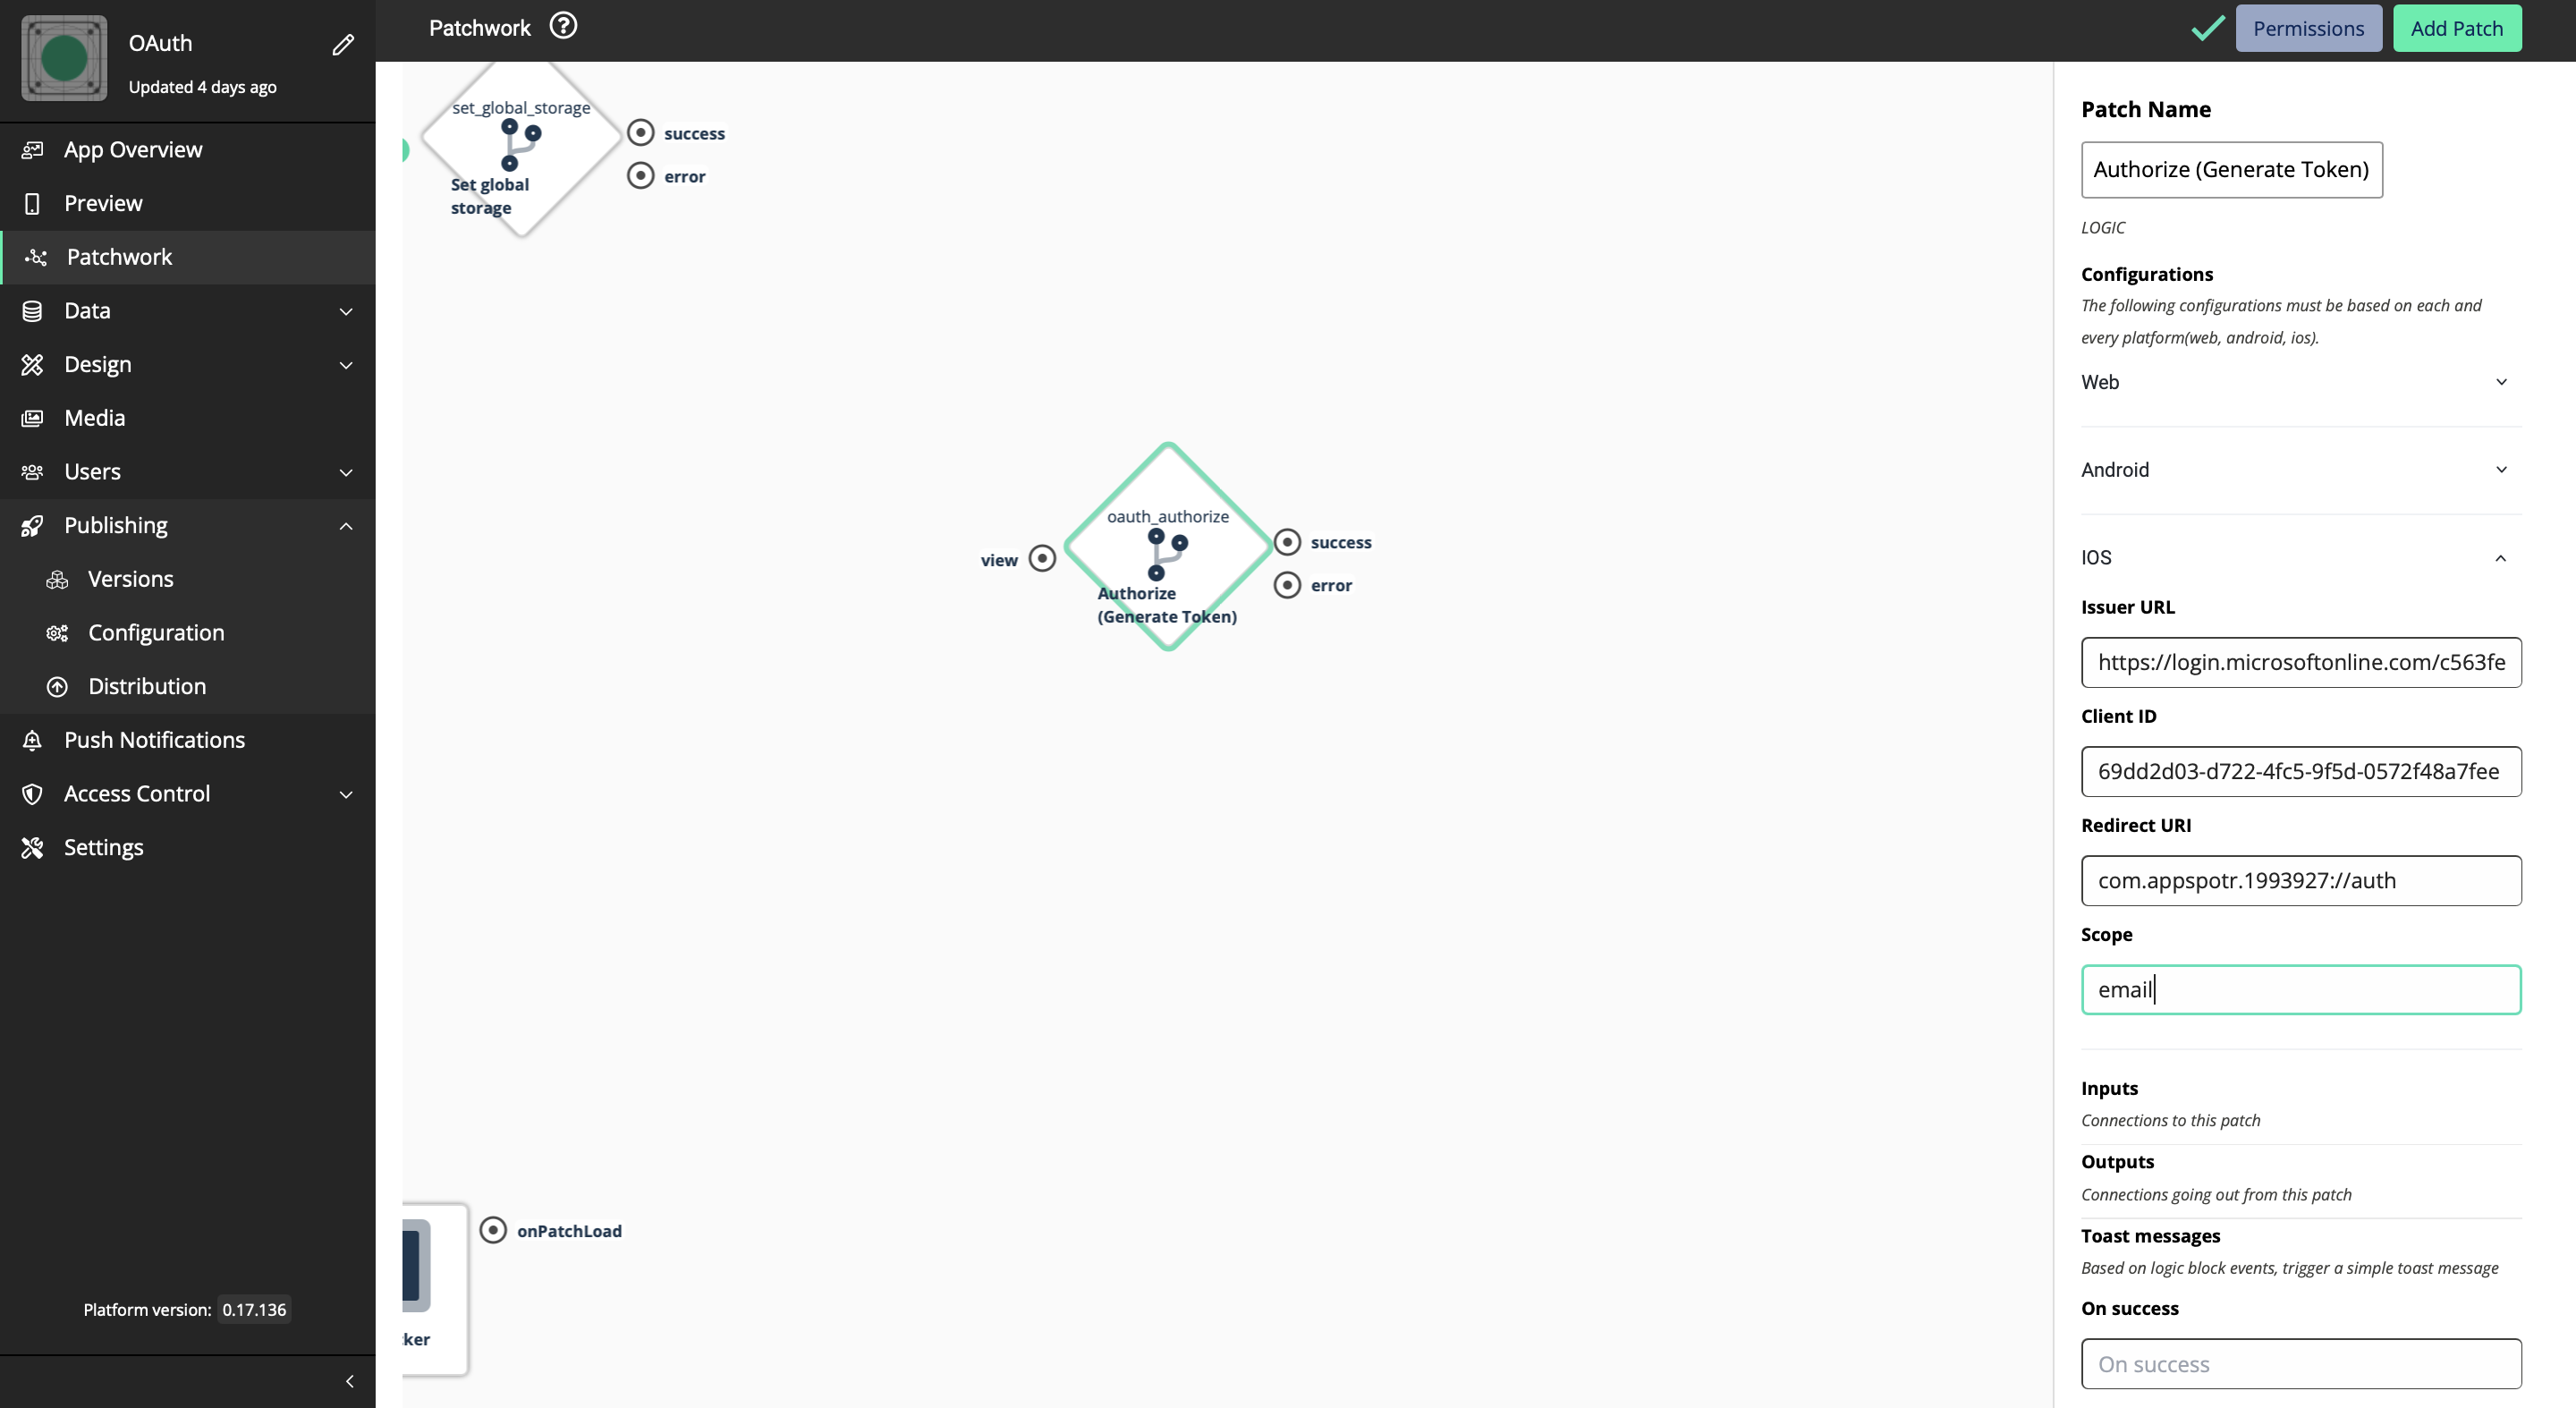
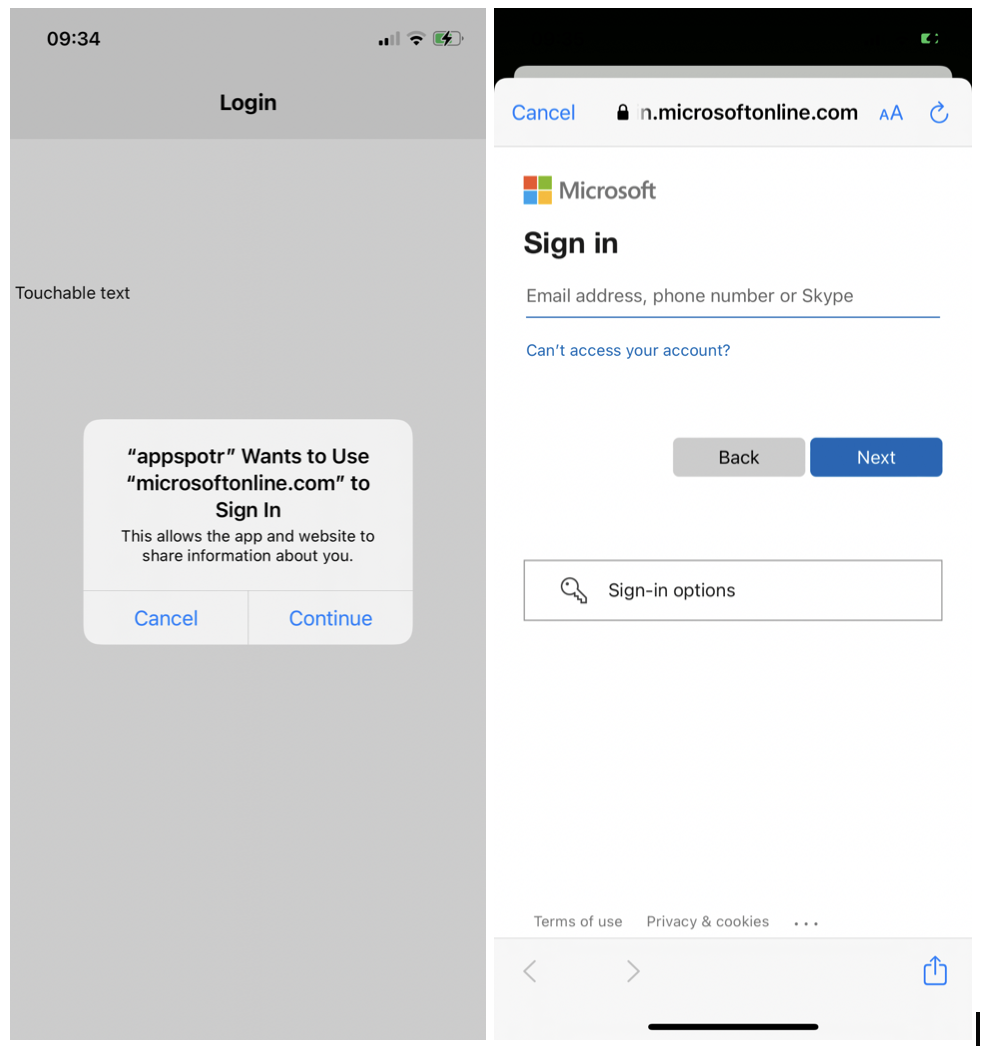
Now configuration for iOS is done.
Setting up the app to see results
-
Create a new View and create a button in it
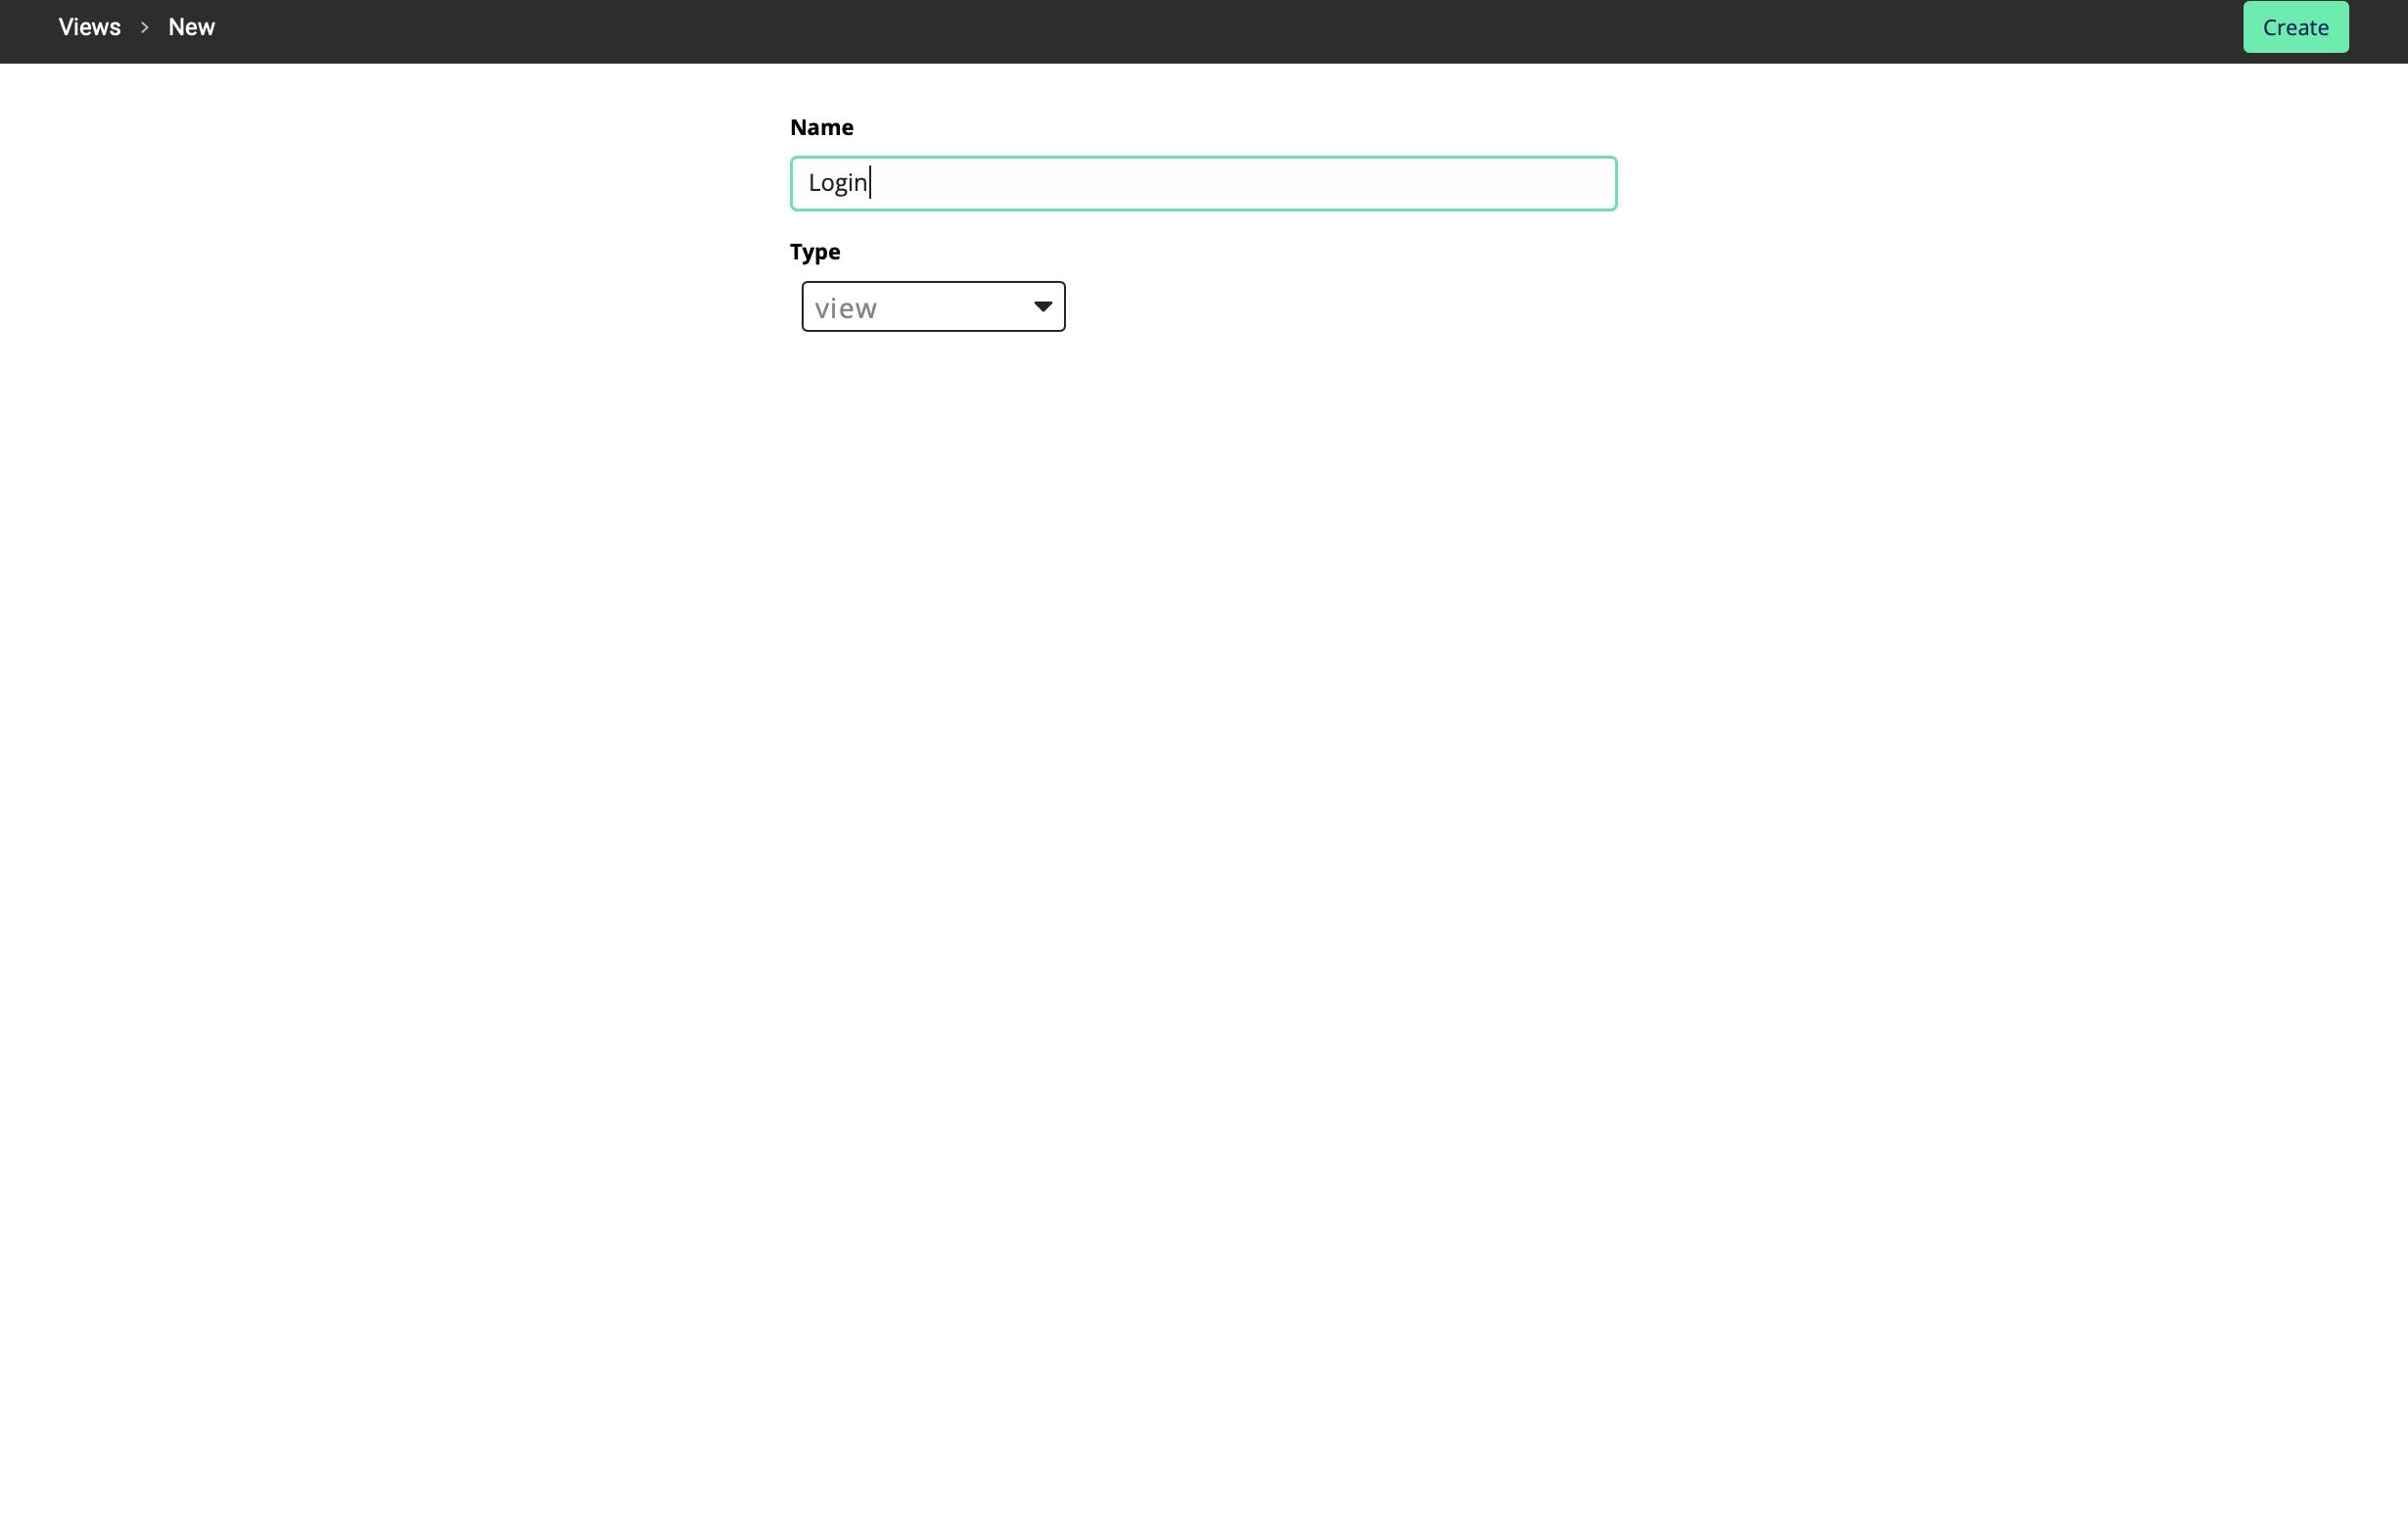
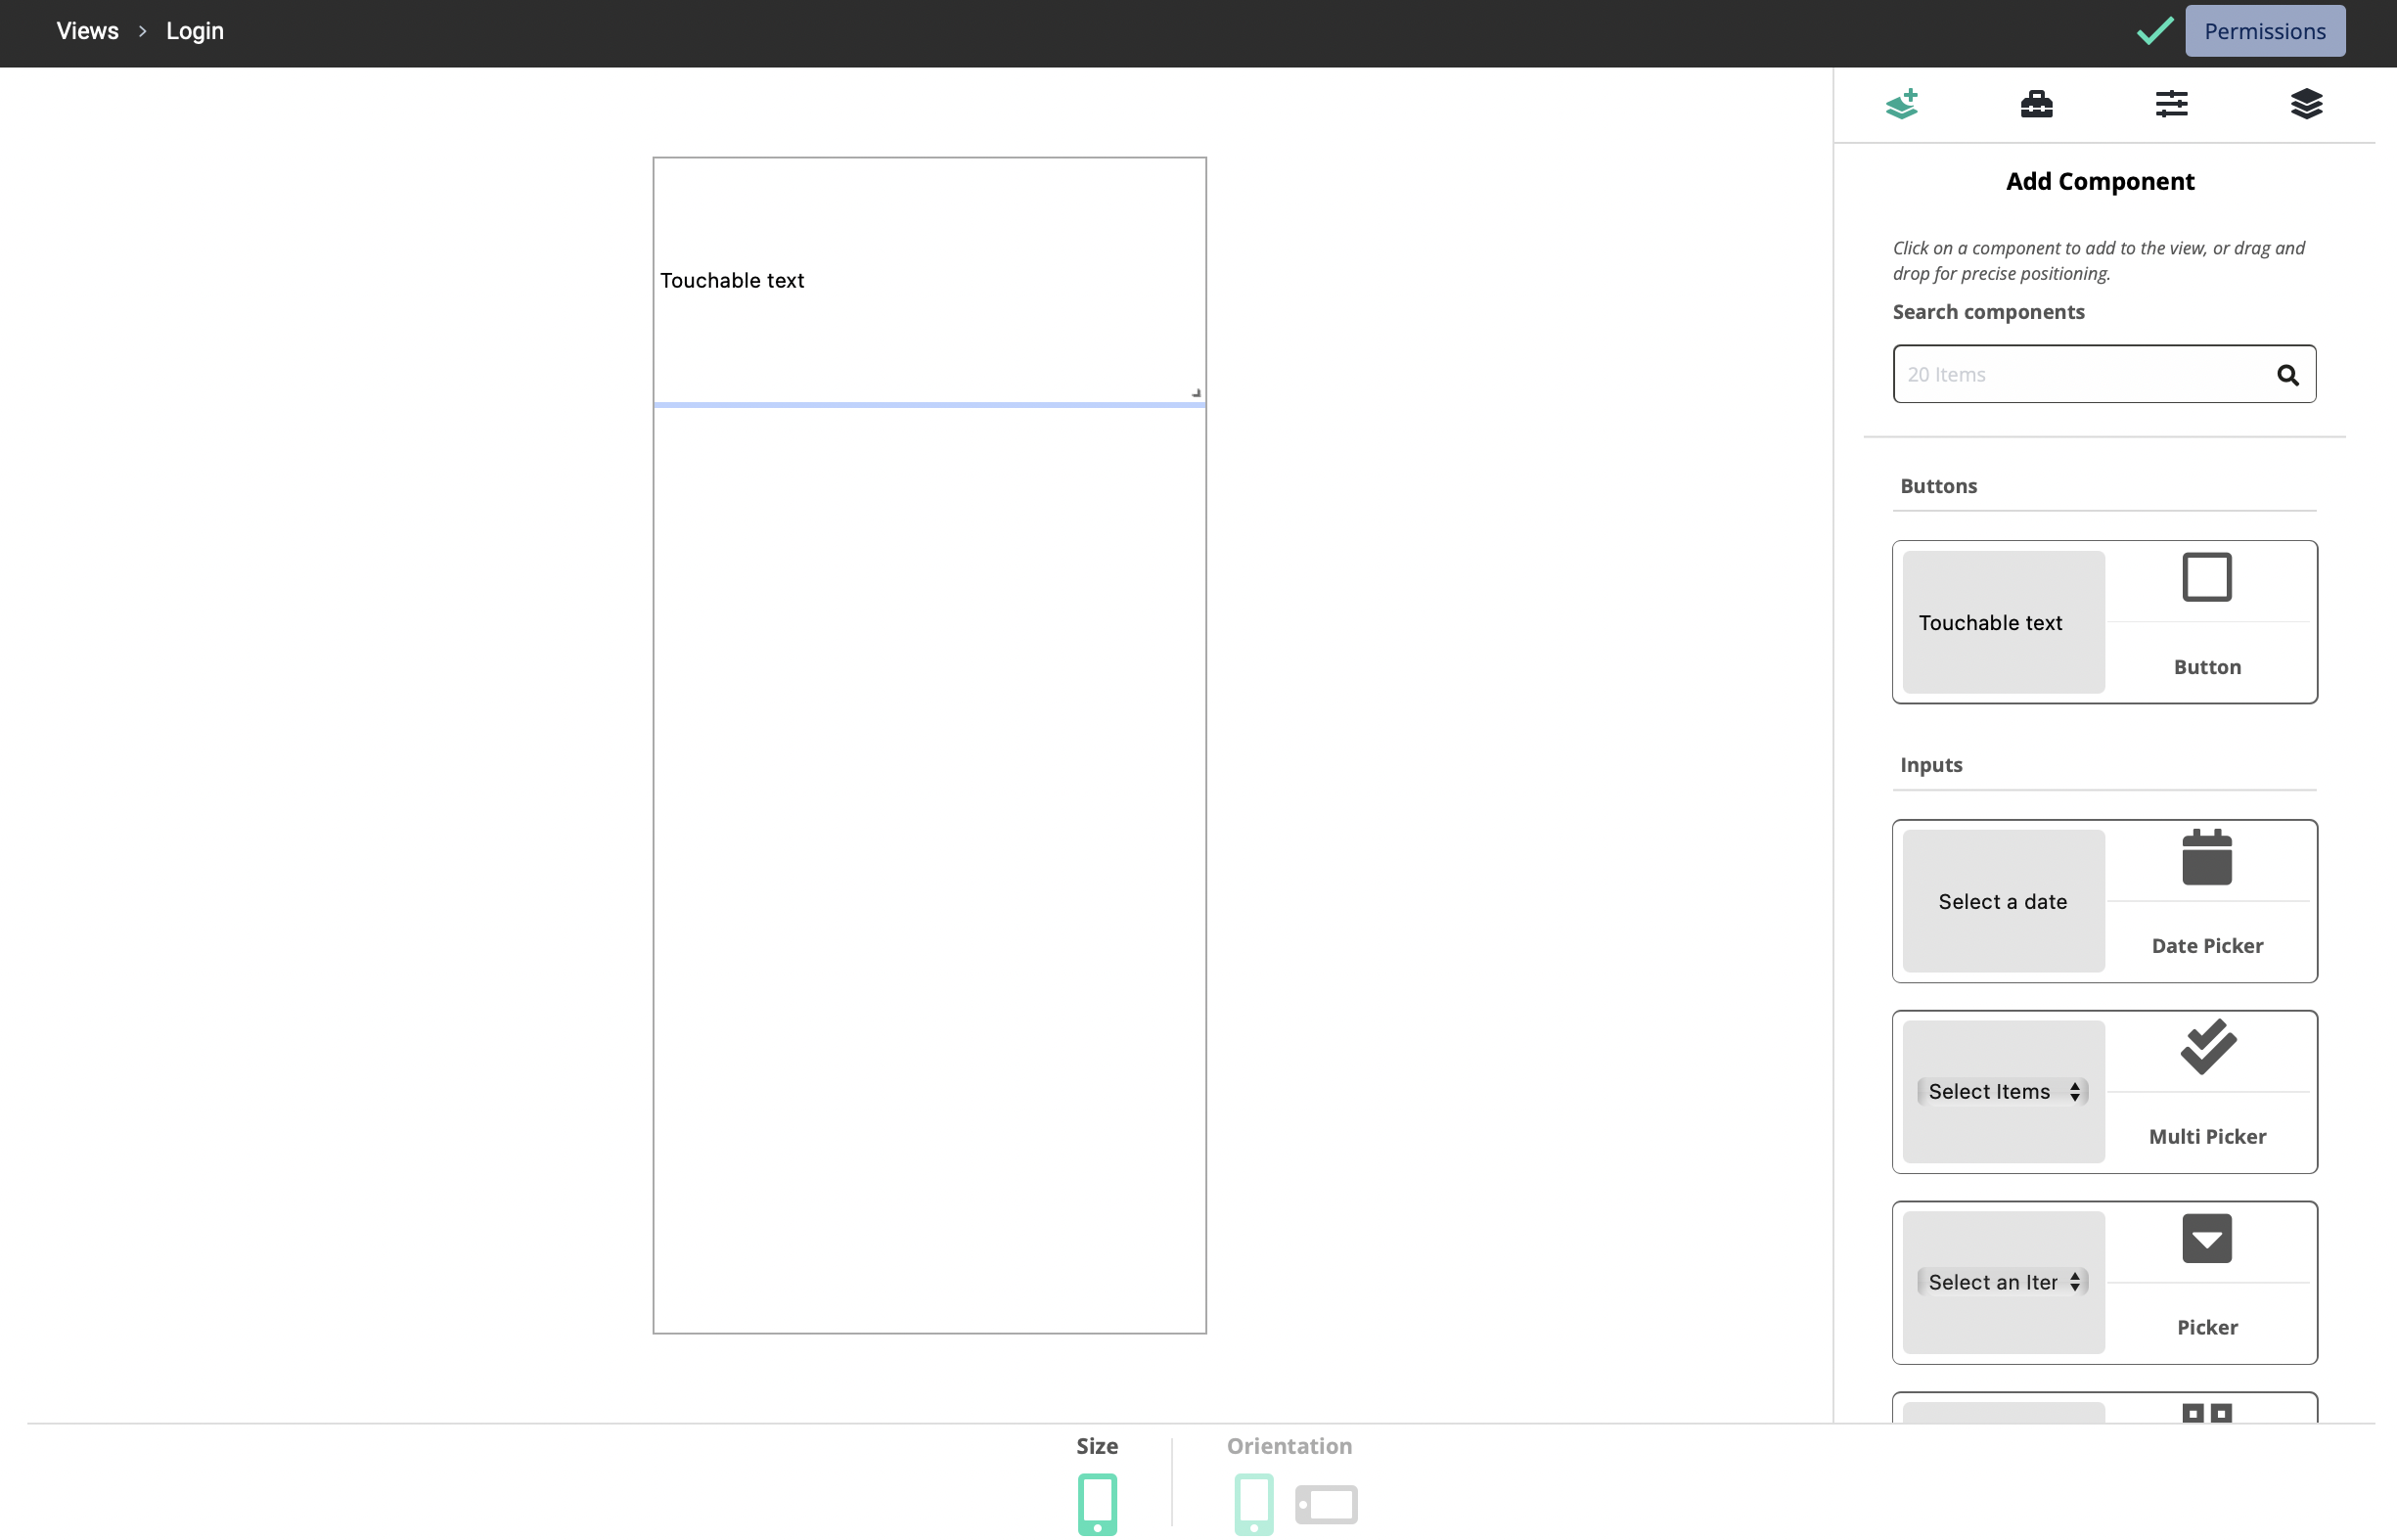
-
Add a new output to it
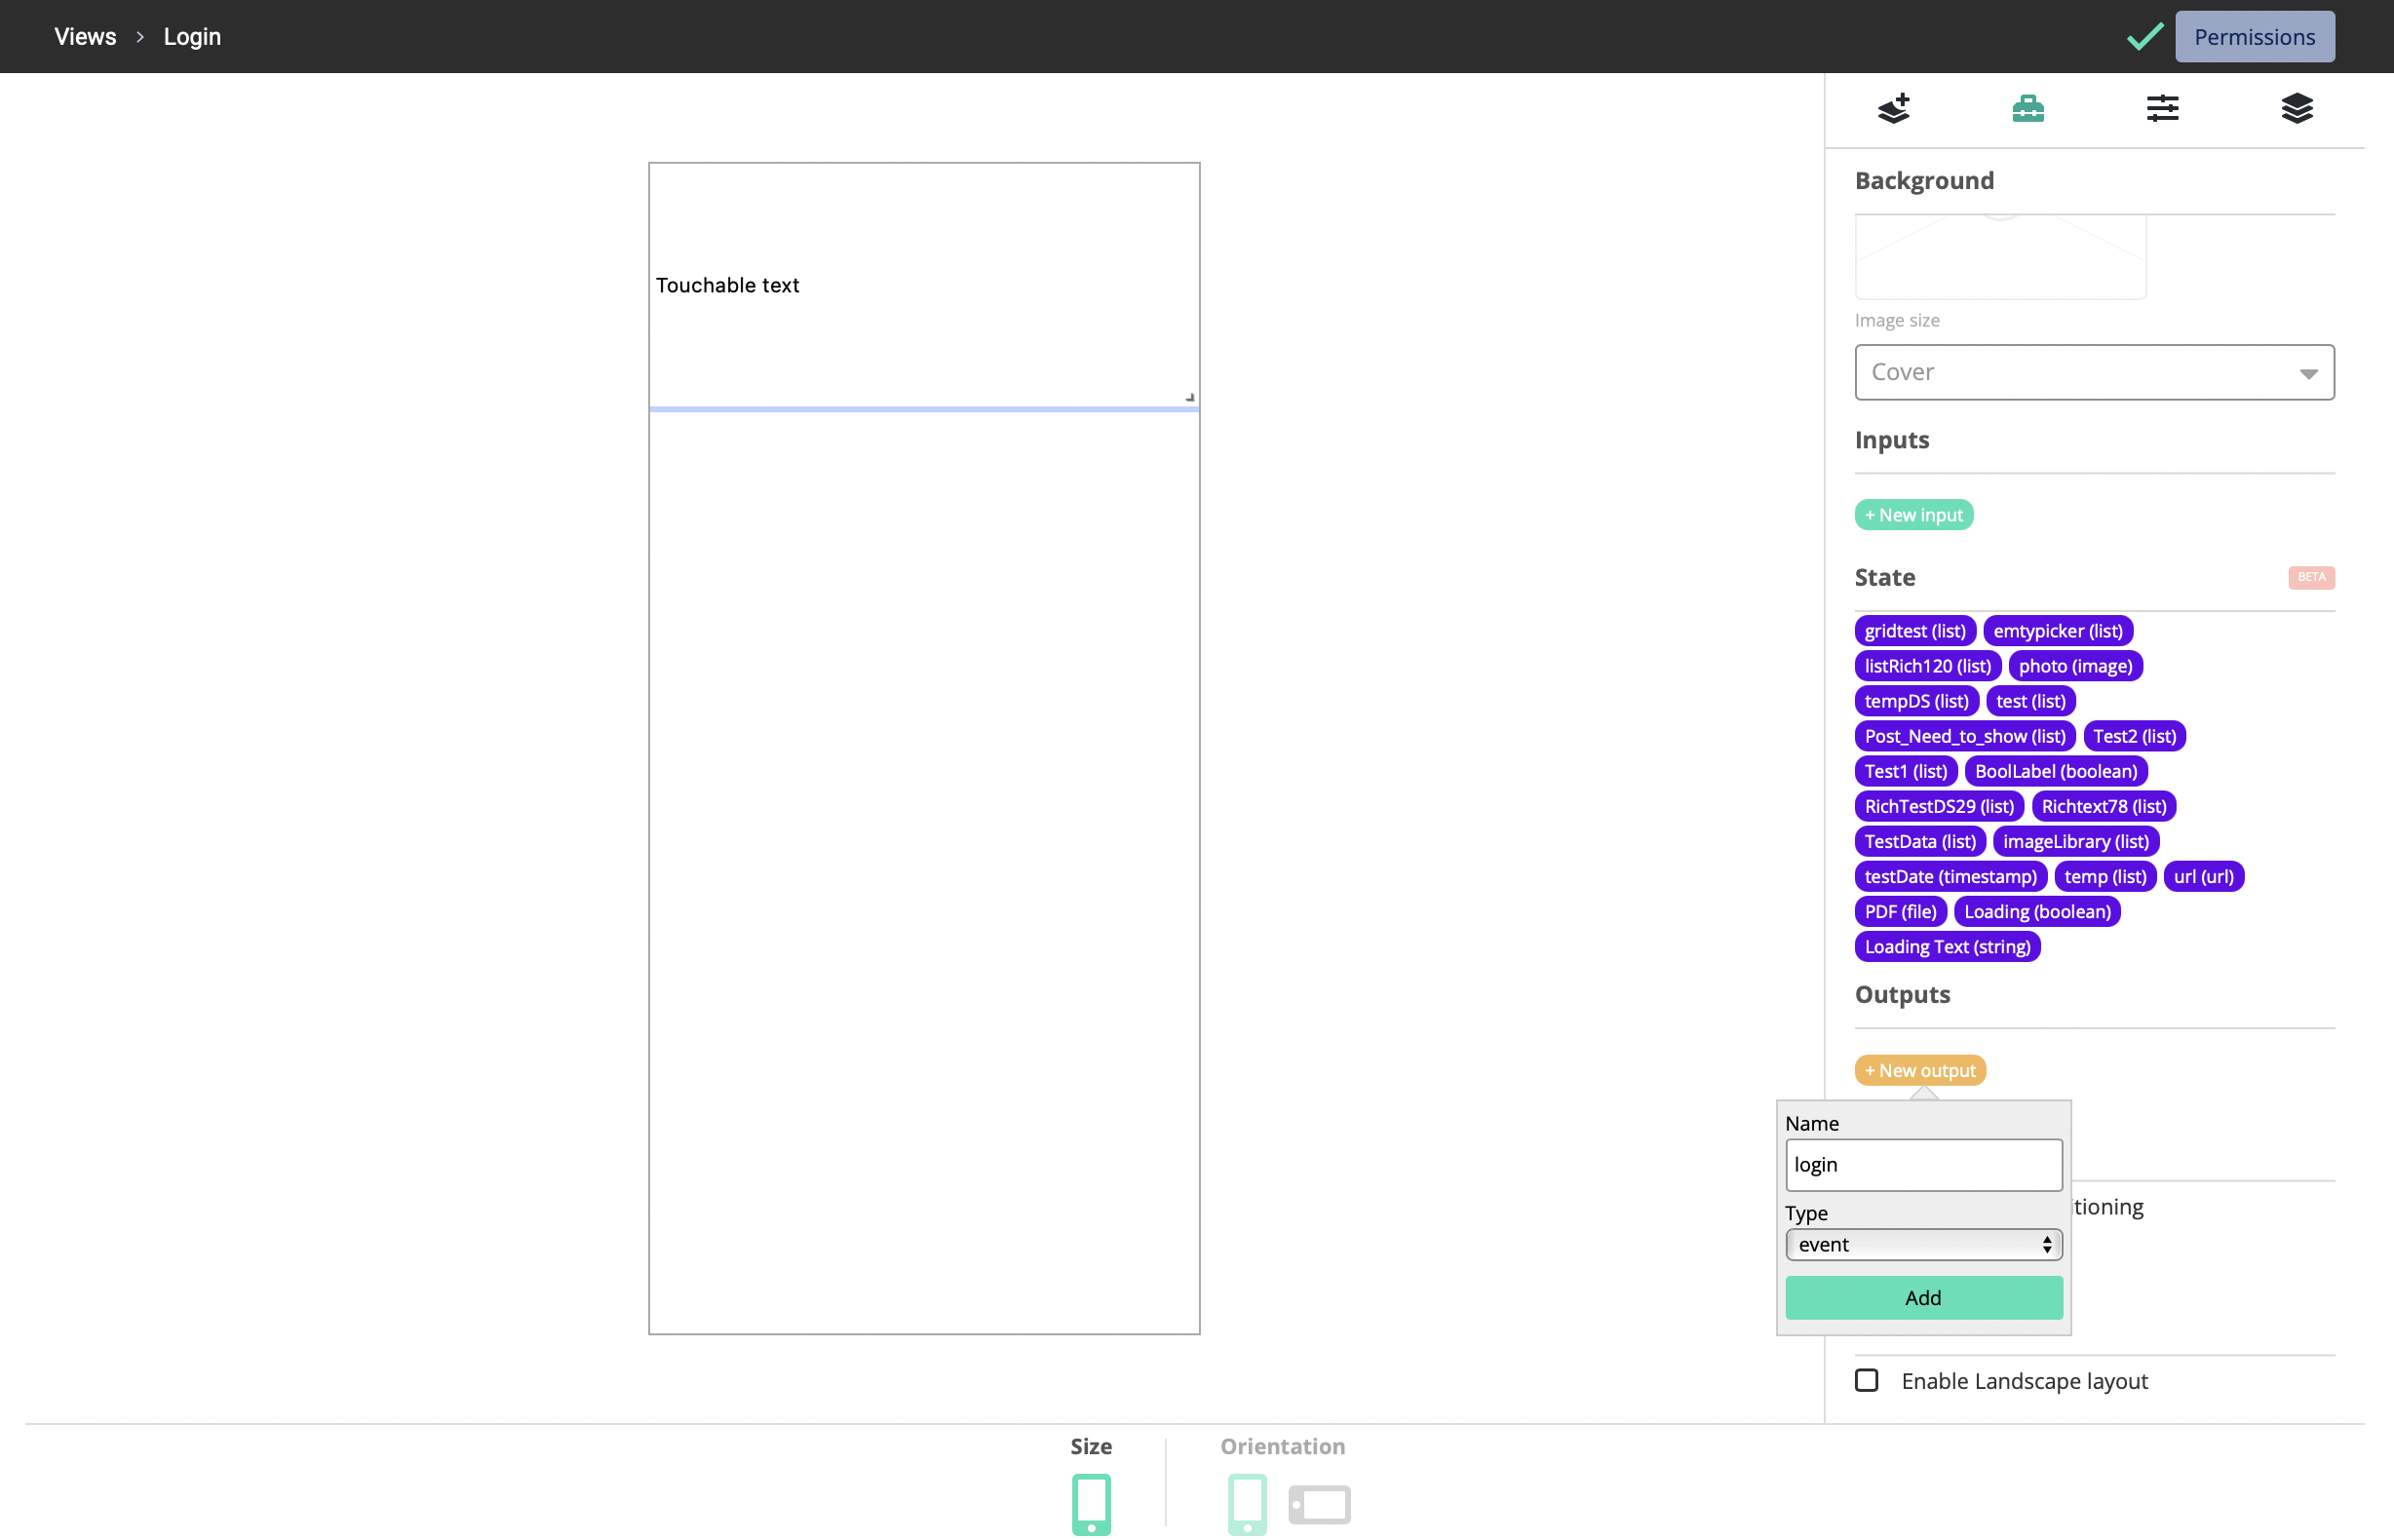
-
Select Login as the OnPress event for the button.
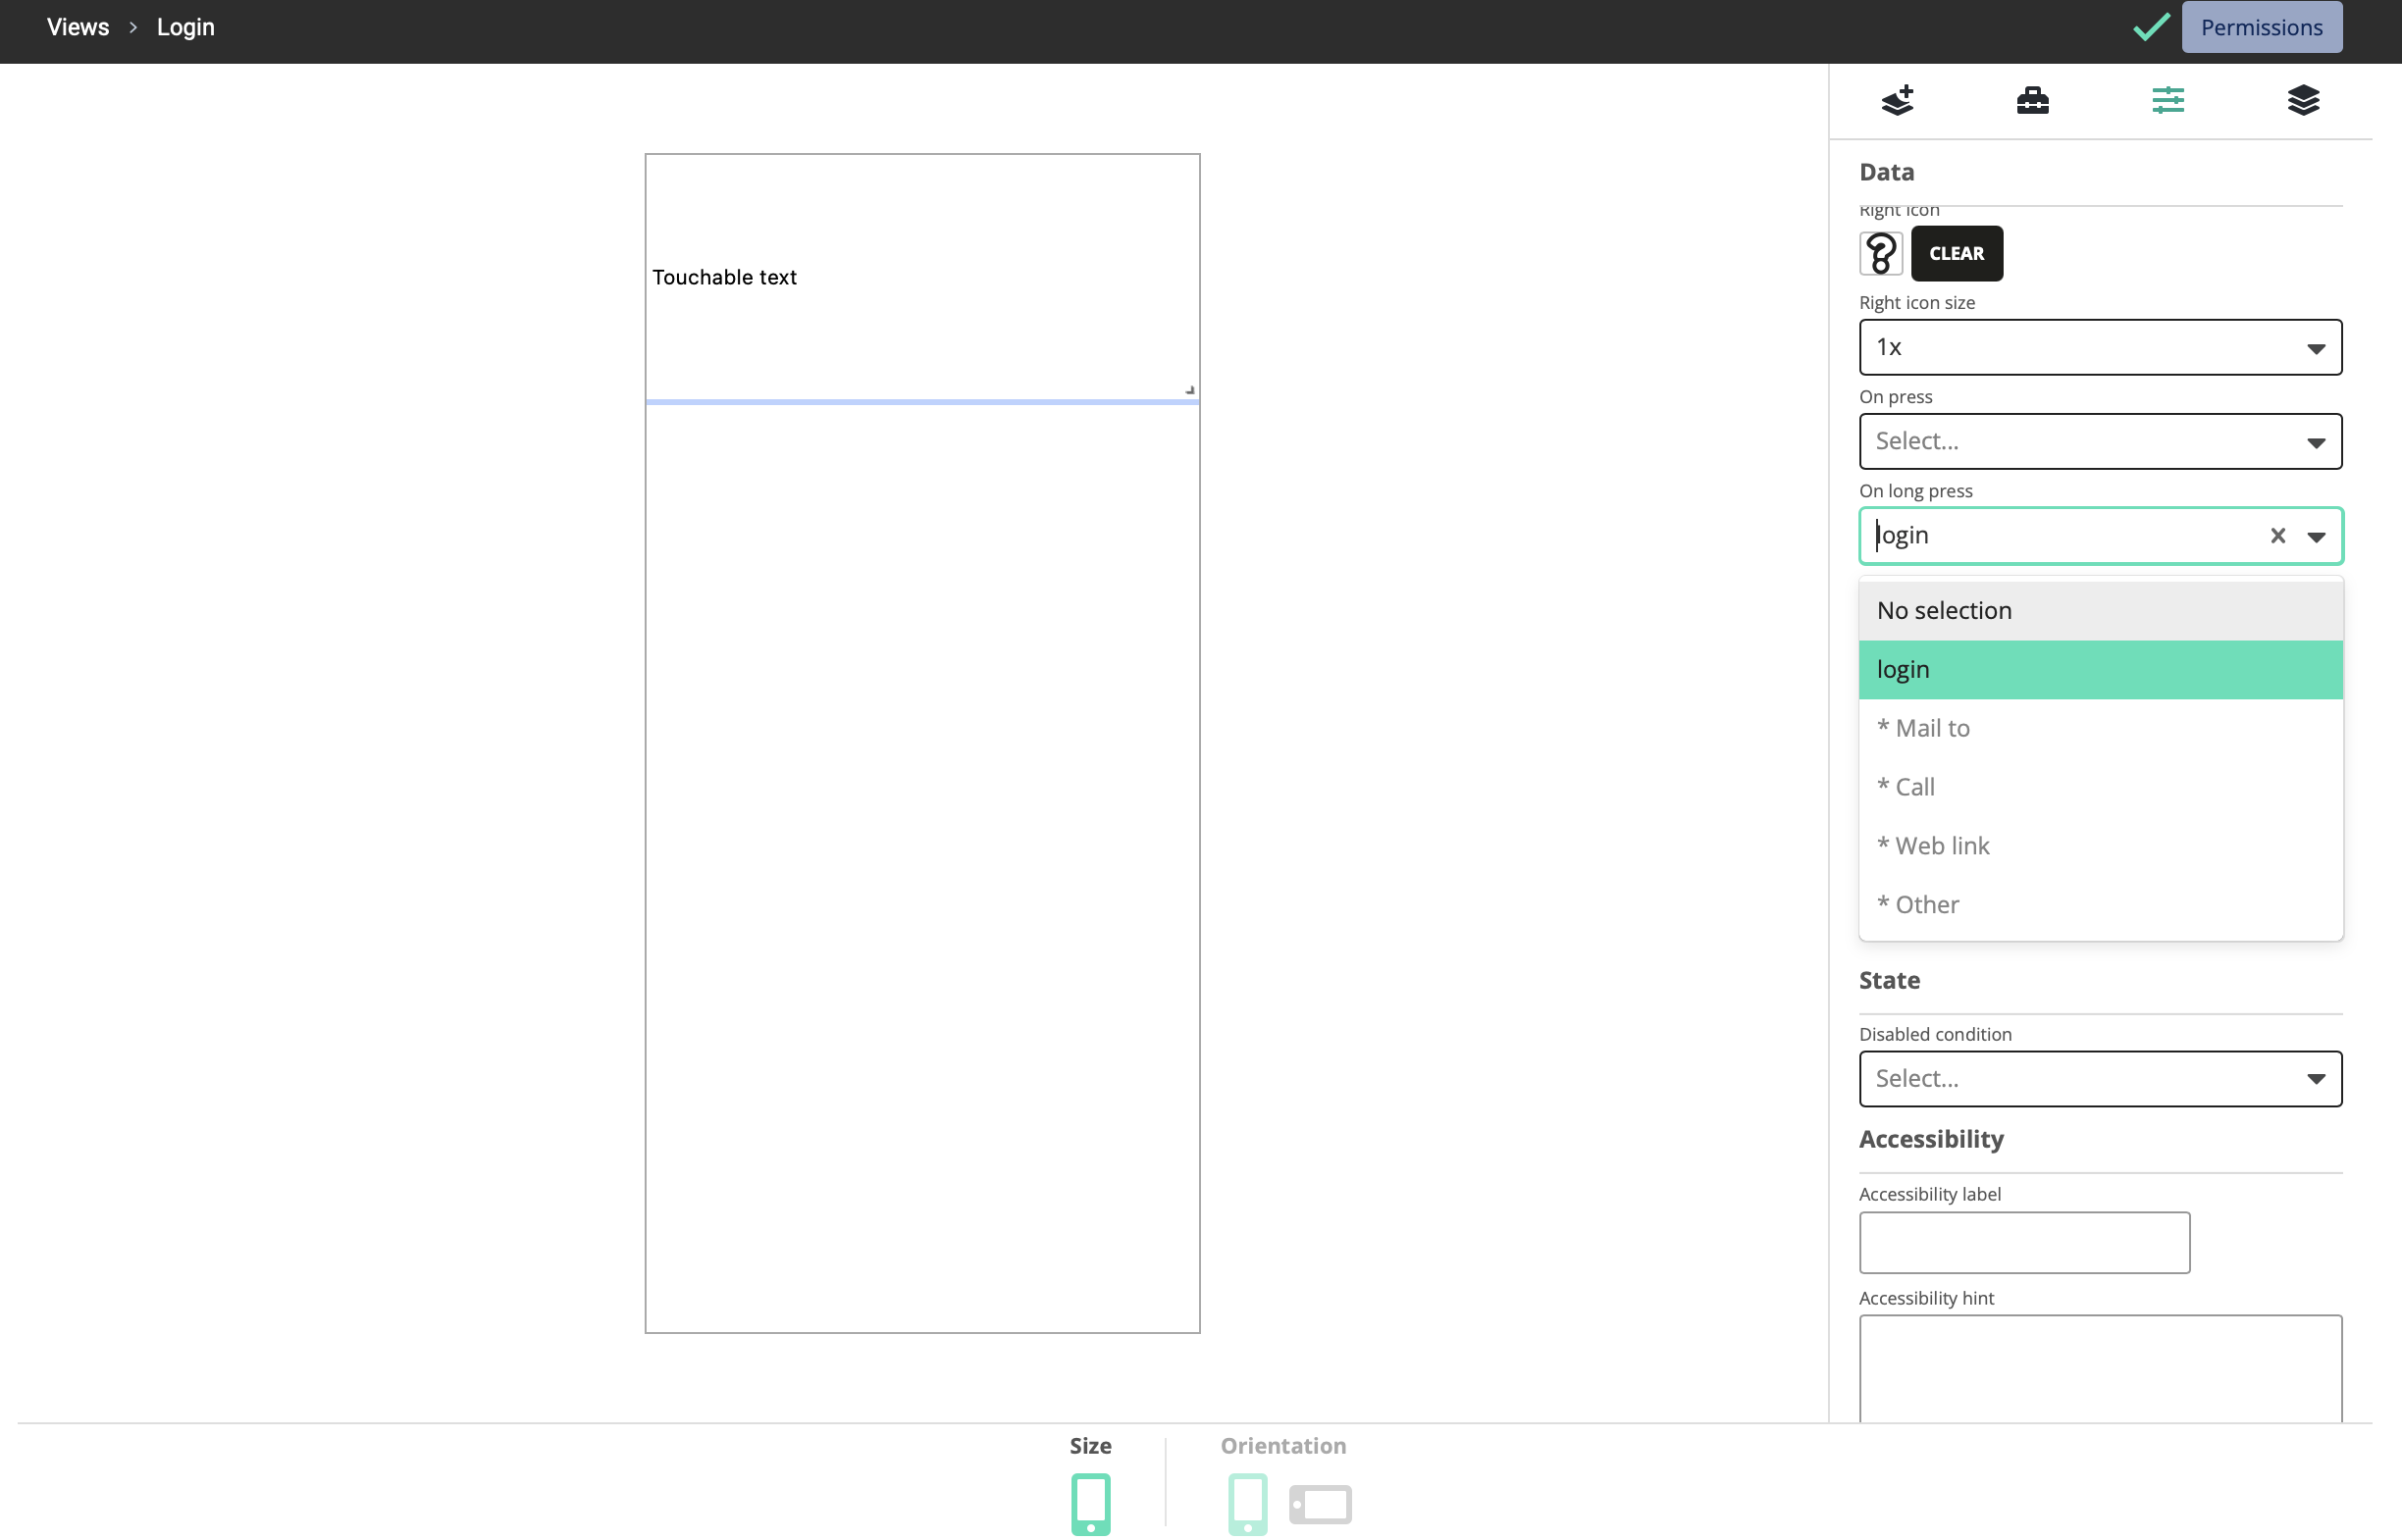
-
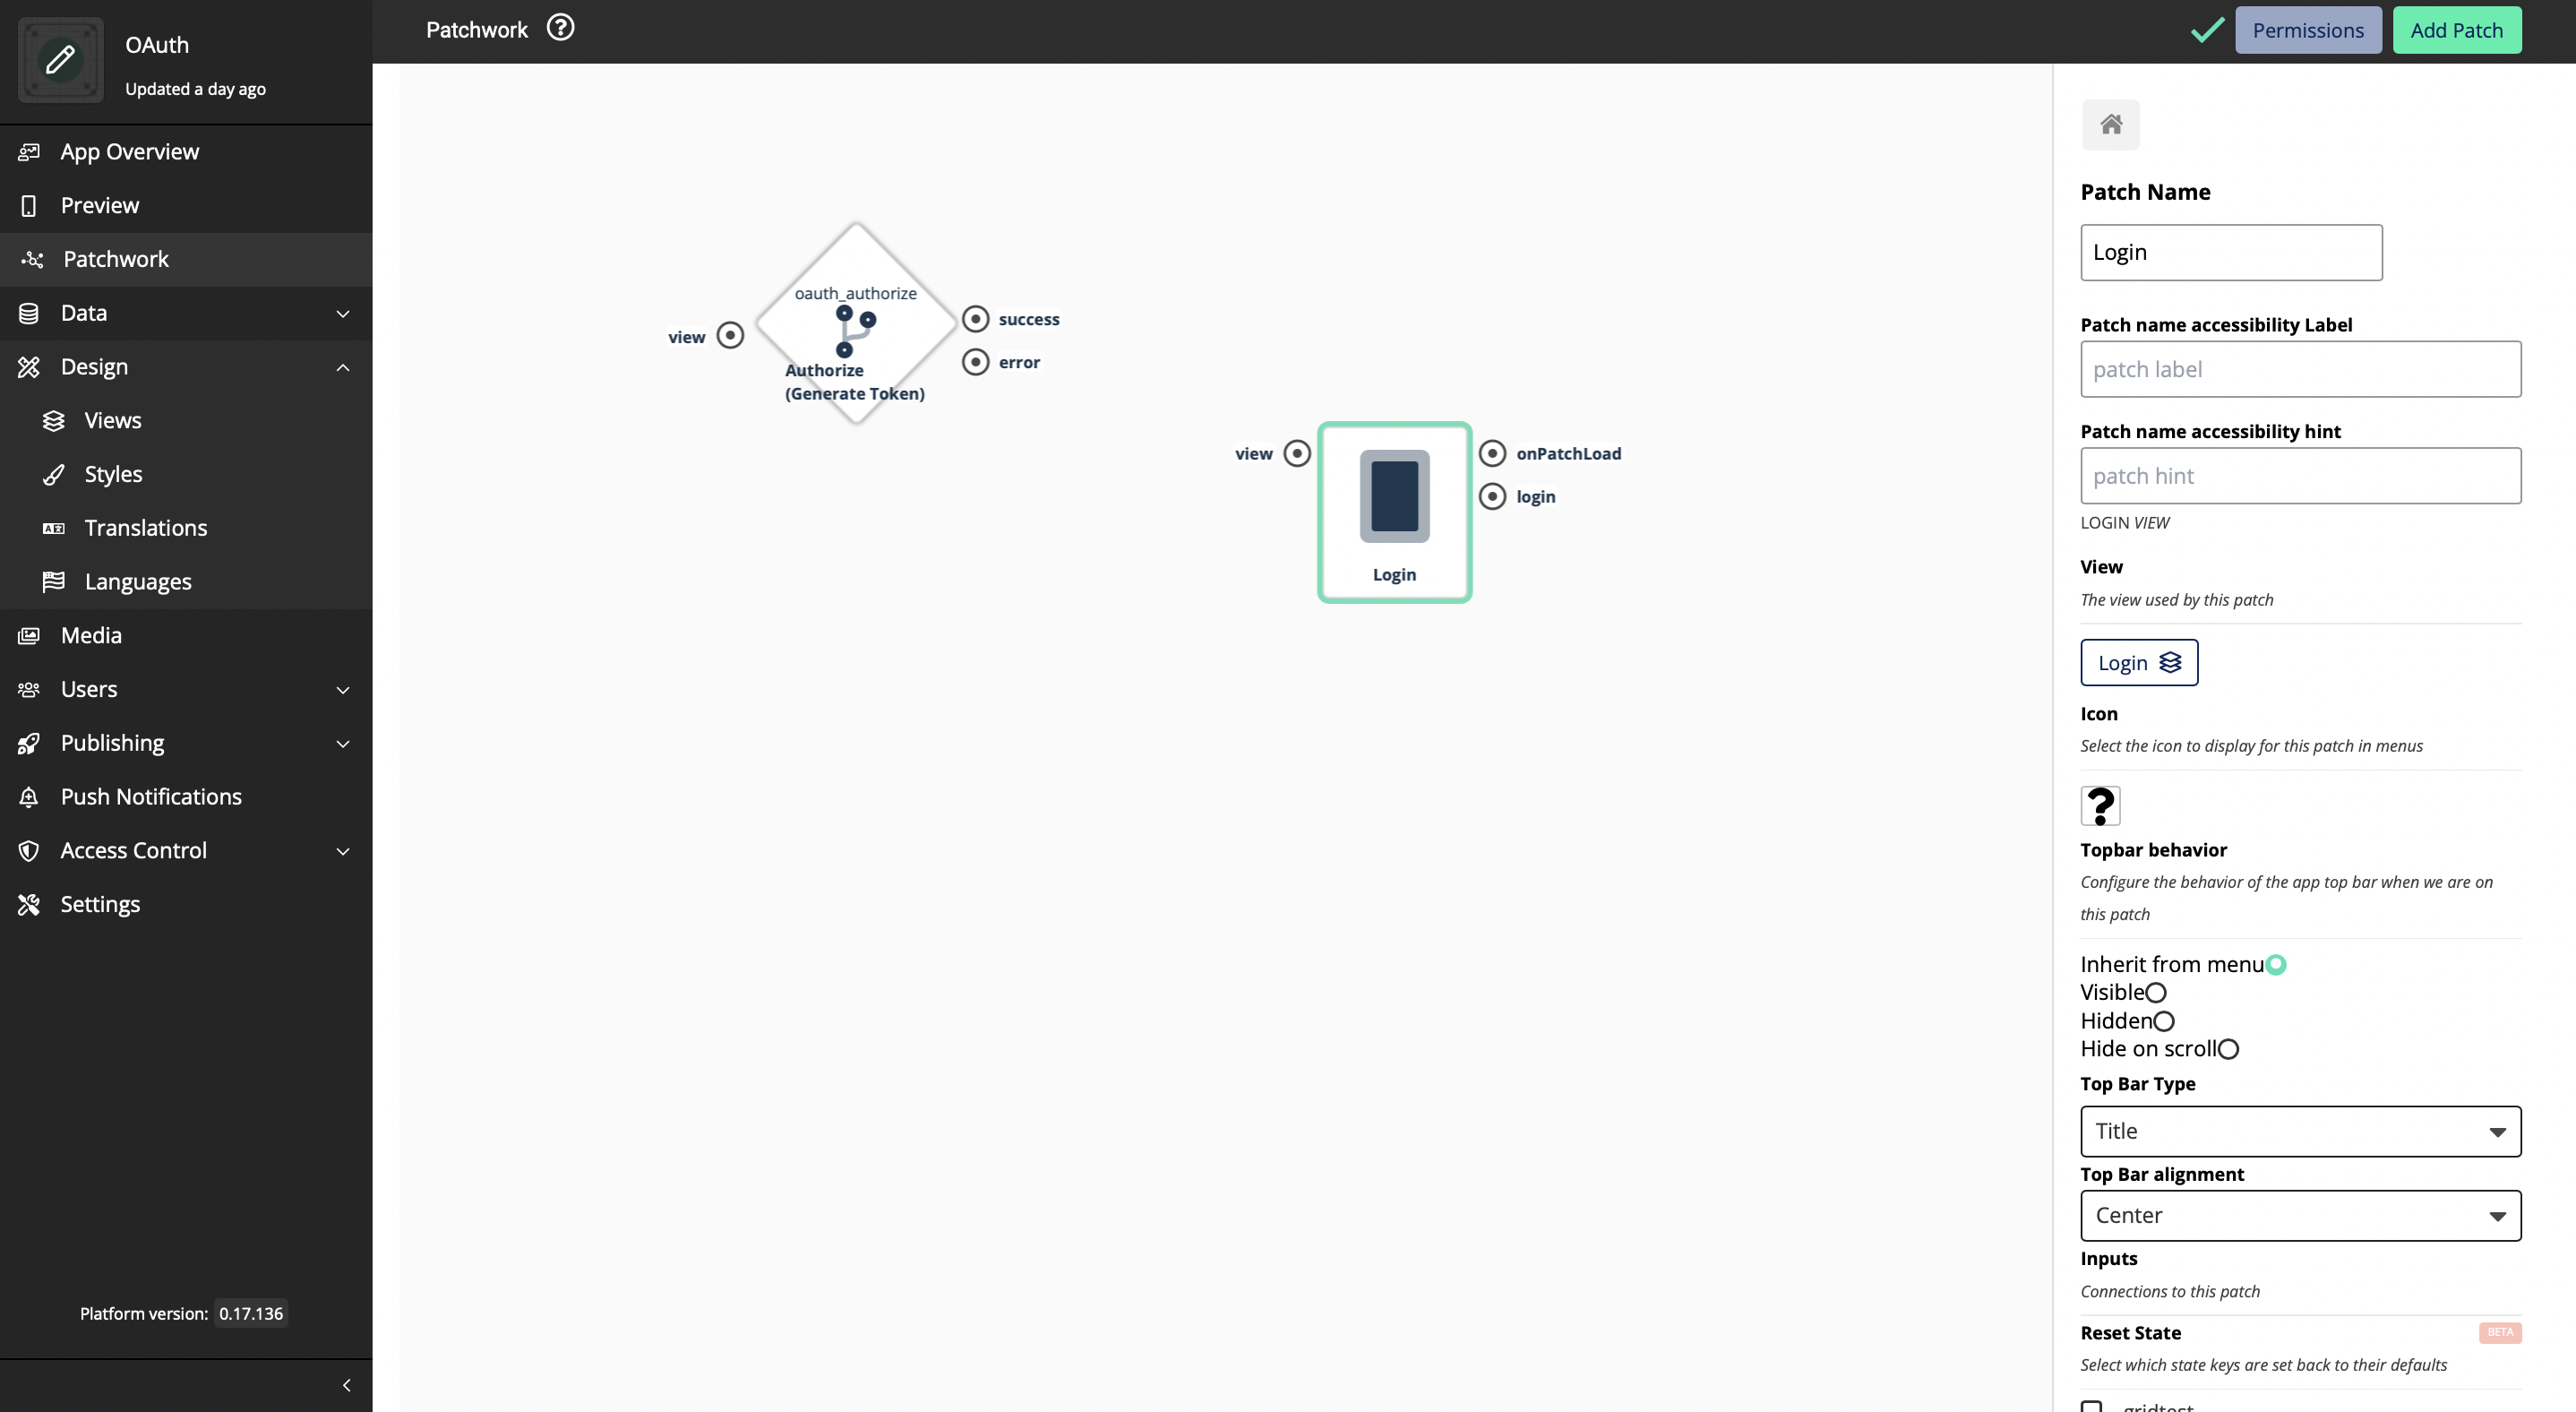
Navigate to the Patchwork and add the new Login view that you created to the Patchwork
-
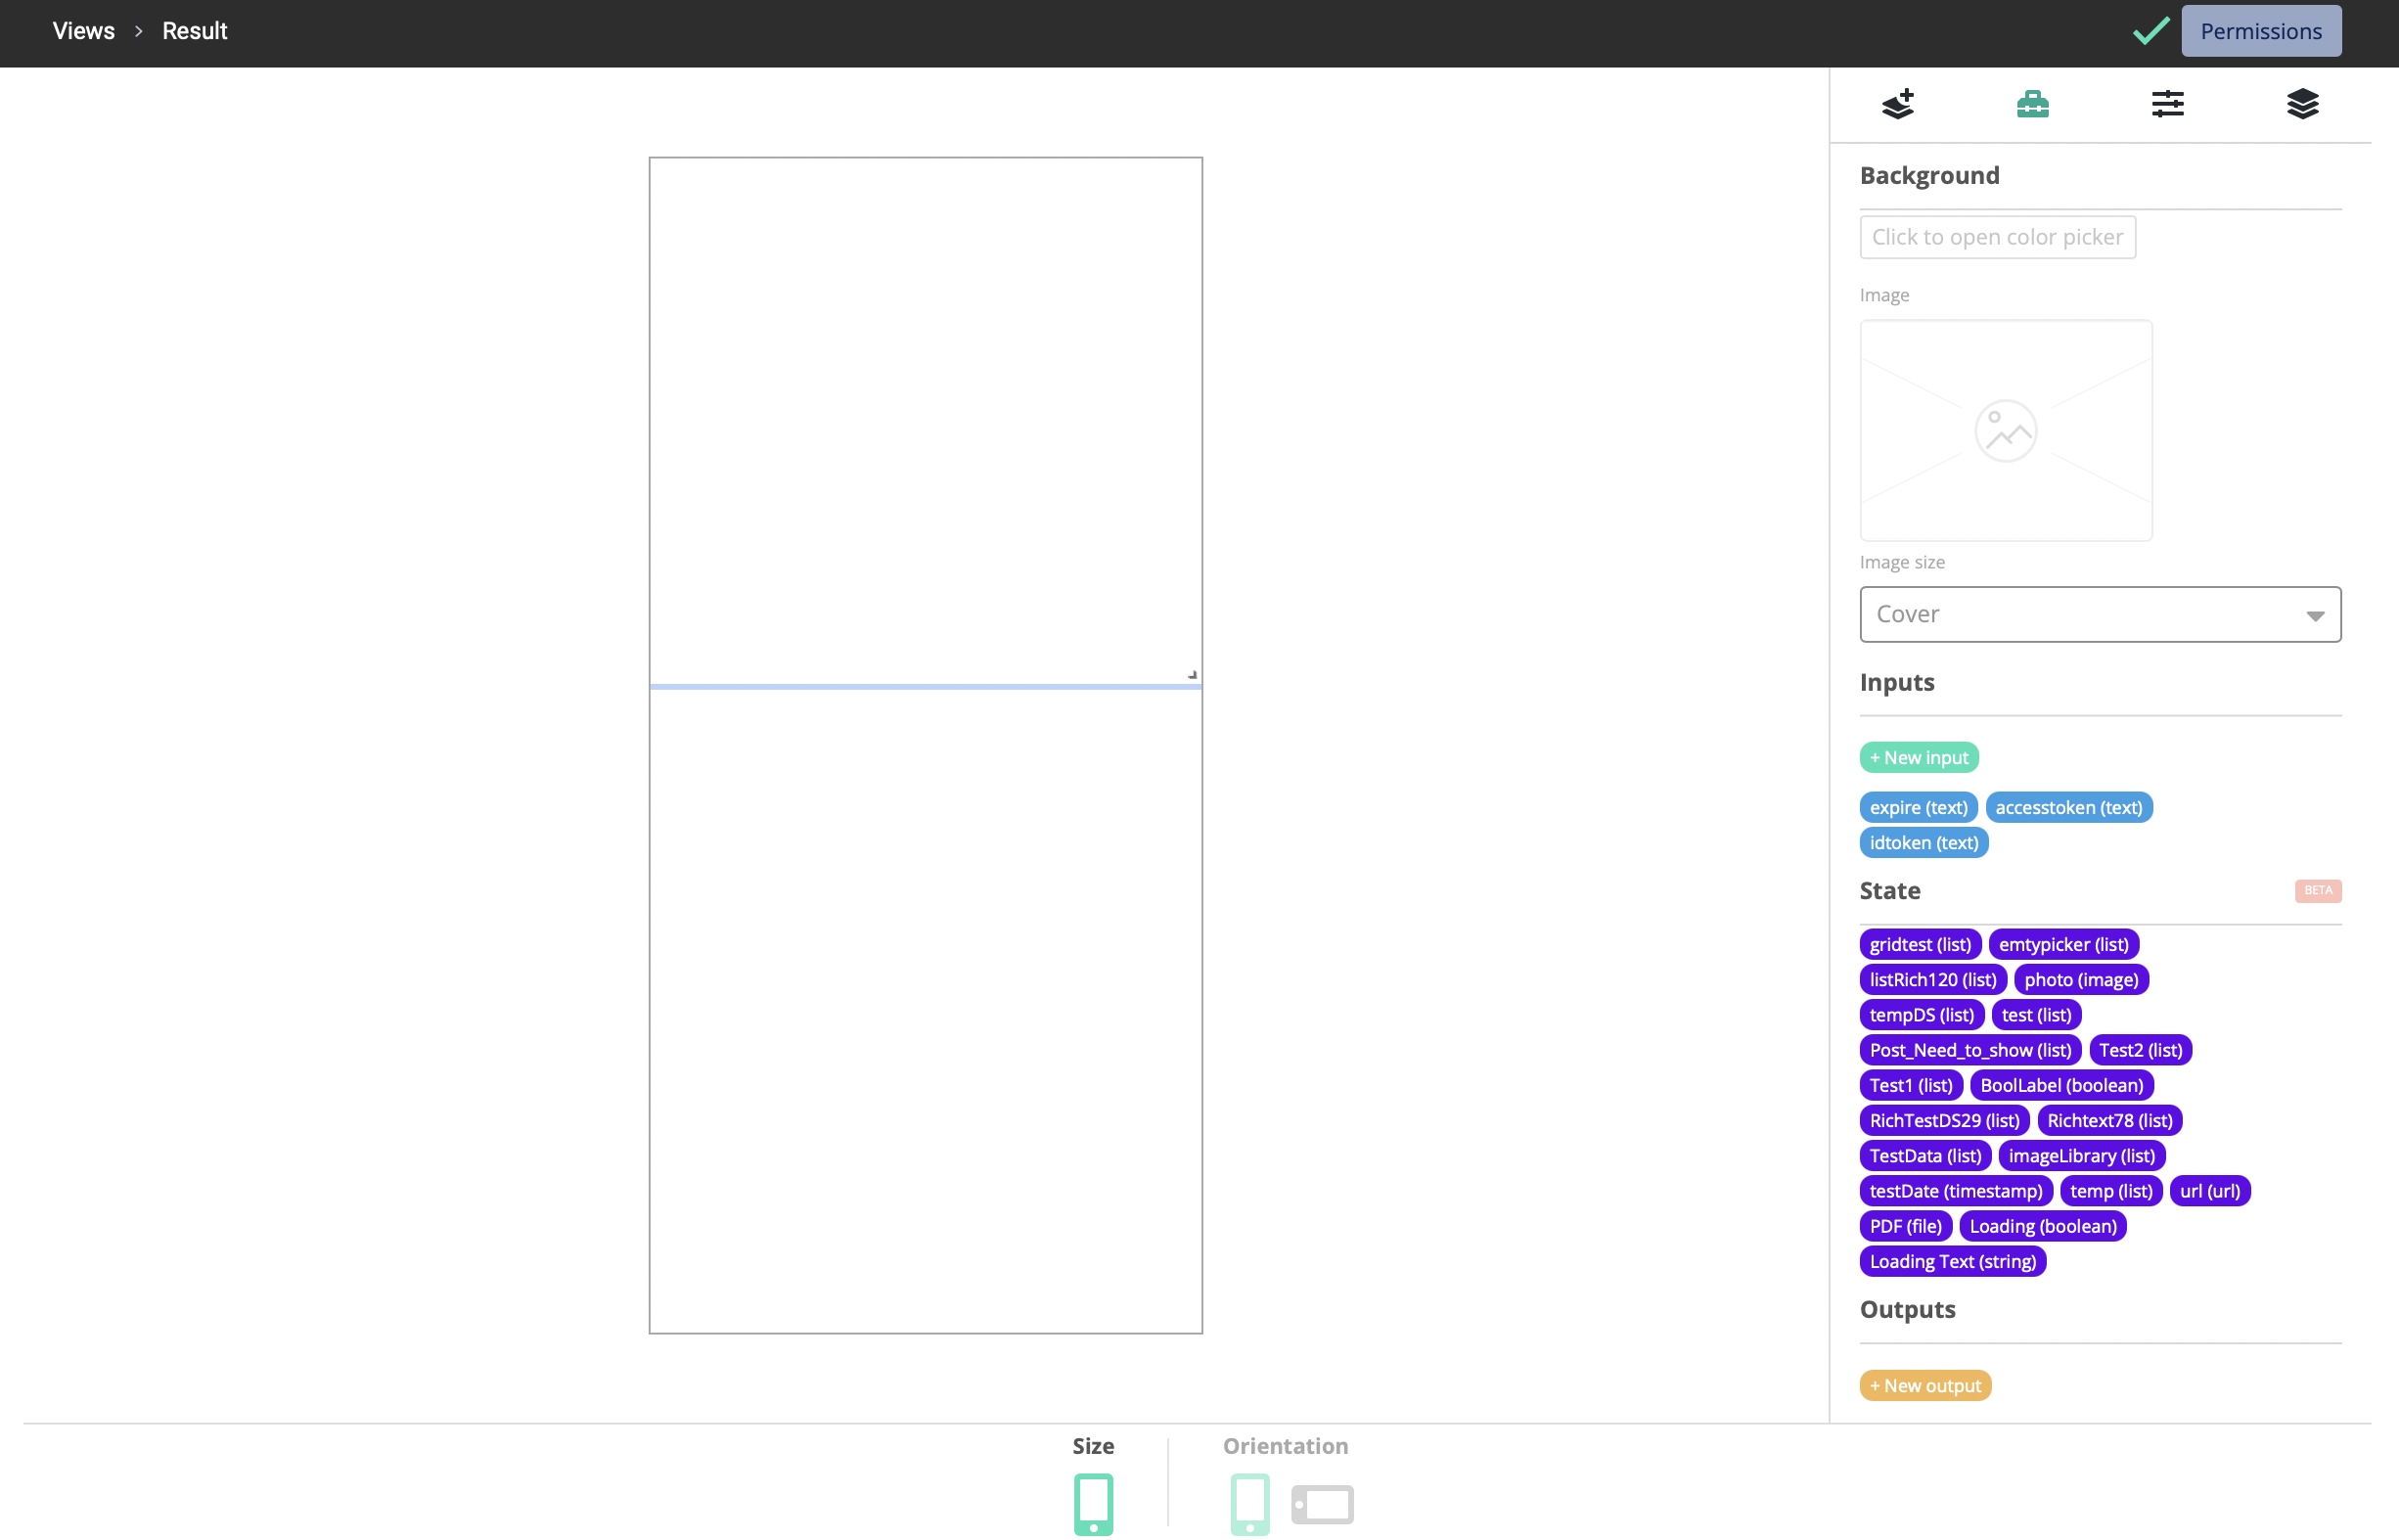
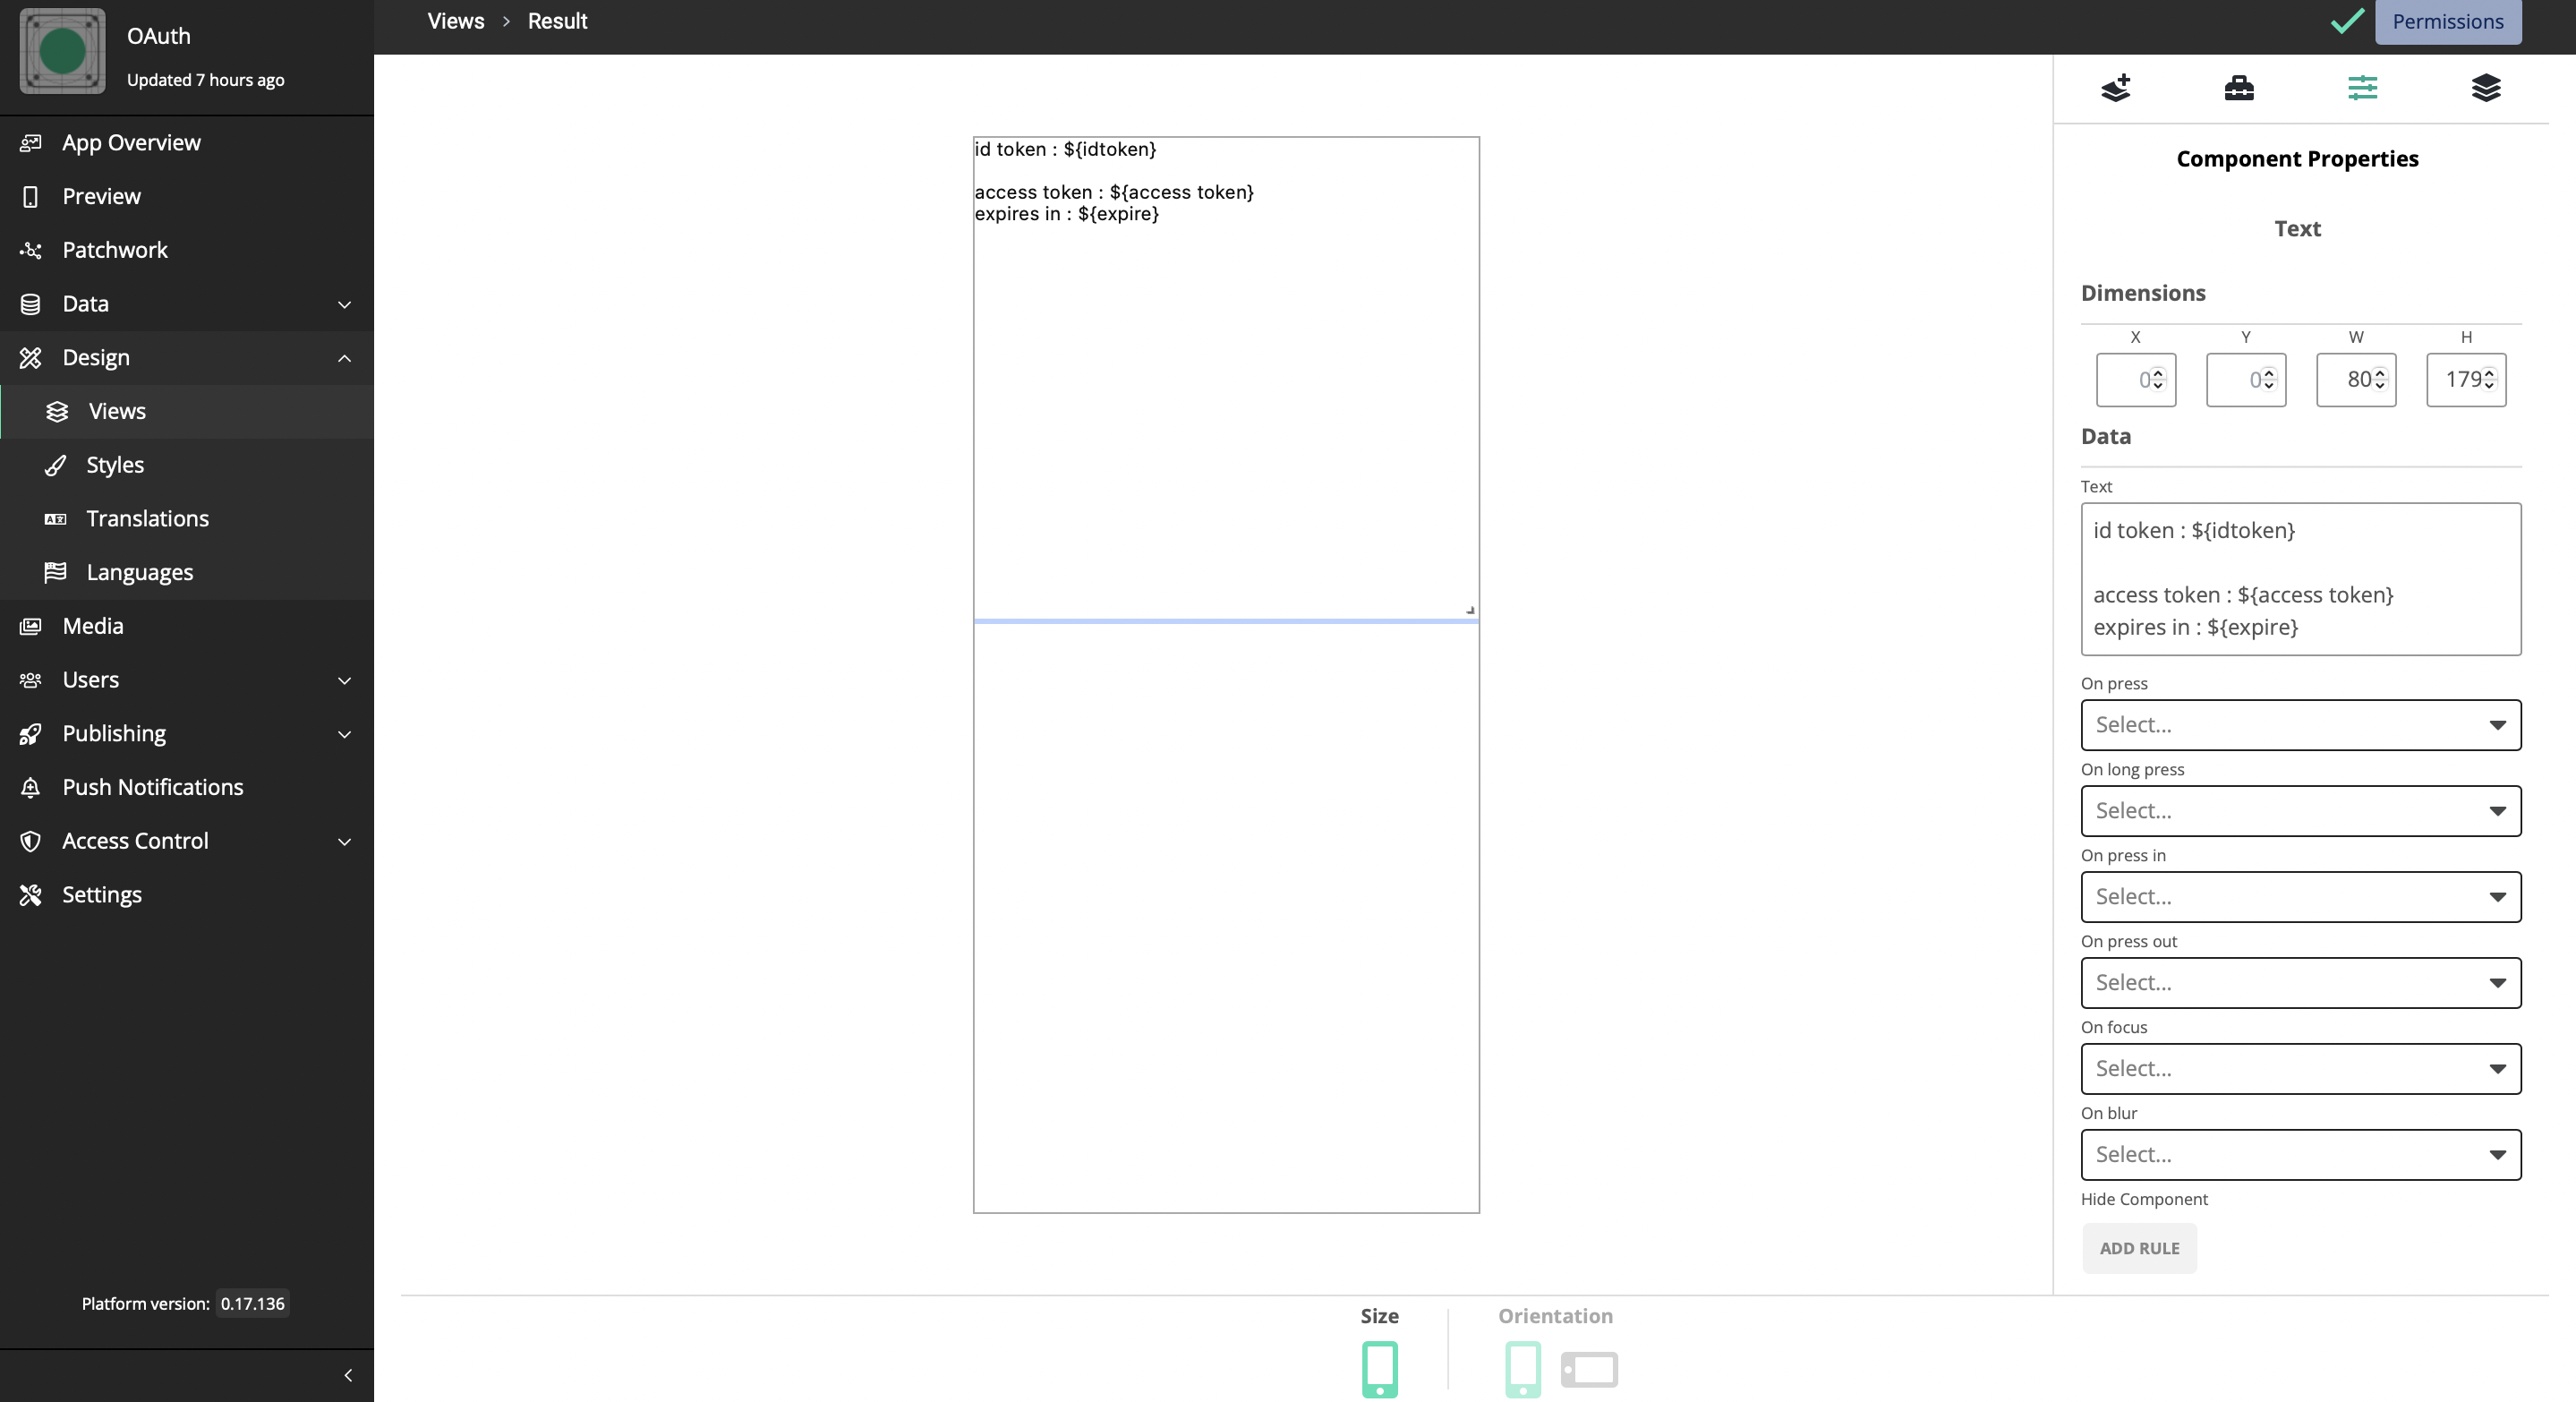
To see how this work, let’s add another view for the result and a Text Box should be added to display the data.
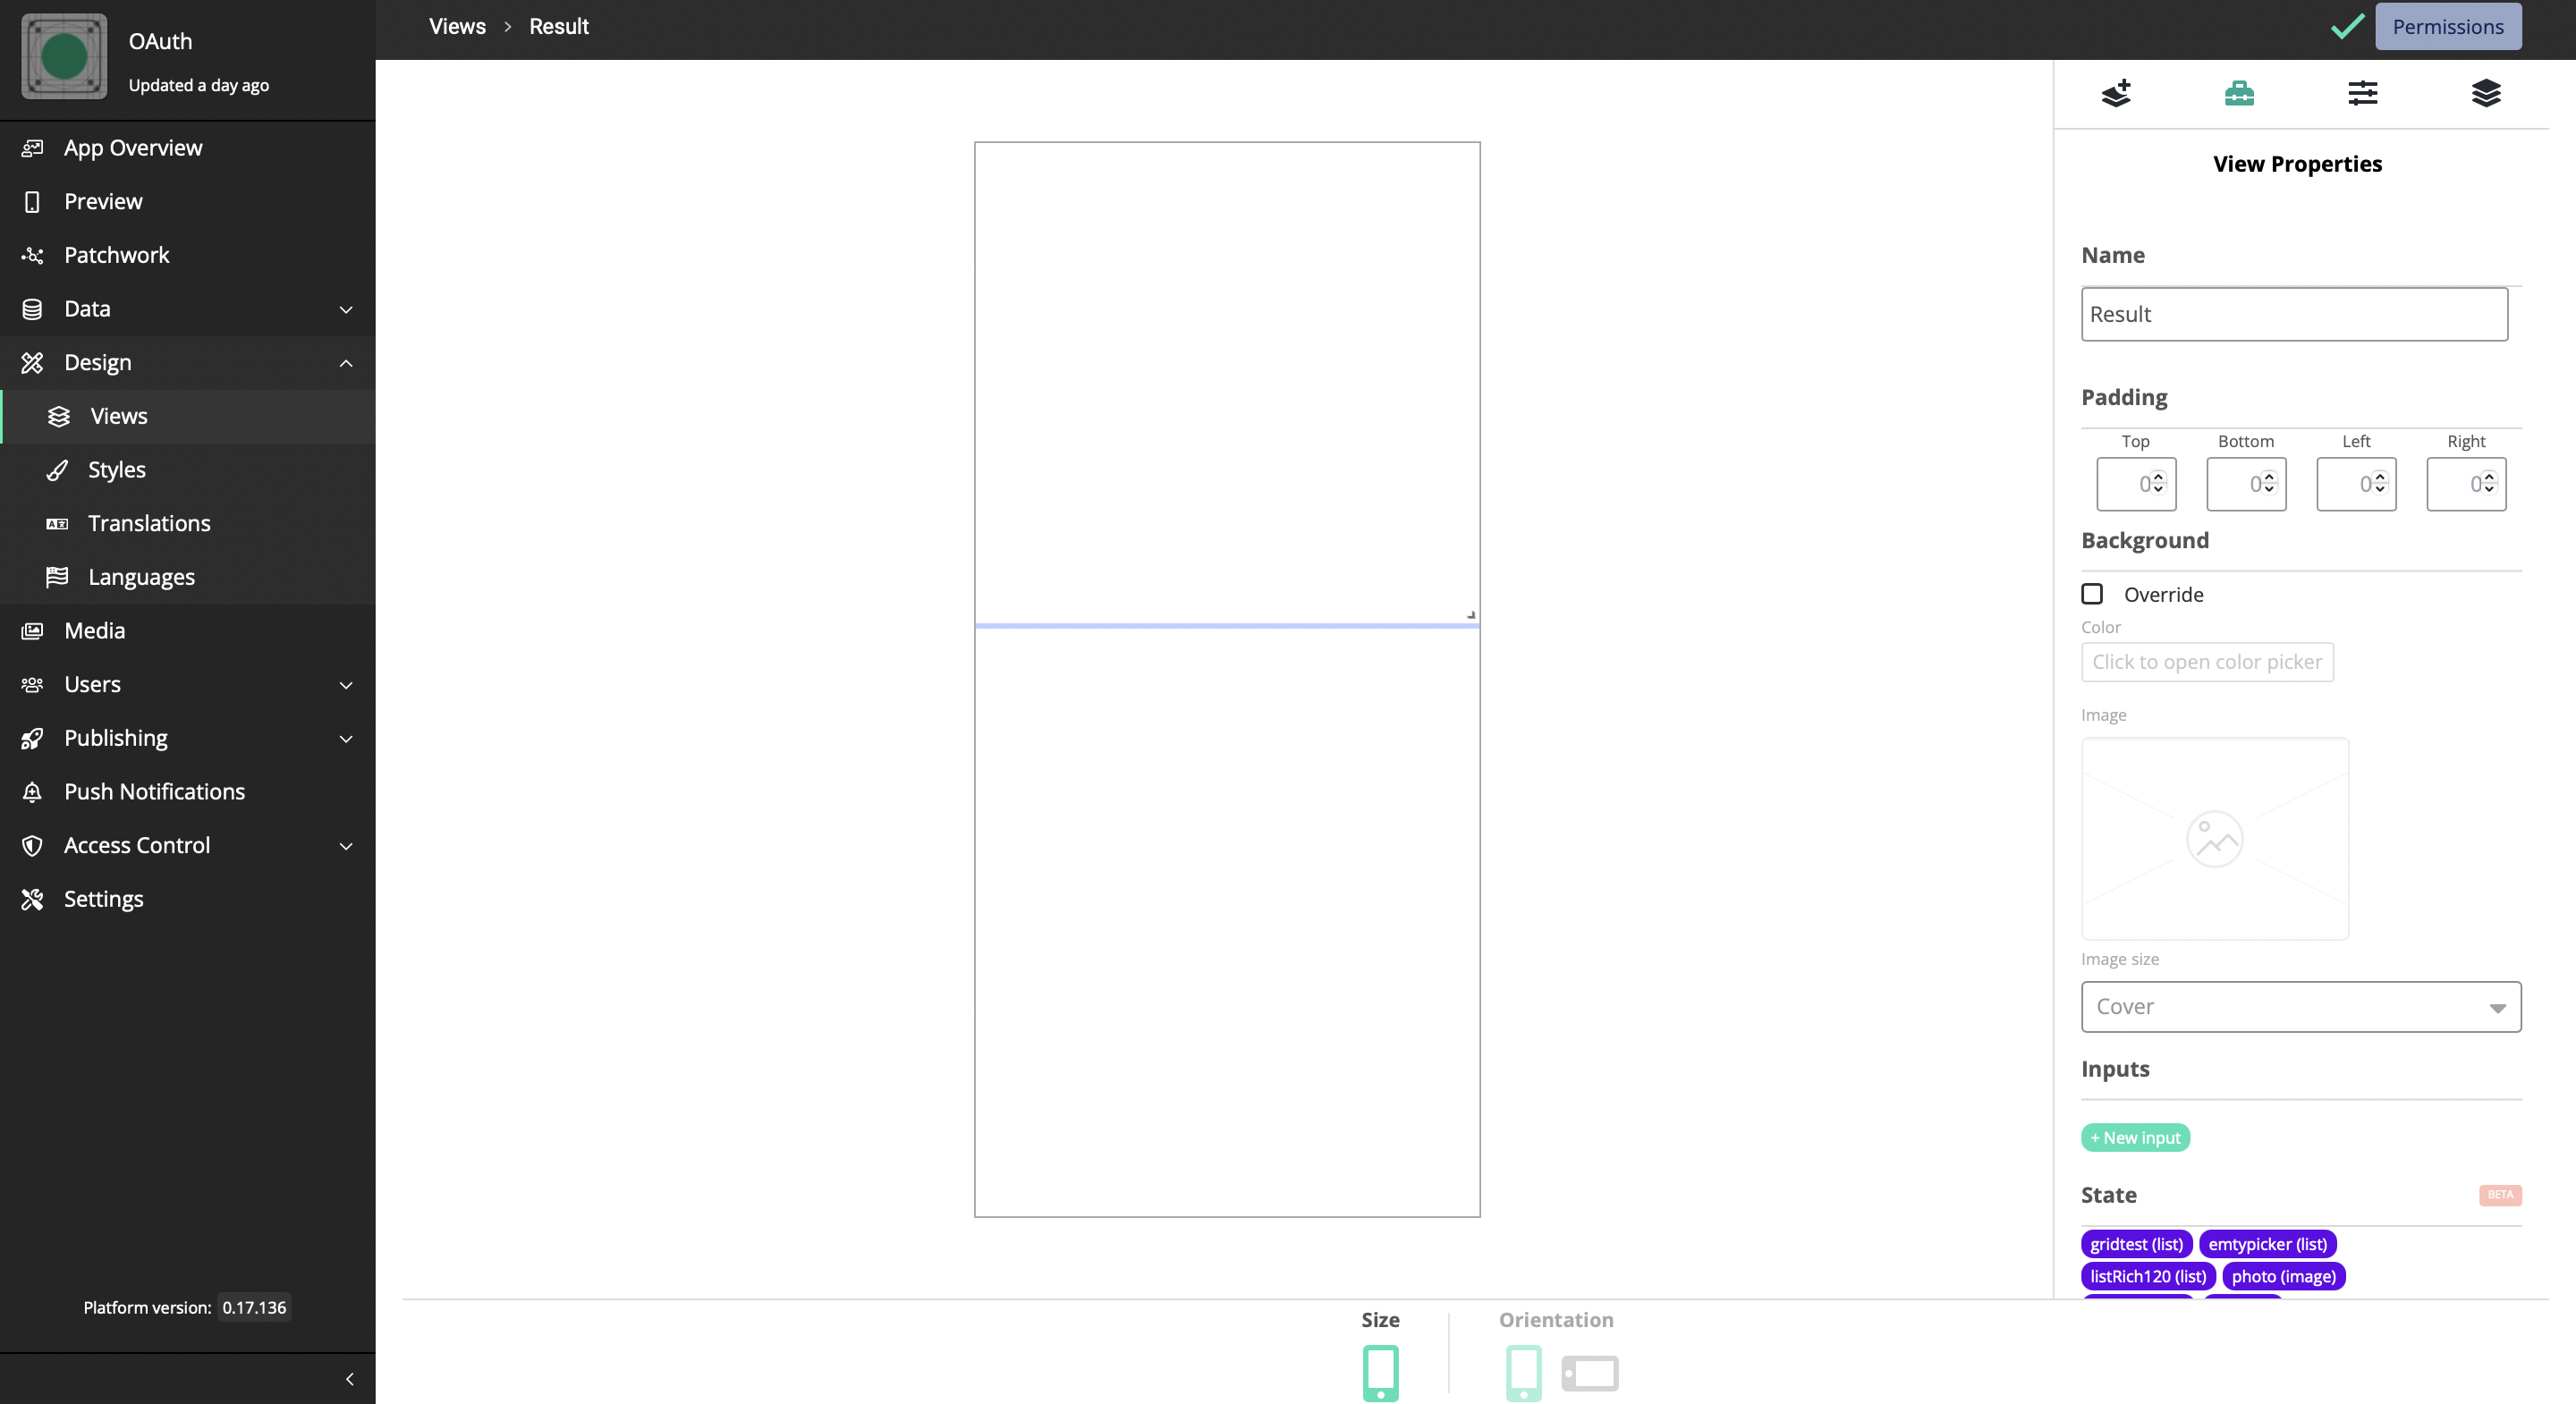
Three inputs should be added to this text box as inputs. Those are;
expire: text
idtoken: text
accesstoken: text
Let’s go back to the patchwork now.
-
Add the Result View to the patchwork
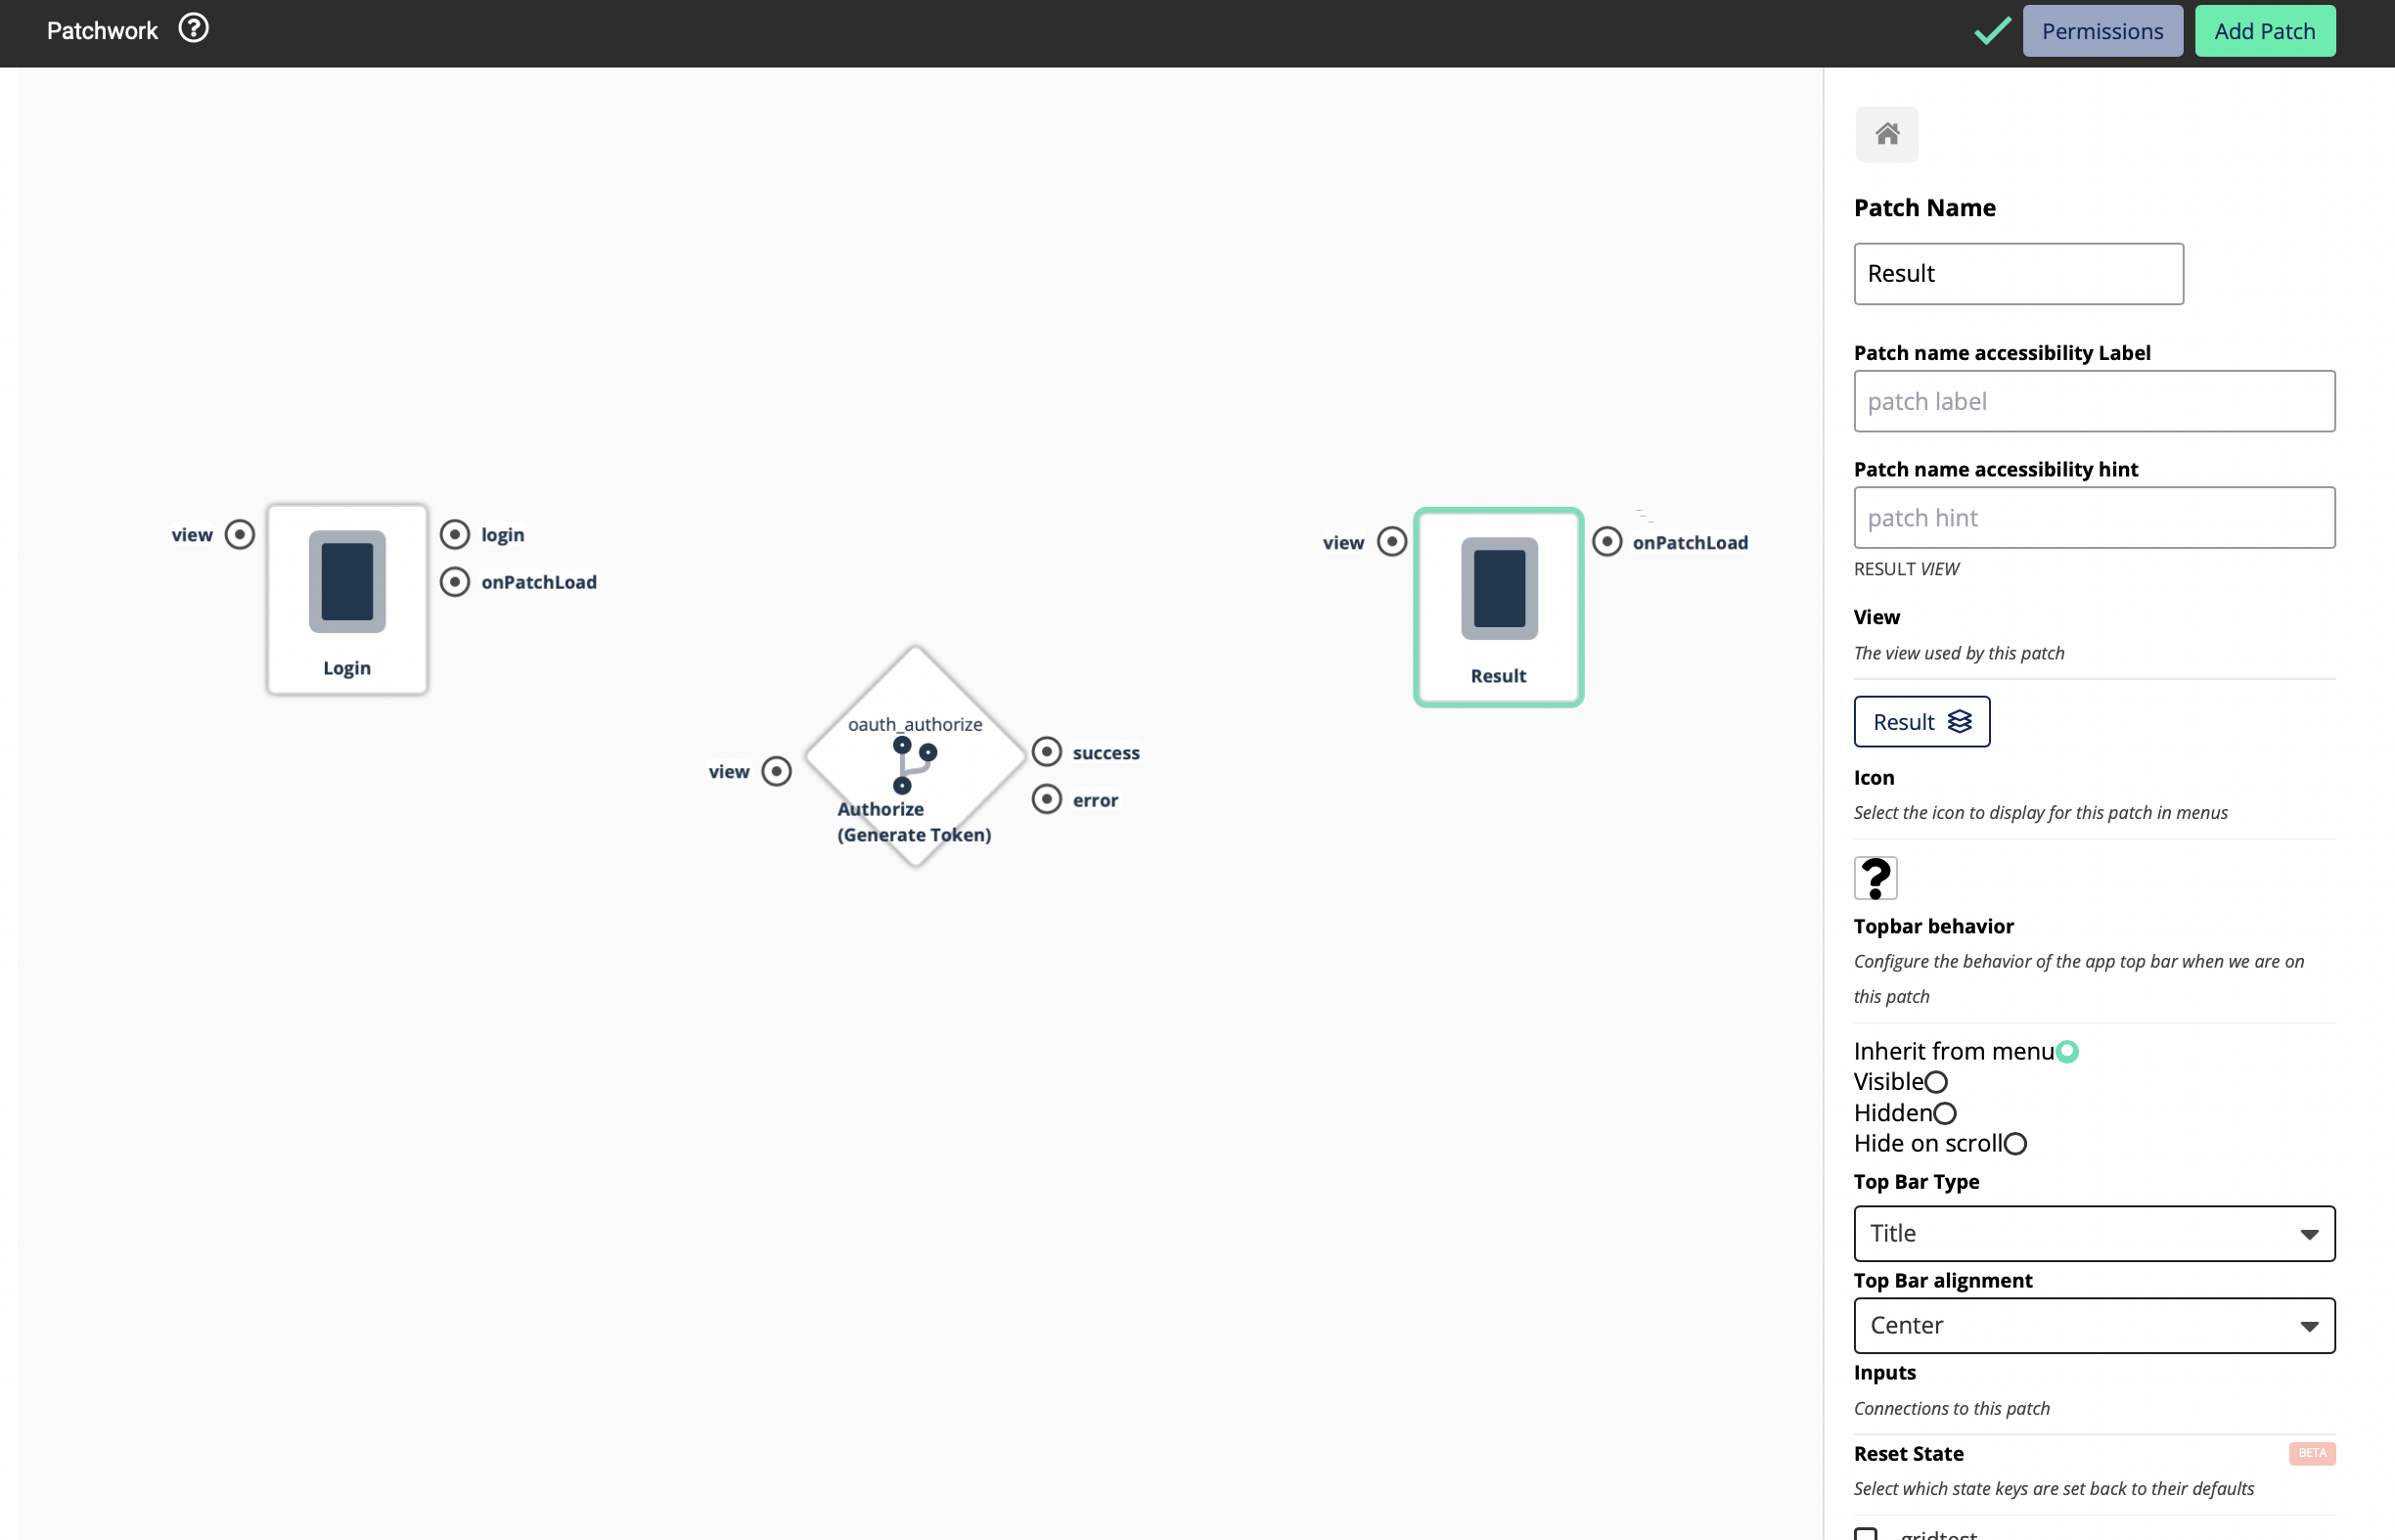
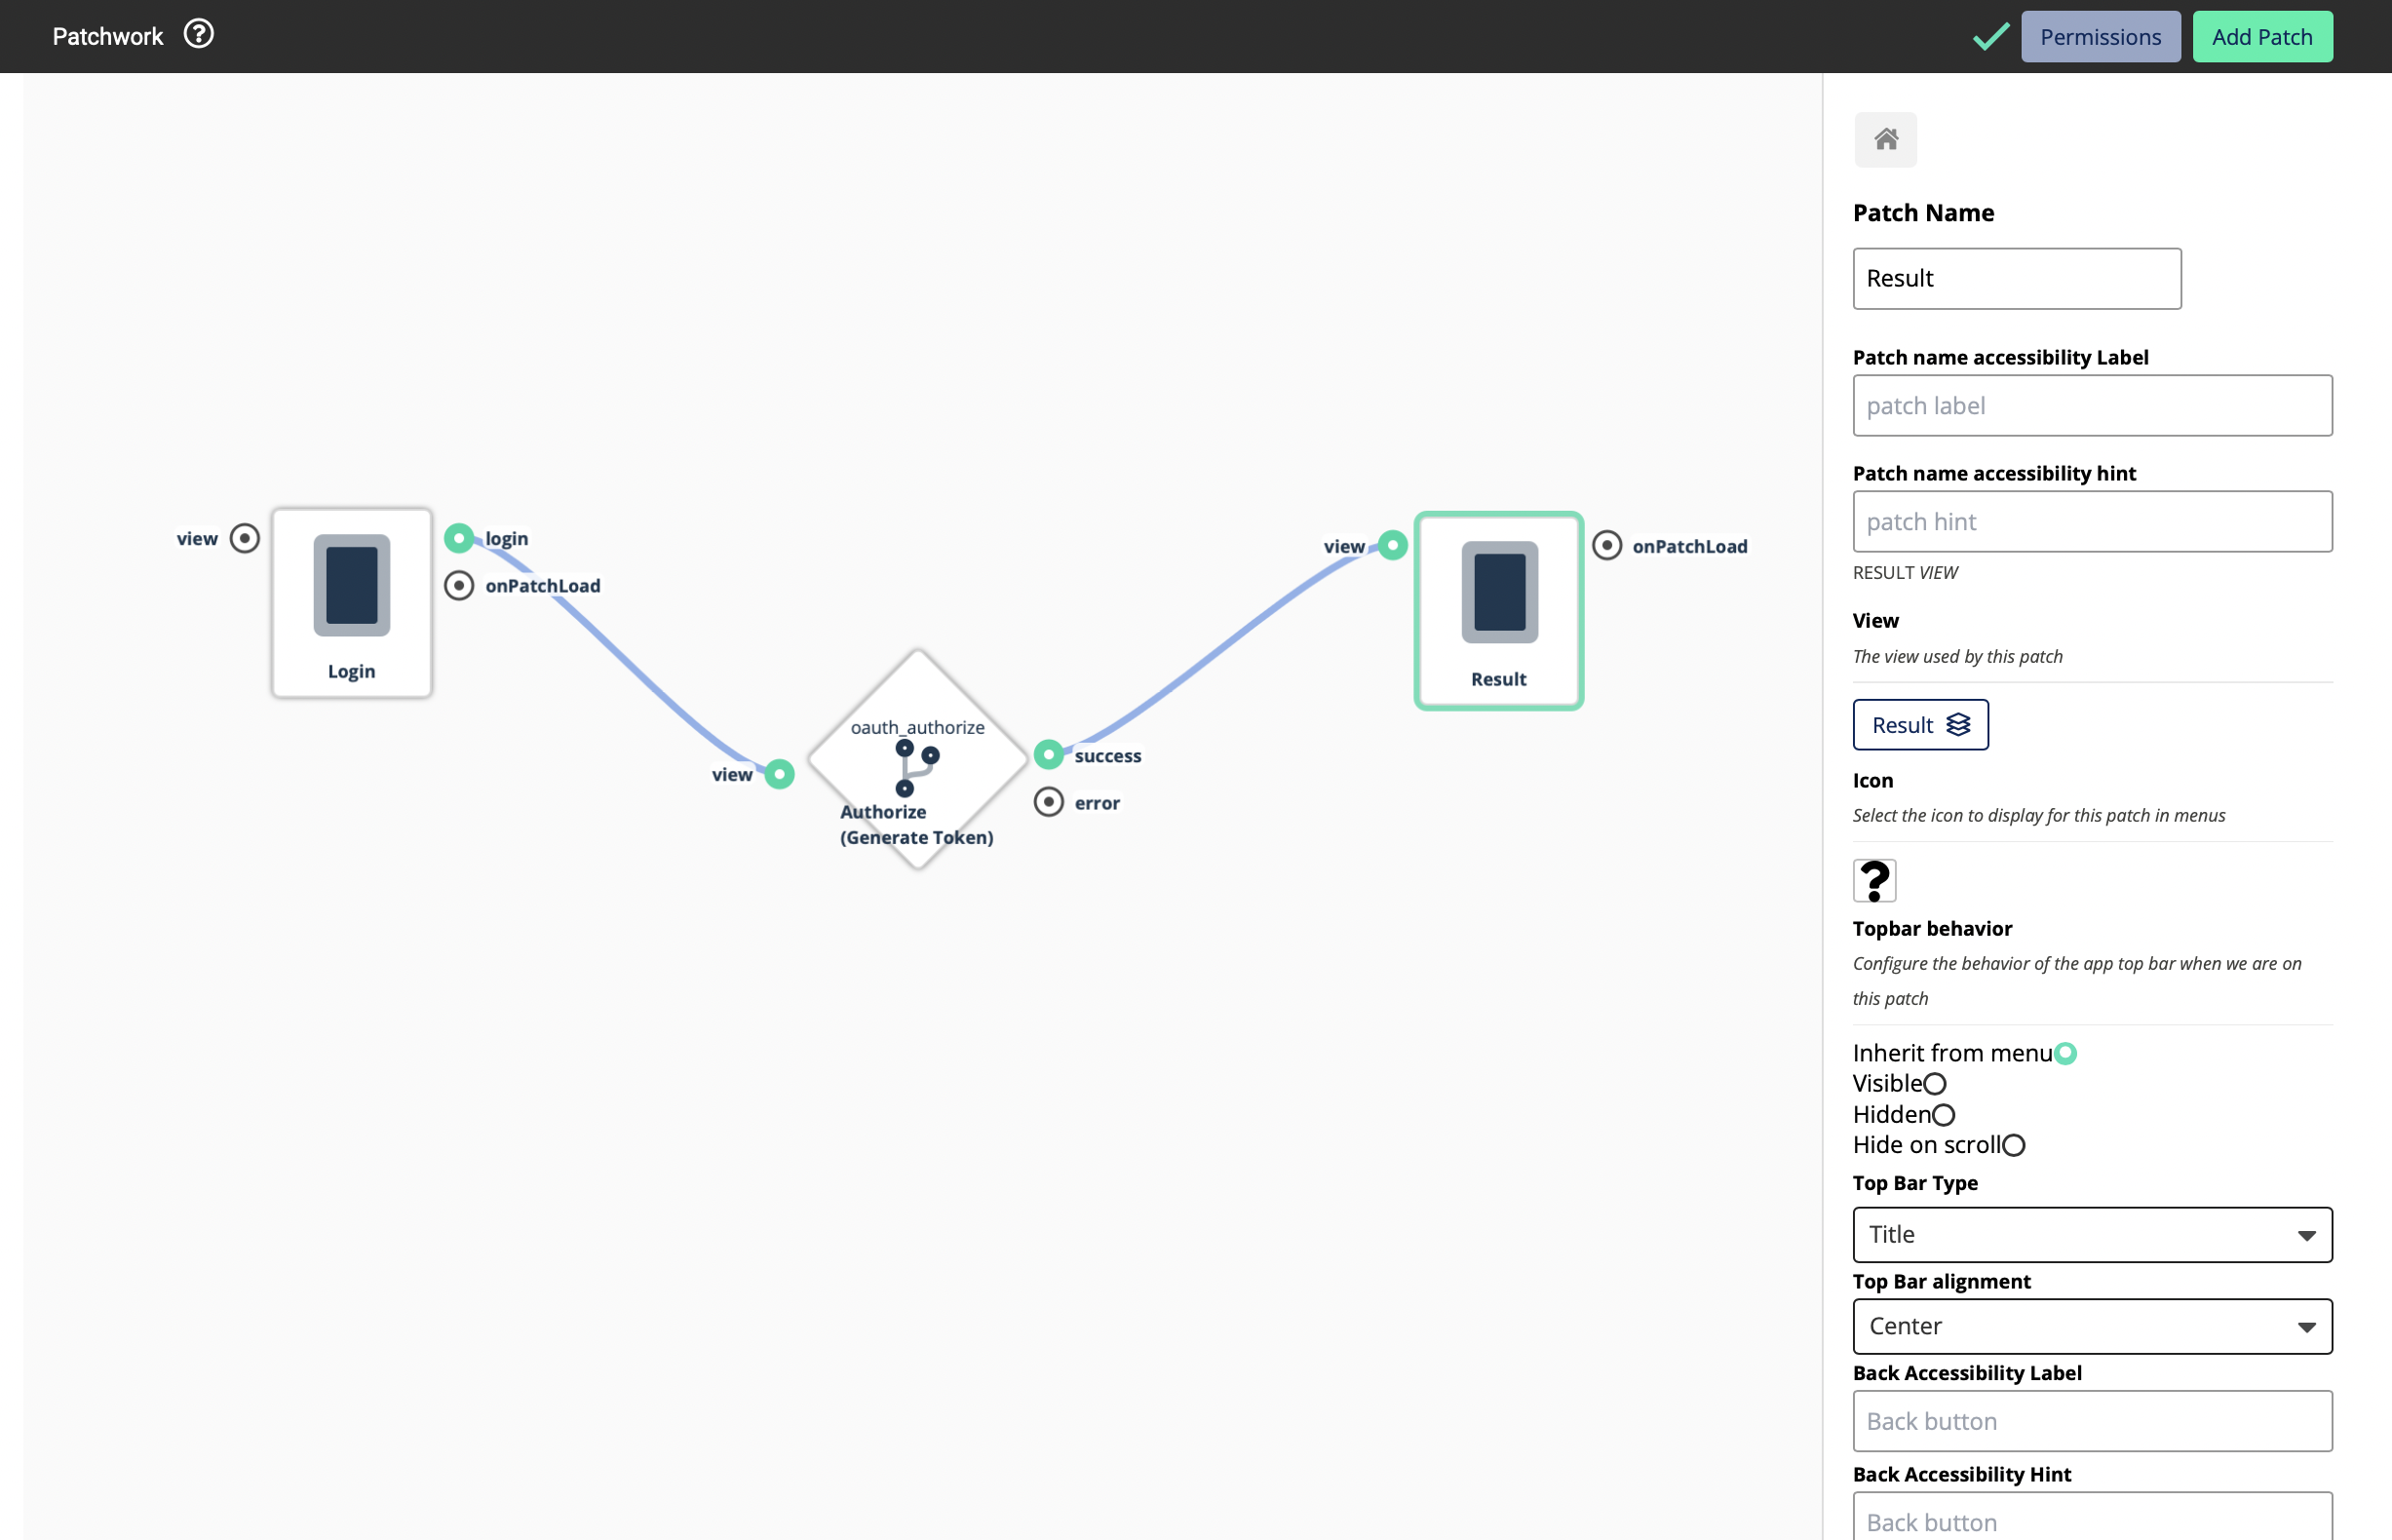
Now you will be able to see 3 inputs. This means that this Logic Block will return you three values
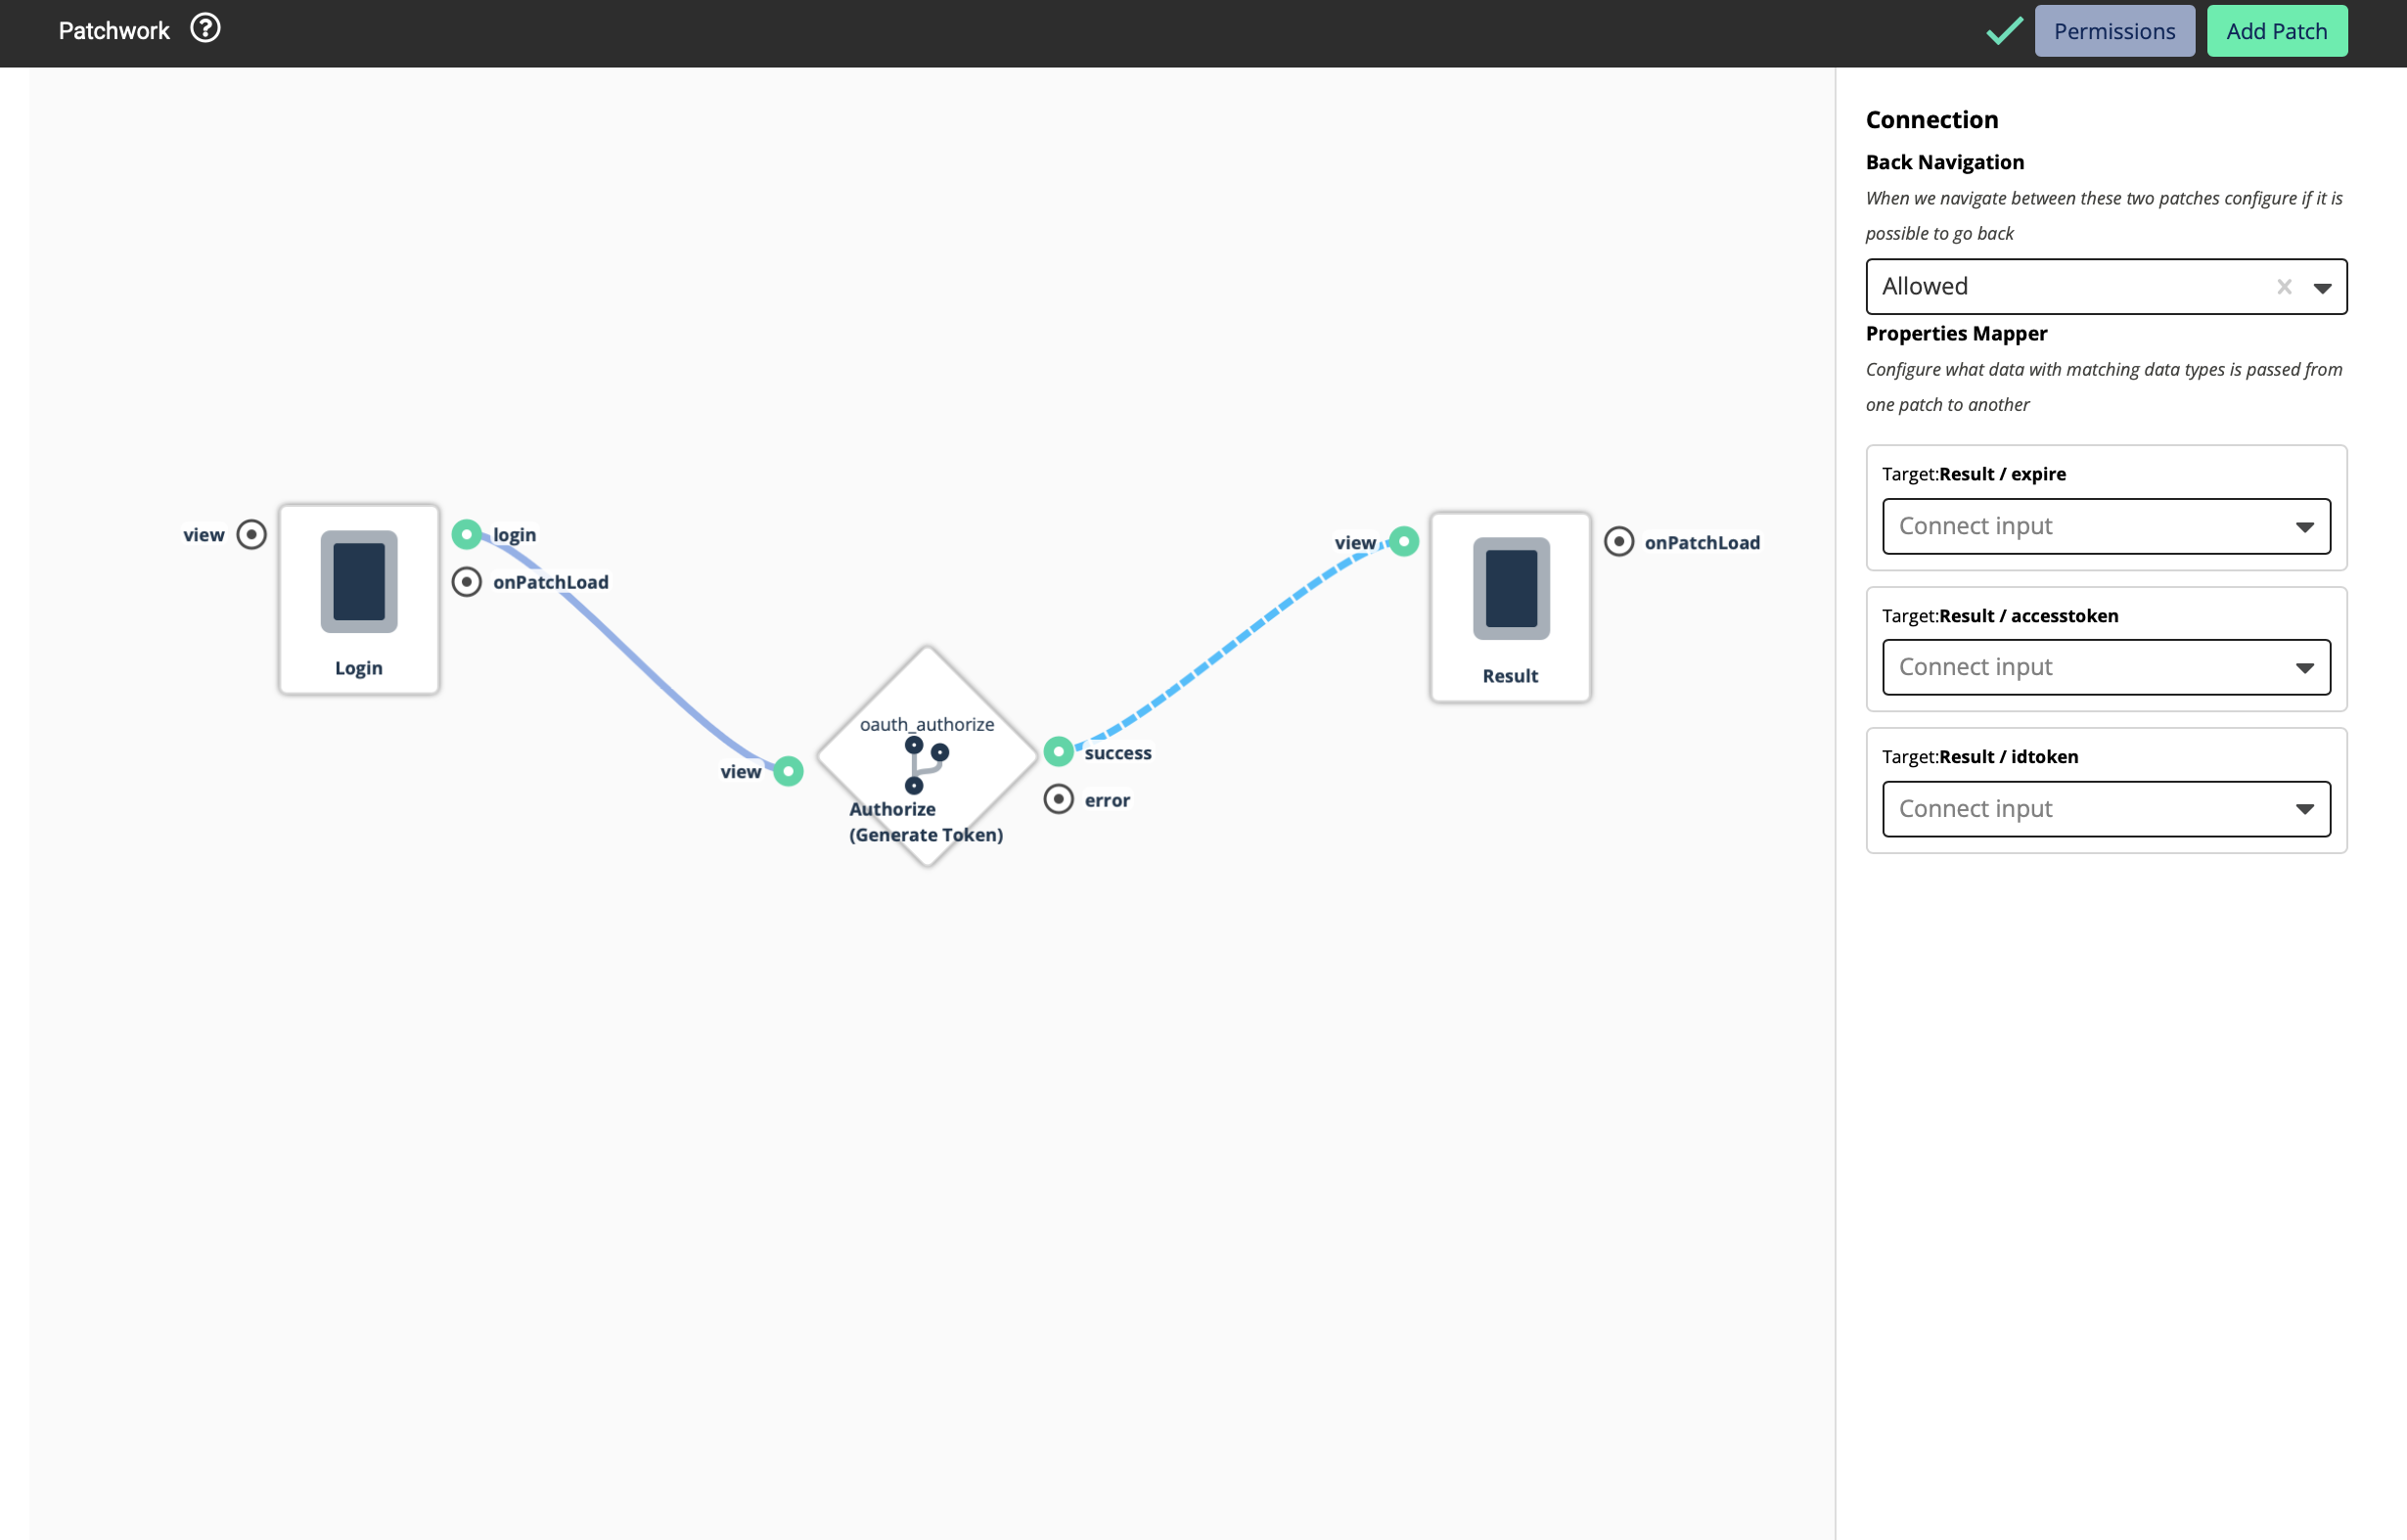
Even though we are using OAuth, here we are using OpenID. OpenID is an identity layer built on top of the OAuth 2.0 framework. It allows third-party applications to verify the identity of the end-user and to obtain basic user profile information.
If a certain external system that follows OAuth 2.0 standards supports OpenID, it provides 2 types of tokens - An Access Token and a ID Token
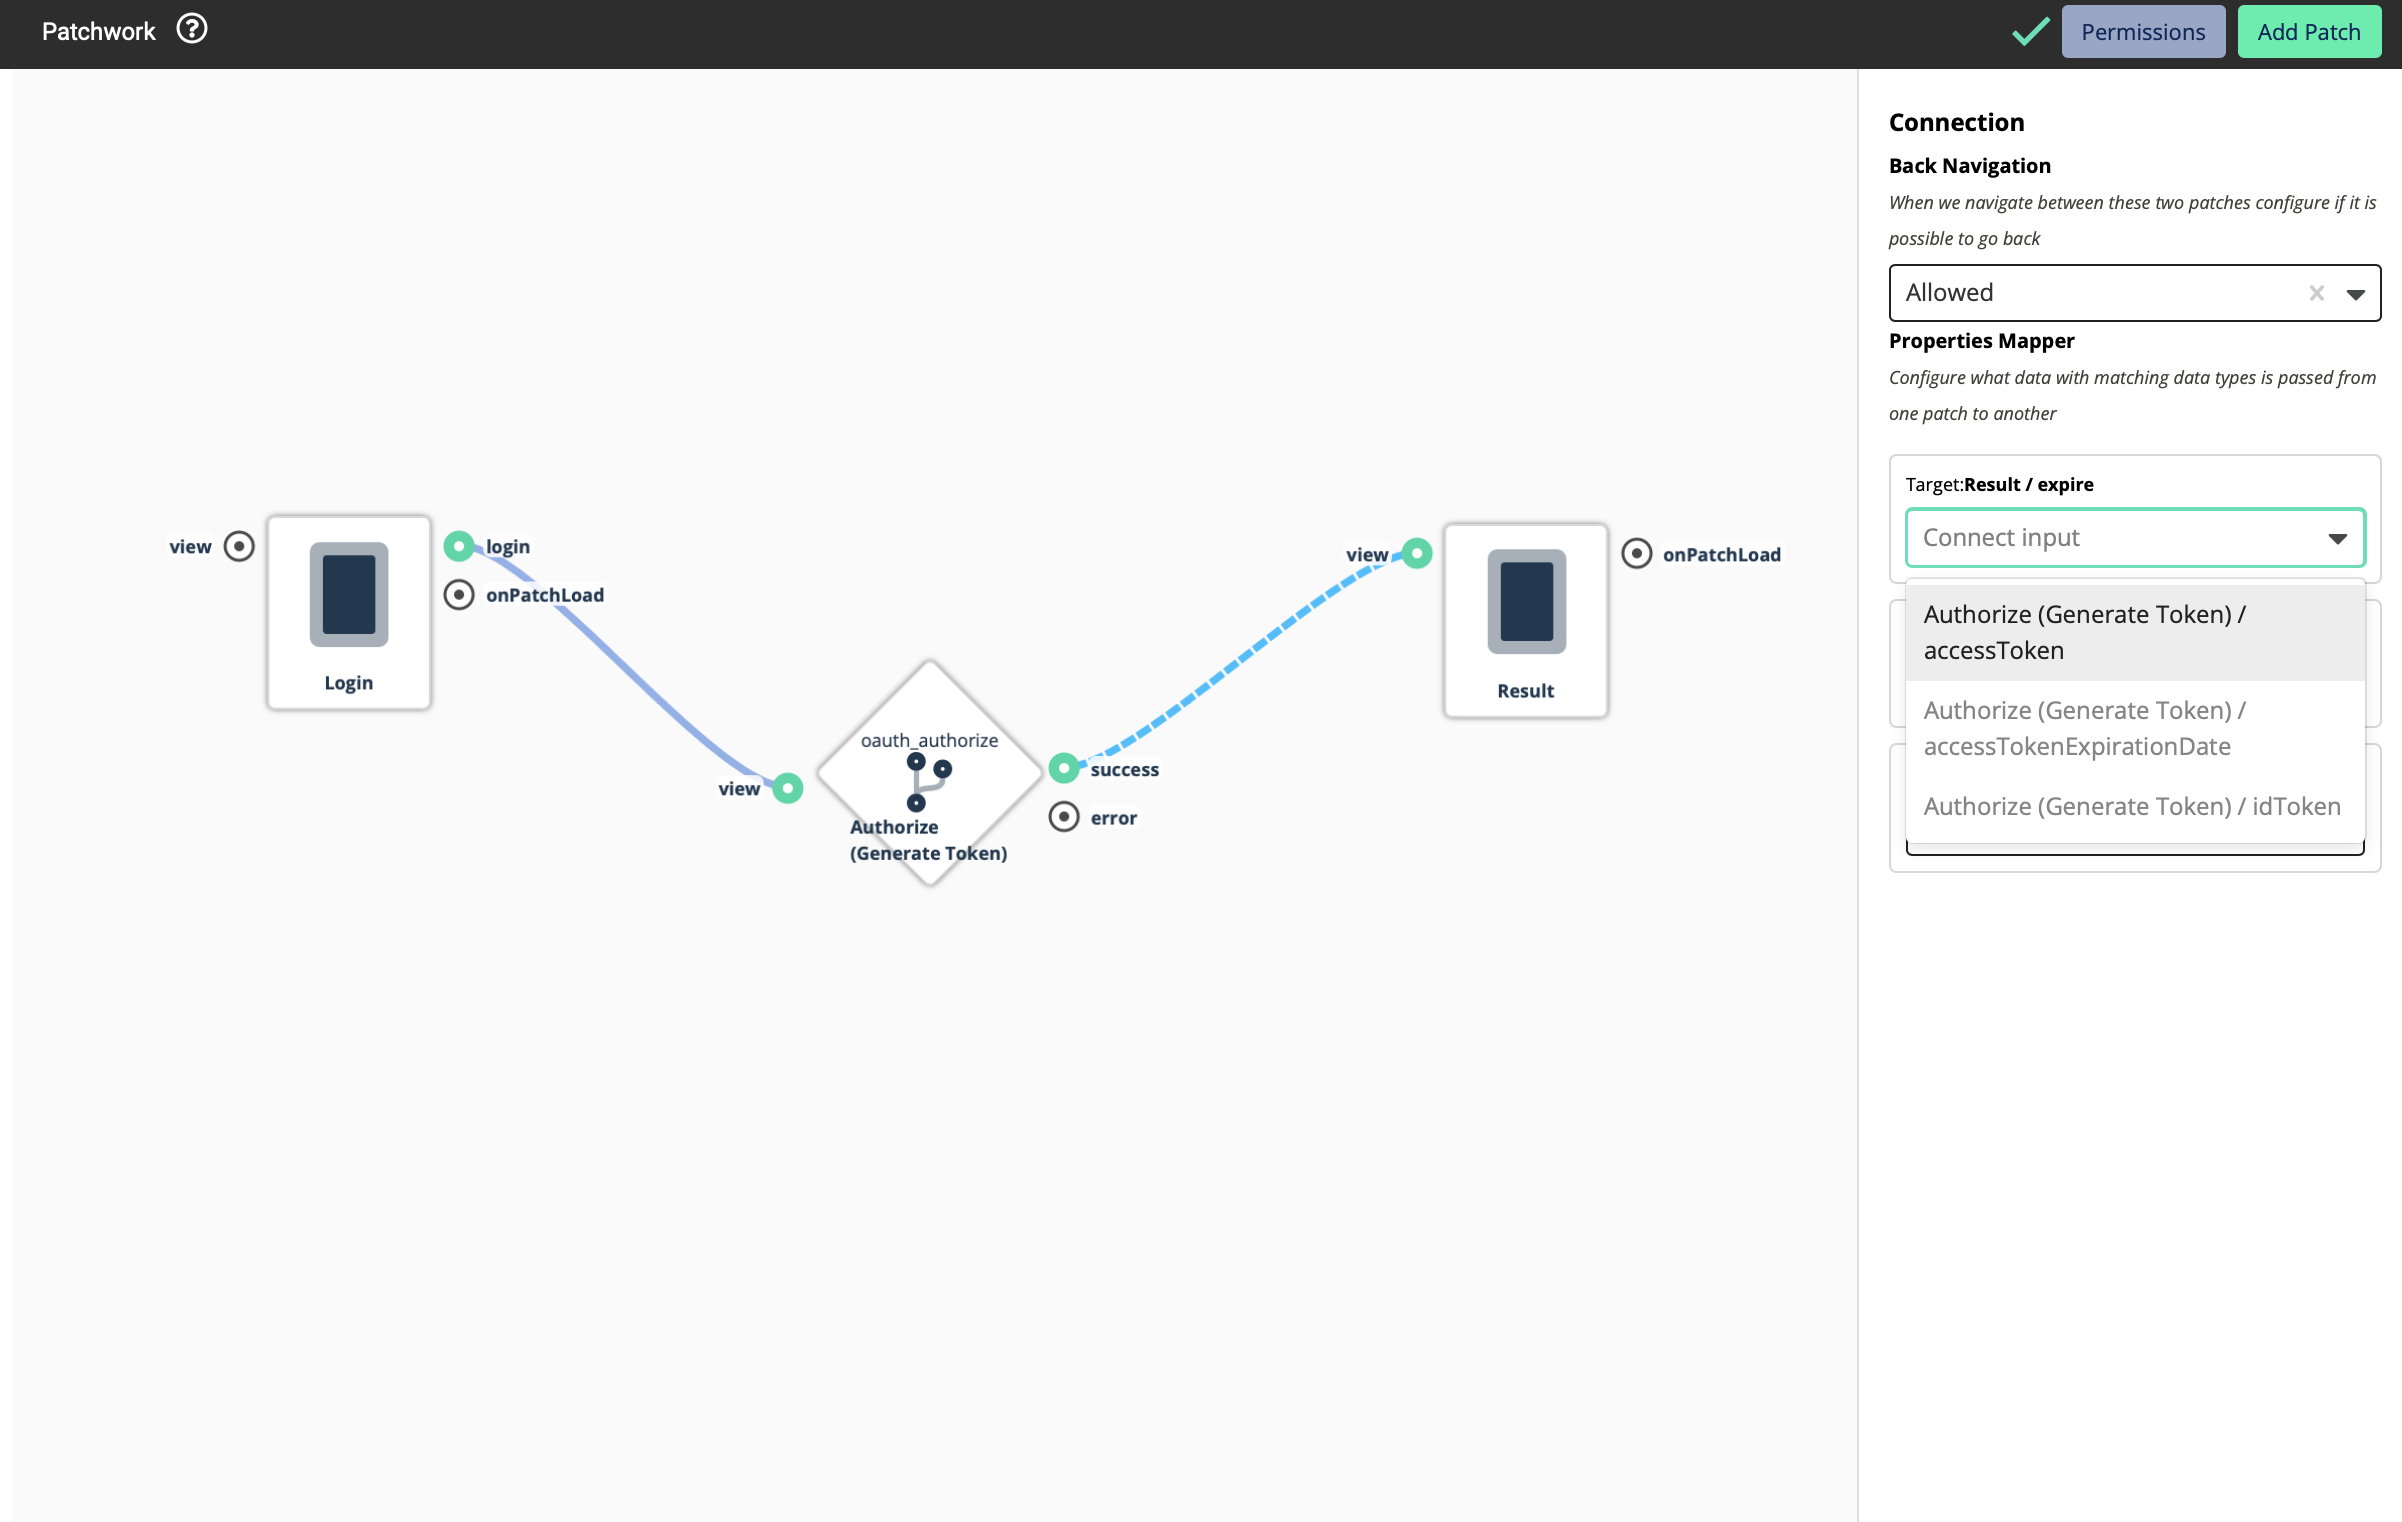
Here below are the uses of those two tokens.
Access Token - The access token allows a client application to access a specific resource to perform specific actions on behalf of the user
ID token - An ID token is an artifact that proves that the user has been authenticated
In a simple scenario, Access Token provides the profile data of a user that’s logged into a system while the ID Token can be used to log out or revoke the access of a user who has logged in using an access token.
Note: Some service providers do not provide both these Access Token and ID Token. They could provide only one of those.
Note: In some cases, even though the users have properly done the configurations in the app their service could be failed. It is because that they have not set the Platform Configurations on the service provider side (in this case - Azure). This must be done for the service to work properly. If not configured properly, you will be able to use the OAuth authentication, and you will be able to see the login buttons and everything, but you will not be able to log into a system - an error will occur saying that the authentication is failed.
Setting up Platform Configurations
-
Open your Registered App on Azure
-
Click on Authentication
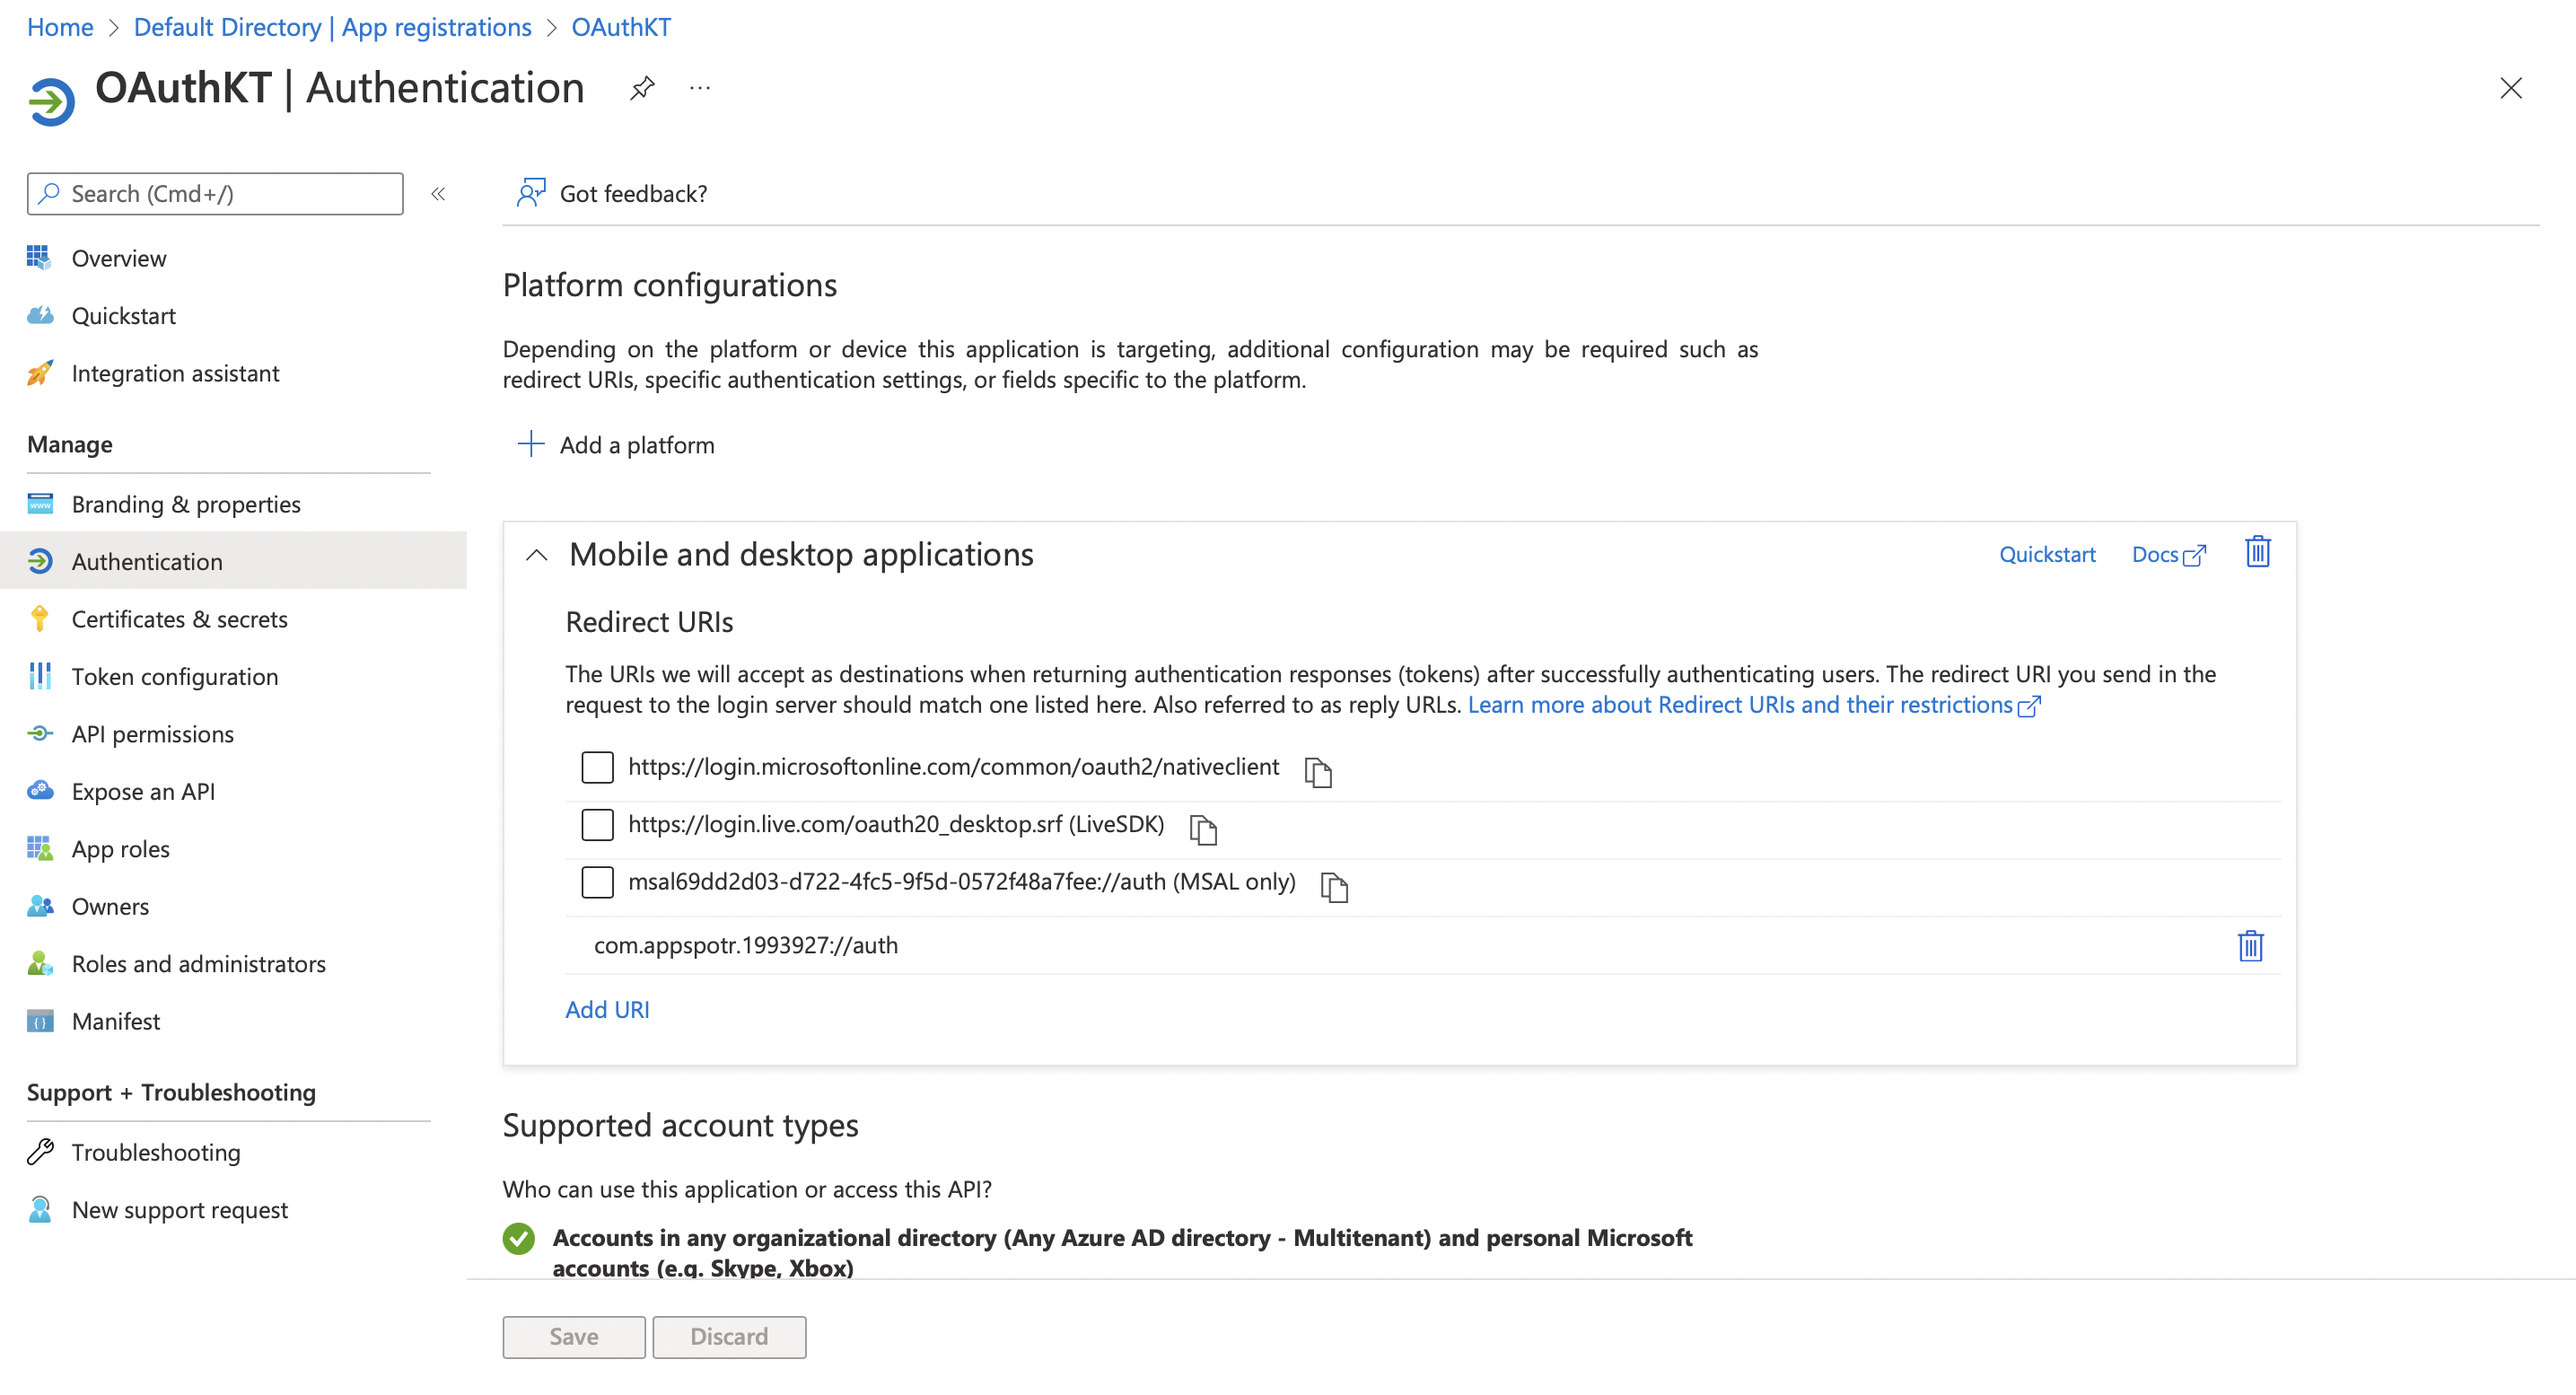
Click on Add a platform
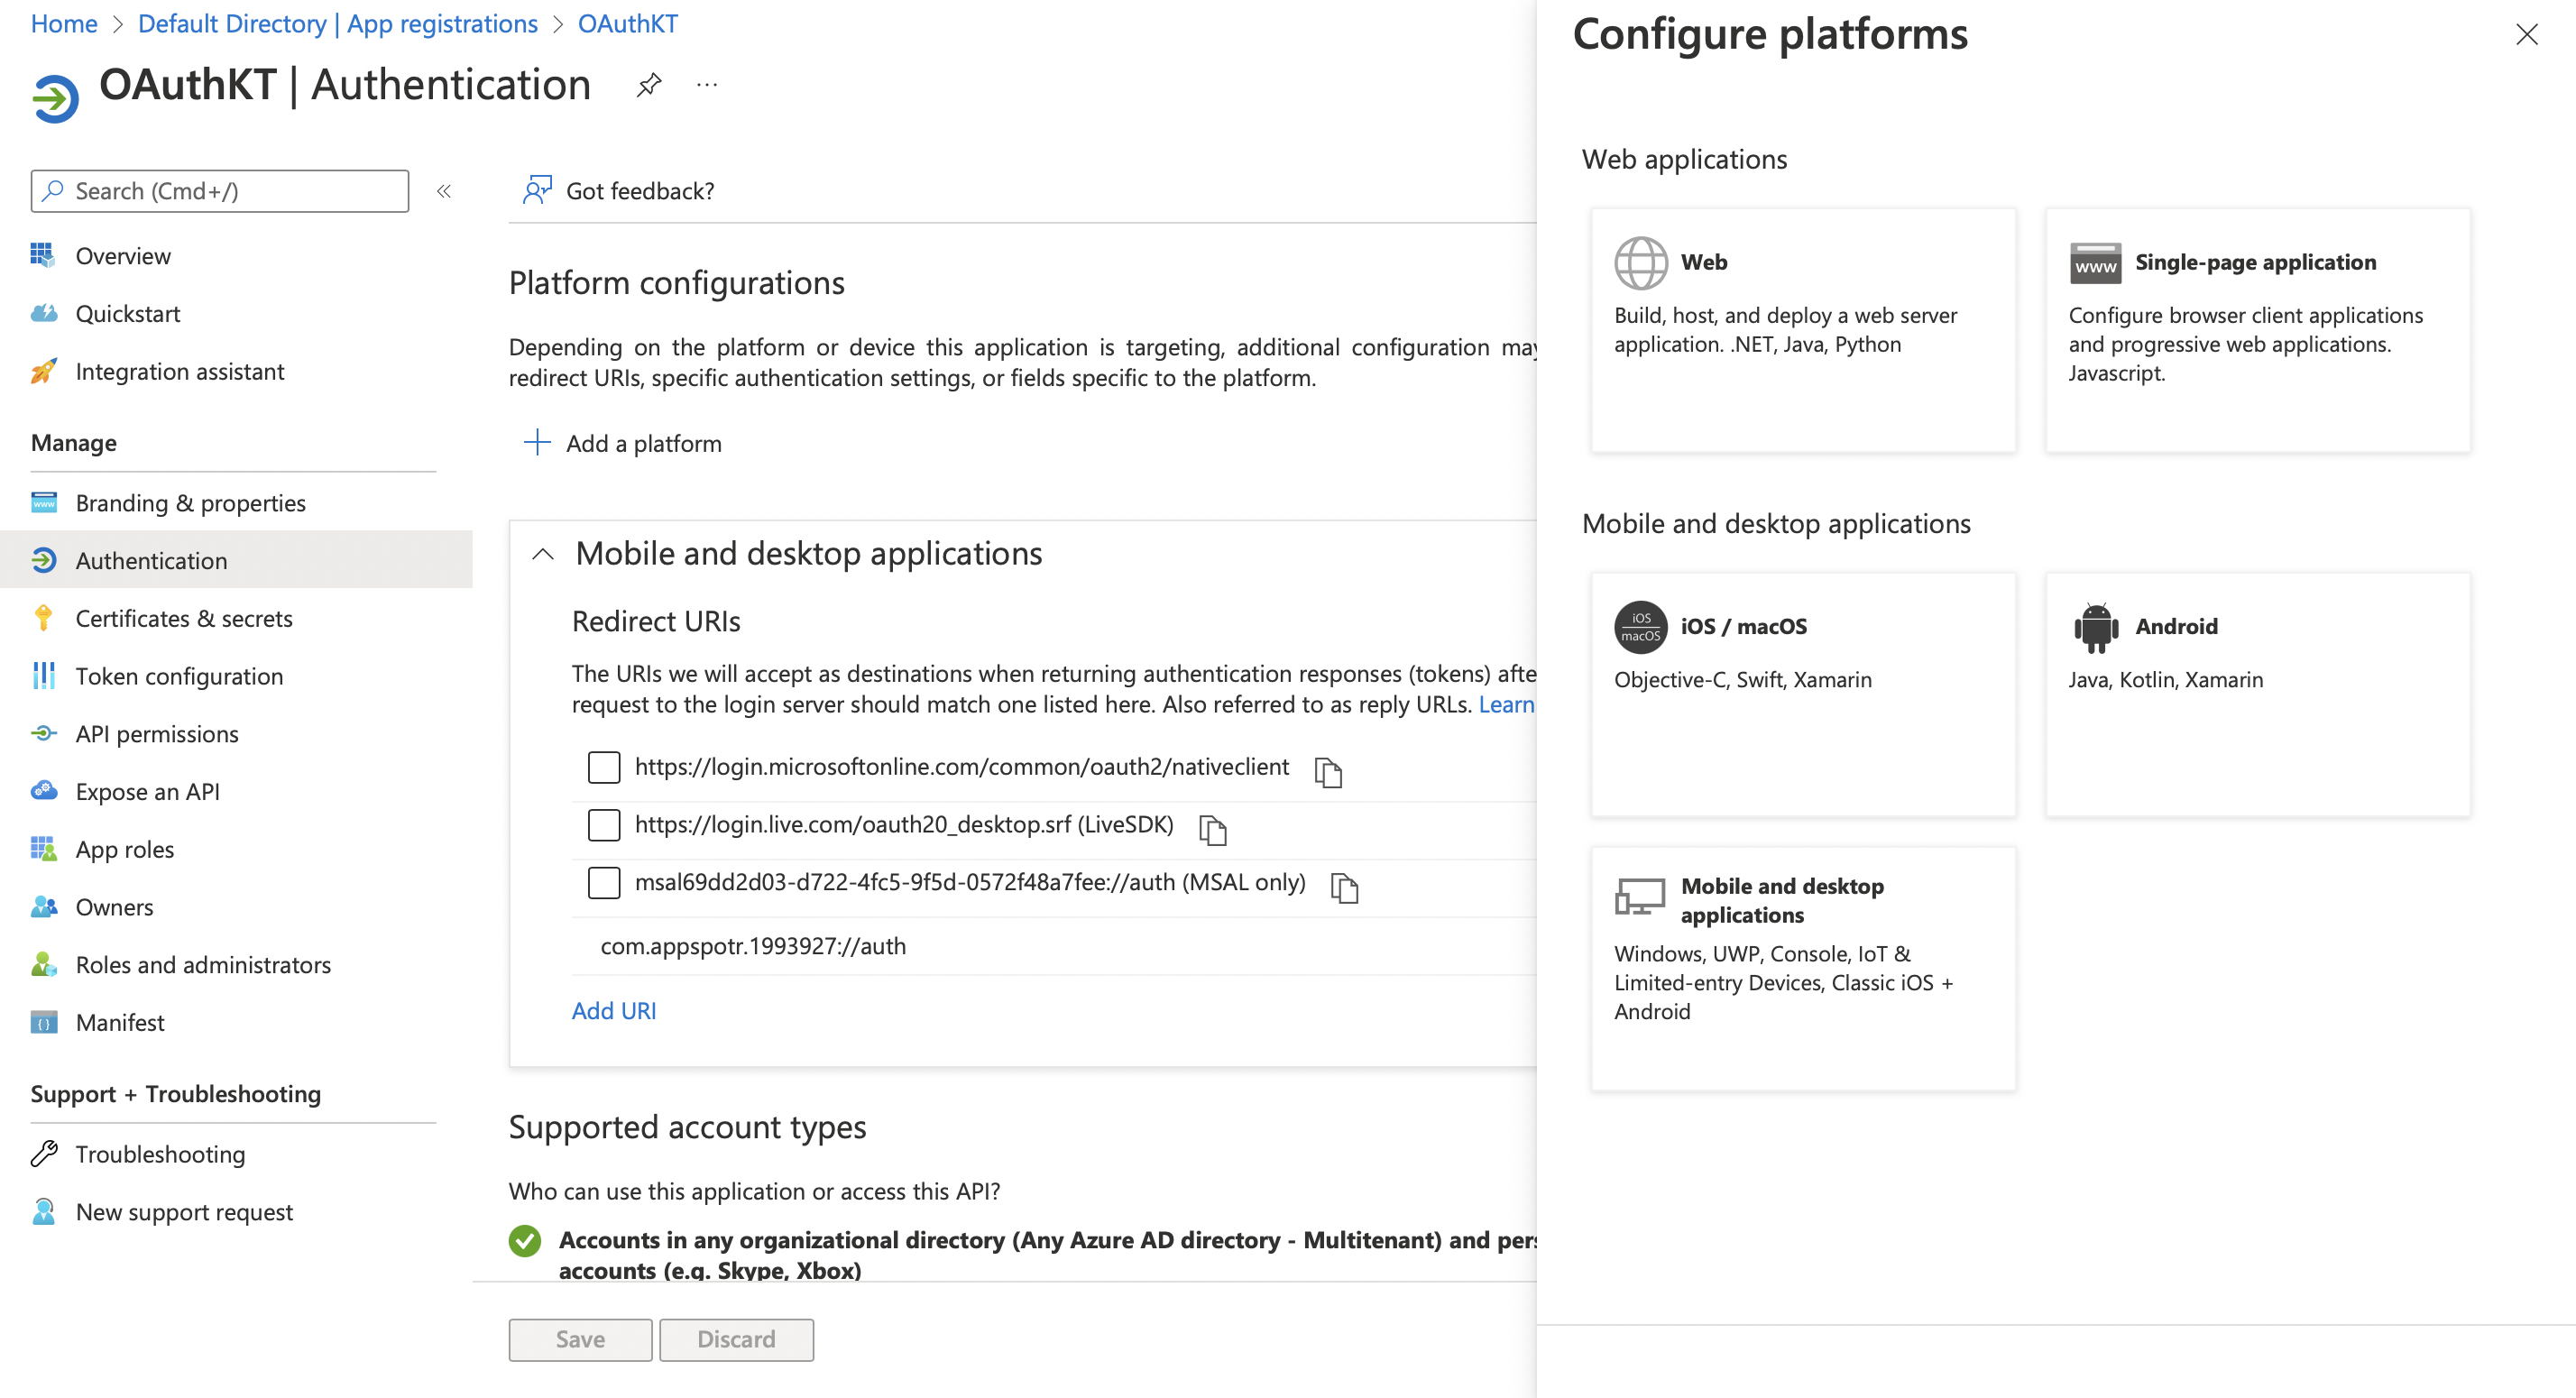
-
Click the relevant platform.
This will allow you to explicitly configure platforms.
Since our App is a Single-page Application, in this guide we’ll be configuring configurations for a Single-page Application.
-
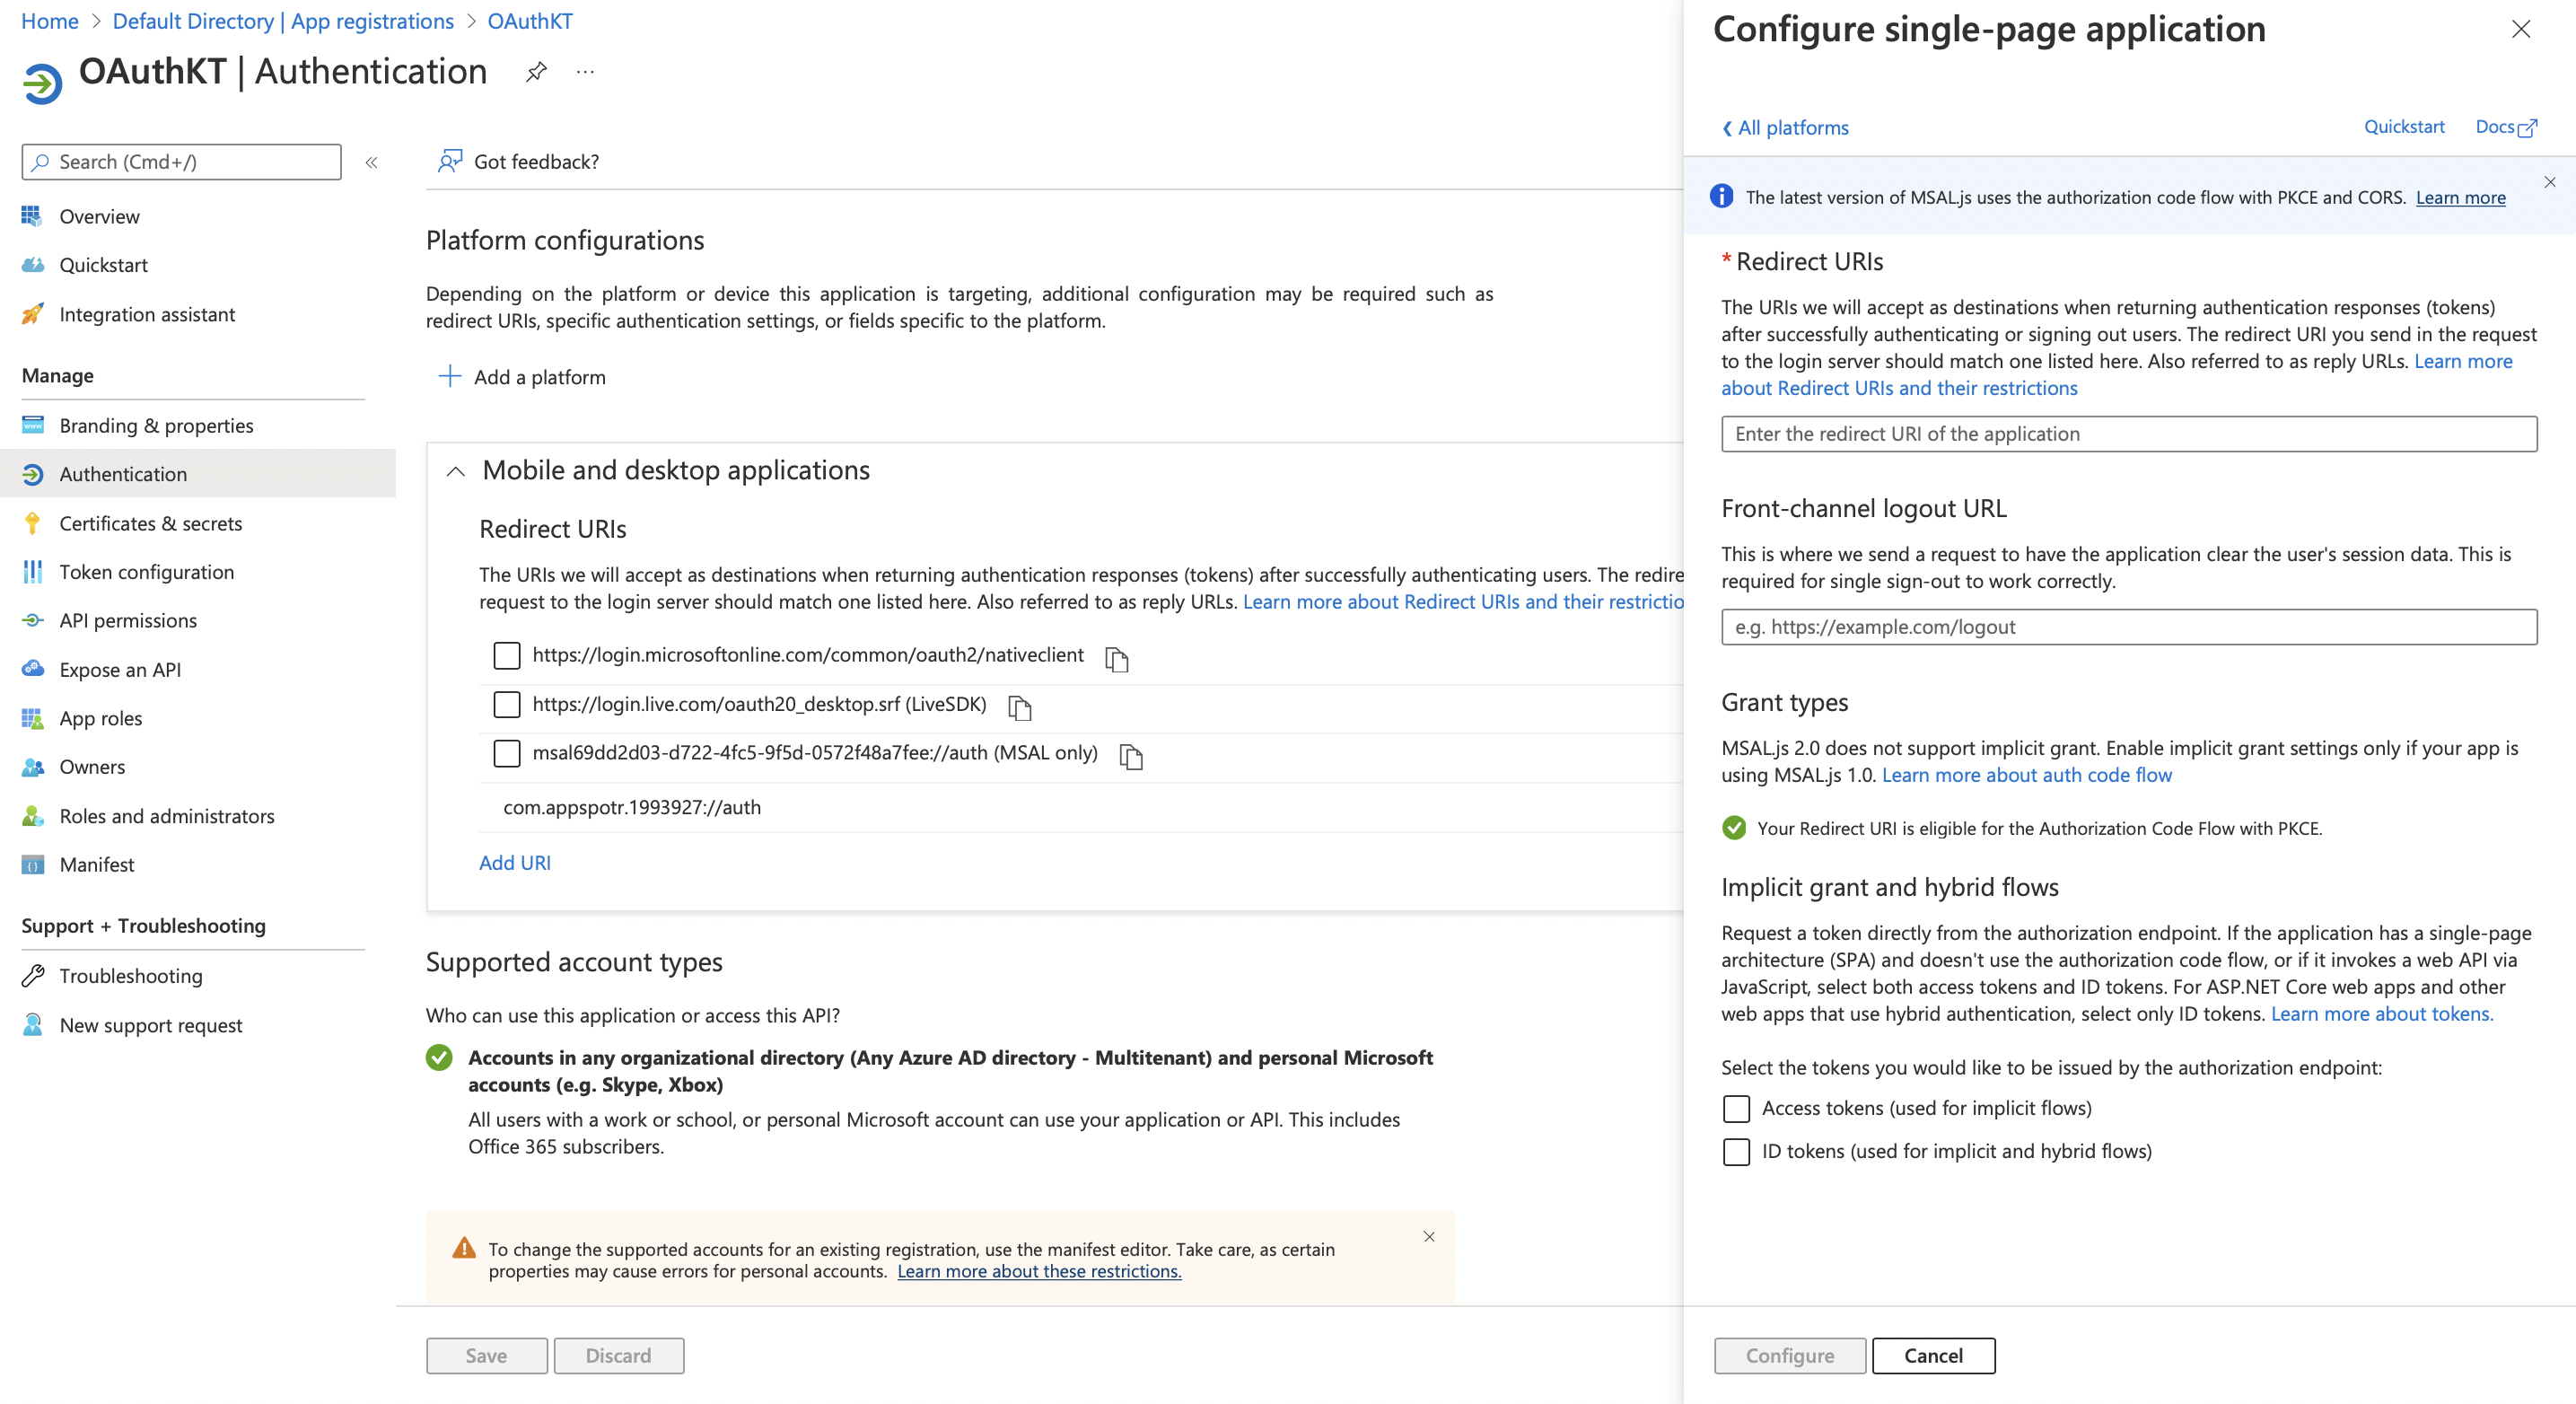
Fill in the following fields according to your app data
Redirect URI - This Redirect URI can be found in your app by following the below path.
Publishing>Configuration>Web App>Sub Domain Configuration
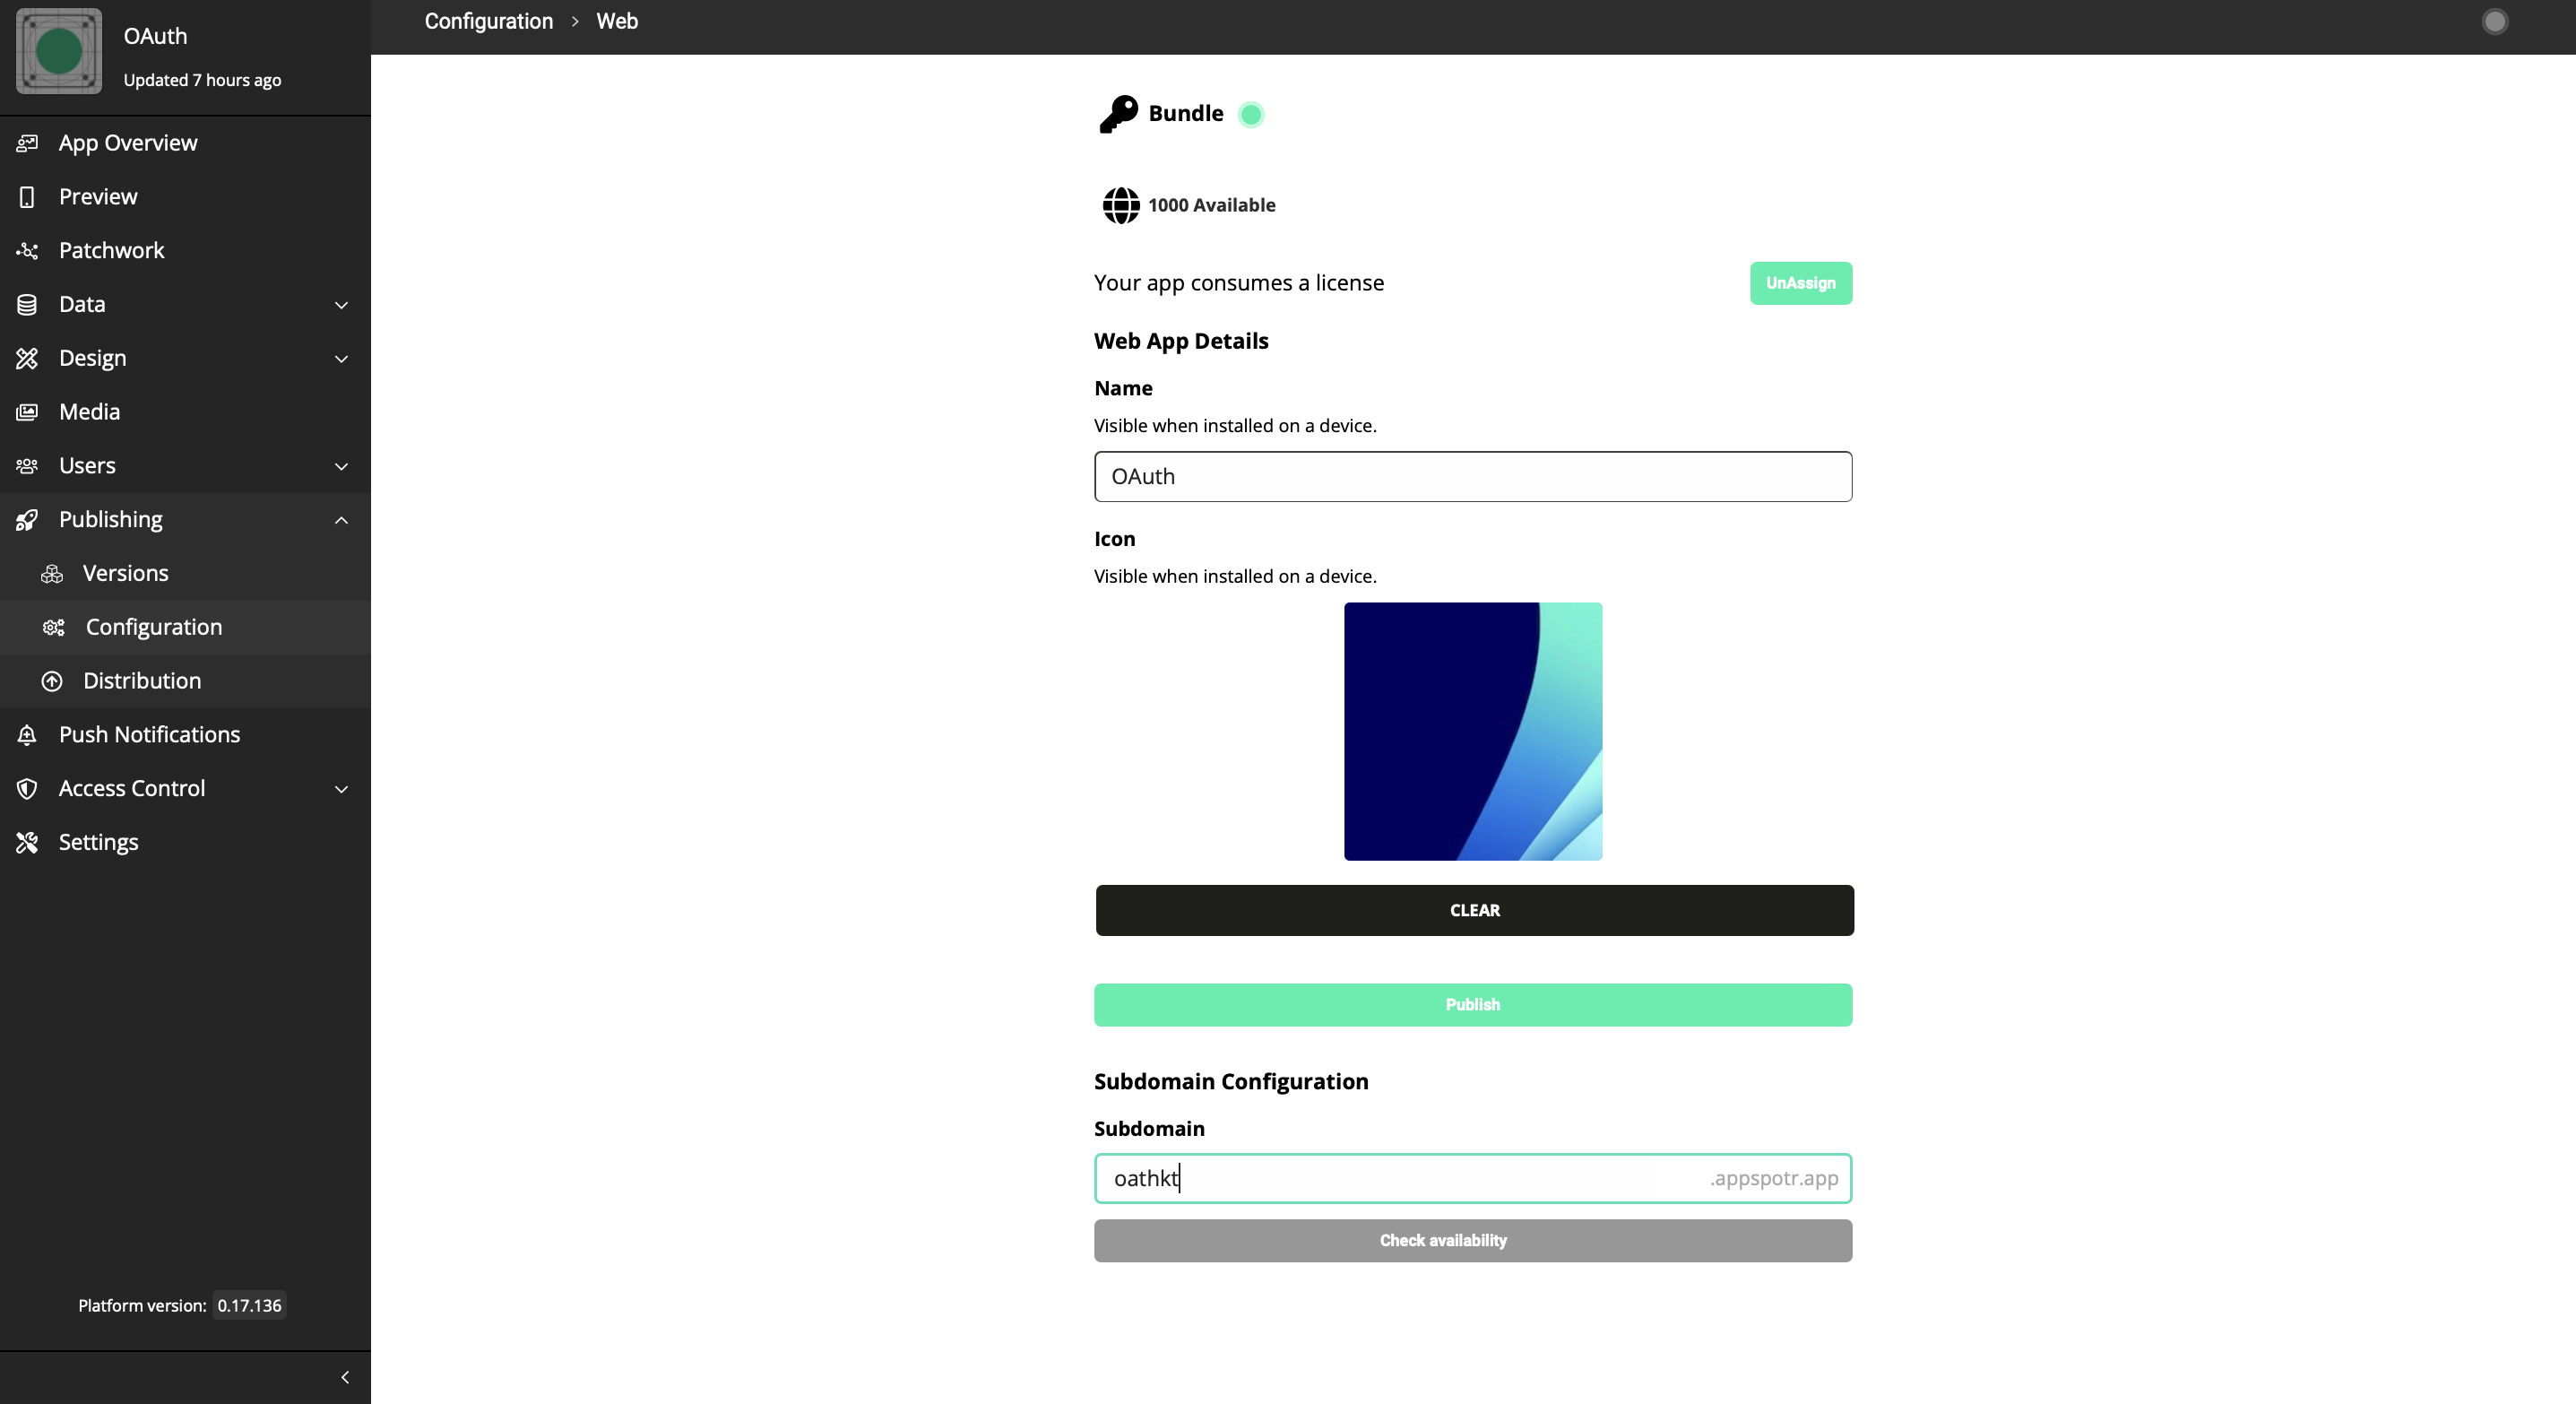
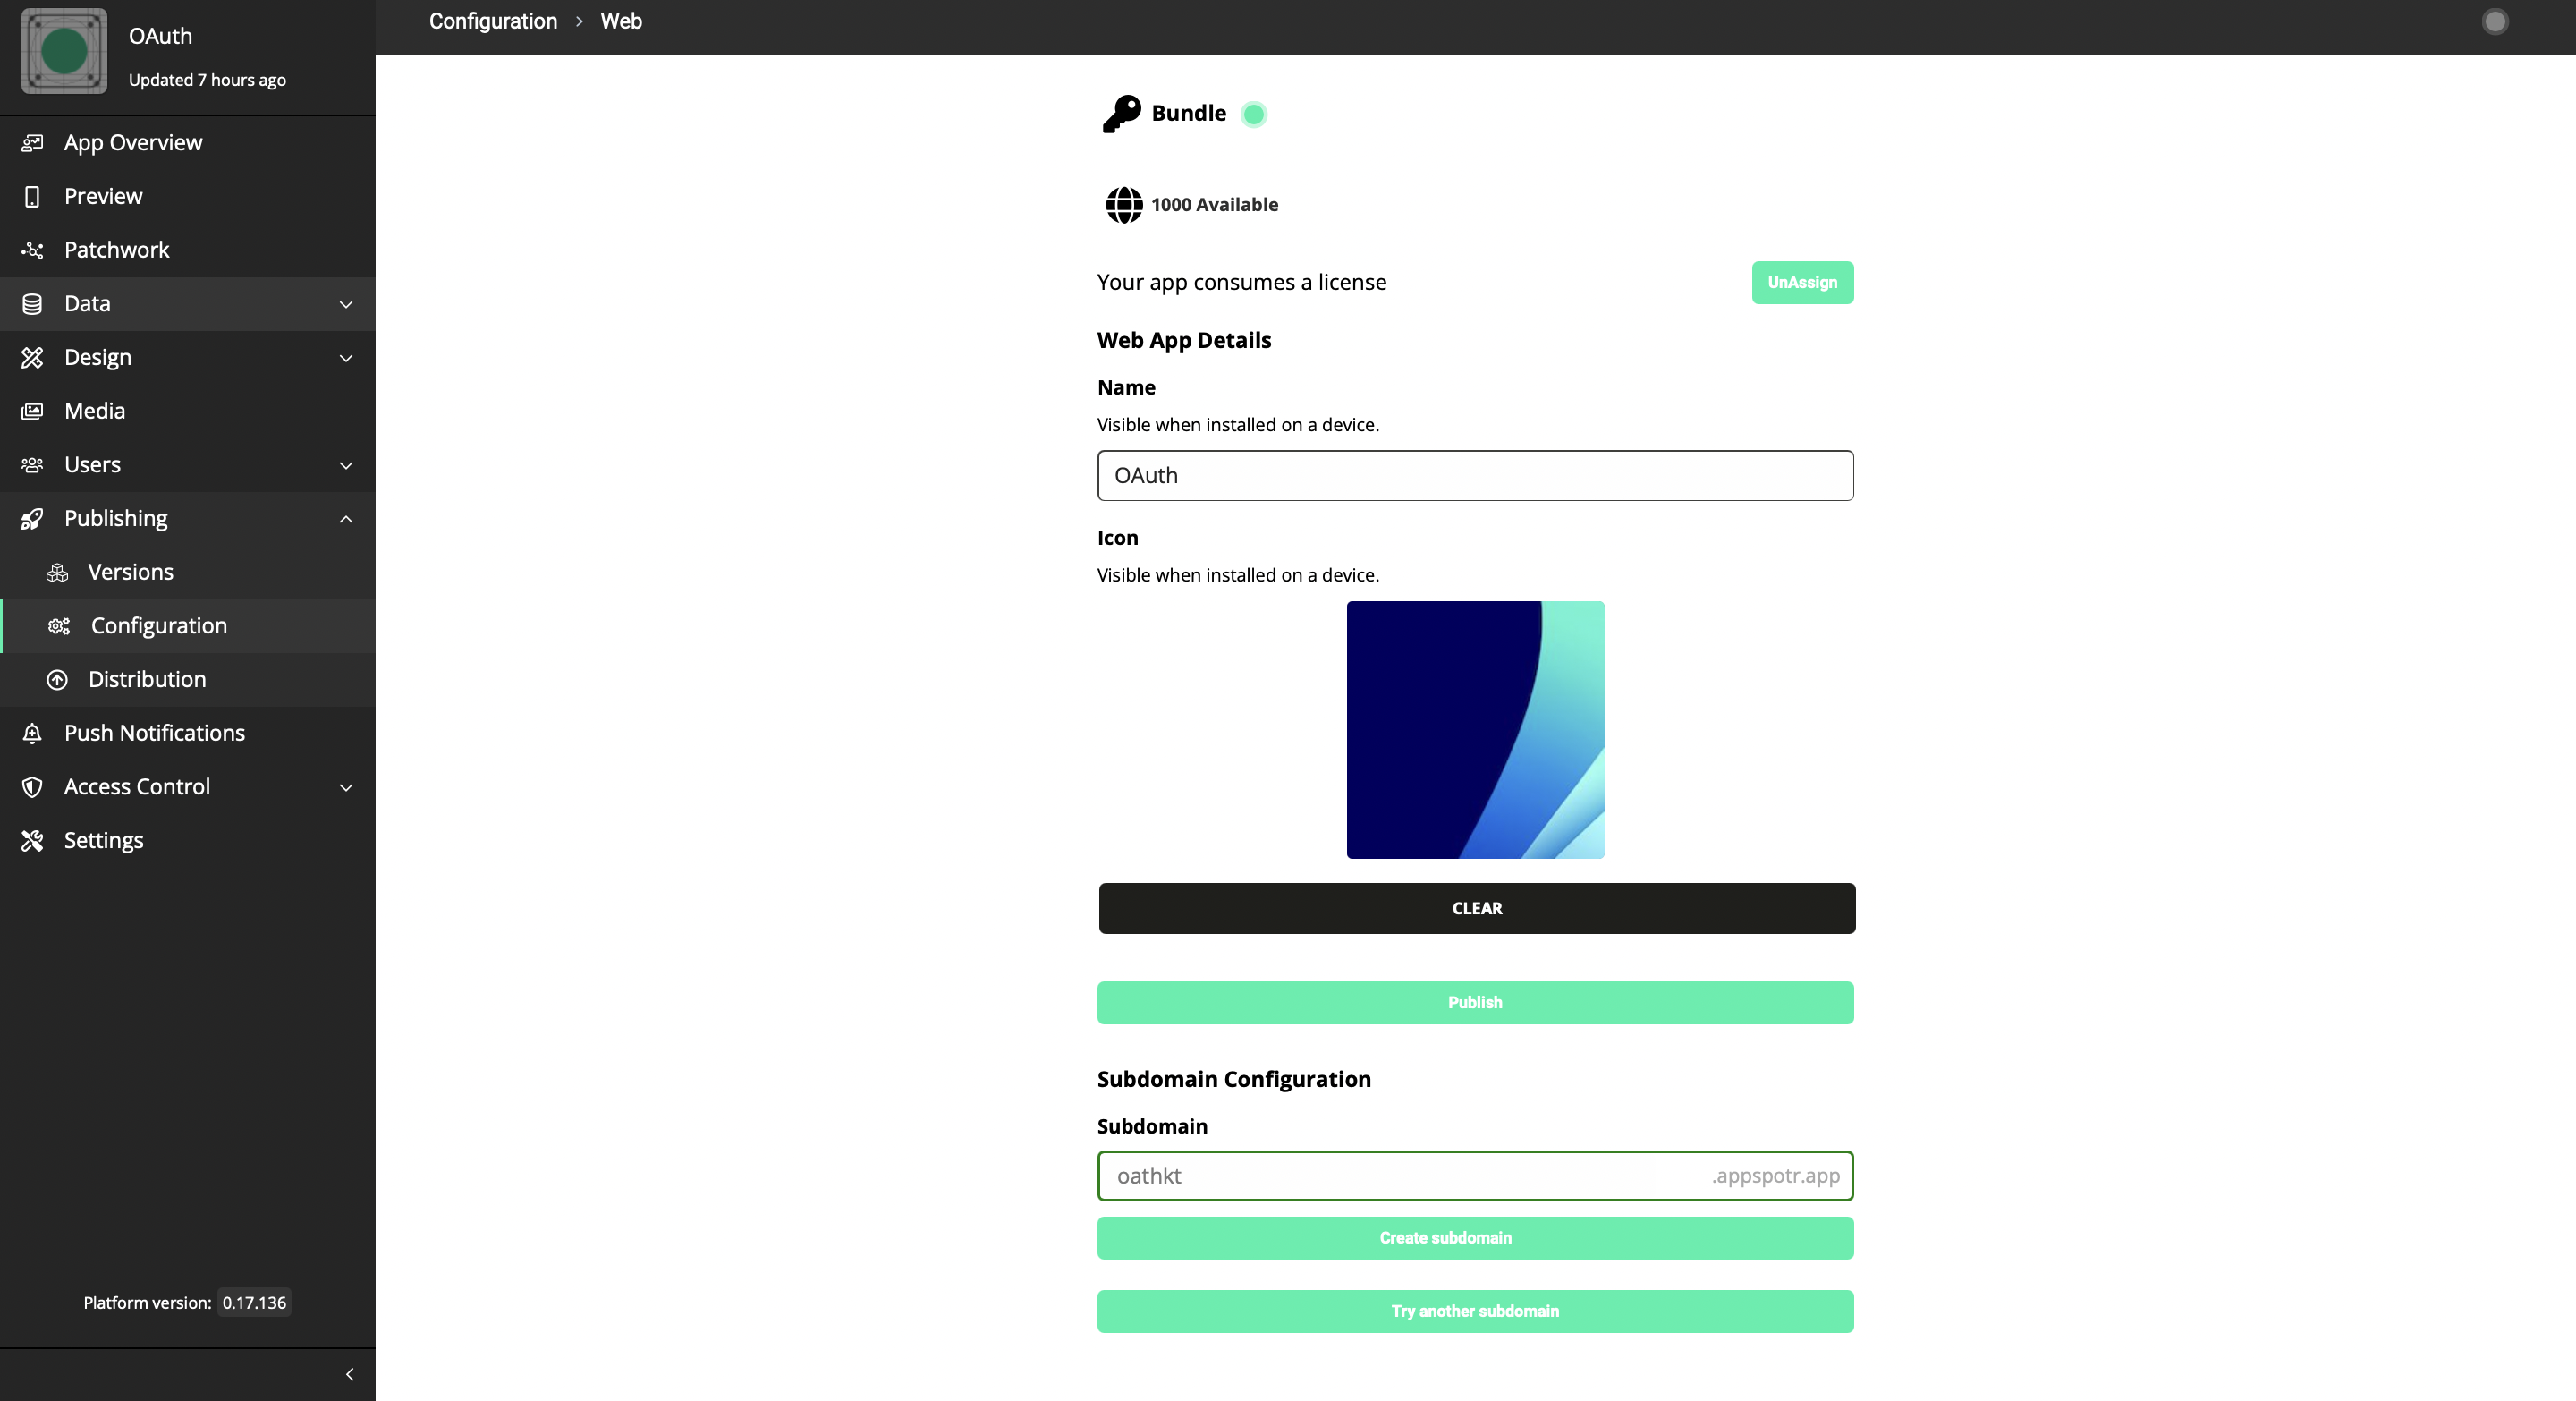
This subdomain configuration URI should be the Redirect URI
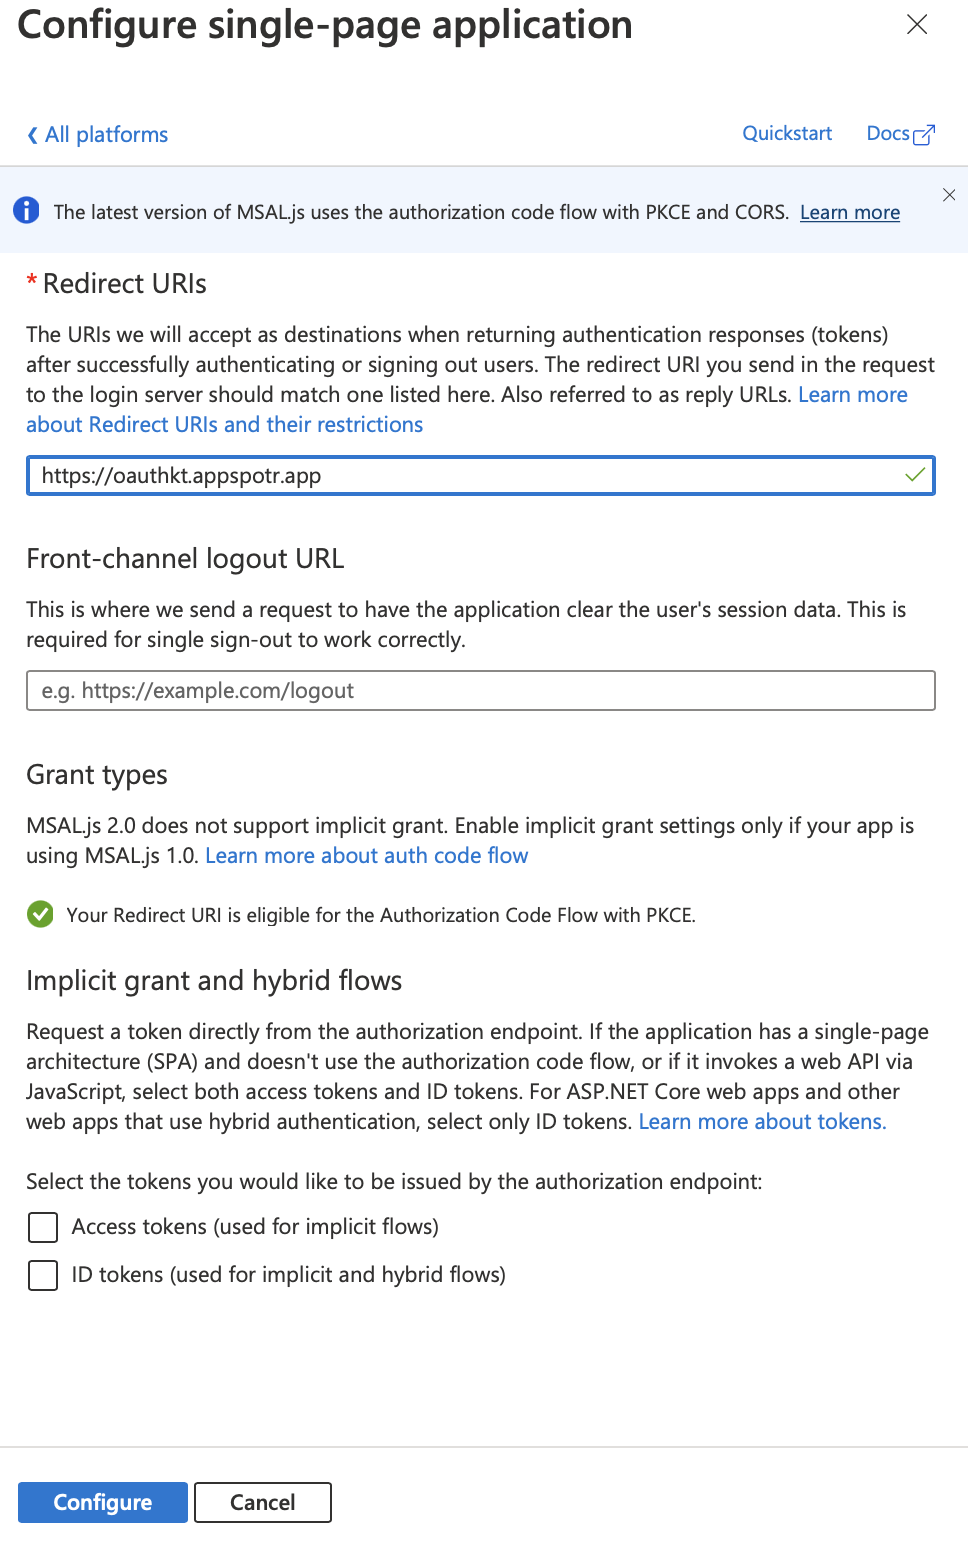
Front-channel logout URL - This can be the same as the Redirect URI
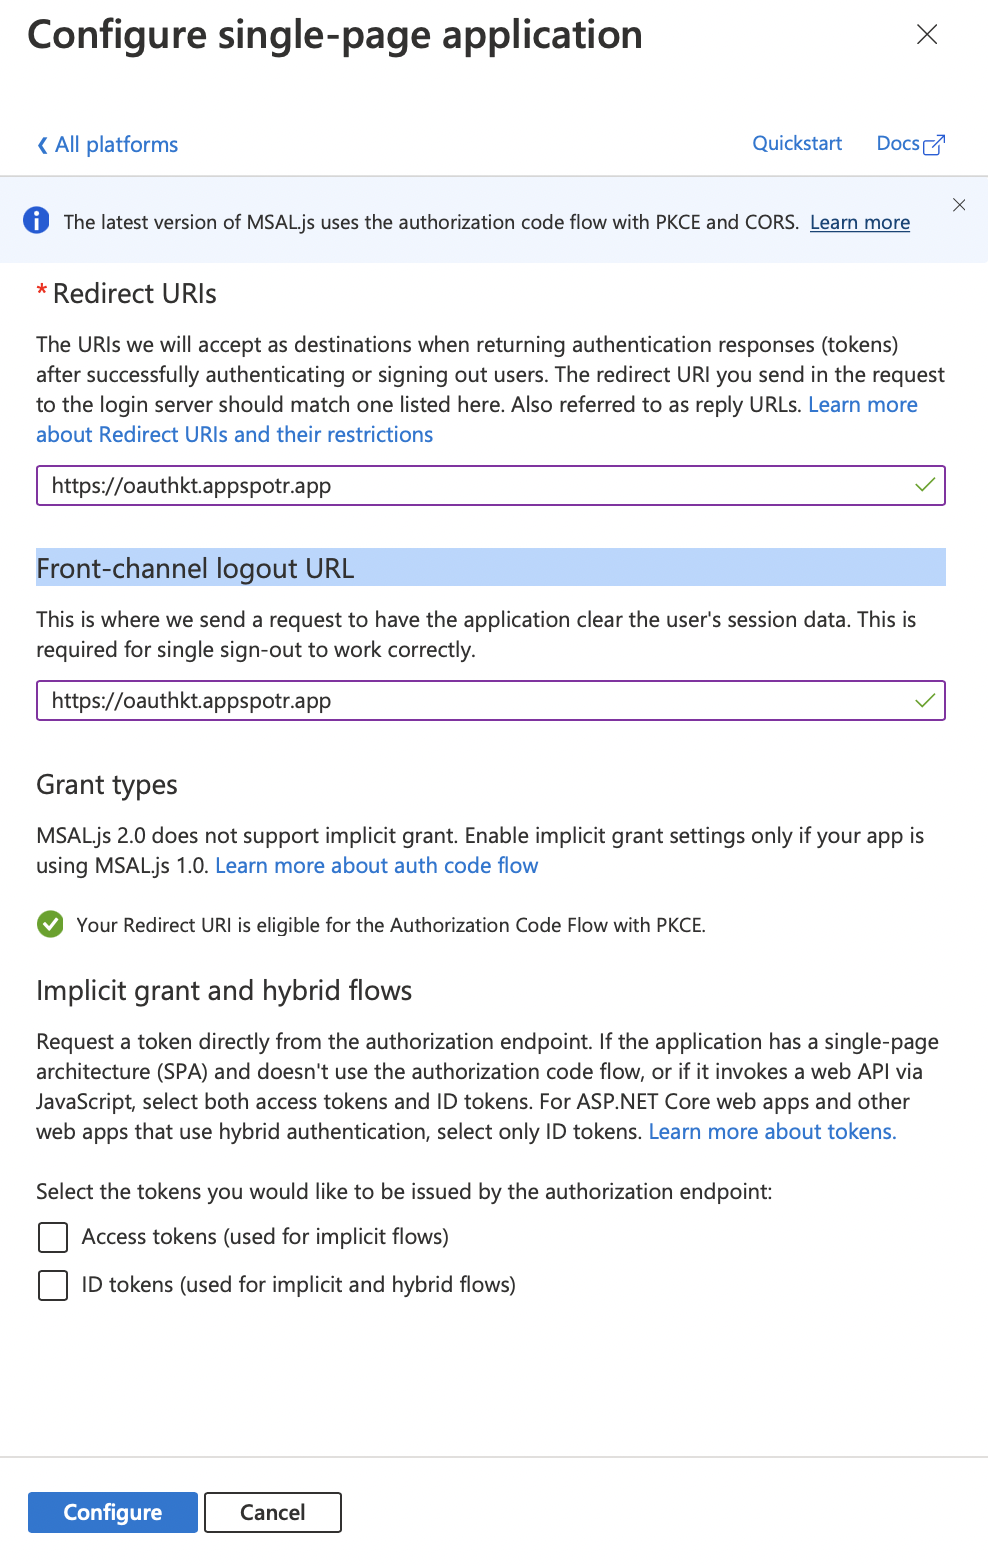
Implicit grant and hybrid flows - You can tick Access tokens and ID tokens both to use both of them in your app
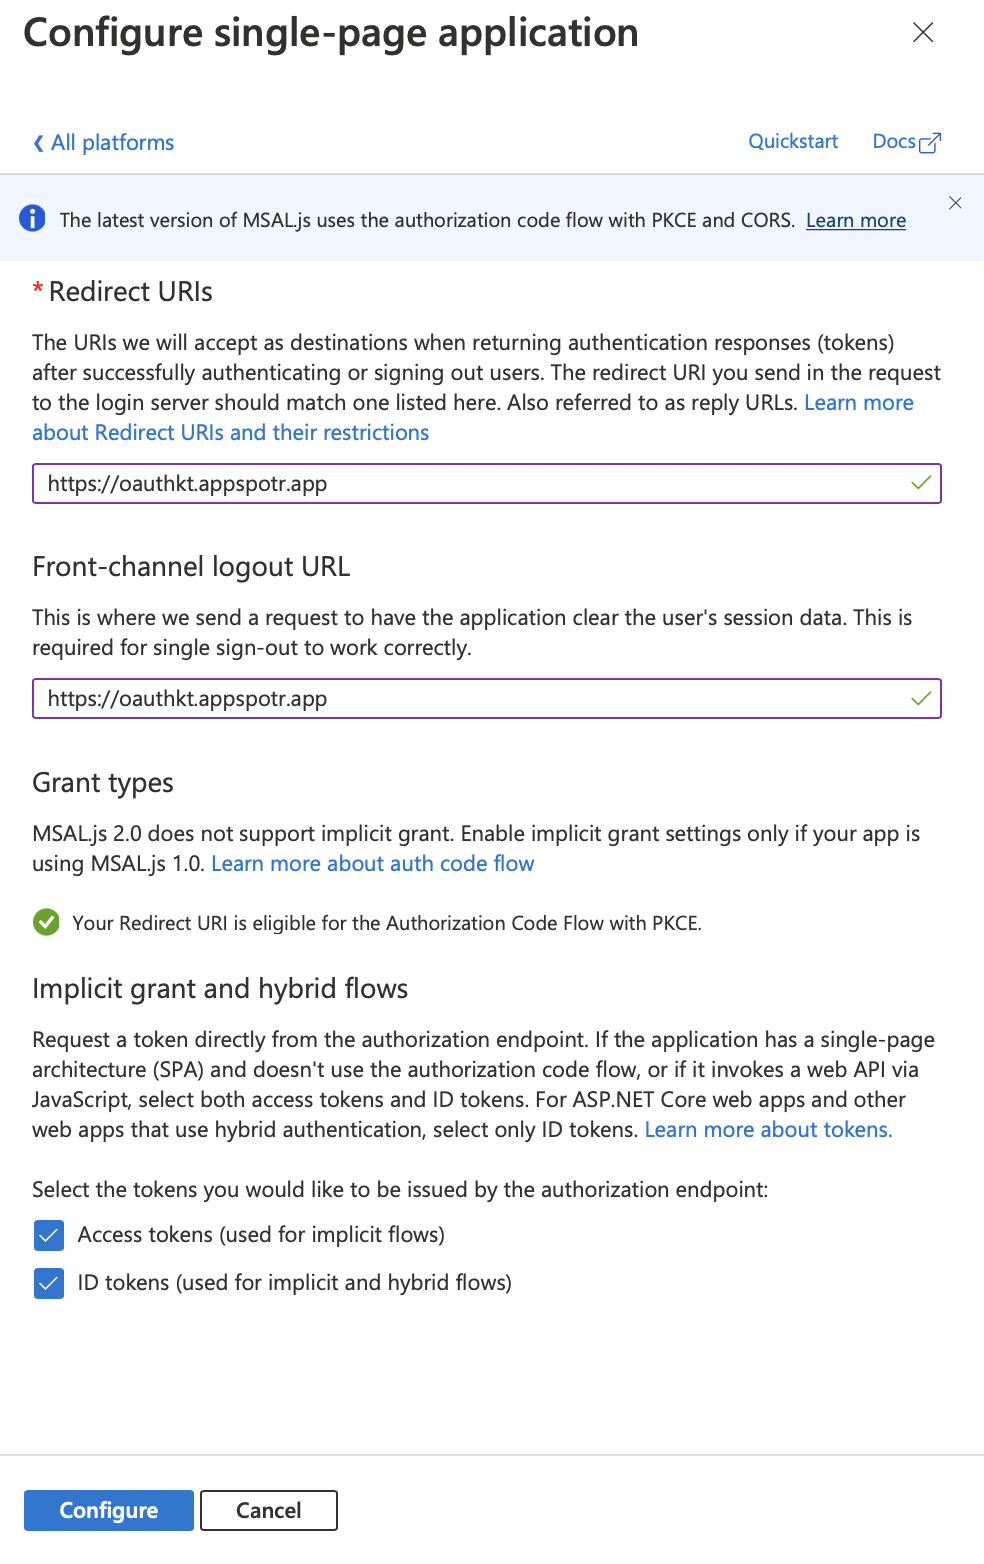
Note: The Front-channel logout URL is not mandatory to configure, but you must configure the Redirect URI. If not, then you will not be able to get the tokens which are going to be issued from the authorization endpoint.
-
Click on Configure
Client Secret for Web Applications
When it comes to configuring a web app, there’s a configuration named Client Secret. This cannot be found in configuring for iOS or Android. Now let’s see how that configuration is done.
-
Open your registered app on Azure
-
Click on Client Credentials

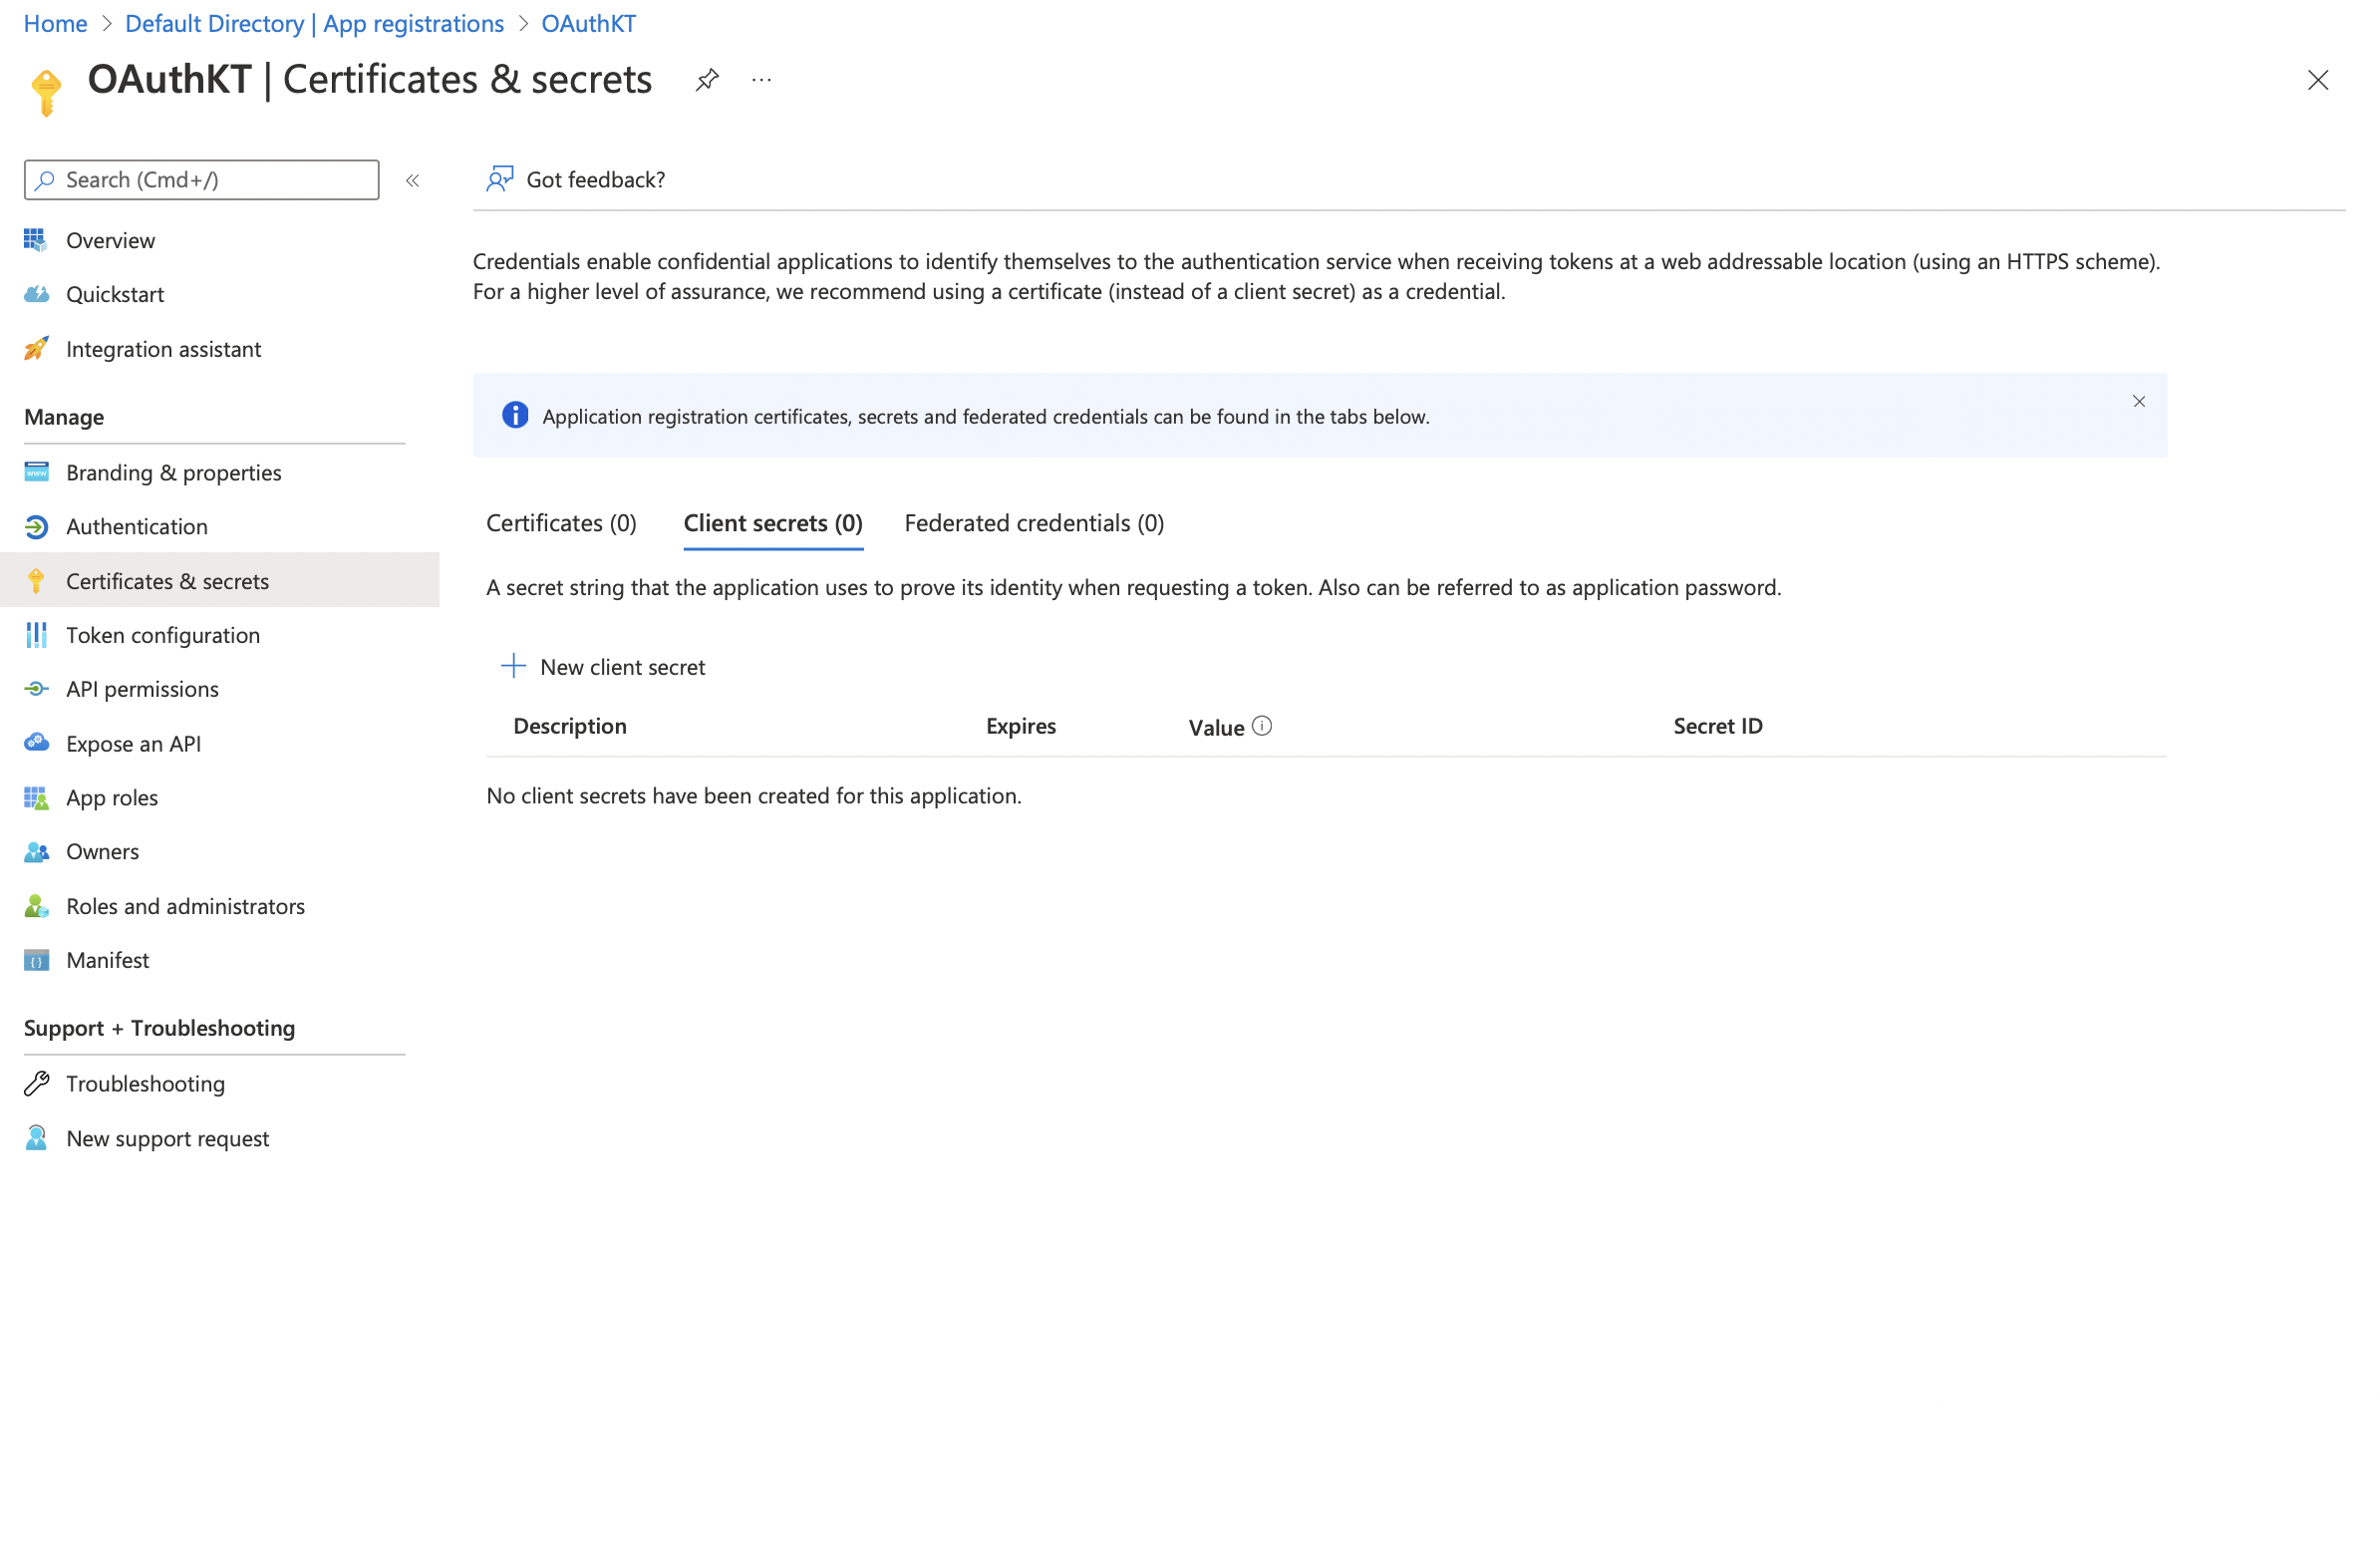
-
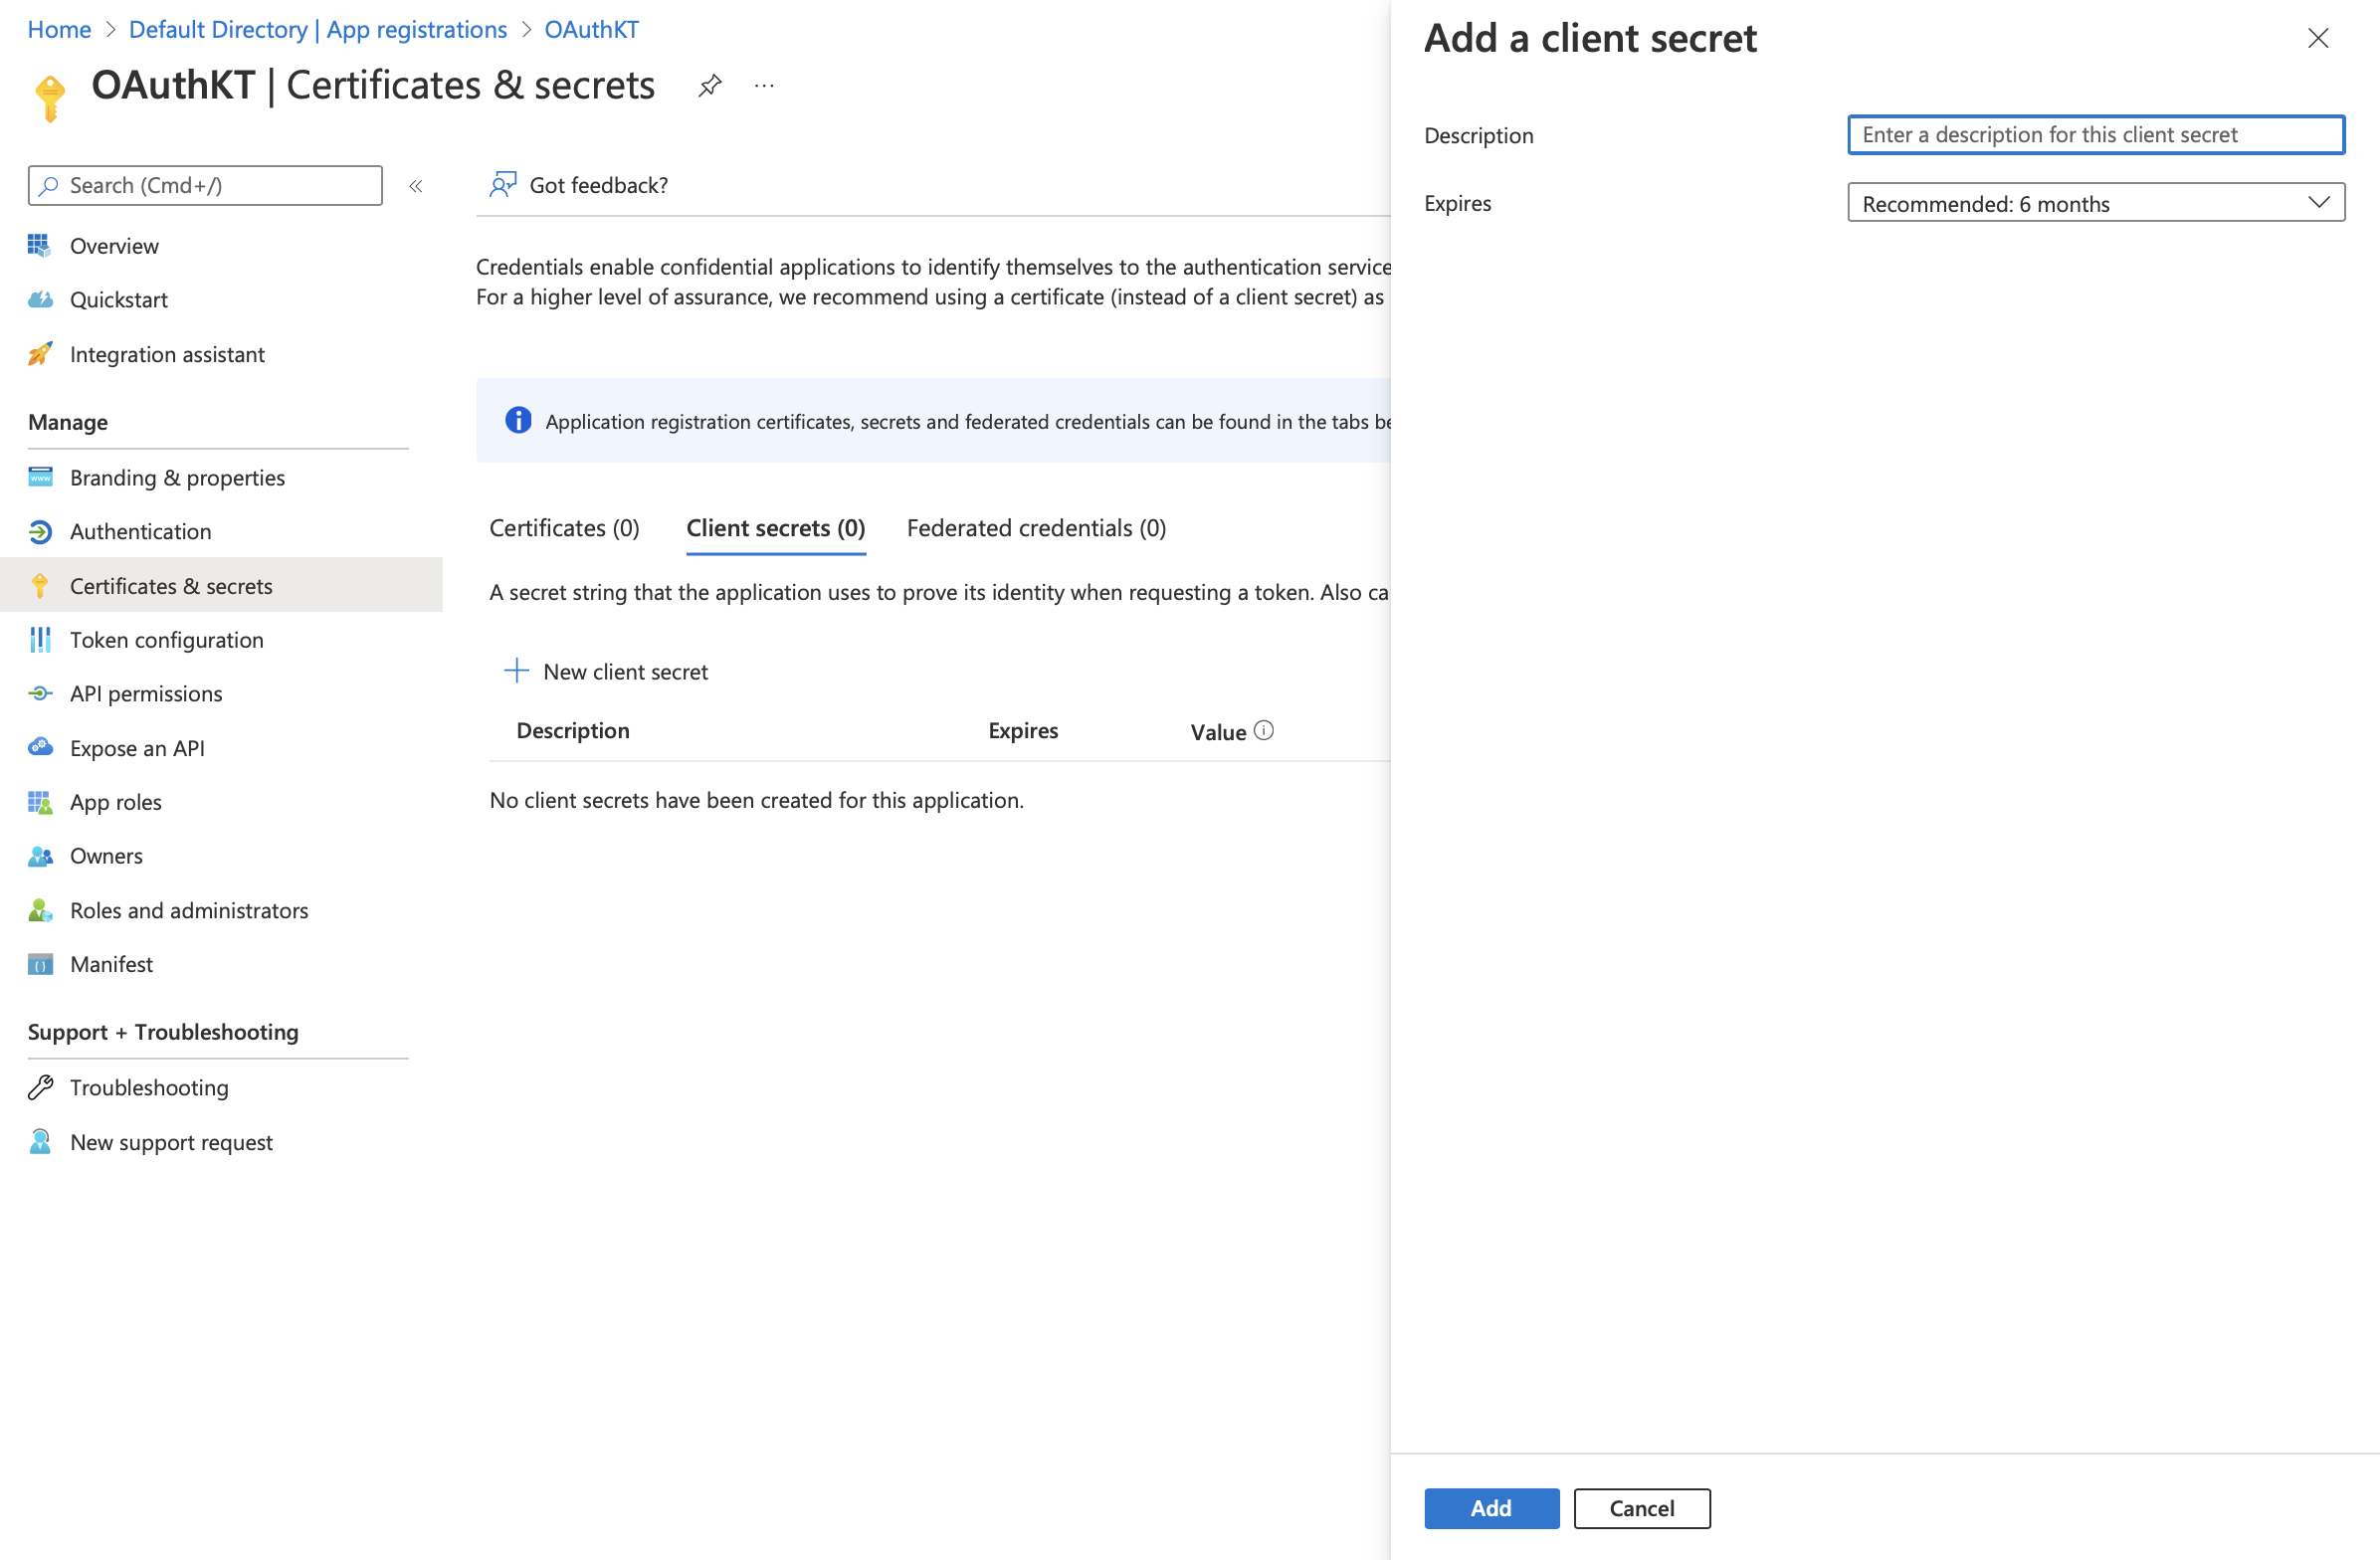
Click on Client Secret > New Client Secret Now you can create a new client secret here.
-
Add the Description and the Expiration time according to your requirement
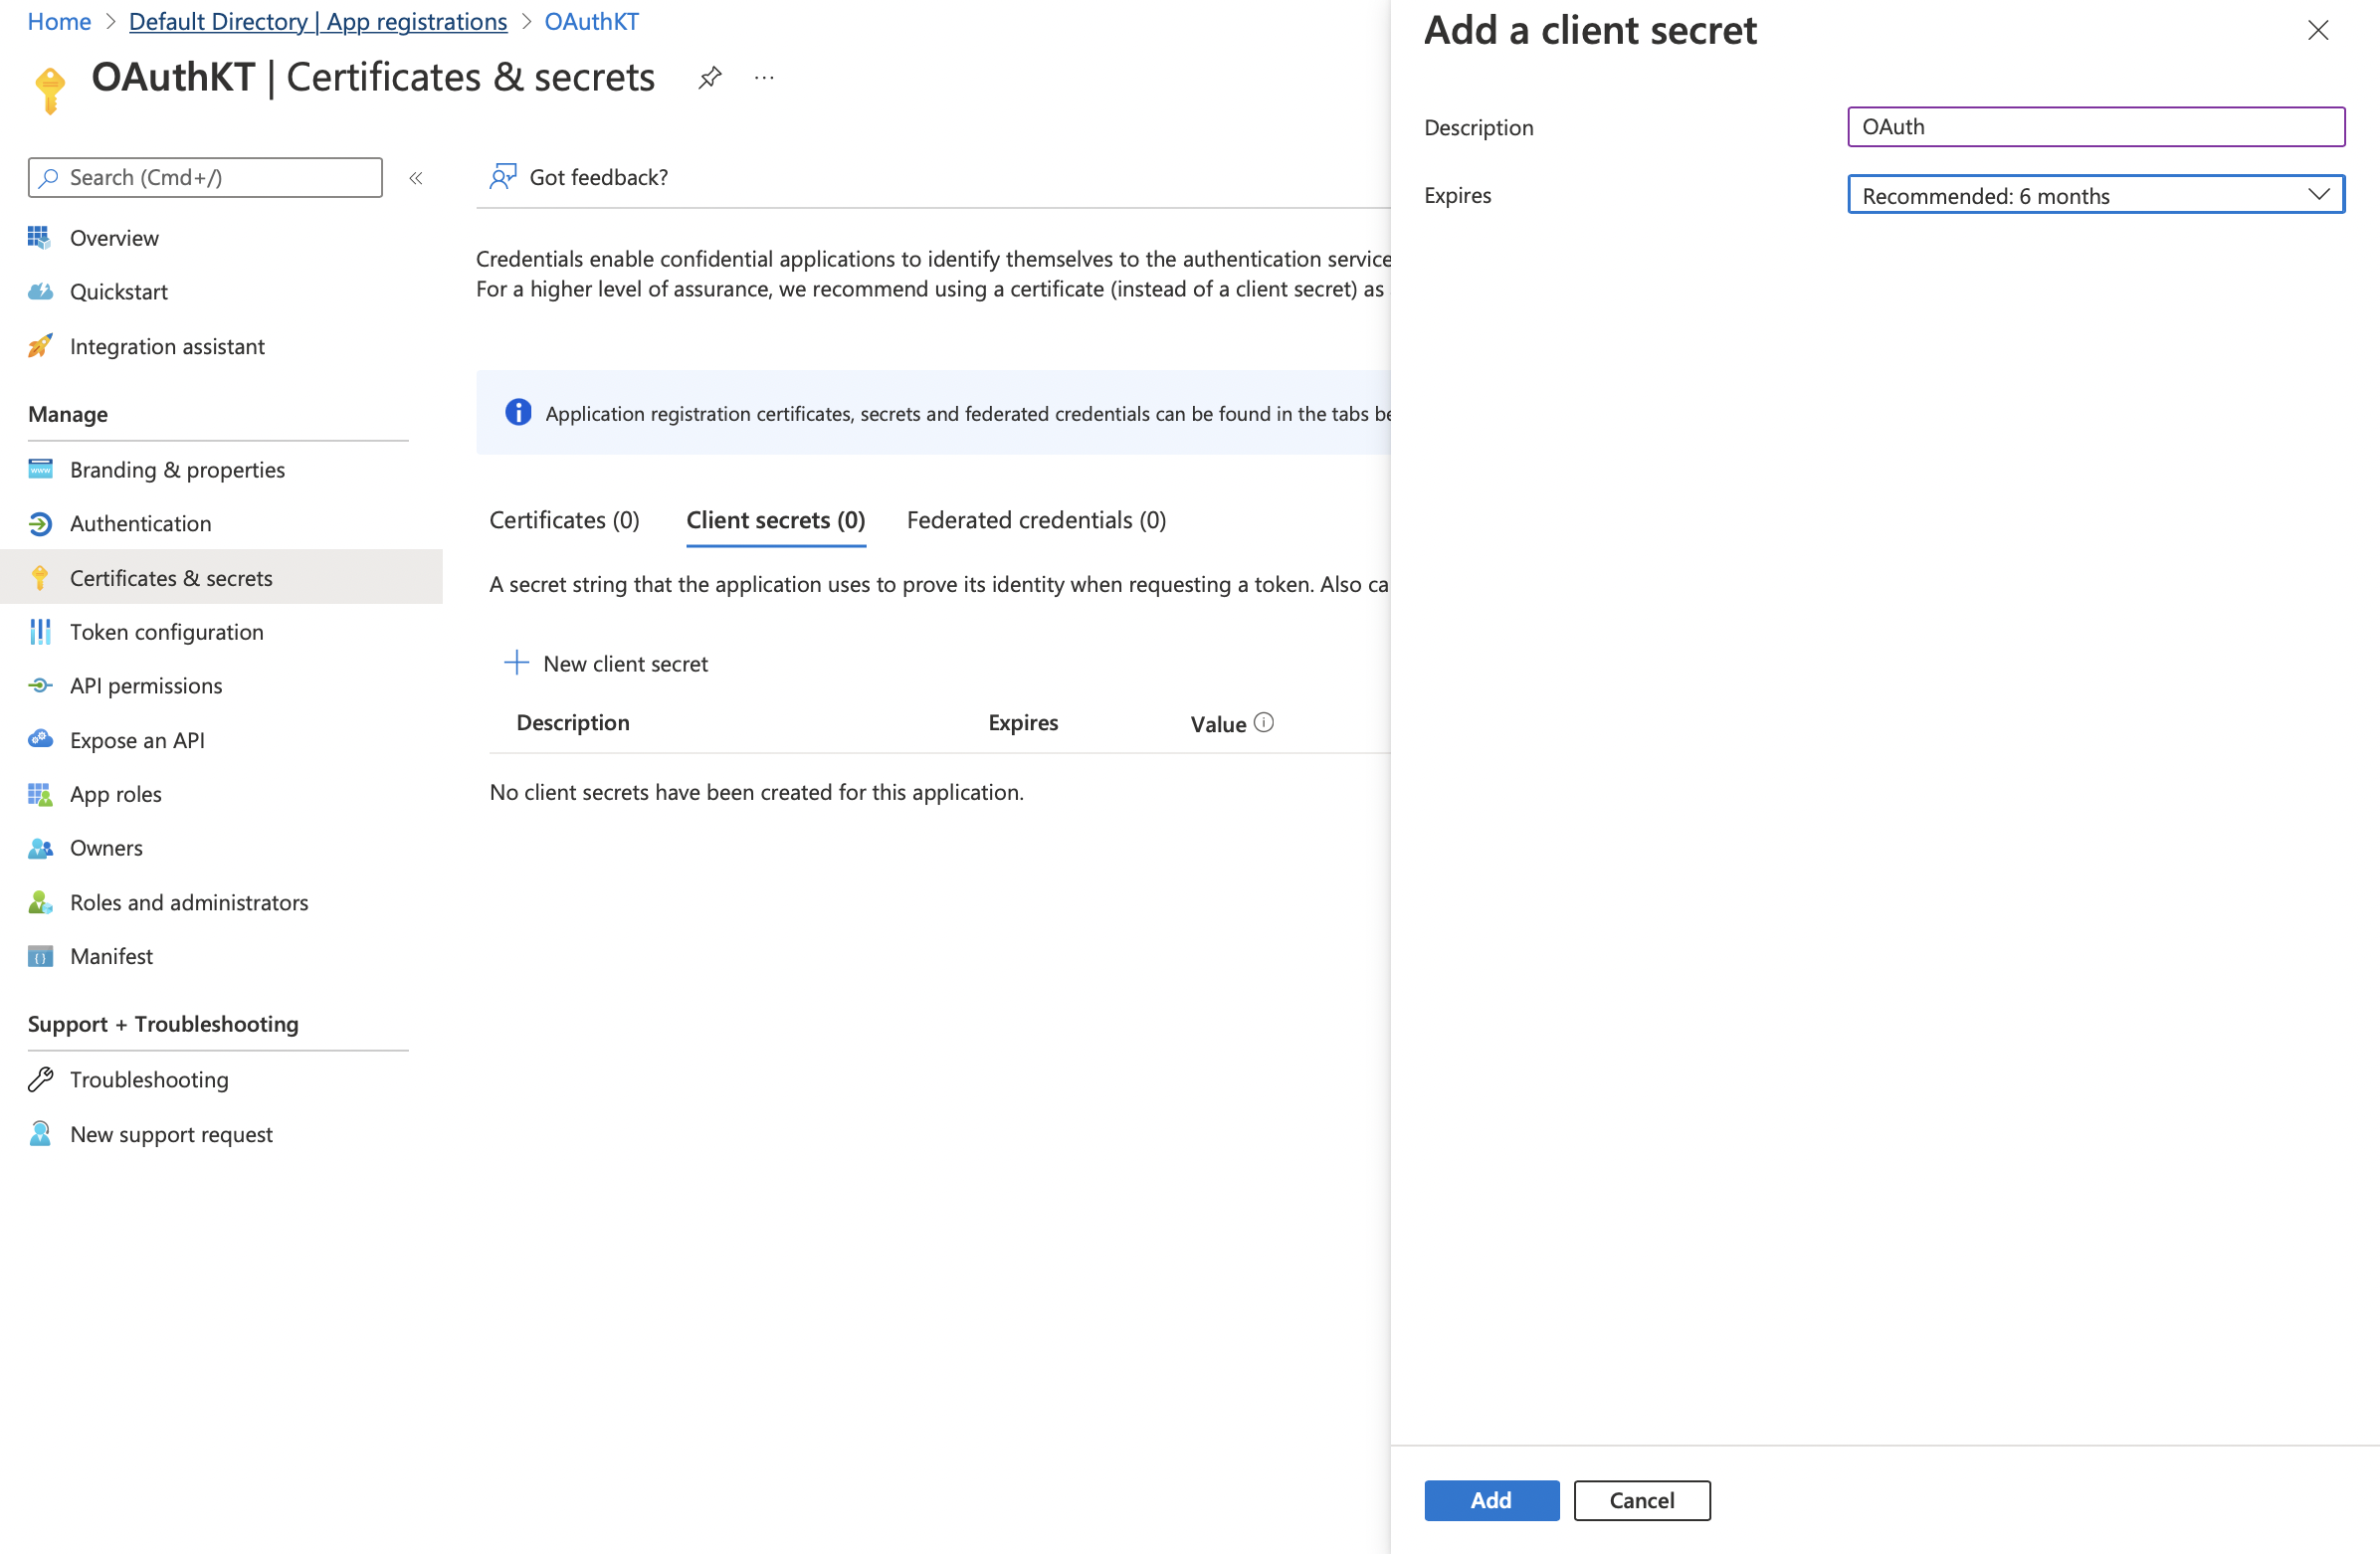
-
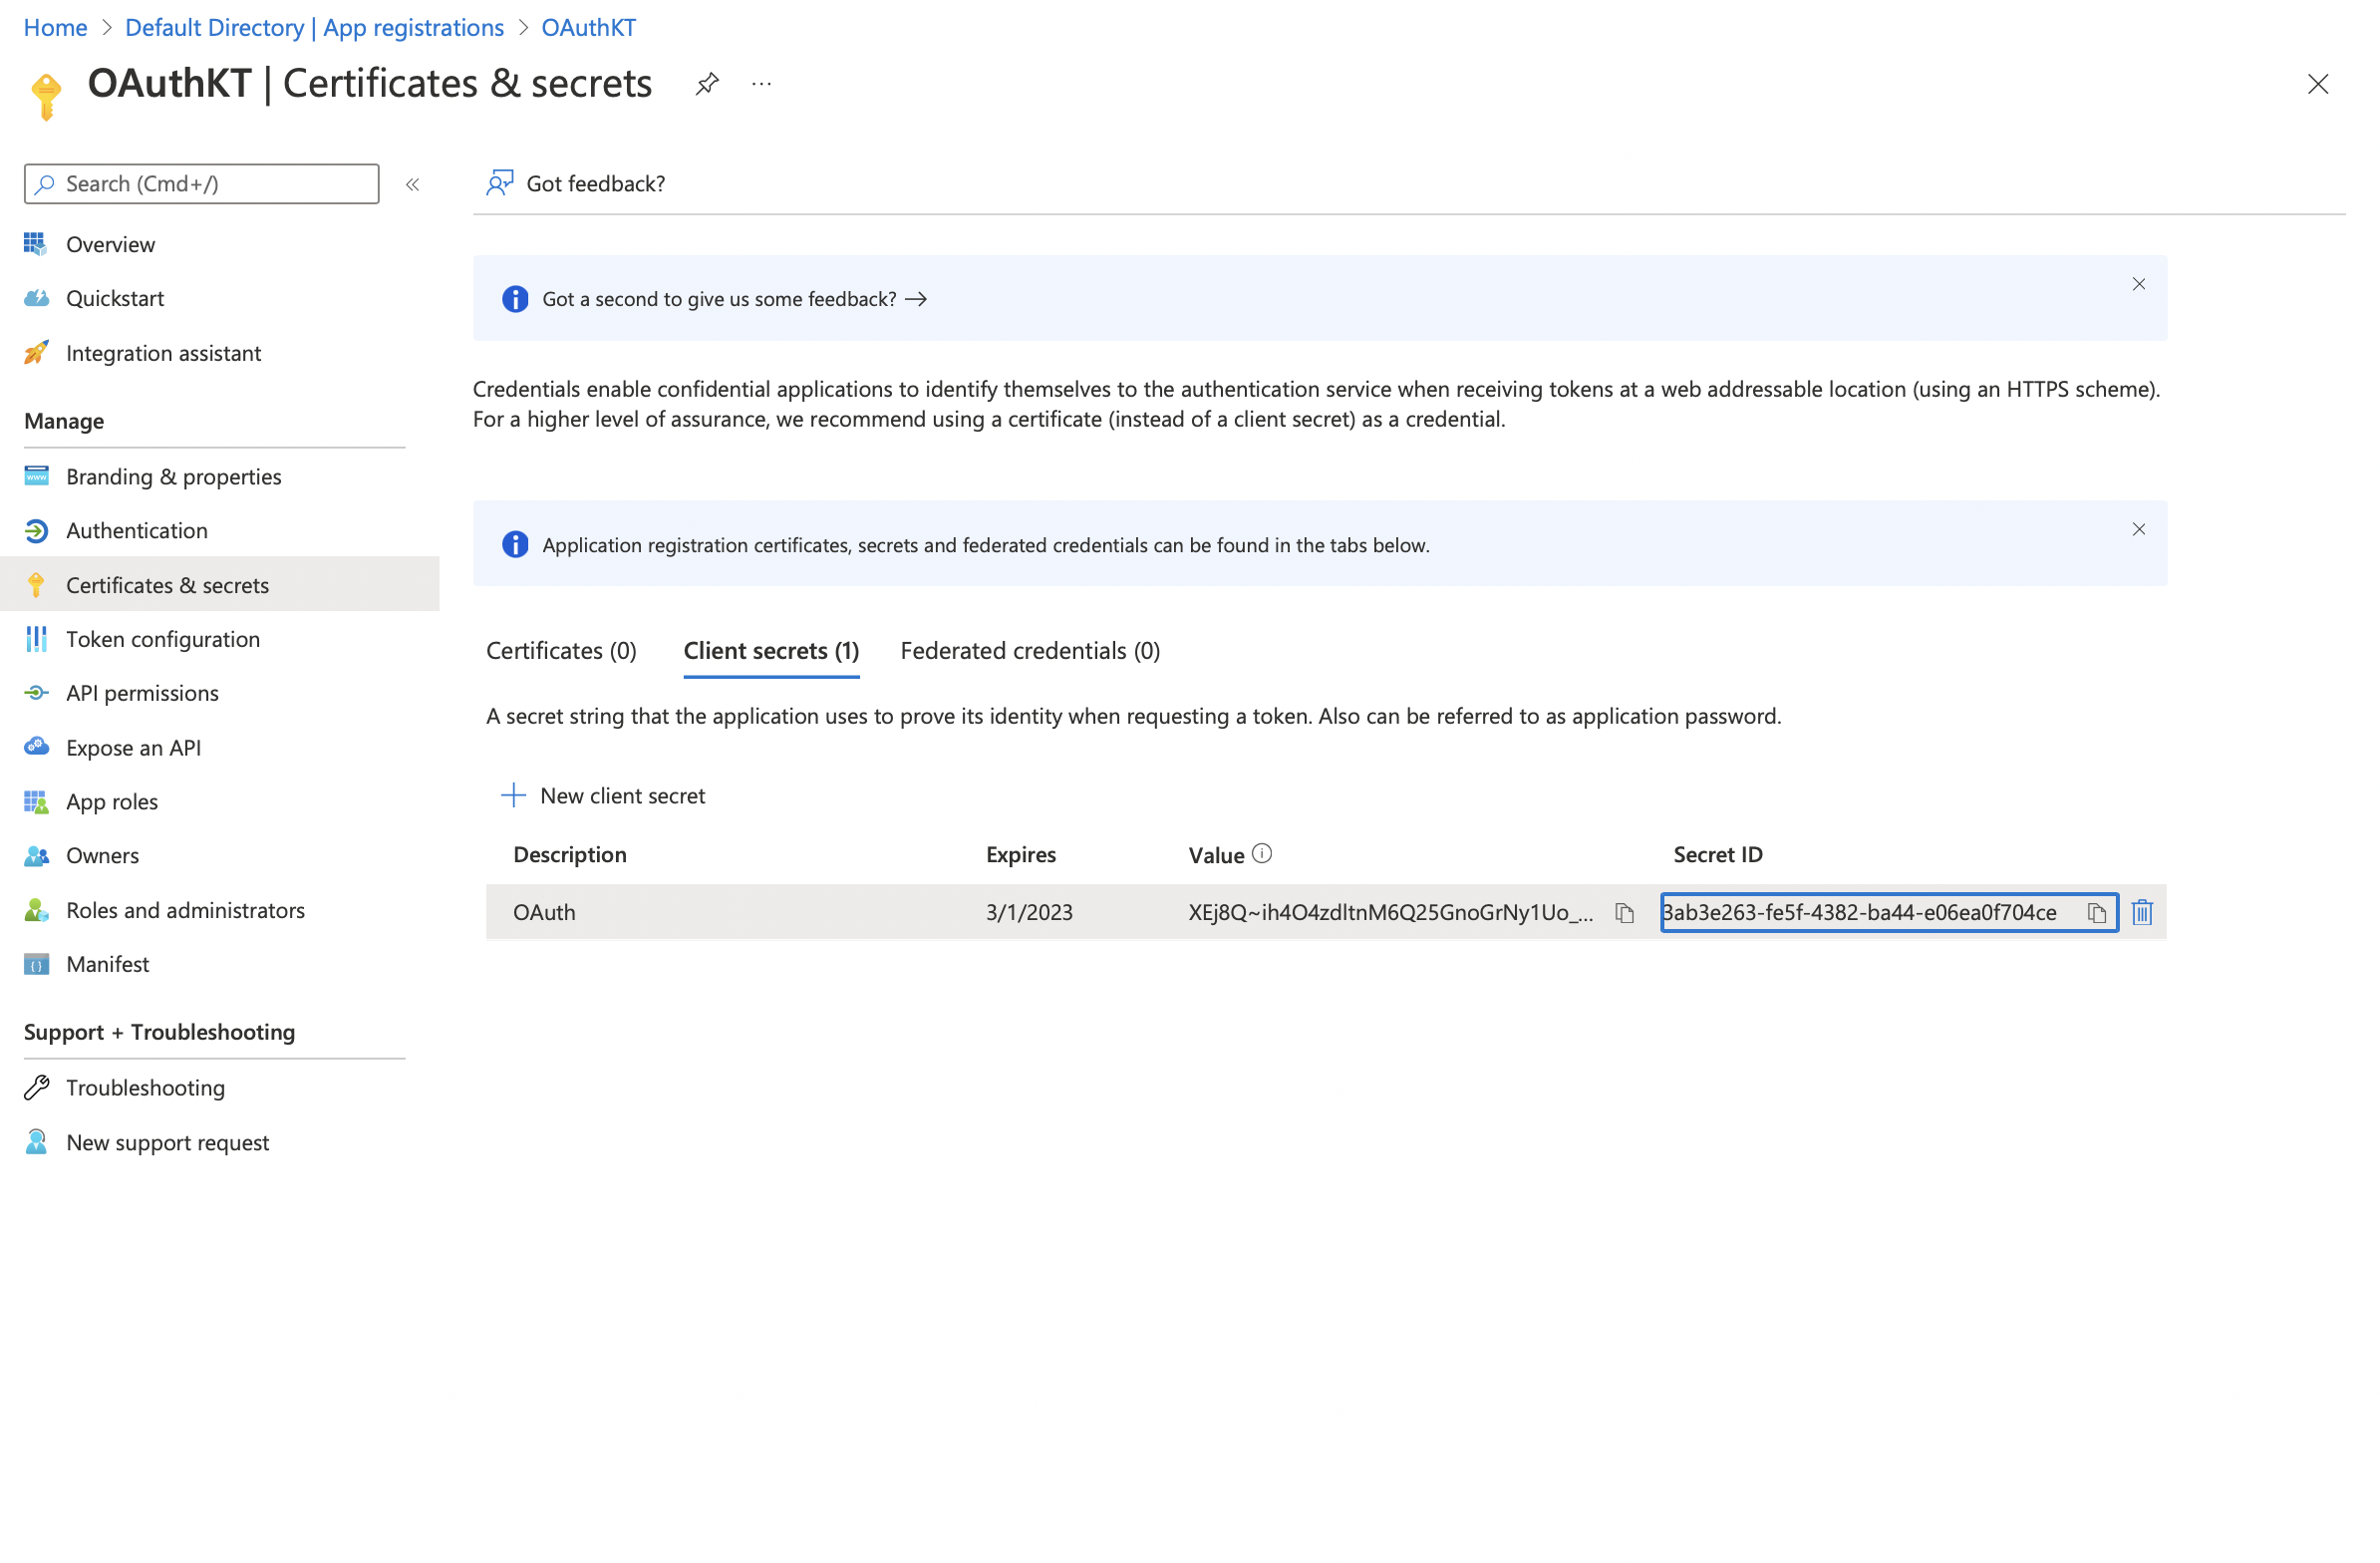
Click on Add - Once added you will be able to view the new Client Secret under the Client Secrets
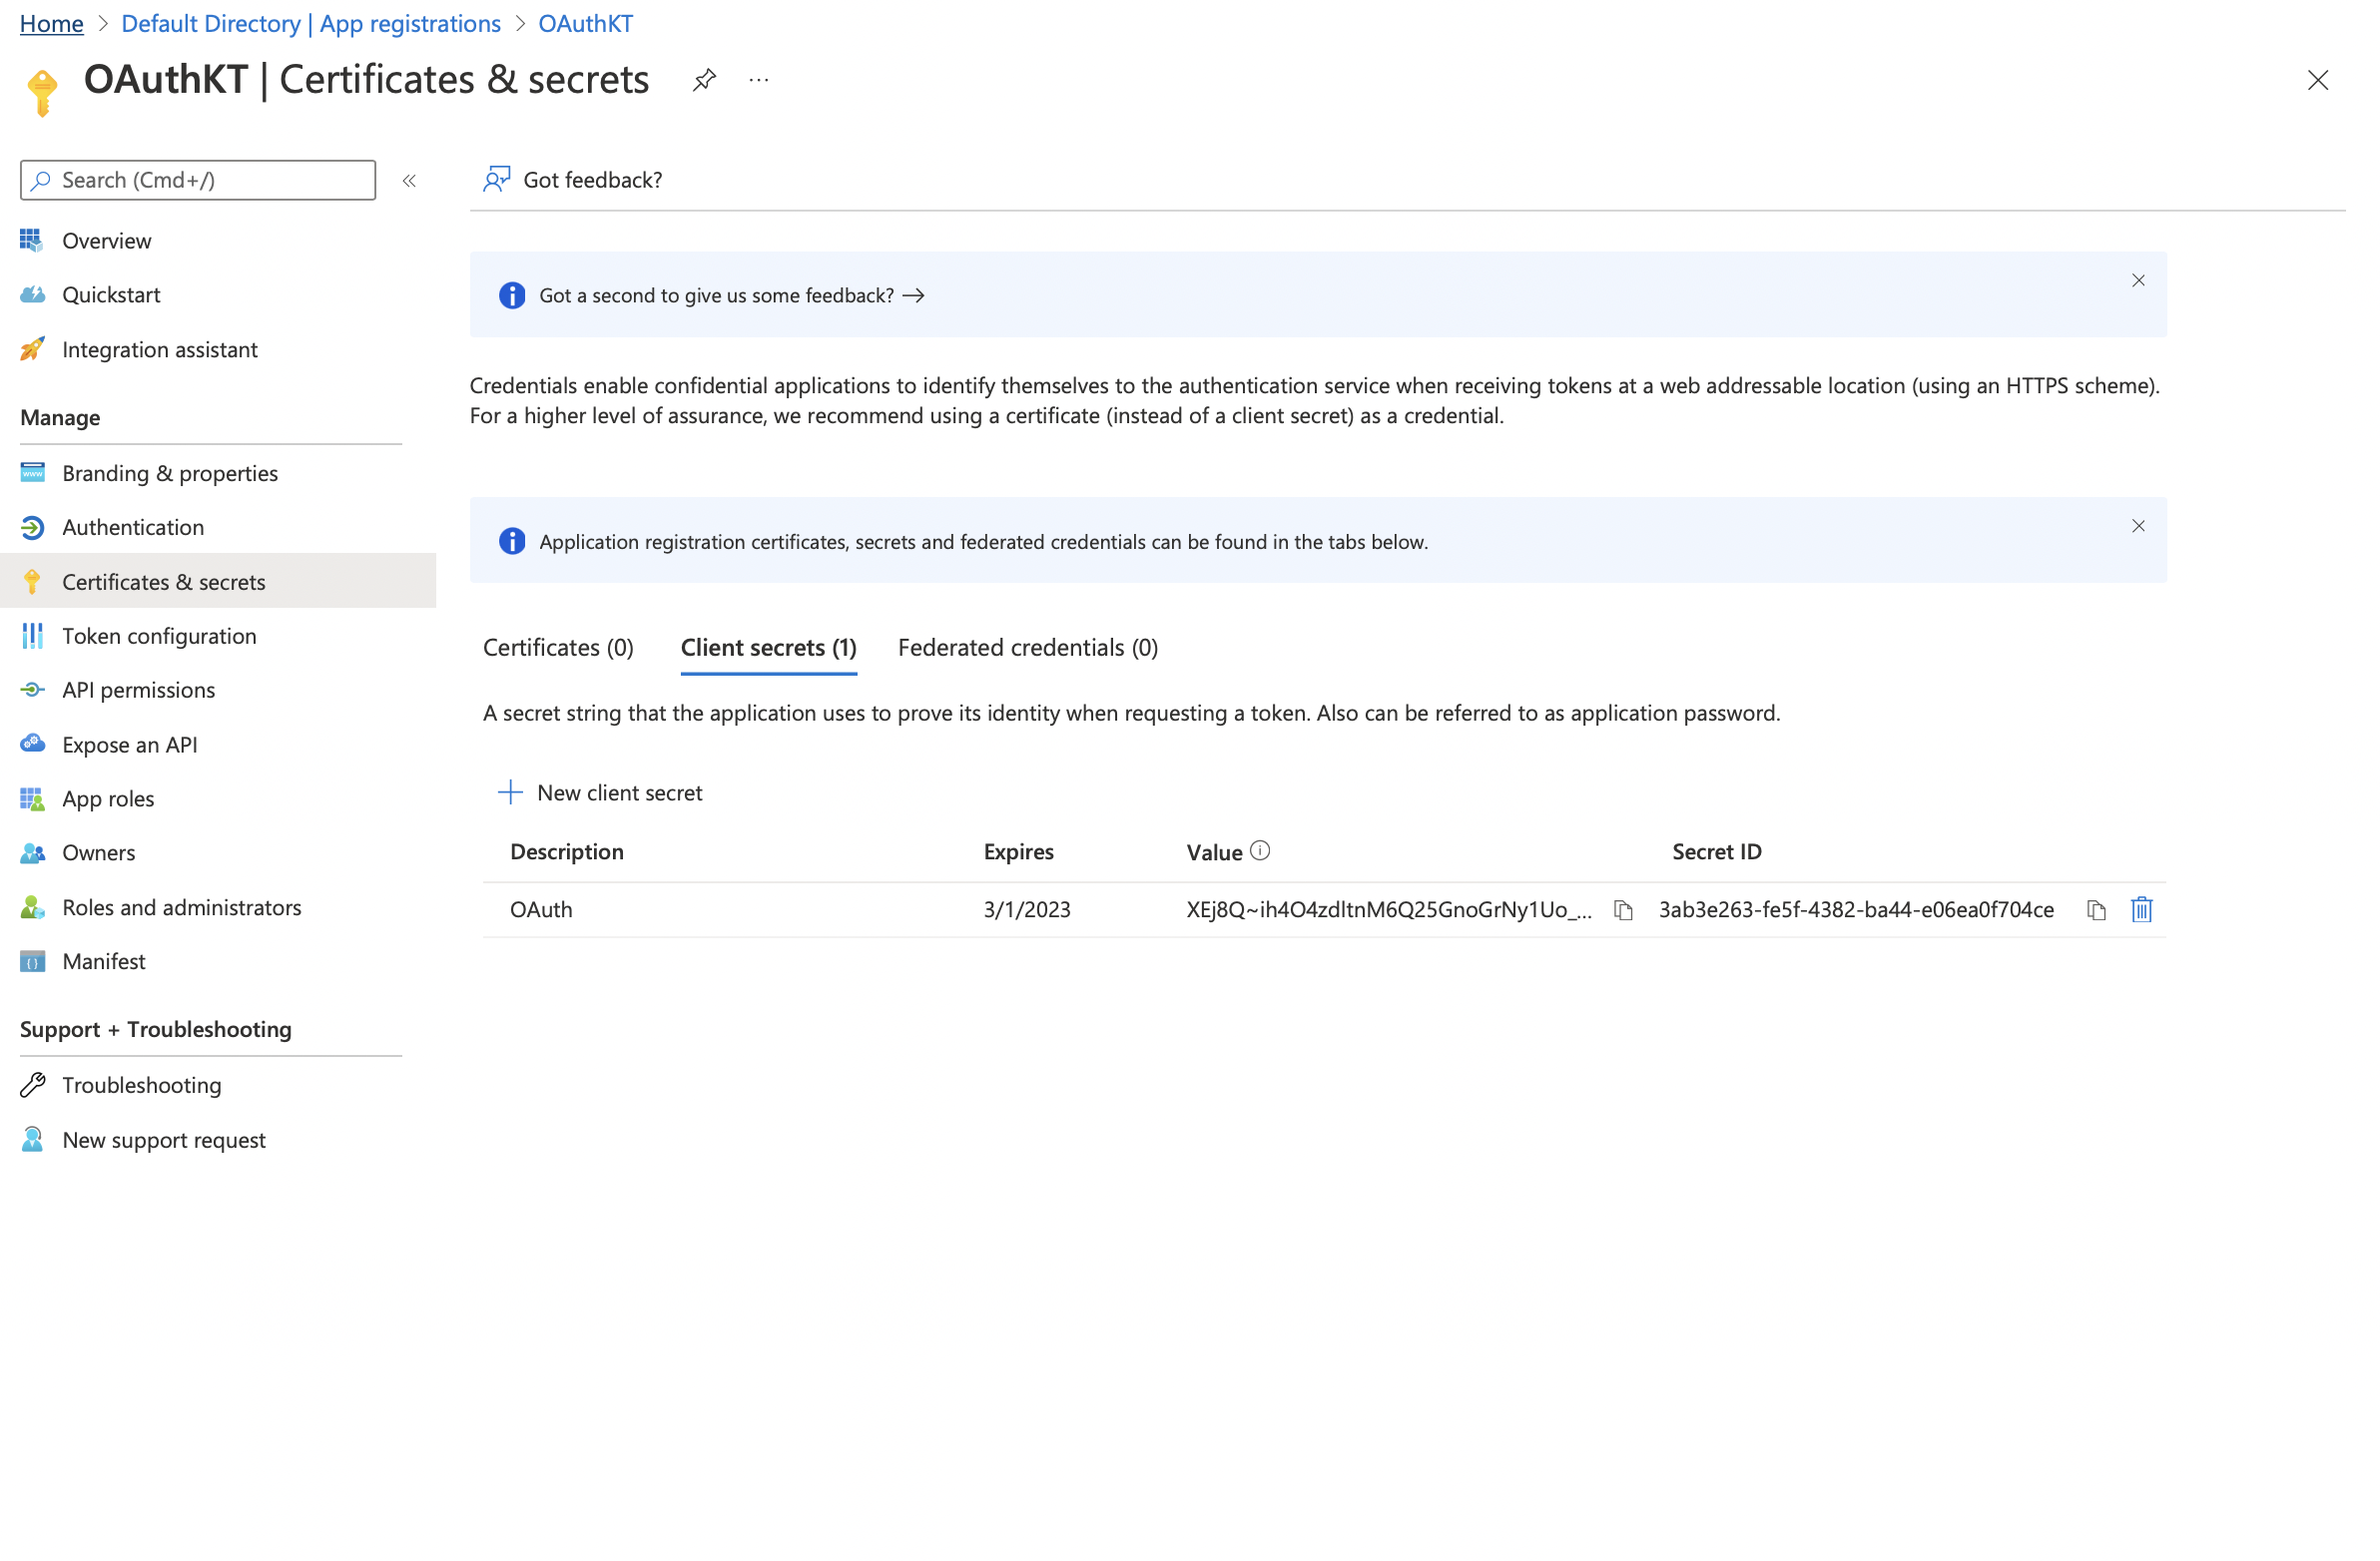
Copy and paste the Secret ID in your app configuration field
Adding a user to the App
Each user that is going to access your app have to have access to the registered app. Now let’s see how to add a new user to this registered app.
-
Open Azure portal and click on Users
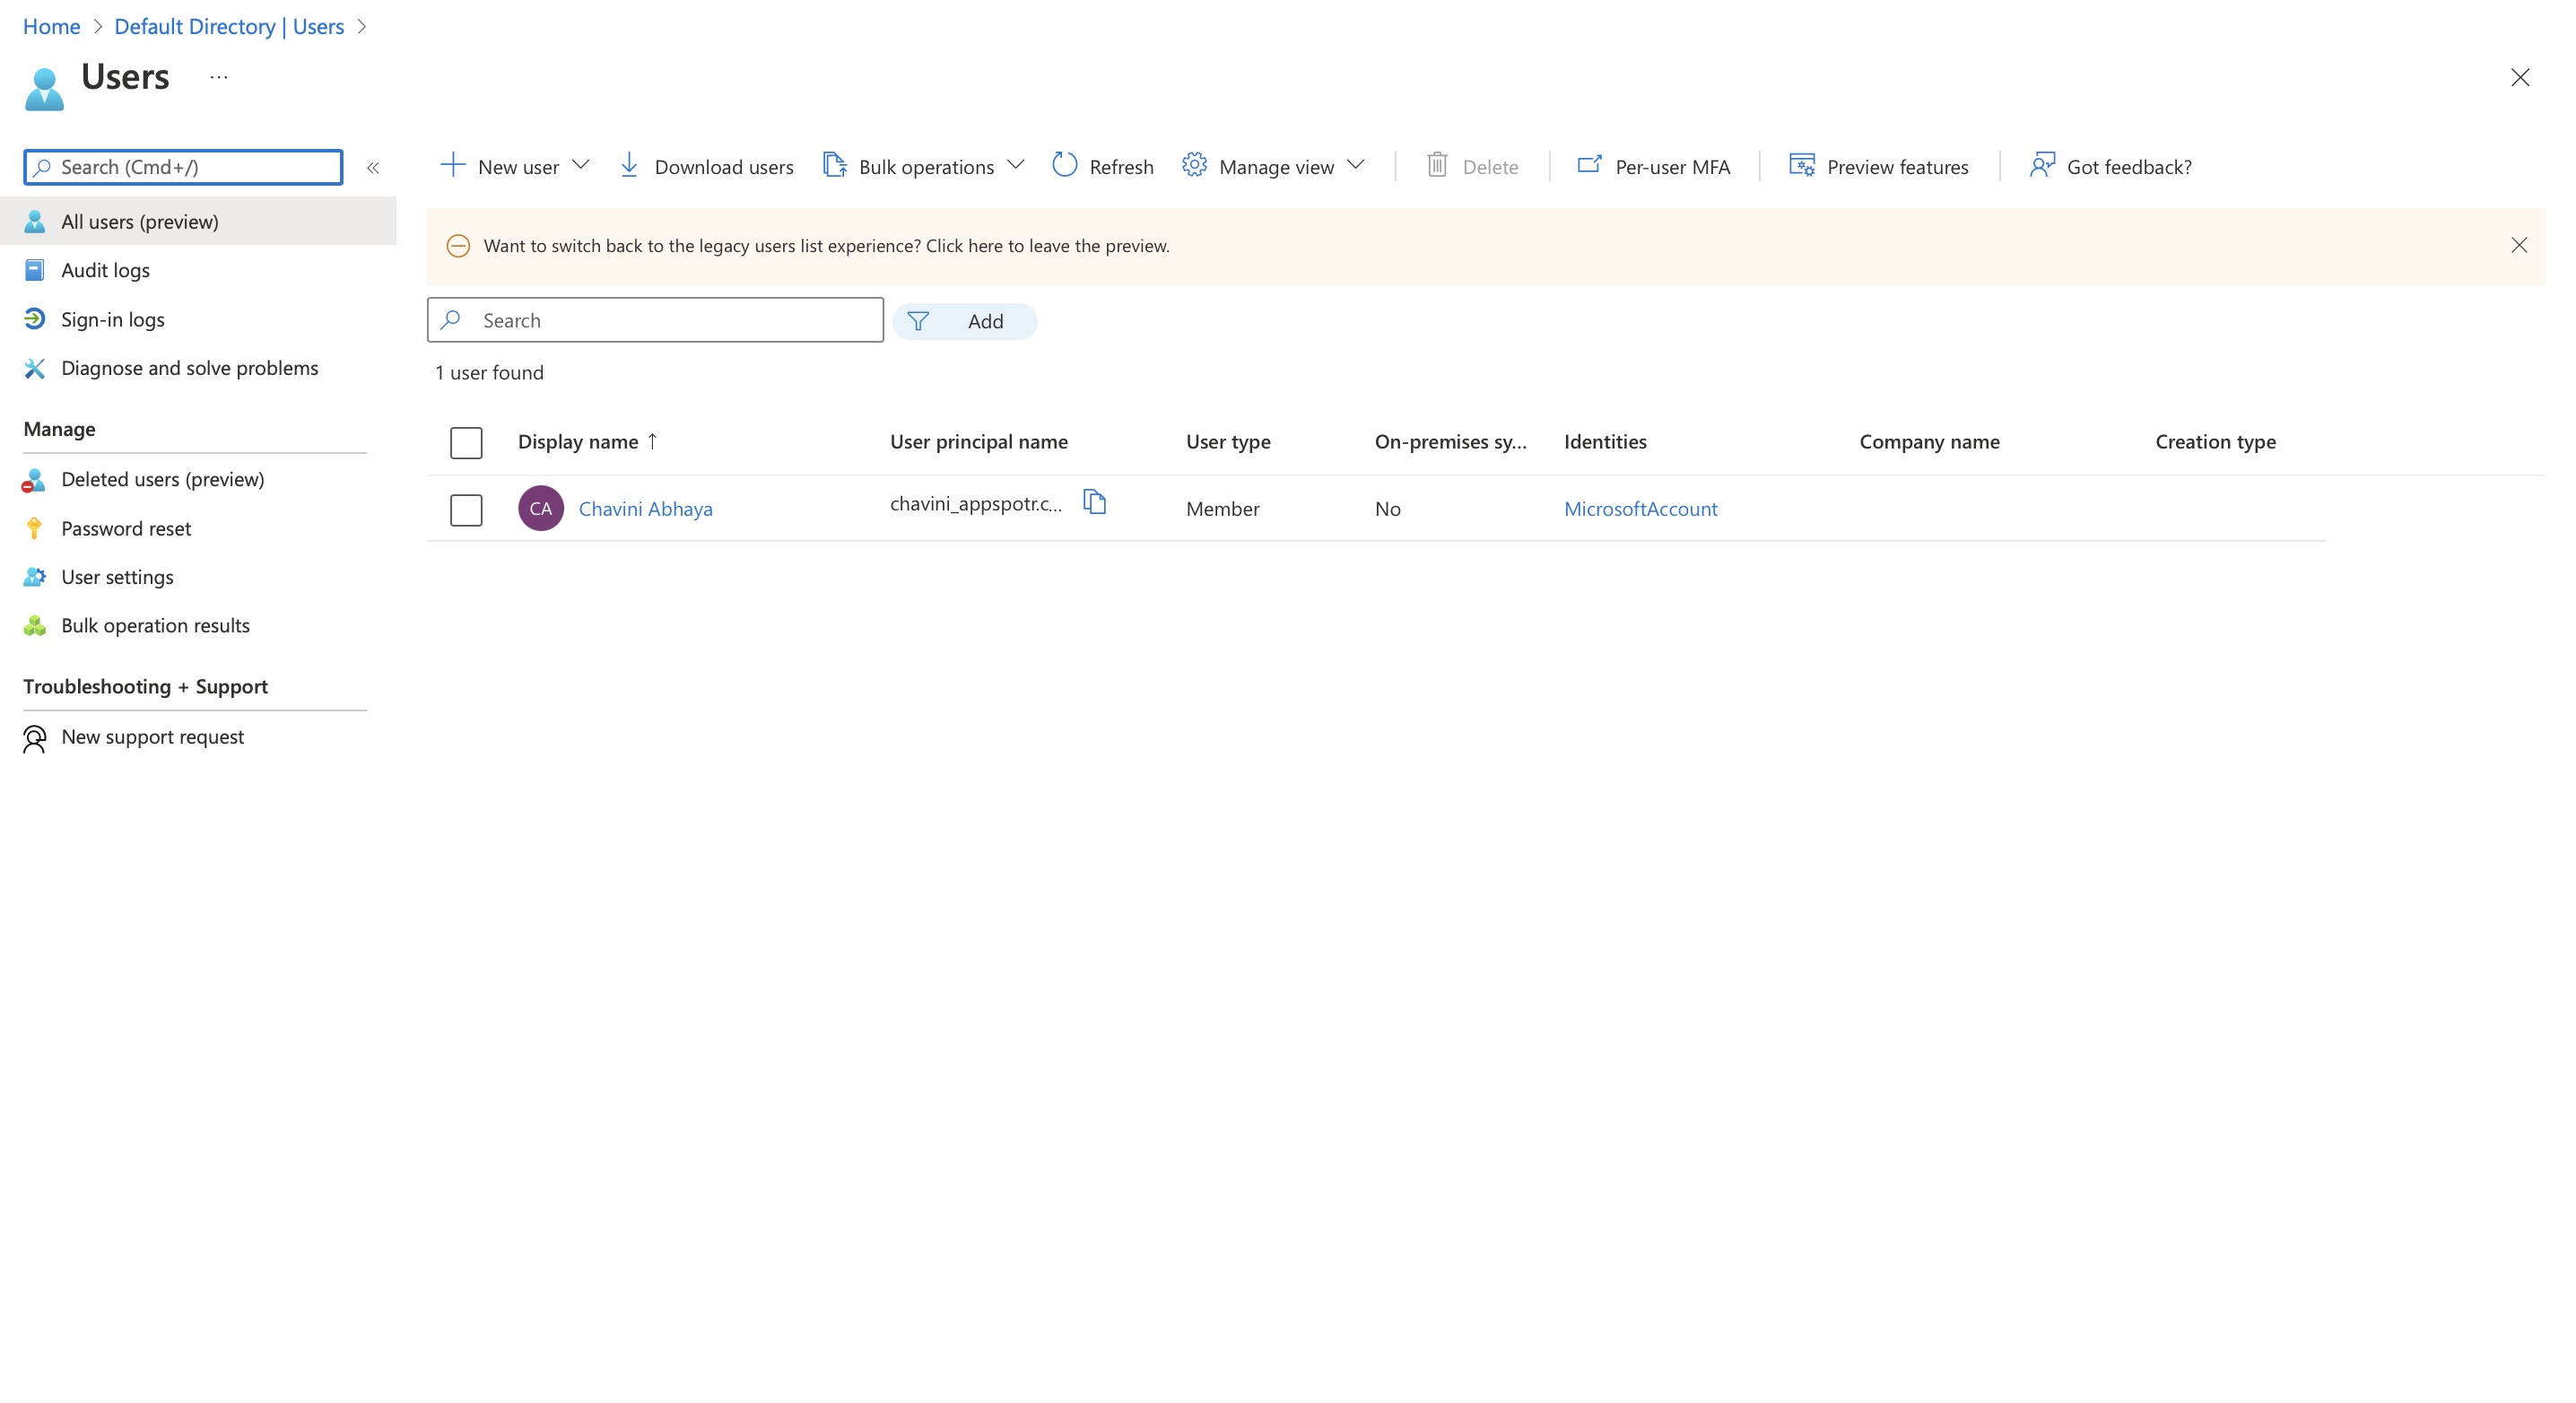
-
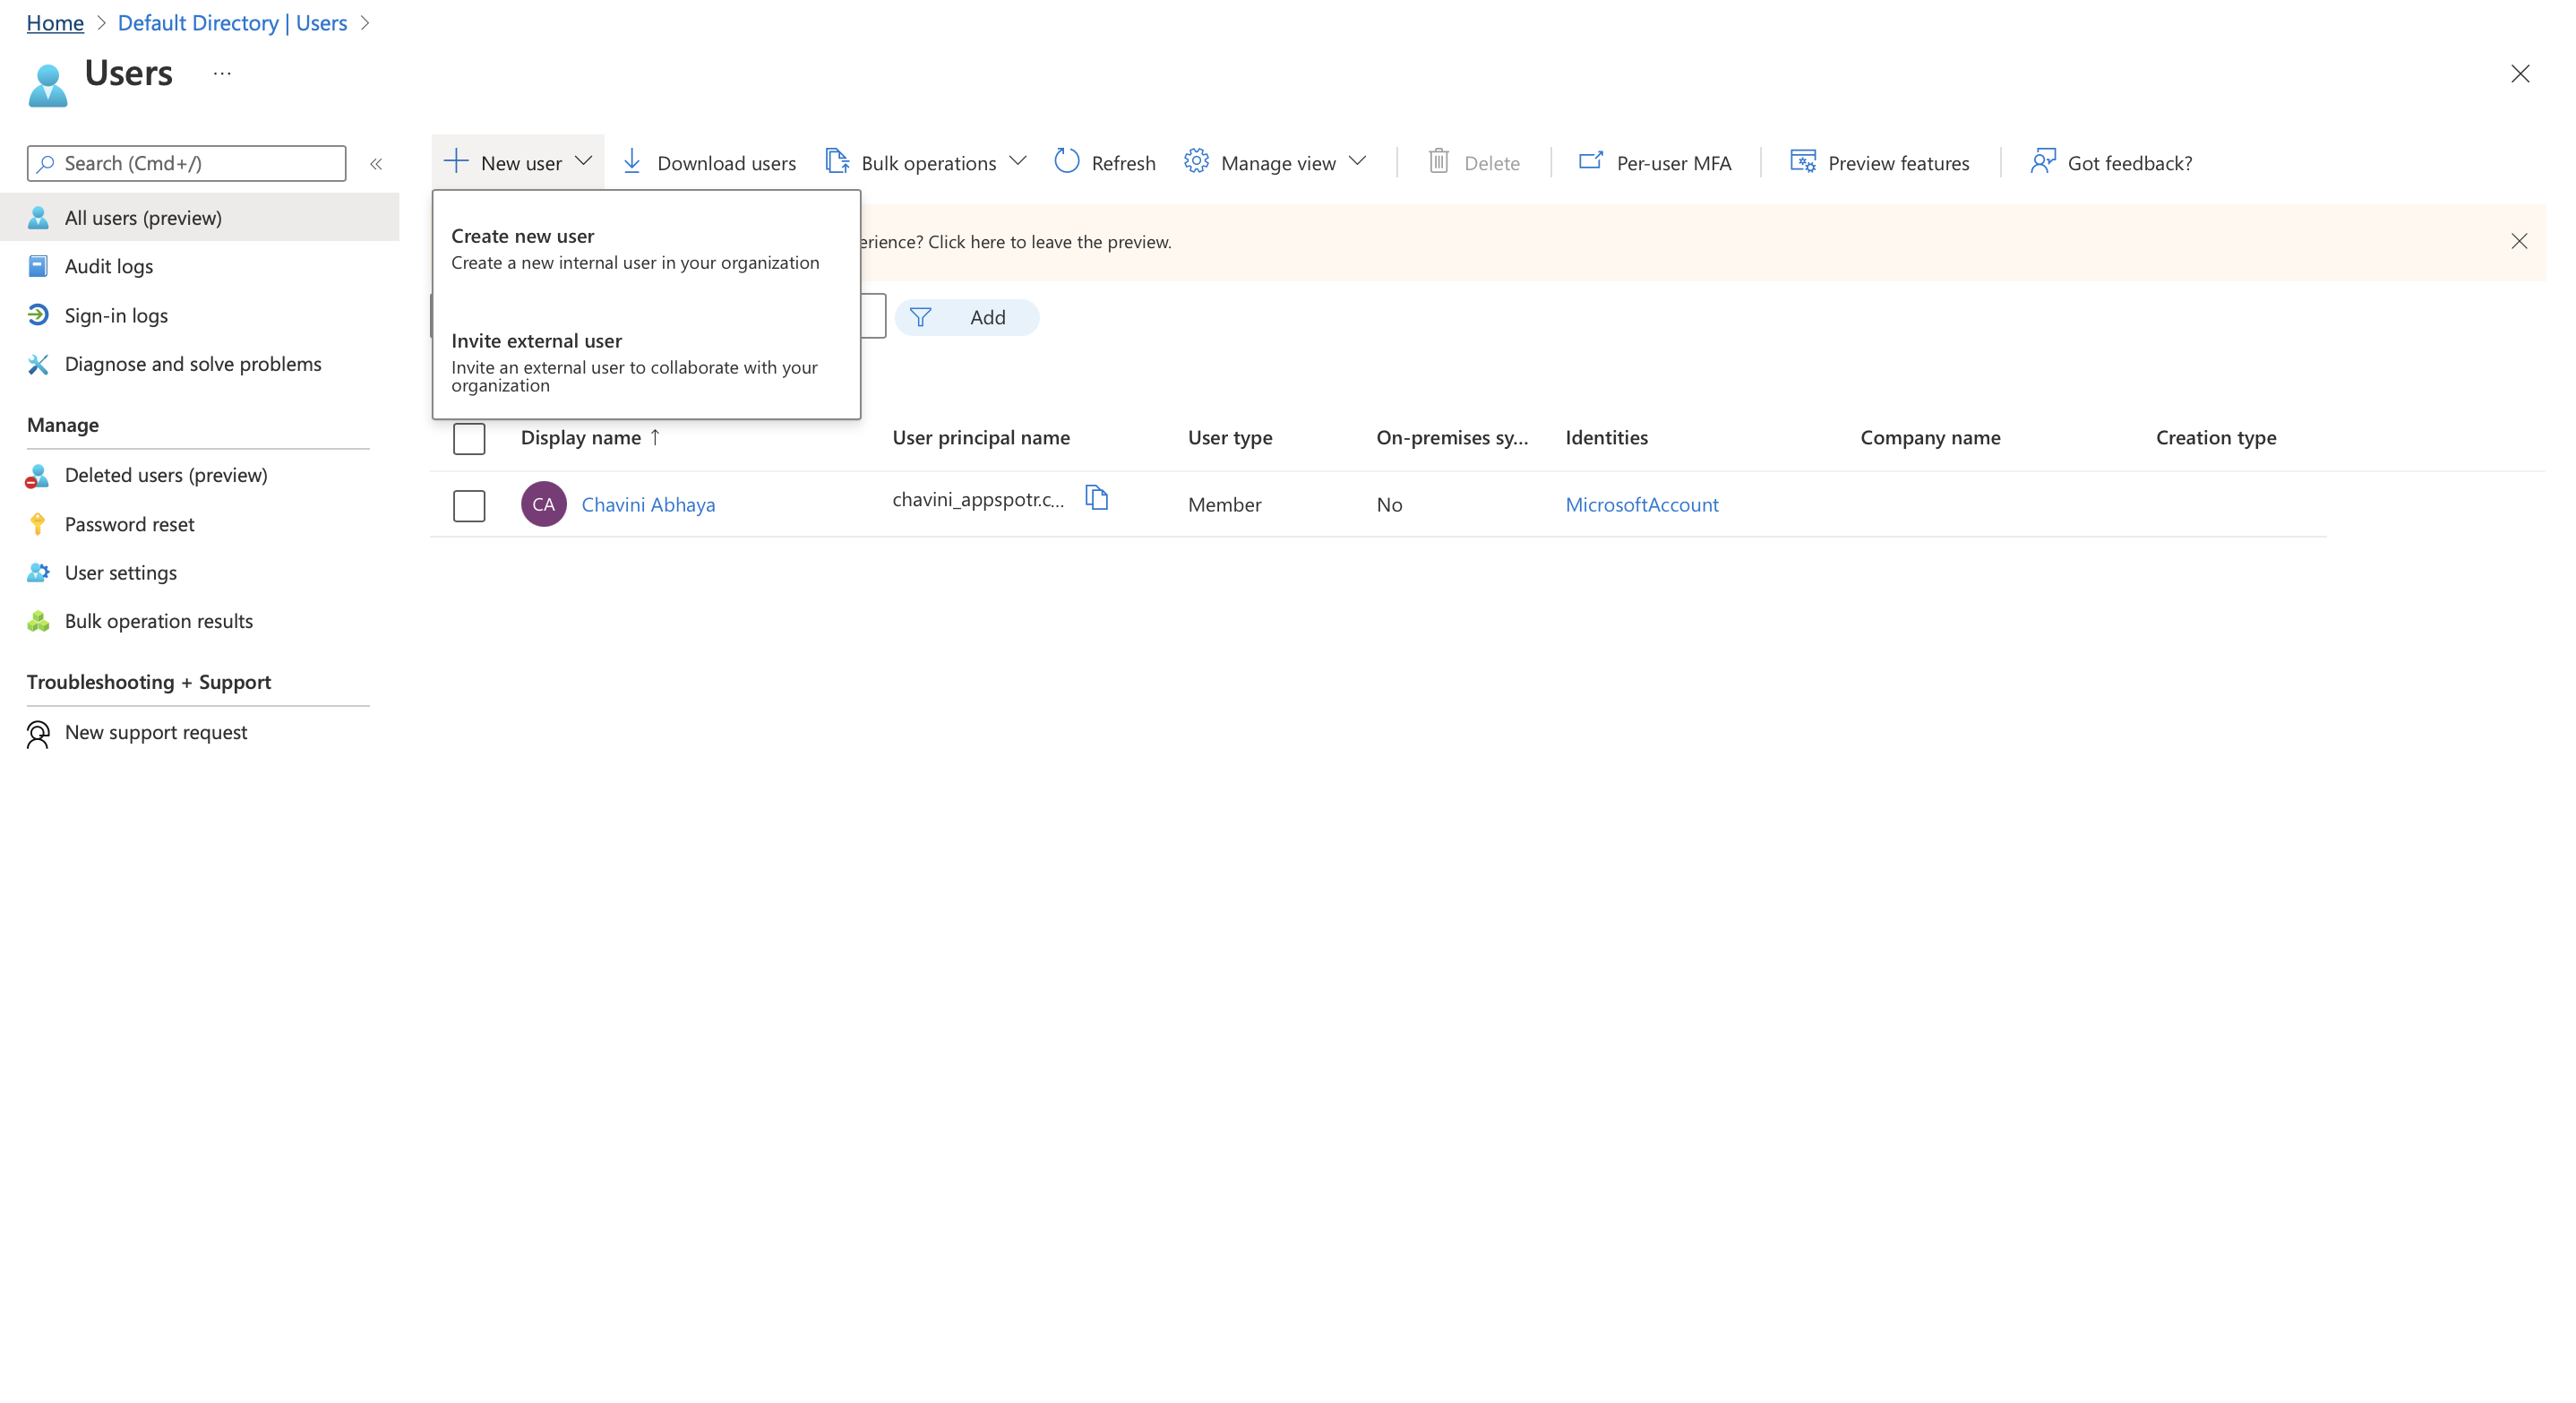
Click on +New User to add a new user
You can either create a new user or invite an external user here.
Fill in the fields according to your requirement
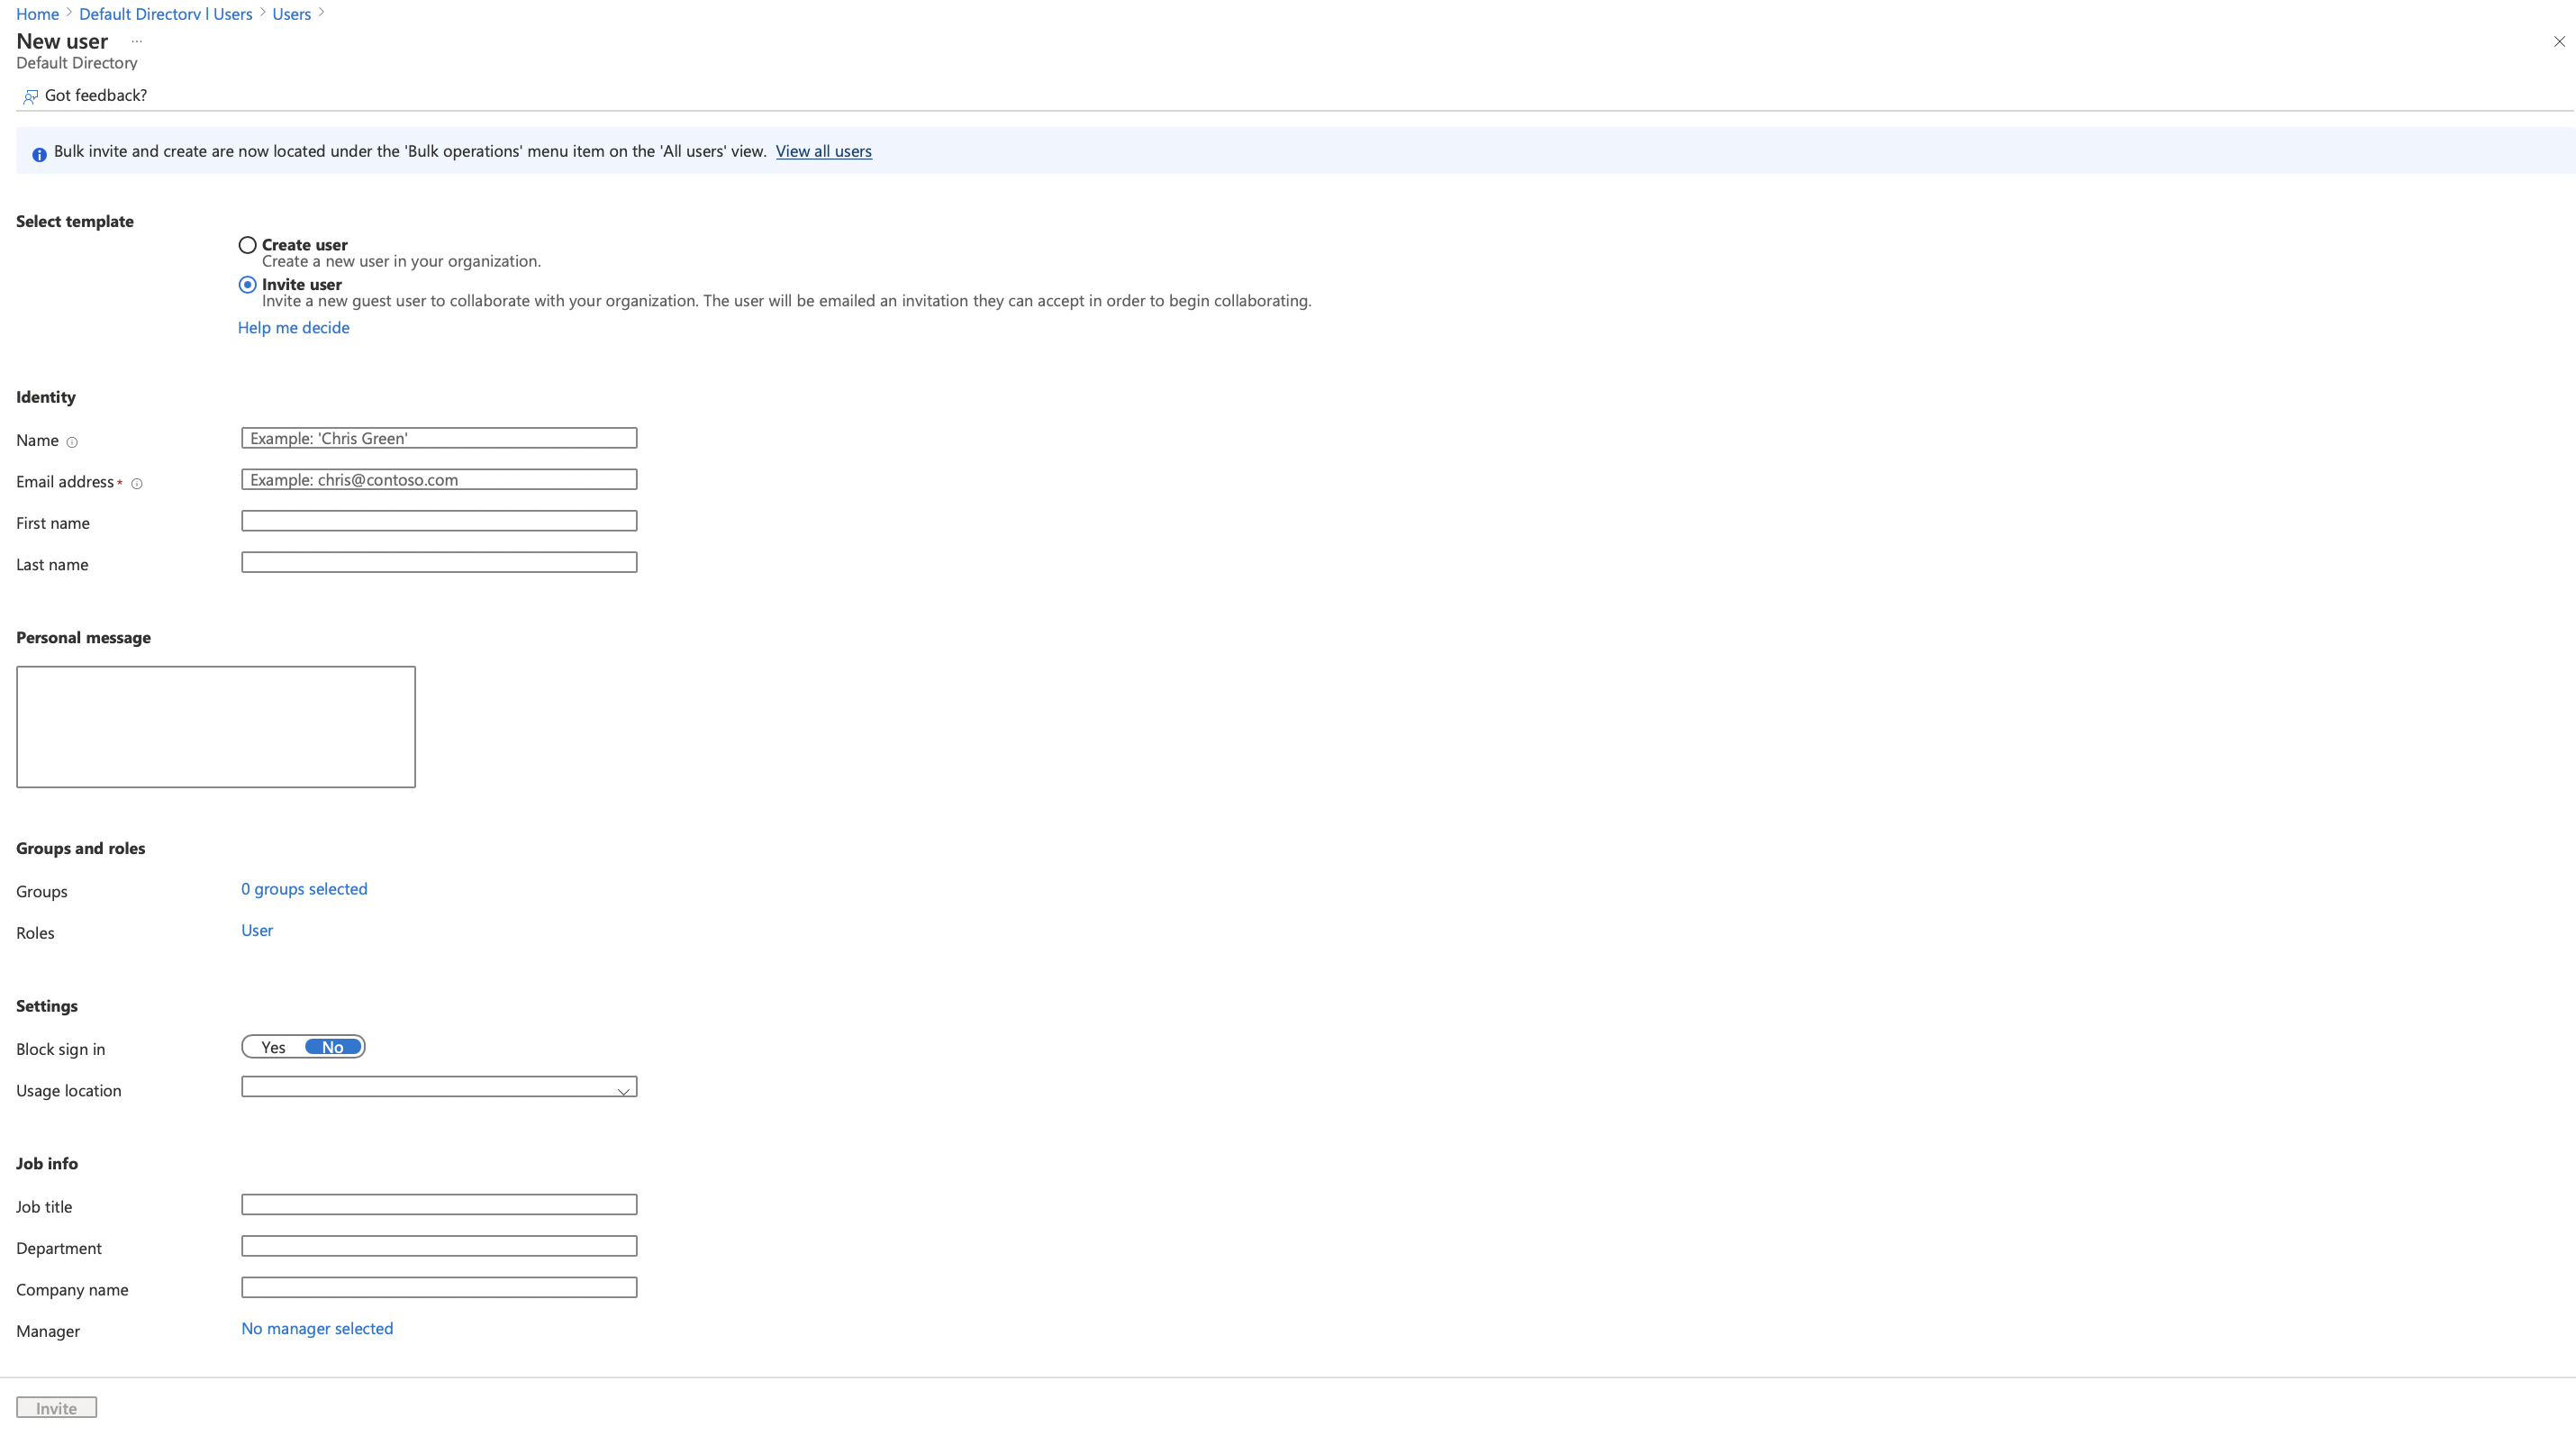
When you fill in the information and click on Invite, the user will receive and email. Once he accept the invitation, they will be able to access your app using OAuth Authorisations that you have set up.
Once you have properly done your configurations in the App’s side and the Service‘s provider’s side(Azure) you will be able to access your app using OAuth Authorisation. service.