Logic Builder
The logic builder, in the context of app development, typically refers to a feature or module within an app development platform that allows developers to define the logic or behavior of the app.
It enables you to create conditional statements, control flow, data manipulation, and other logical operations without writing extensive code manually.
Here we’ll discuss how to get started with the Logic Builder.
Navigate to the Logic Builder menu.
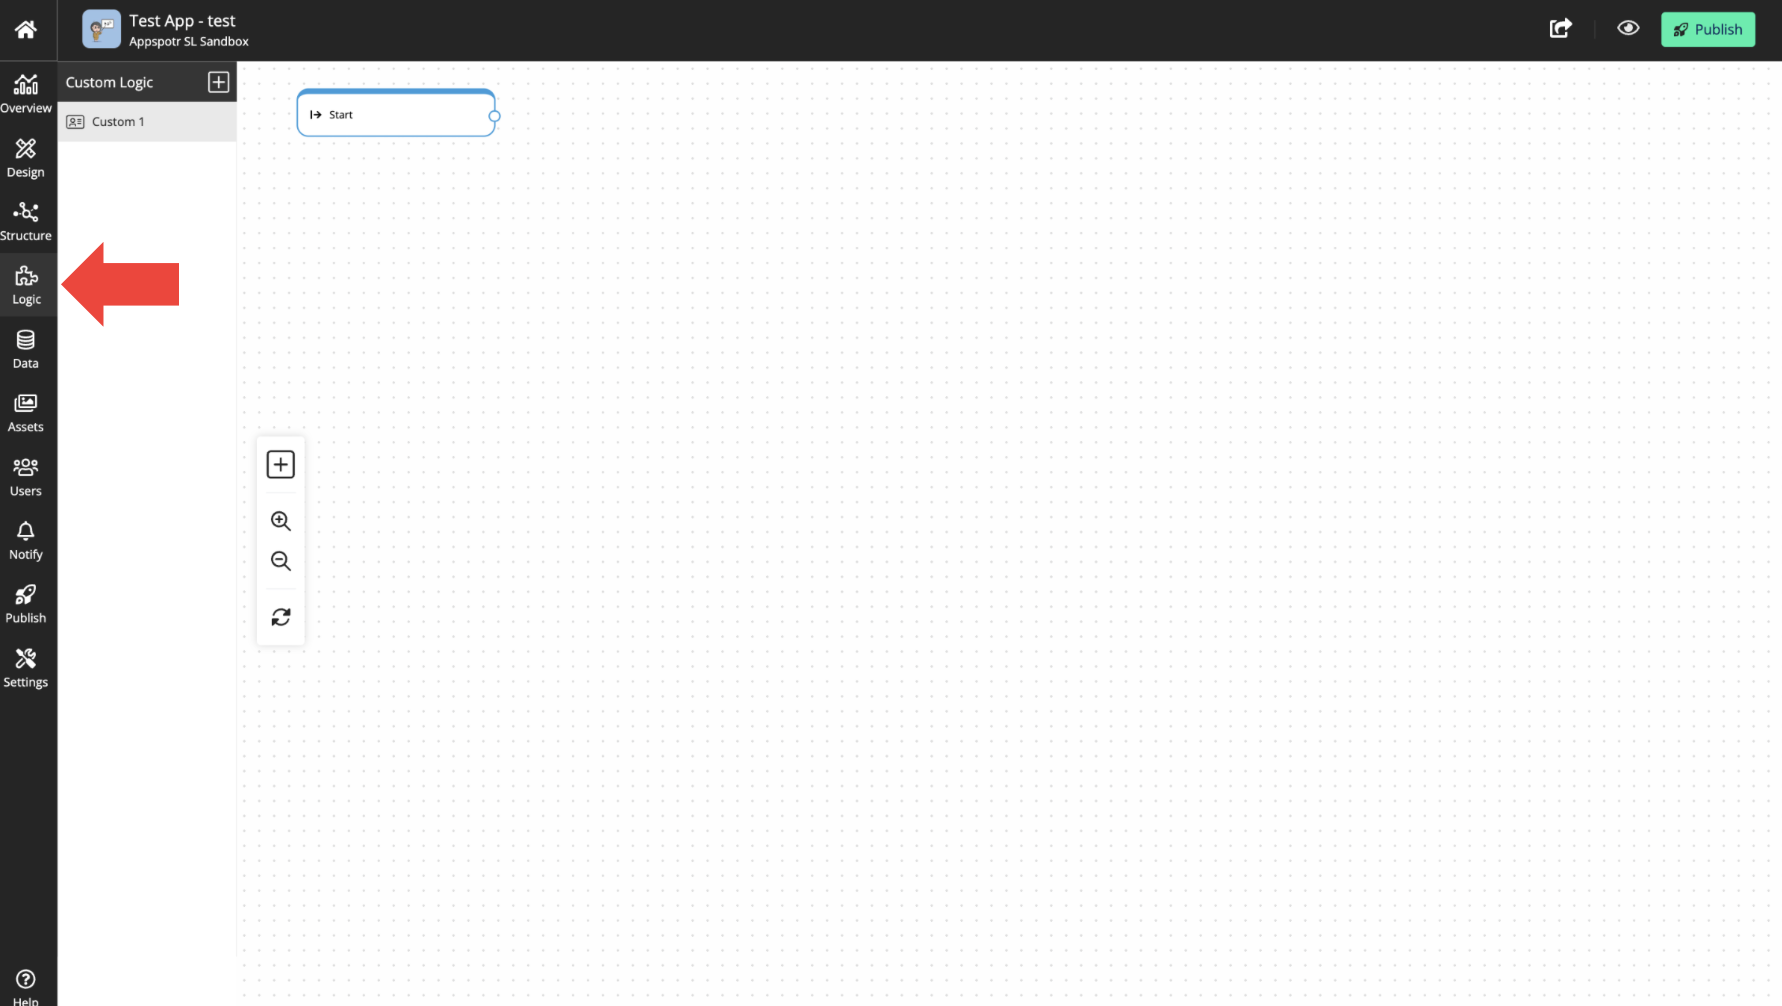
The sub-menu on the left is used to manage all the custom logics that you create.
Custom Logic - A logic group that provides you more flexibility when defining inputs and outputs.
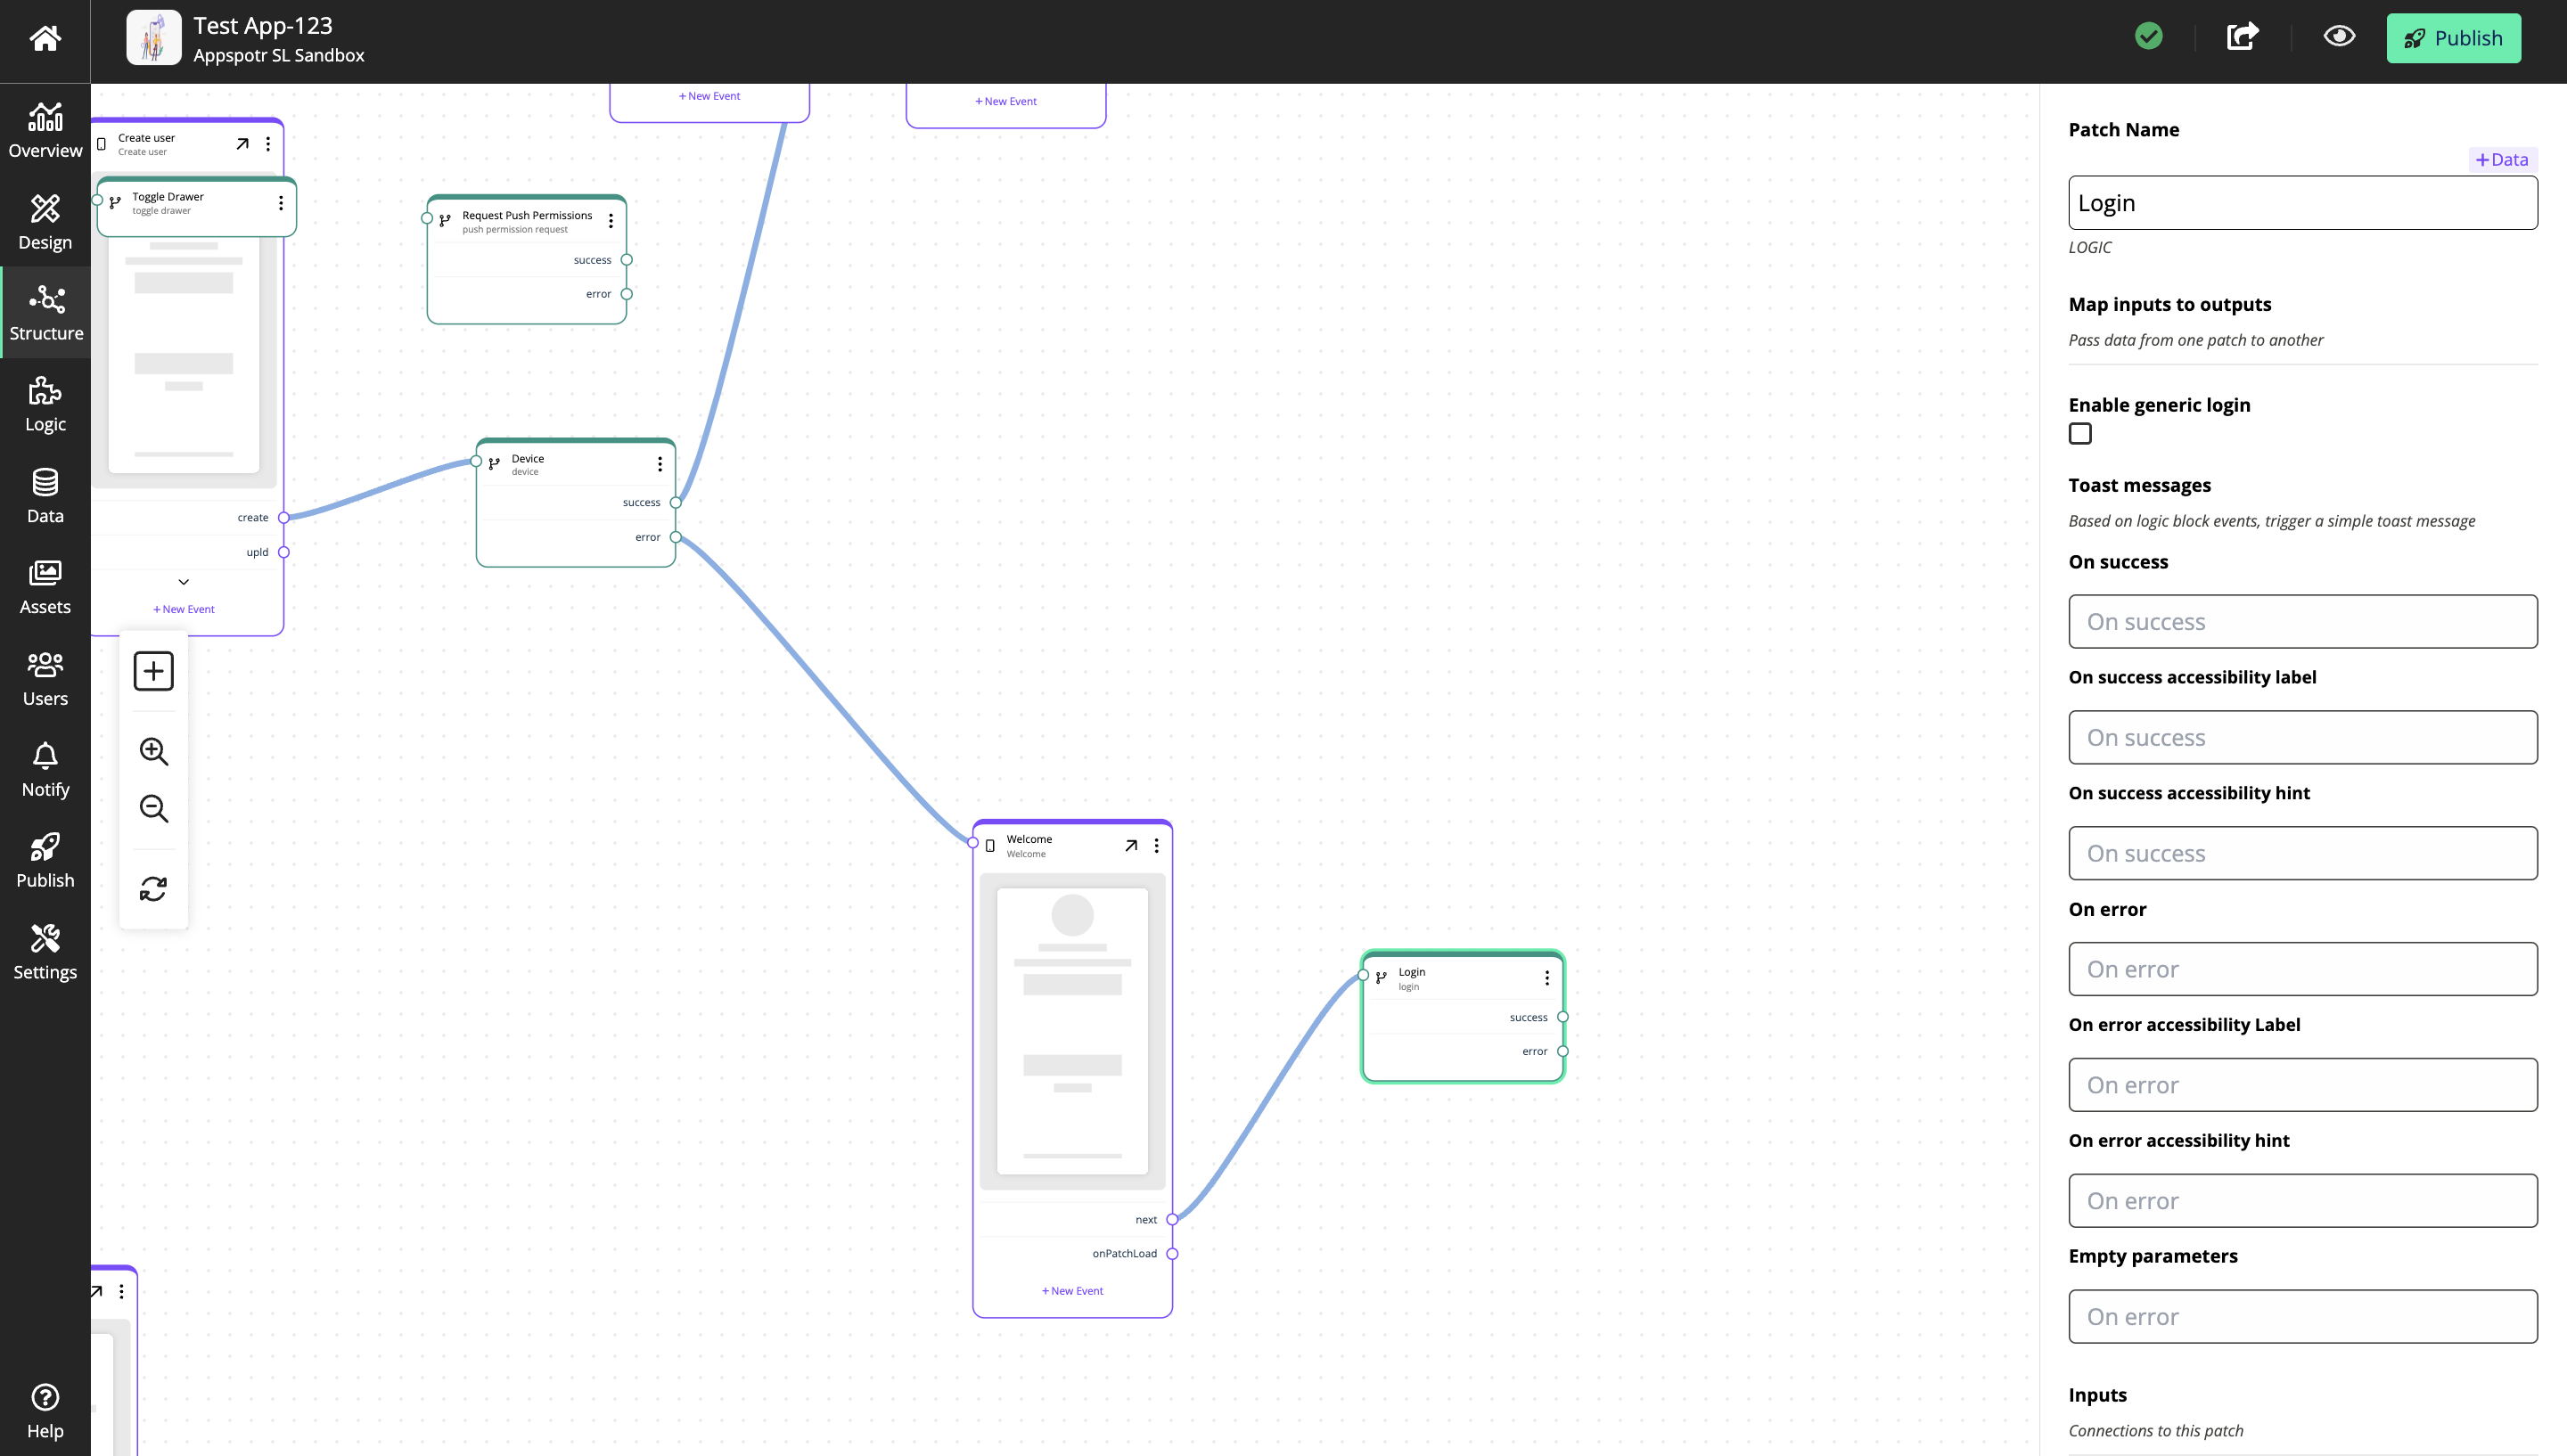
When you click on the Add patch button you will be able to view all the logic patches.
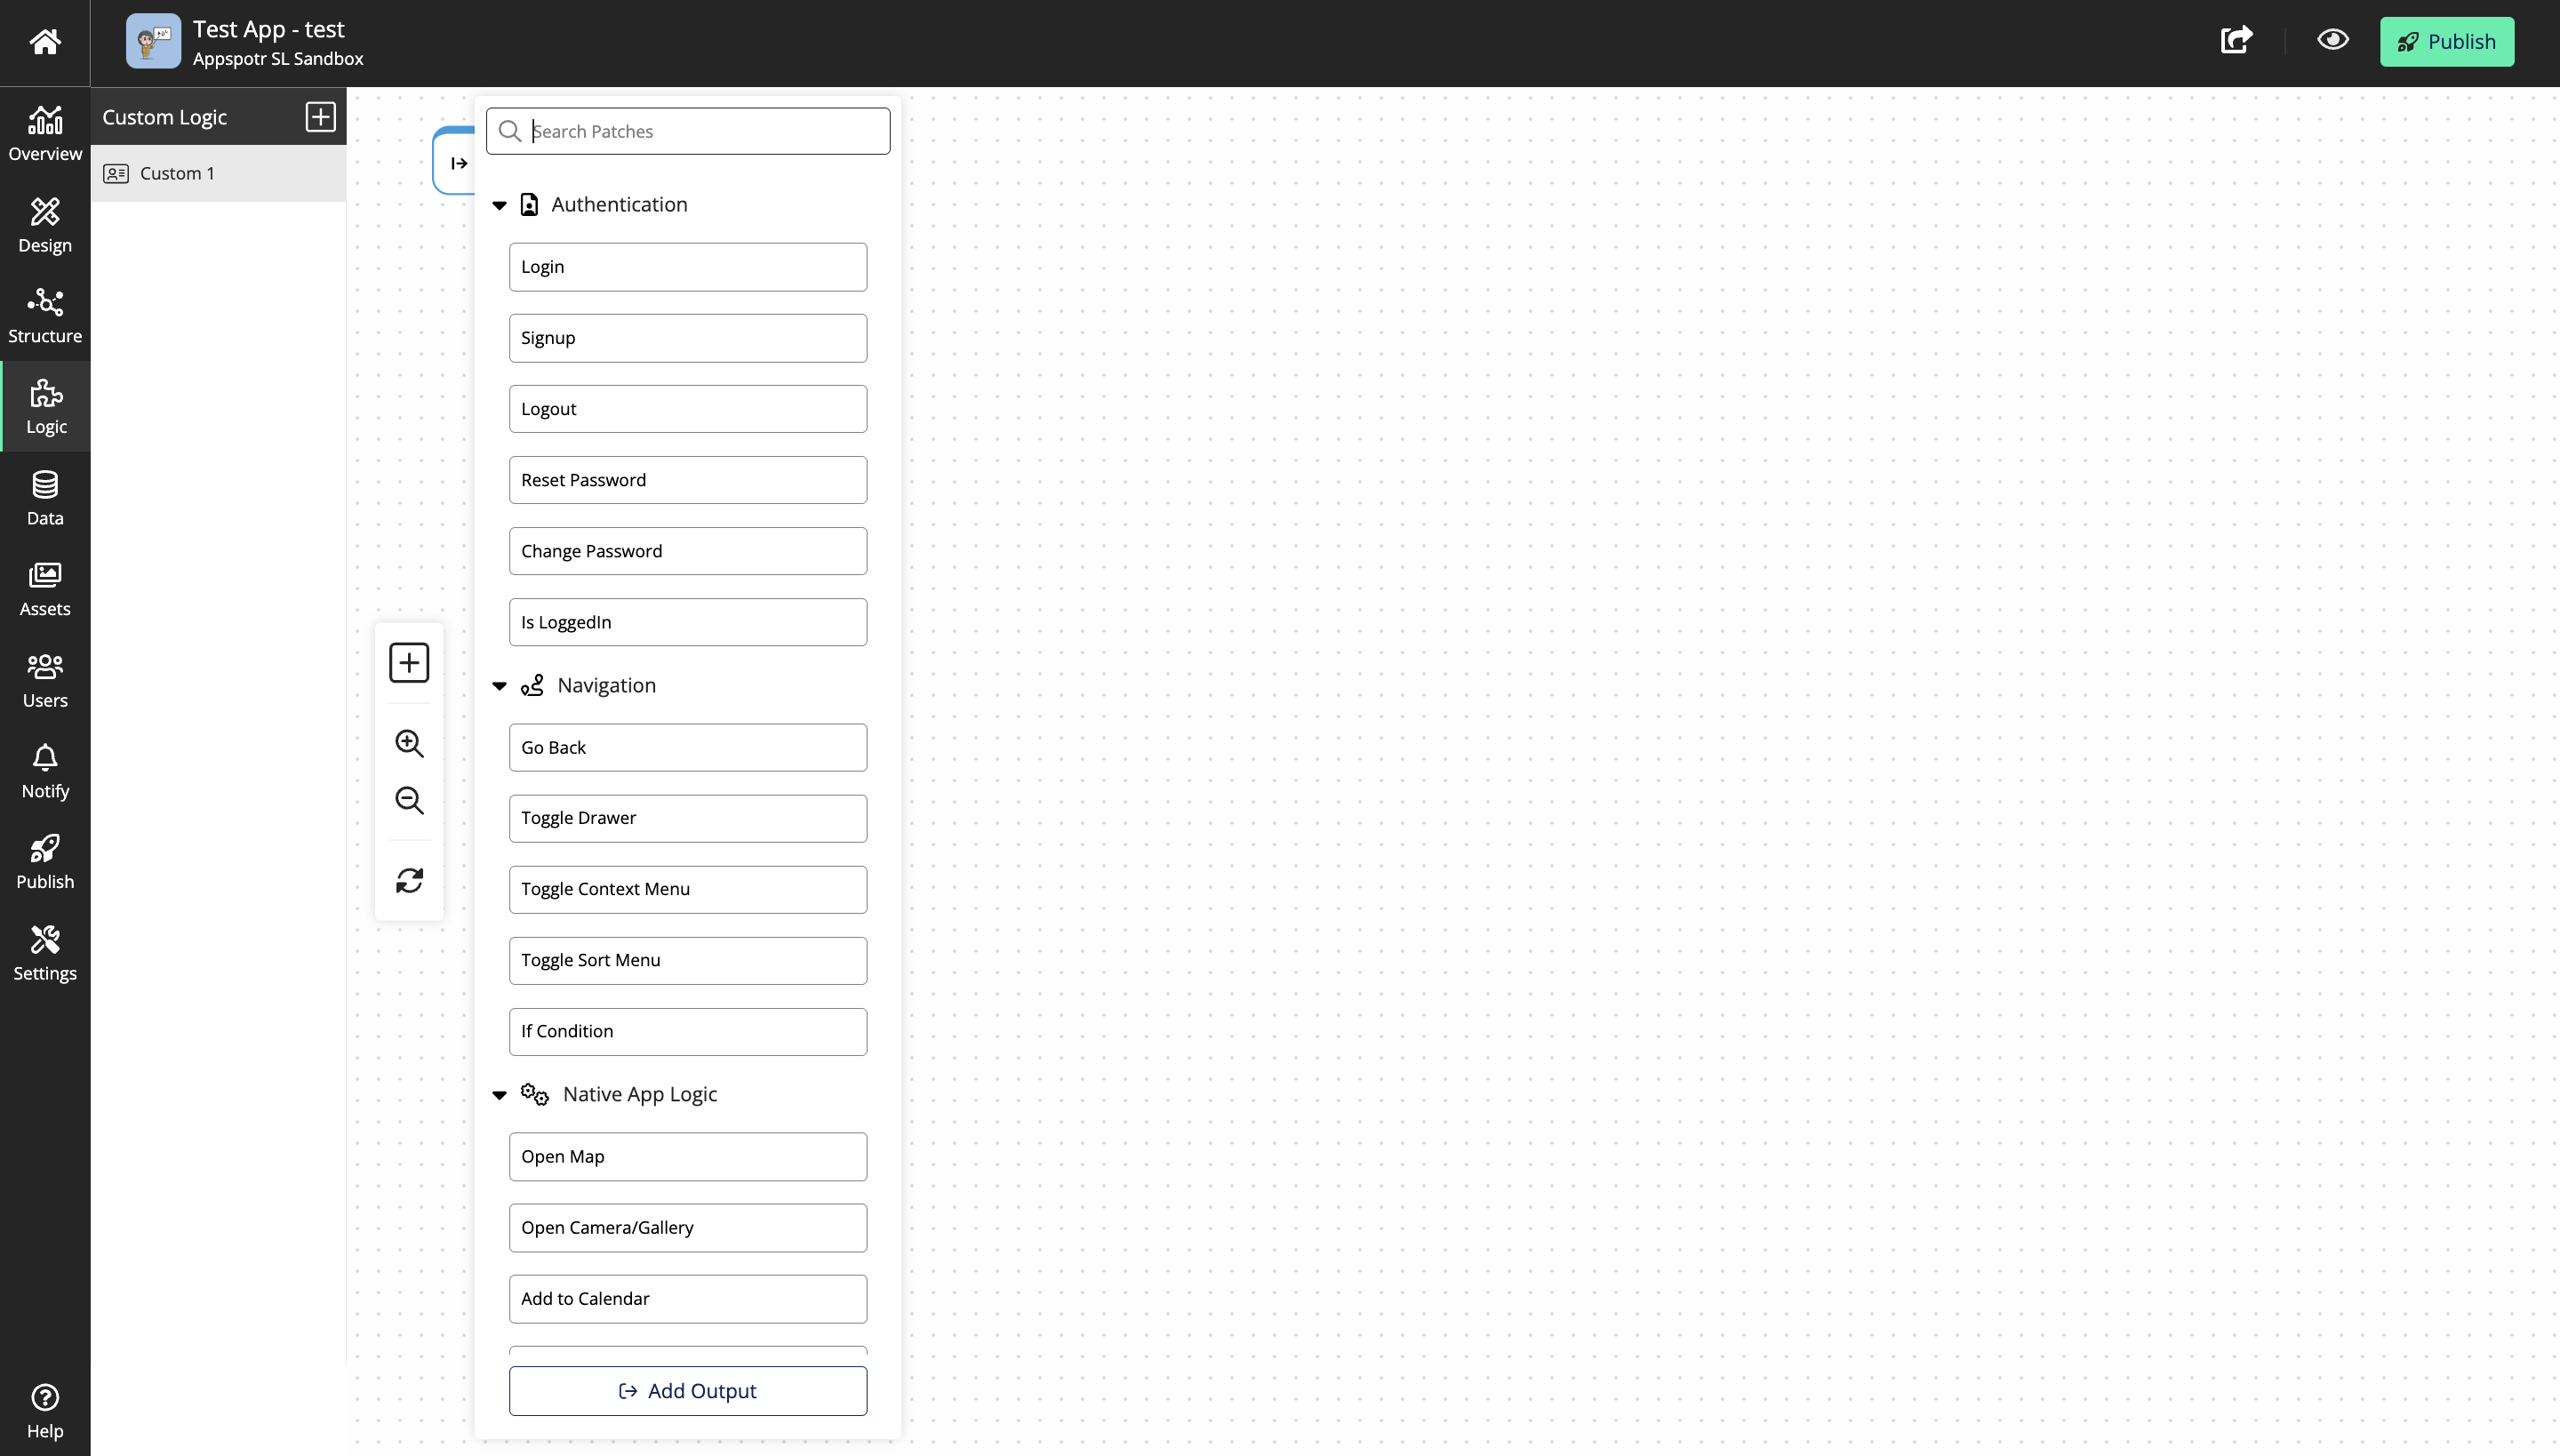
When you start creating the logic flow, the first patch is named the ‘Start Patch’, and the second patch you create is named the ‘Output Patch’.
Creating a custom logic
There are three ways of creating a custom logic.
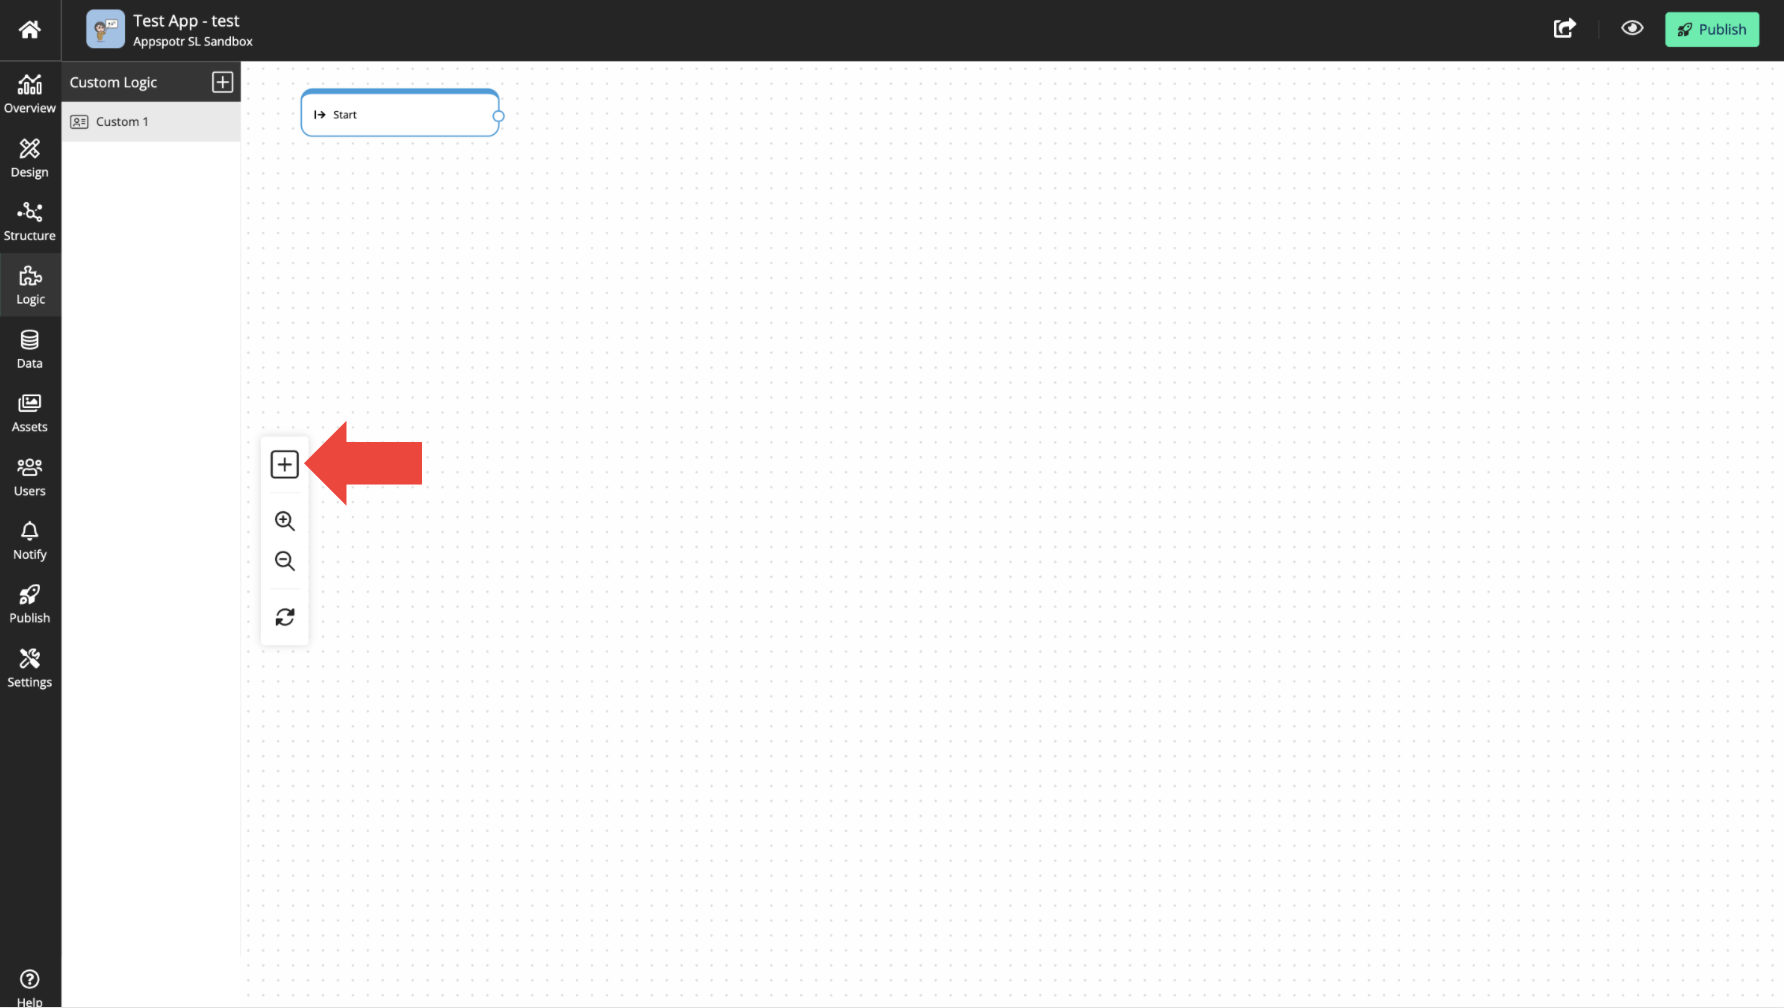
You can click on the + button to create a custom logic.

The second method to create a custom logic is through the Structure builder.
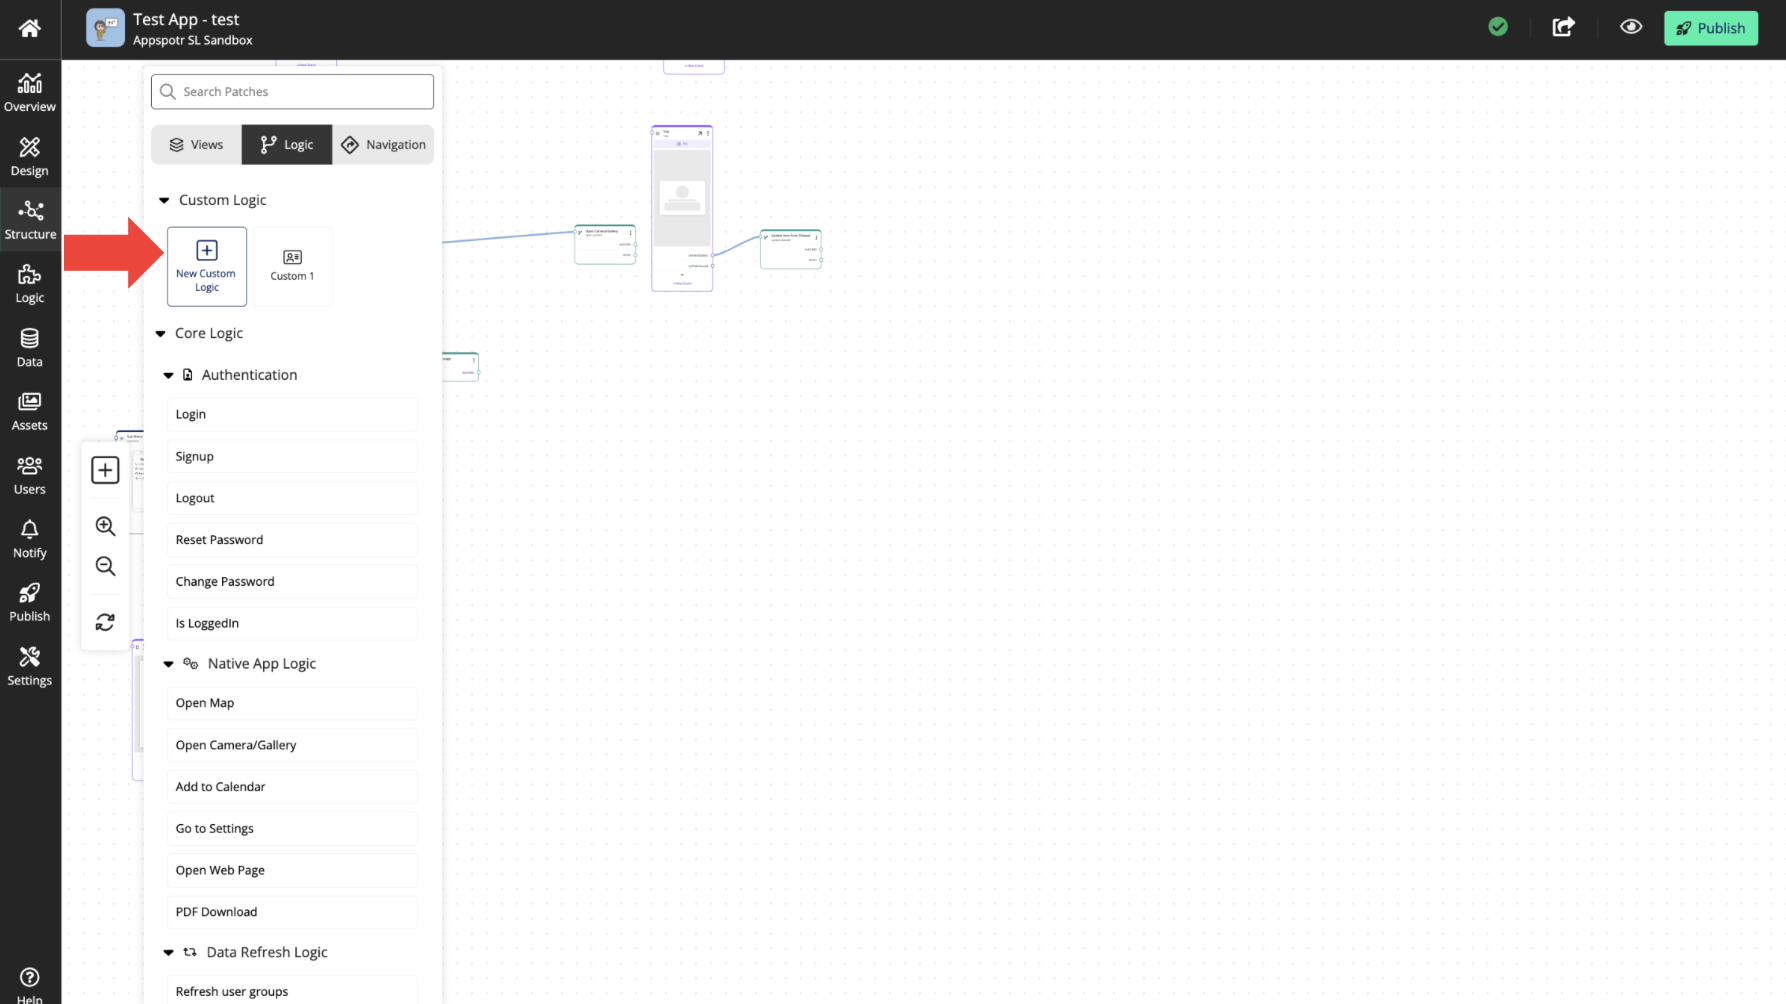
You can navigate to the Structure Builder and Add Patch. And once you open the Logic sub menu, you can click on + New Custom Logic to create custom logic.
The third method is by selecting the existing logic patches.
Building a custom logic from scratch
In this guide, we’ll discuss how to create a custom logic, manage its properties and build a custom logic from scratch
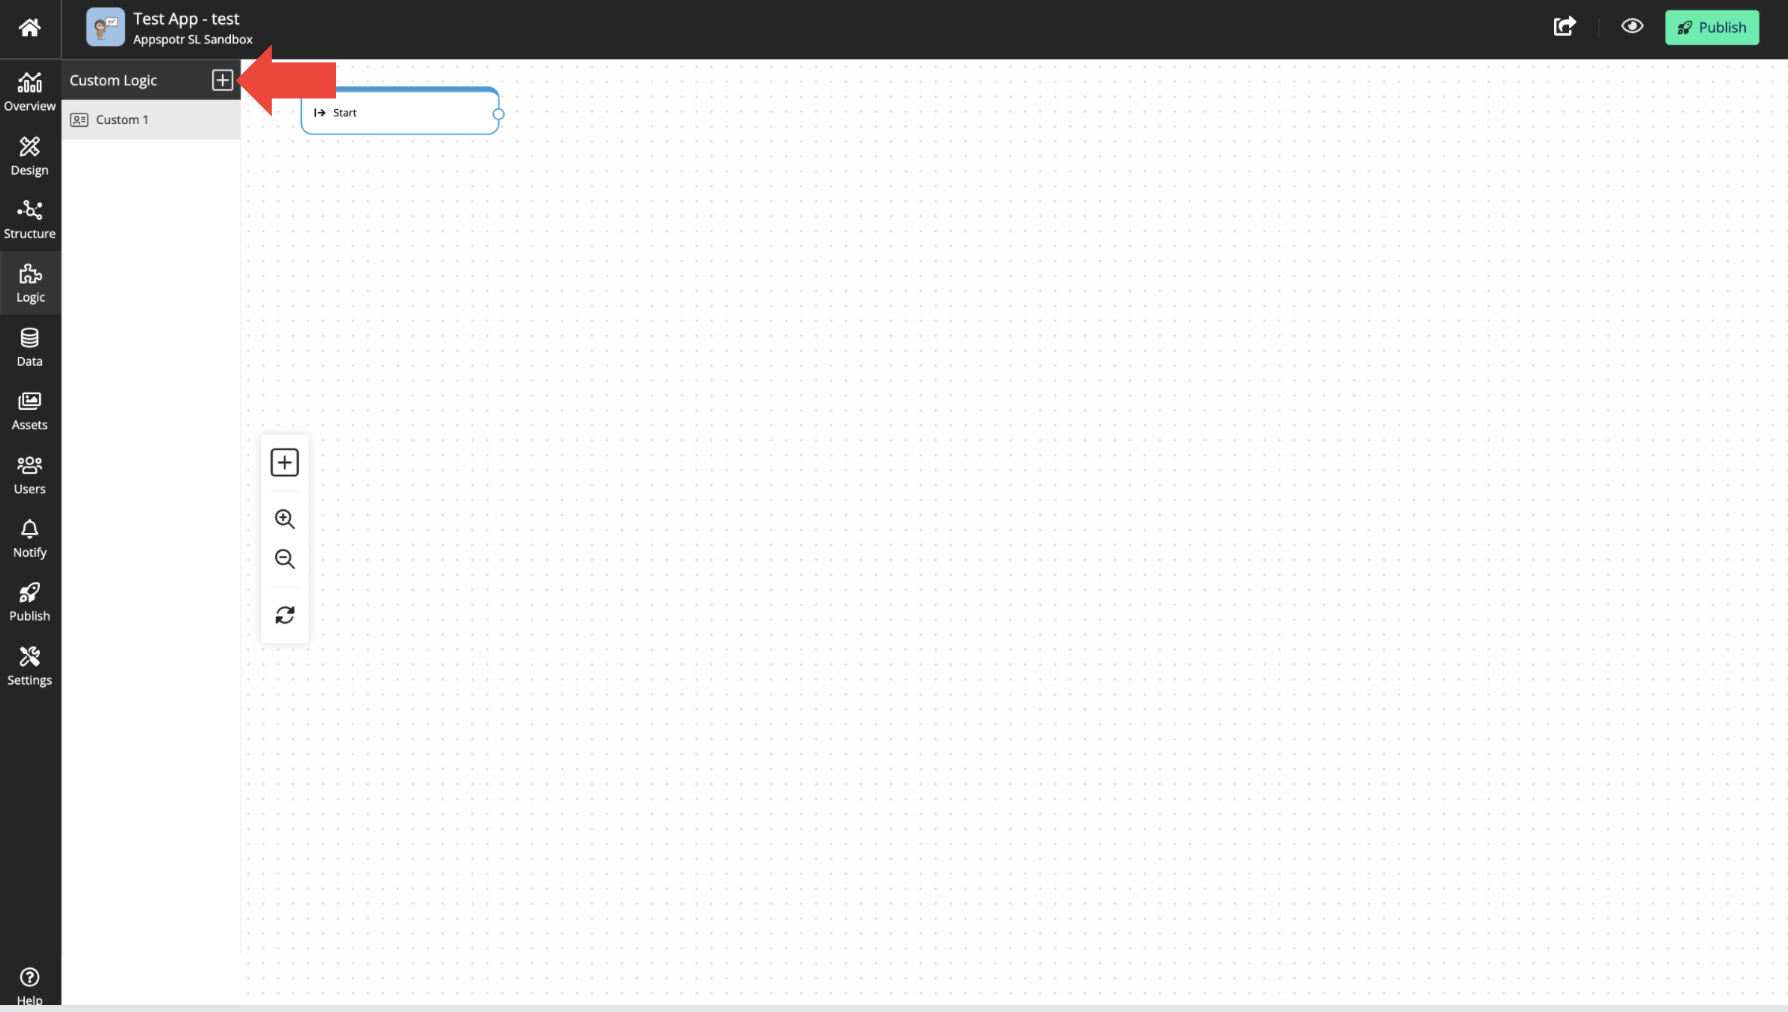
Click on the + button
And there, when you click on the Settings icon you can view and edit the properties of the logic.
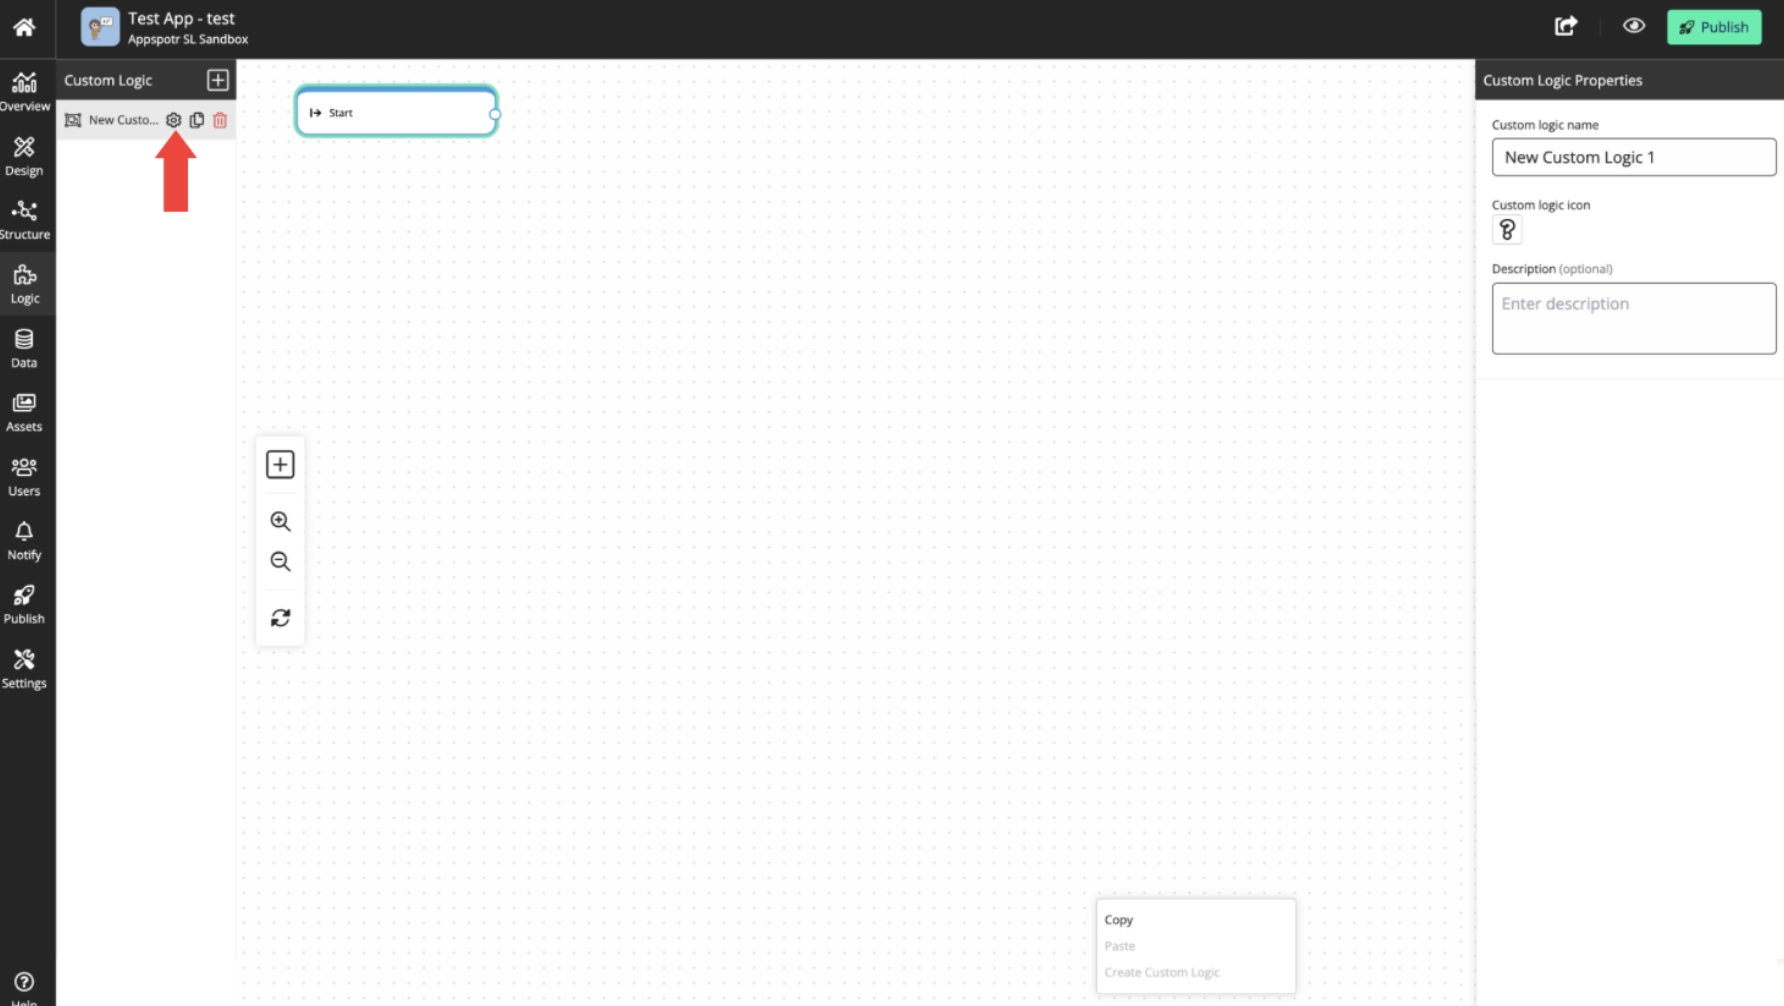
You can use the Custom Logic Properties to edit the name, icon, and description.
This description option is useful for documentation and tracking inputs, outputs, and other data related to certain logic patches.
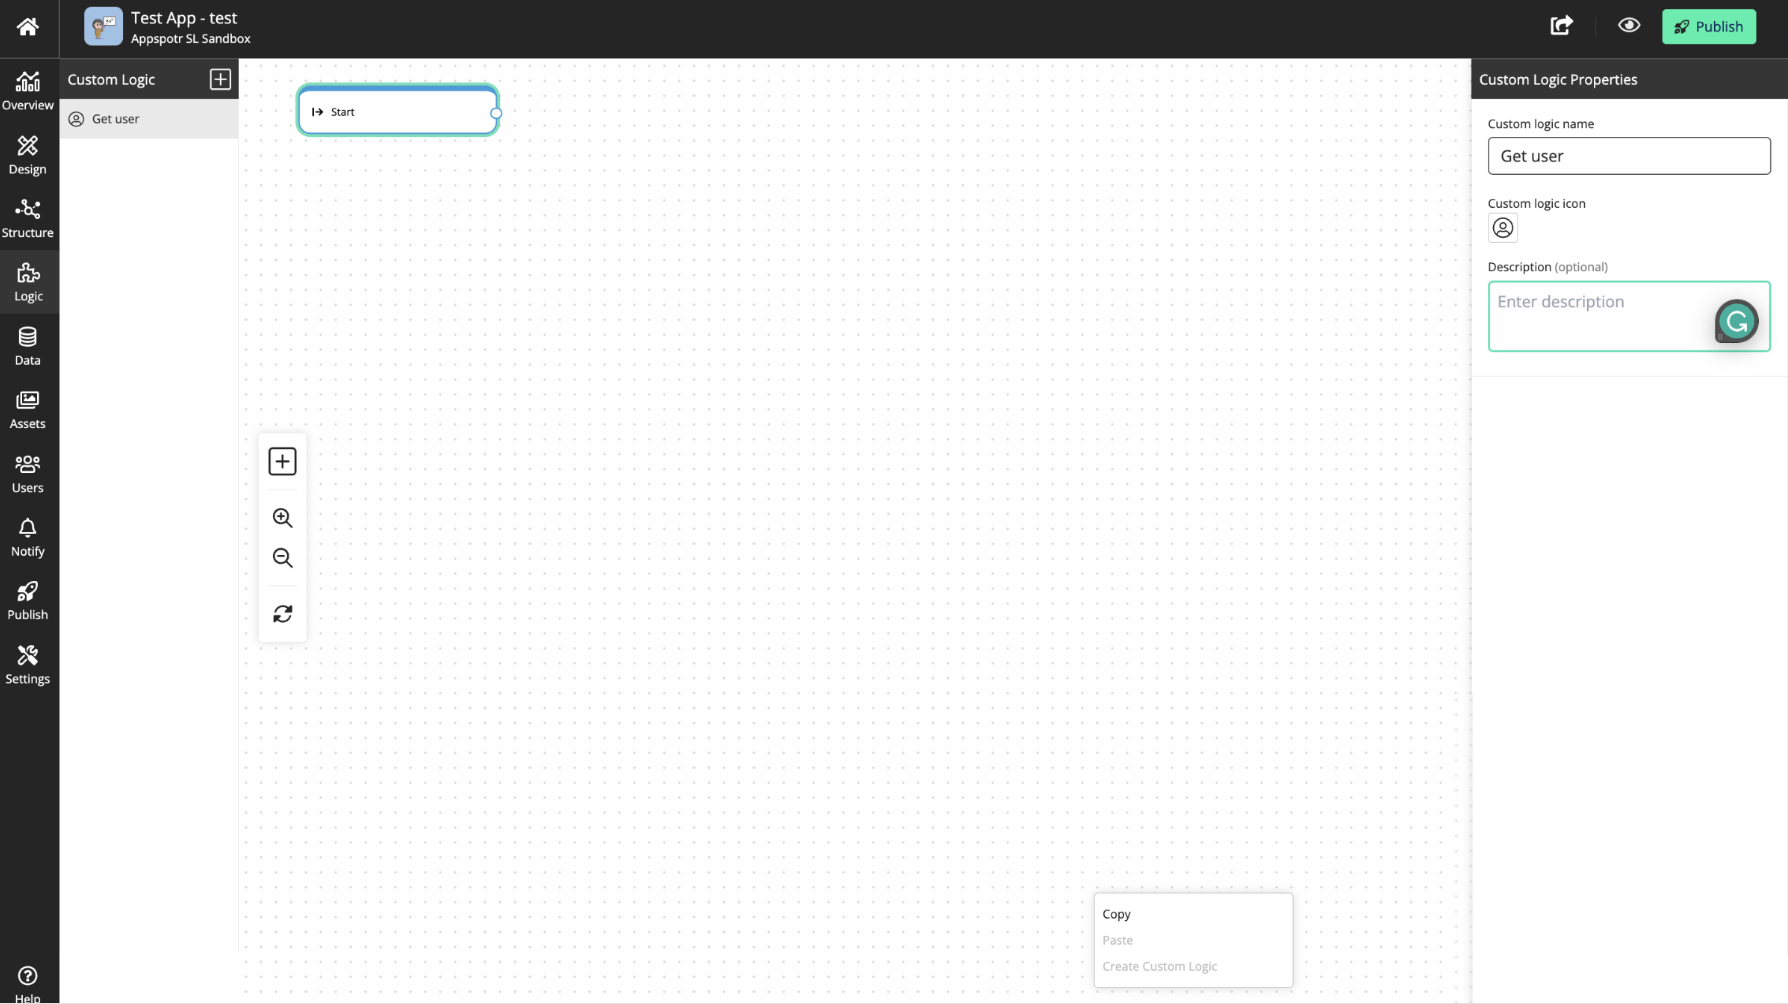
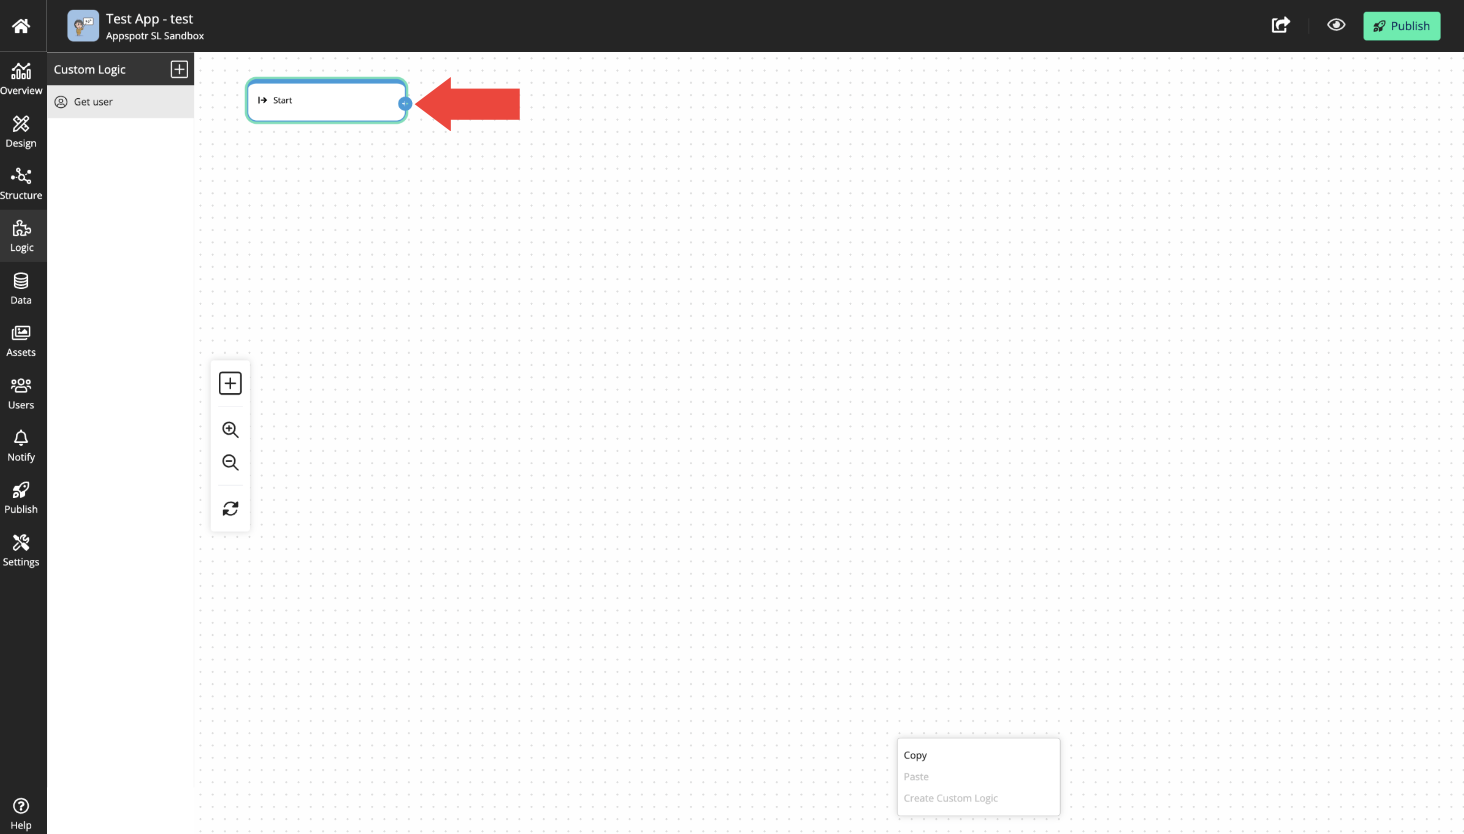
To add the next logic patch, click on the circle at the right end of the start patch.
Then you will be able to view all the available logic patches.
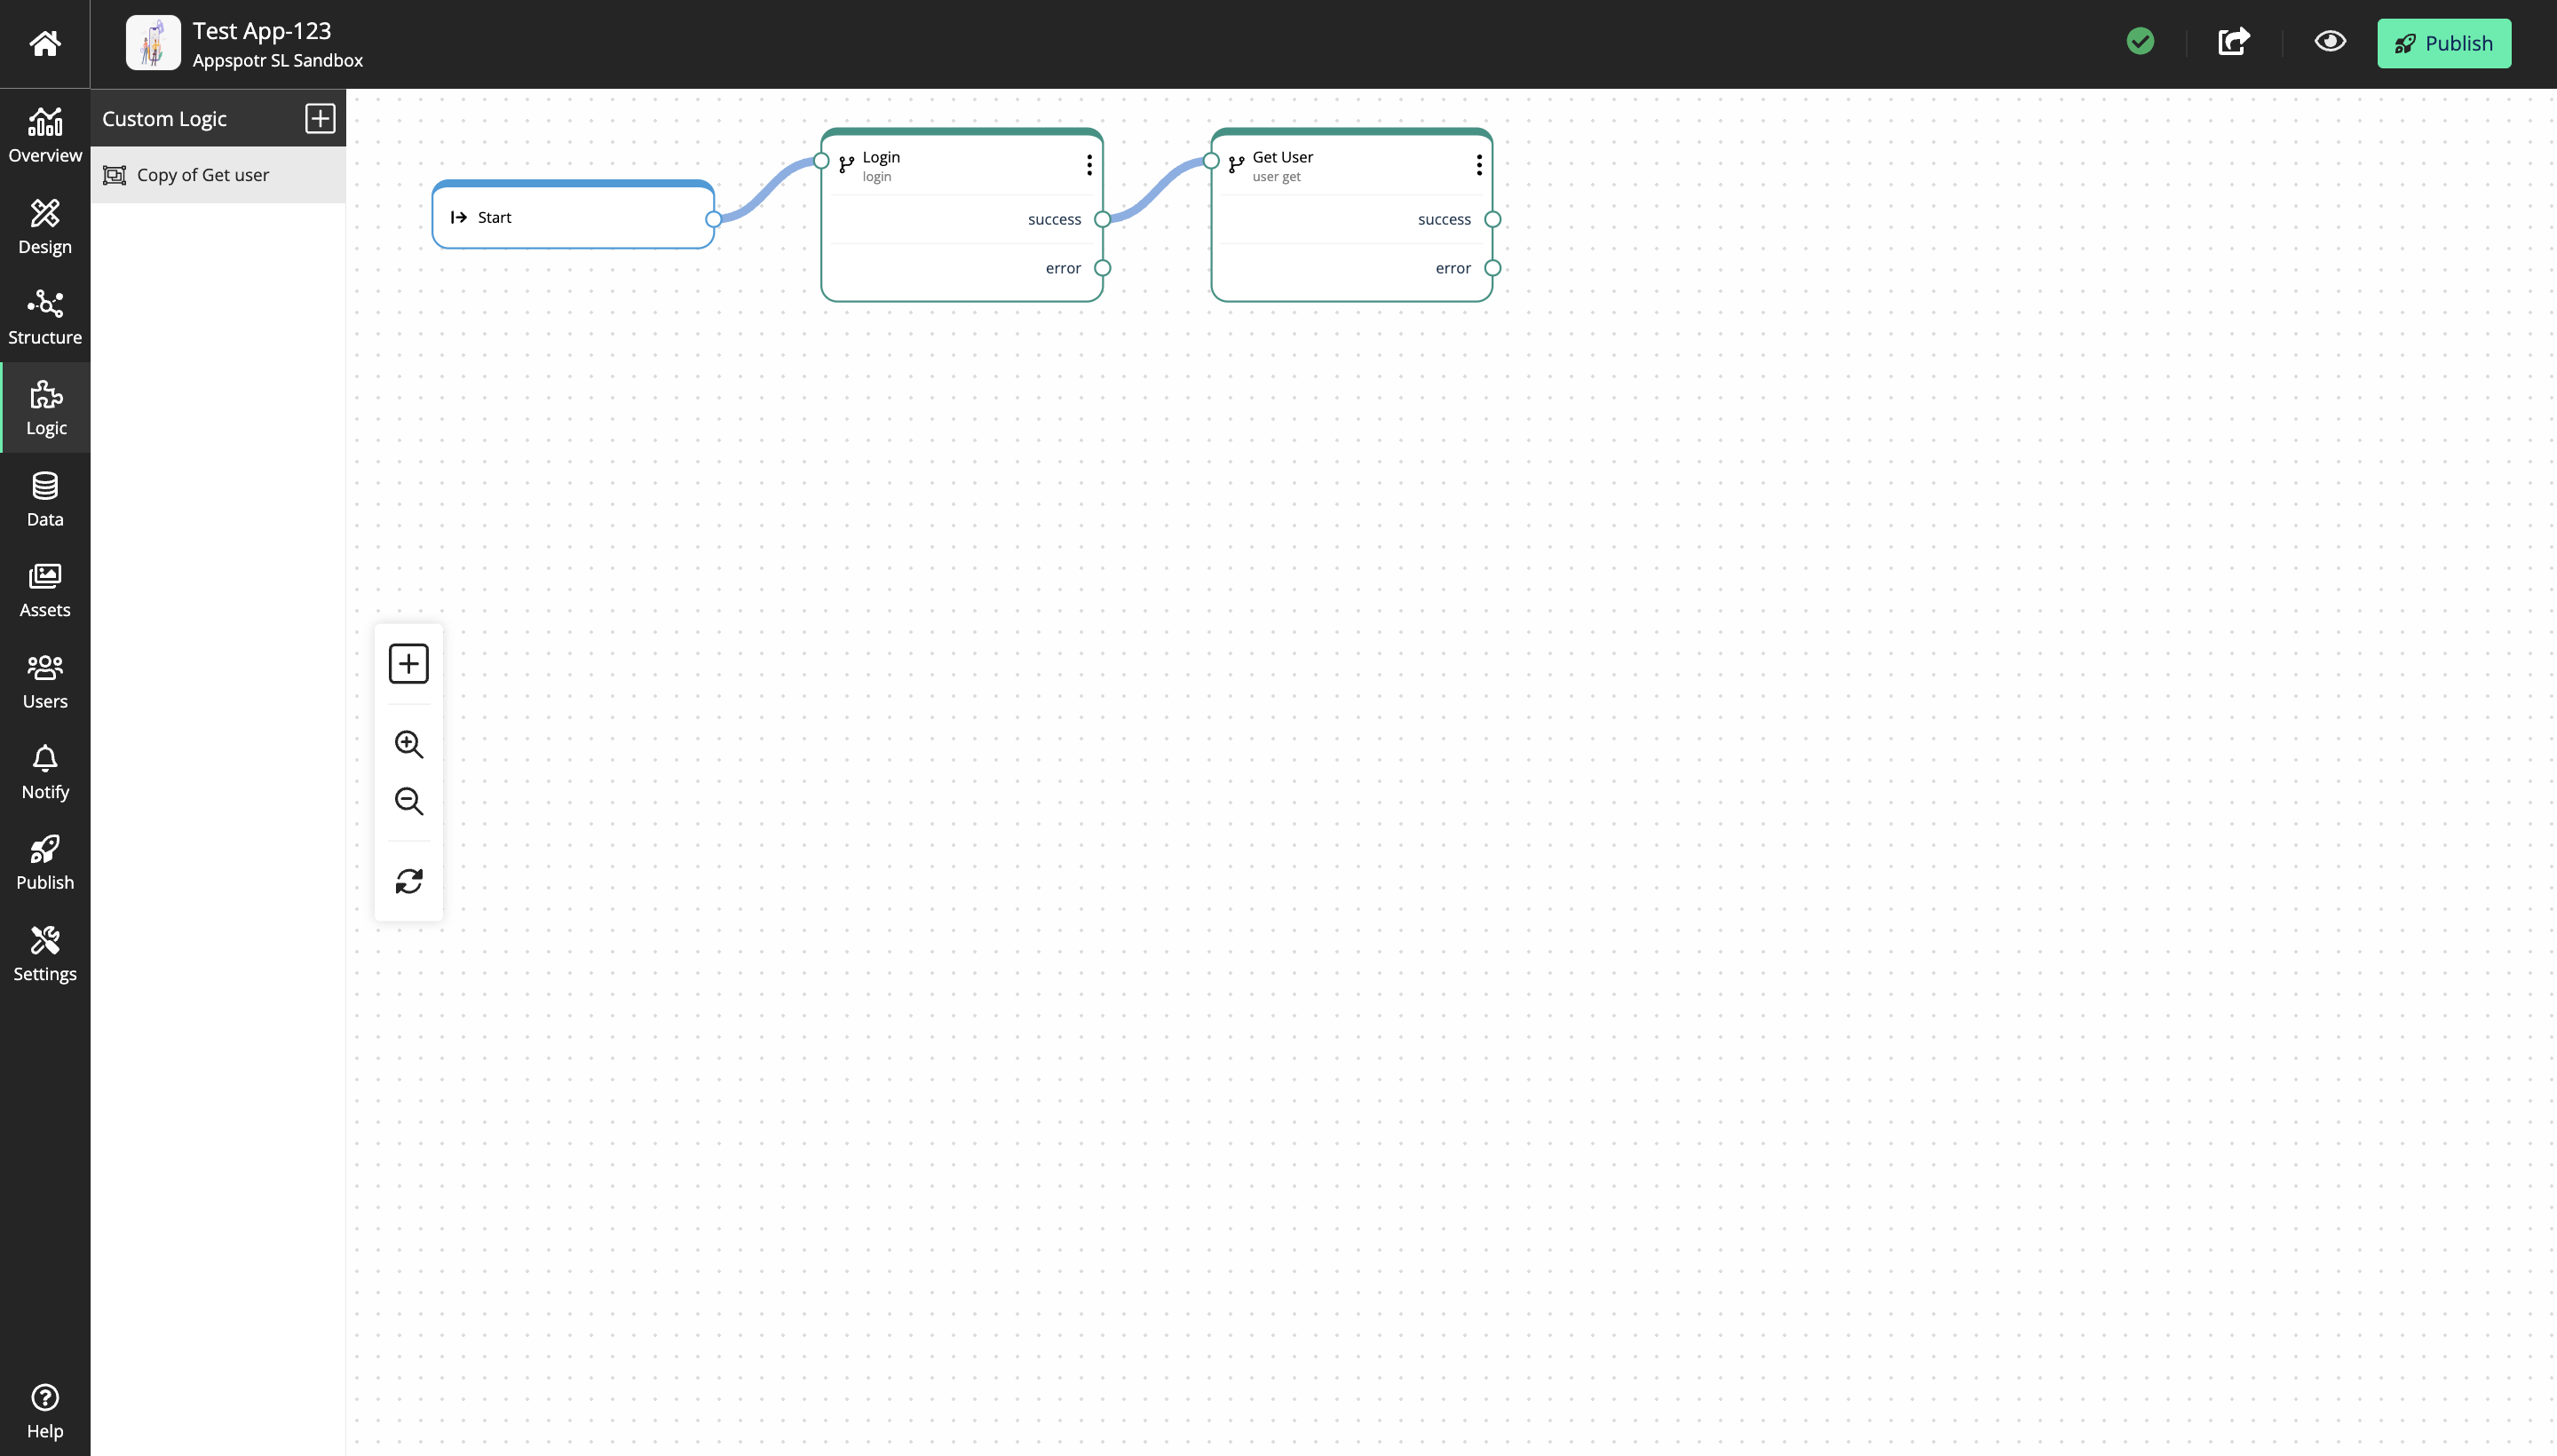
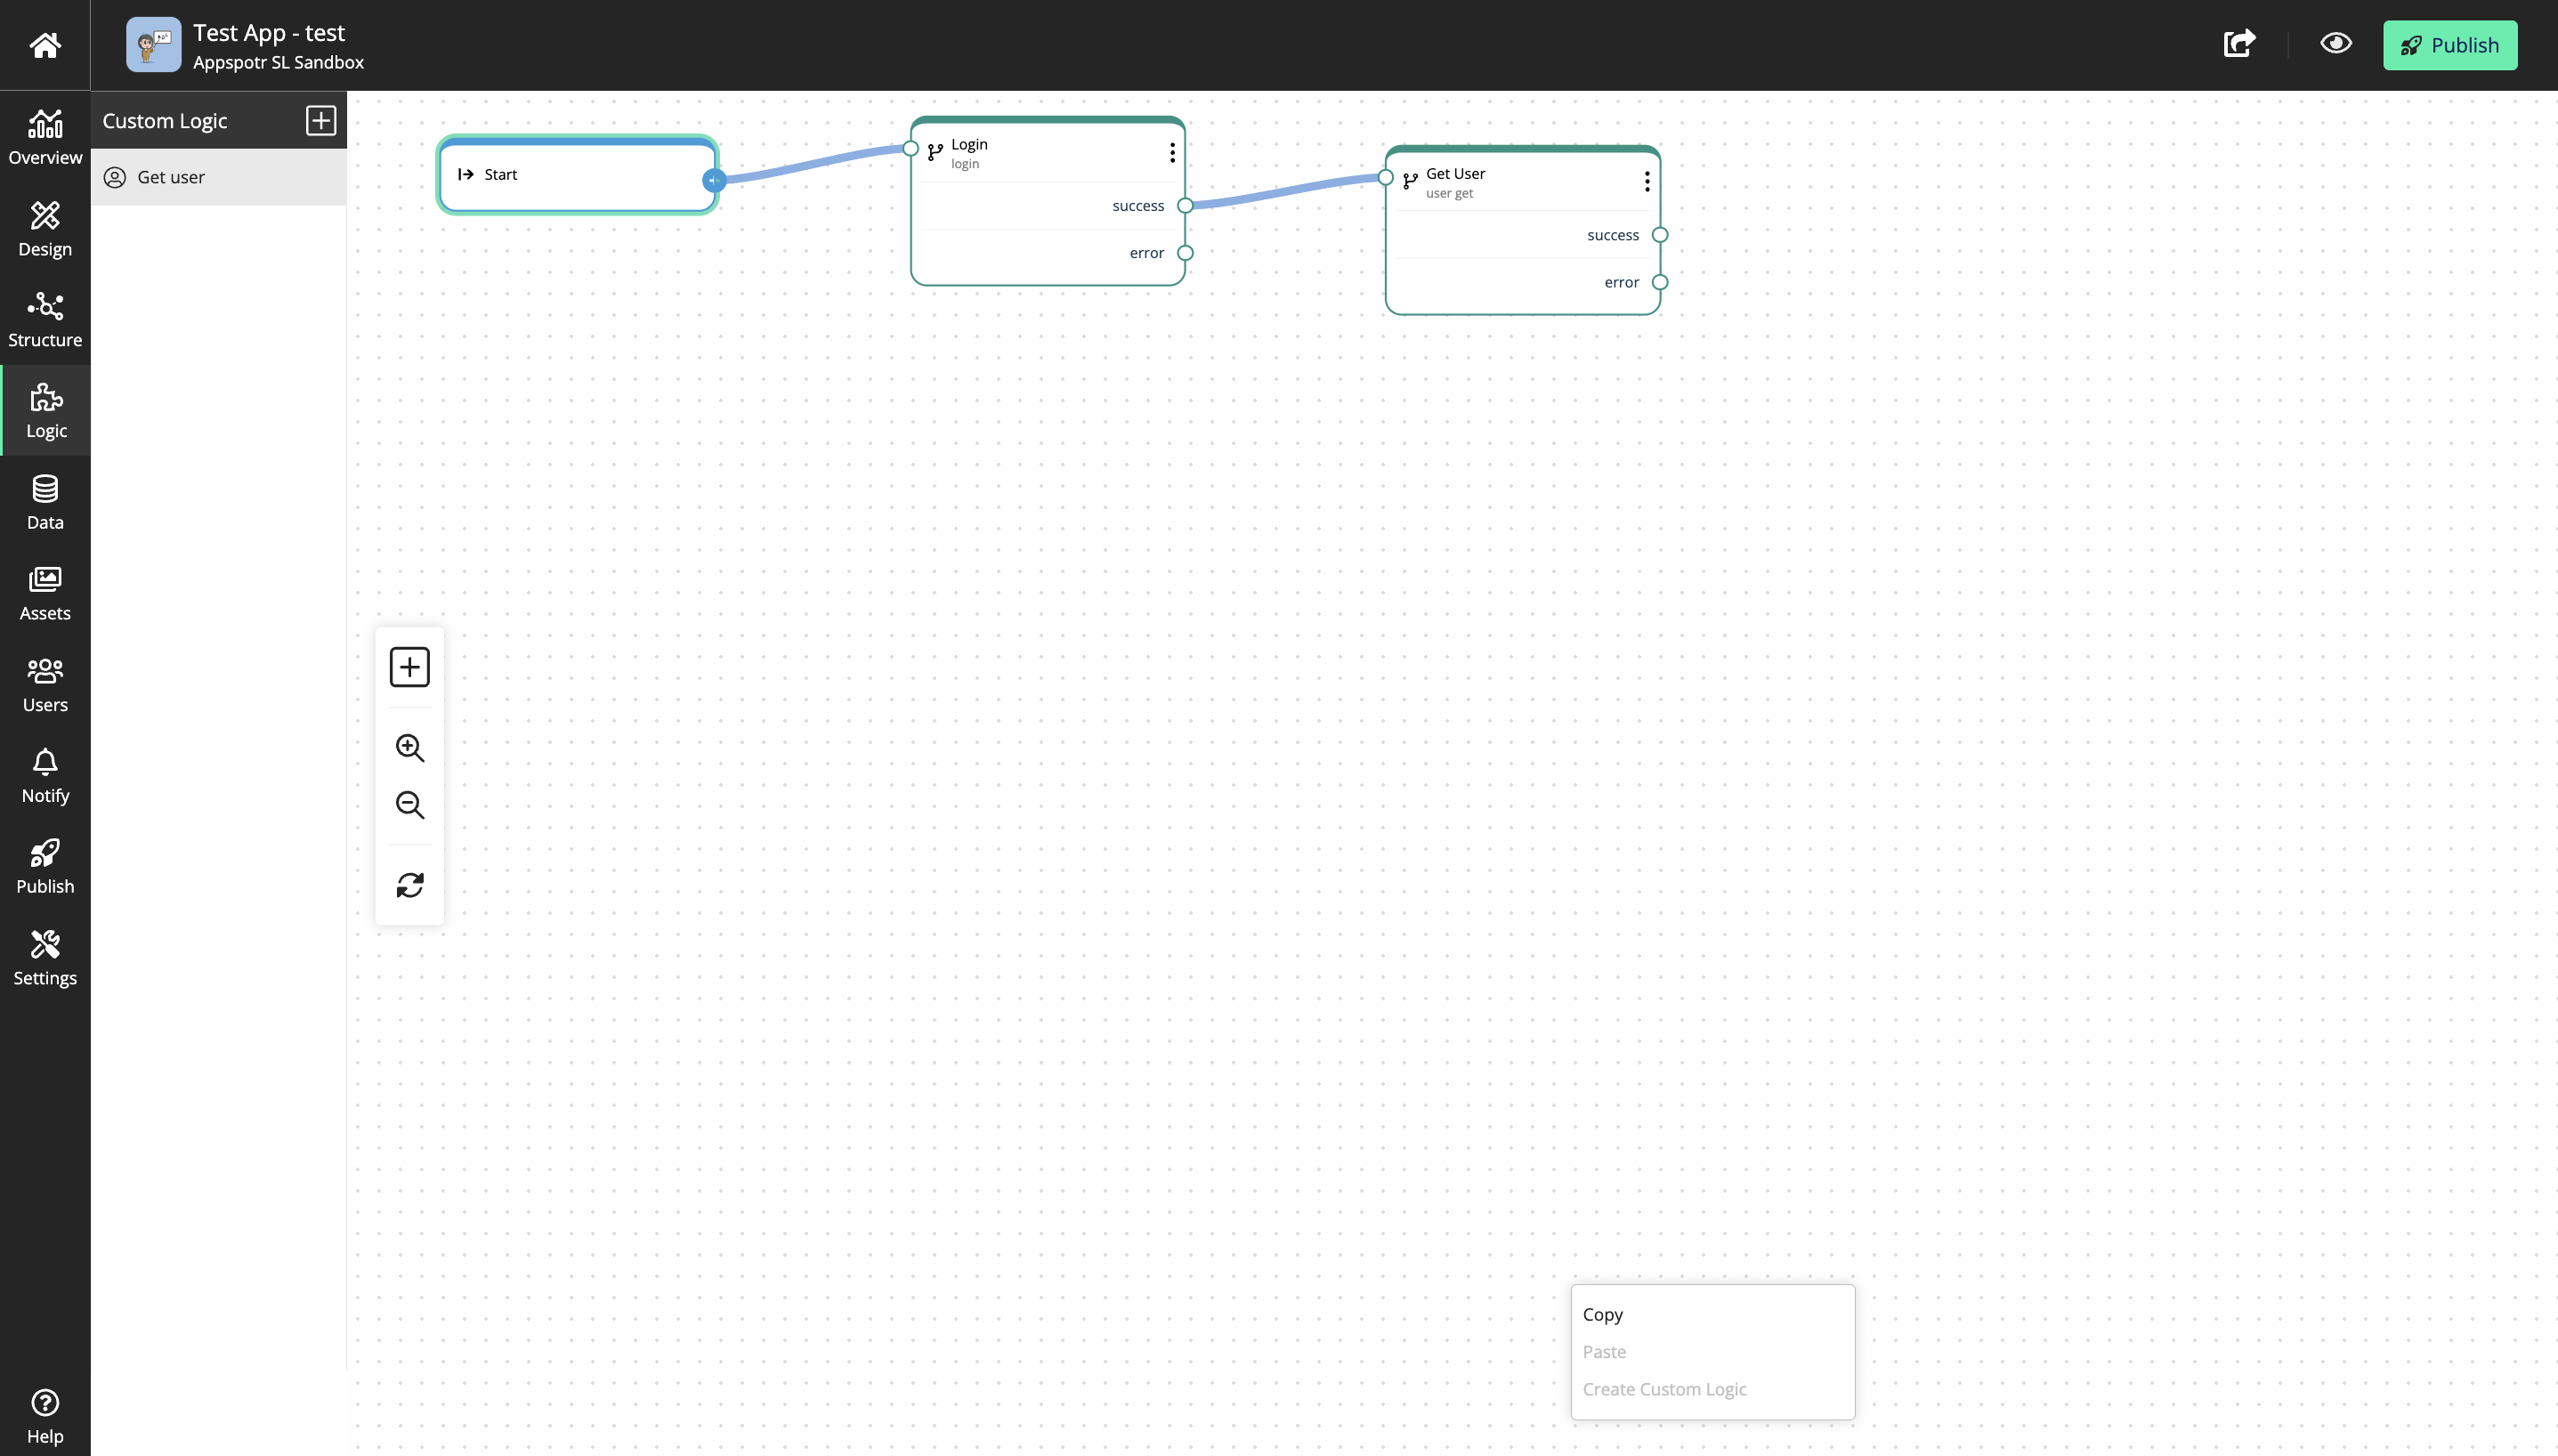
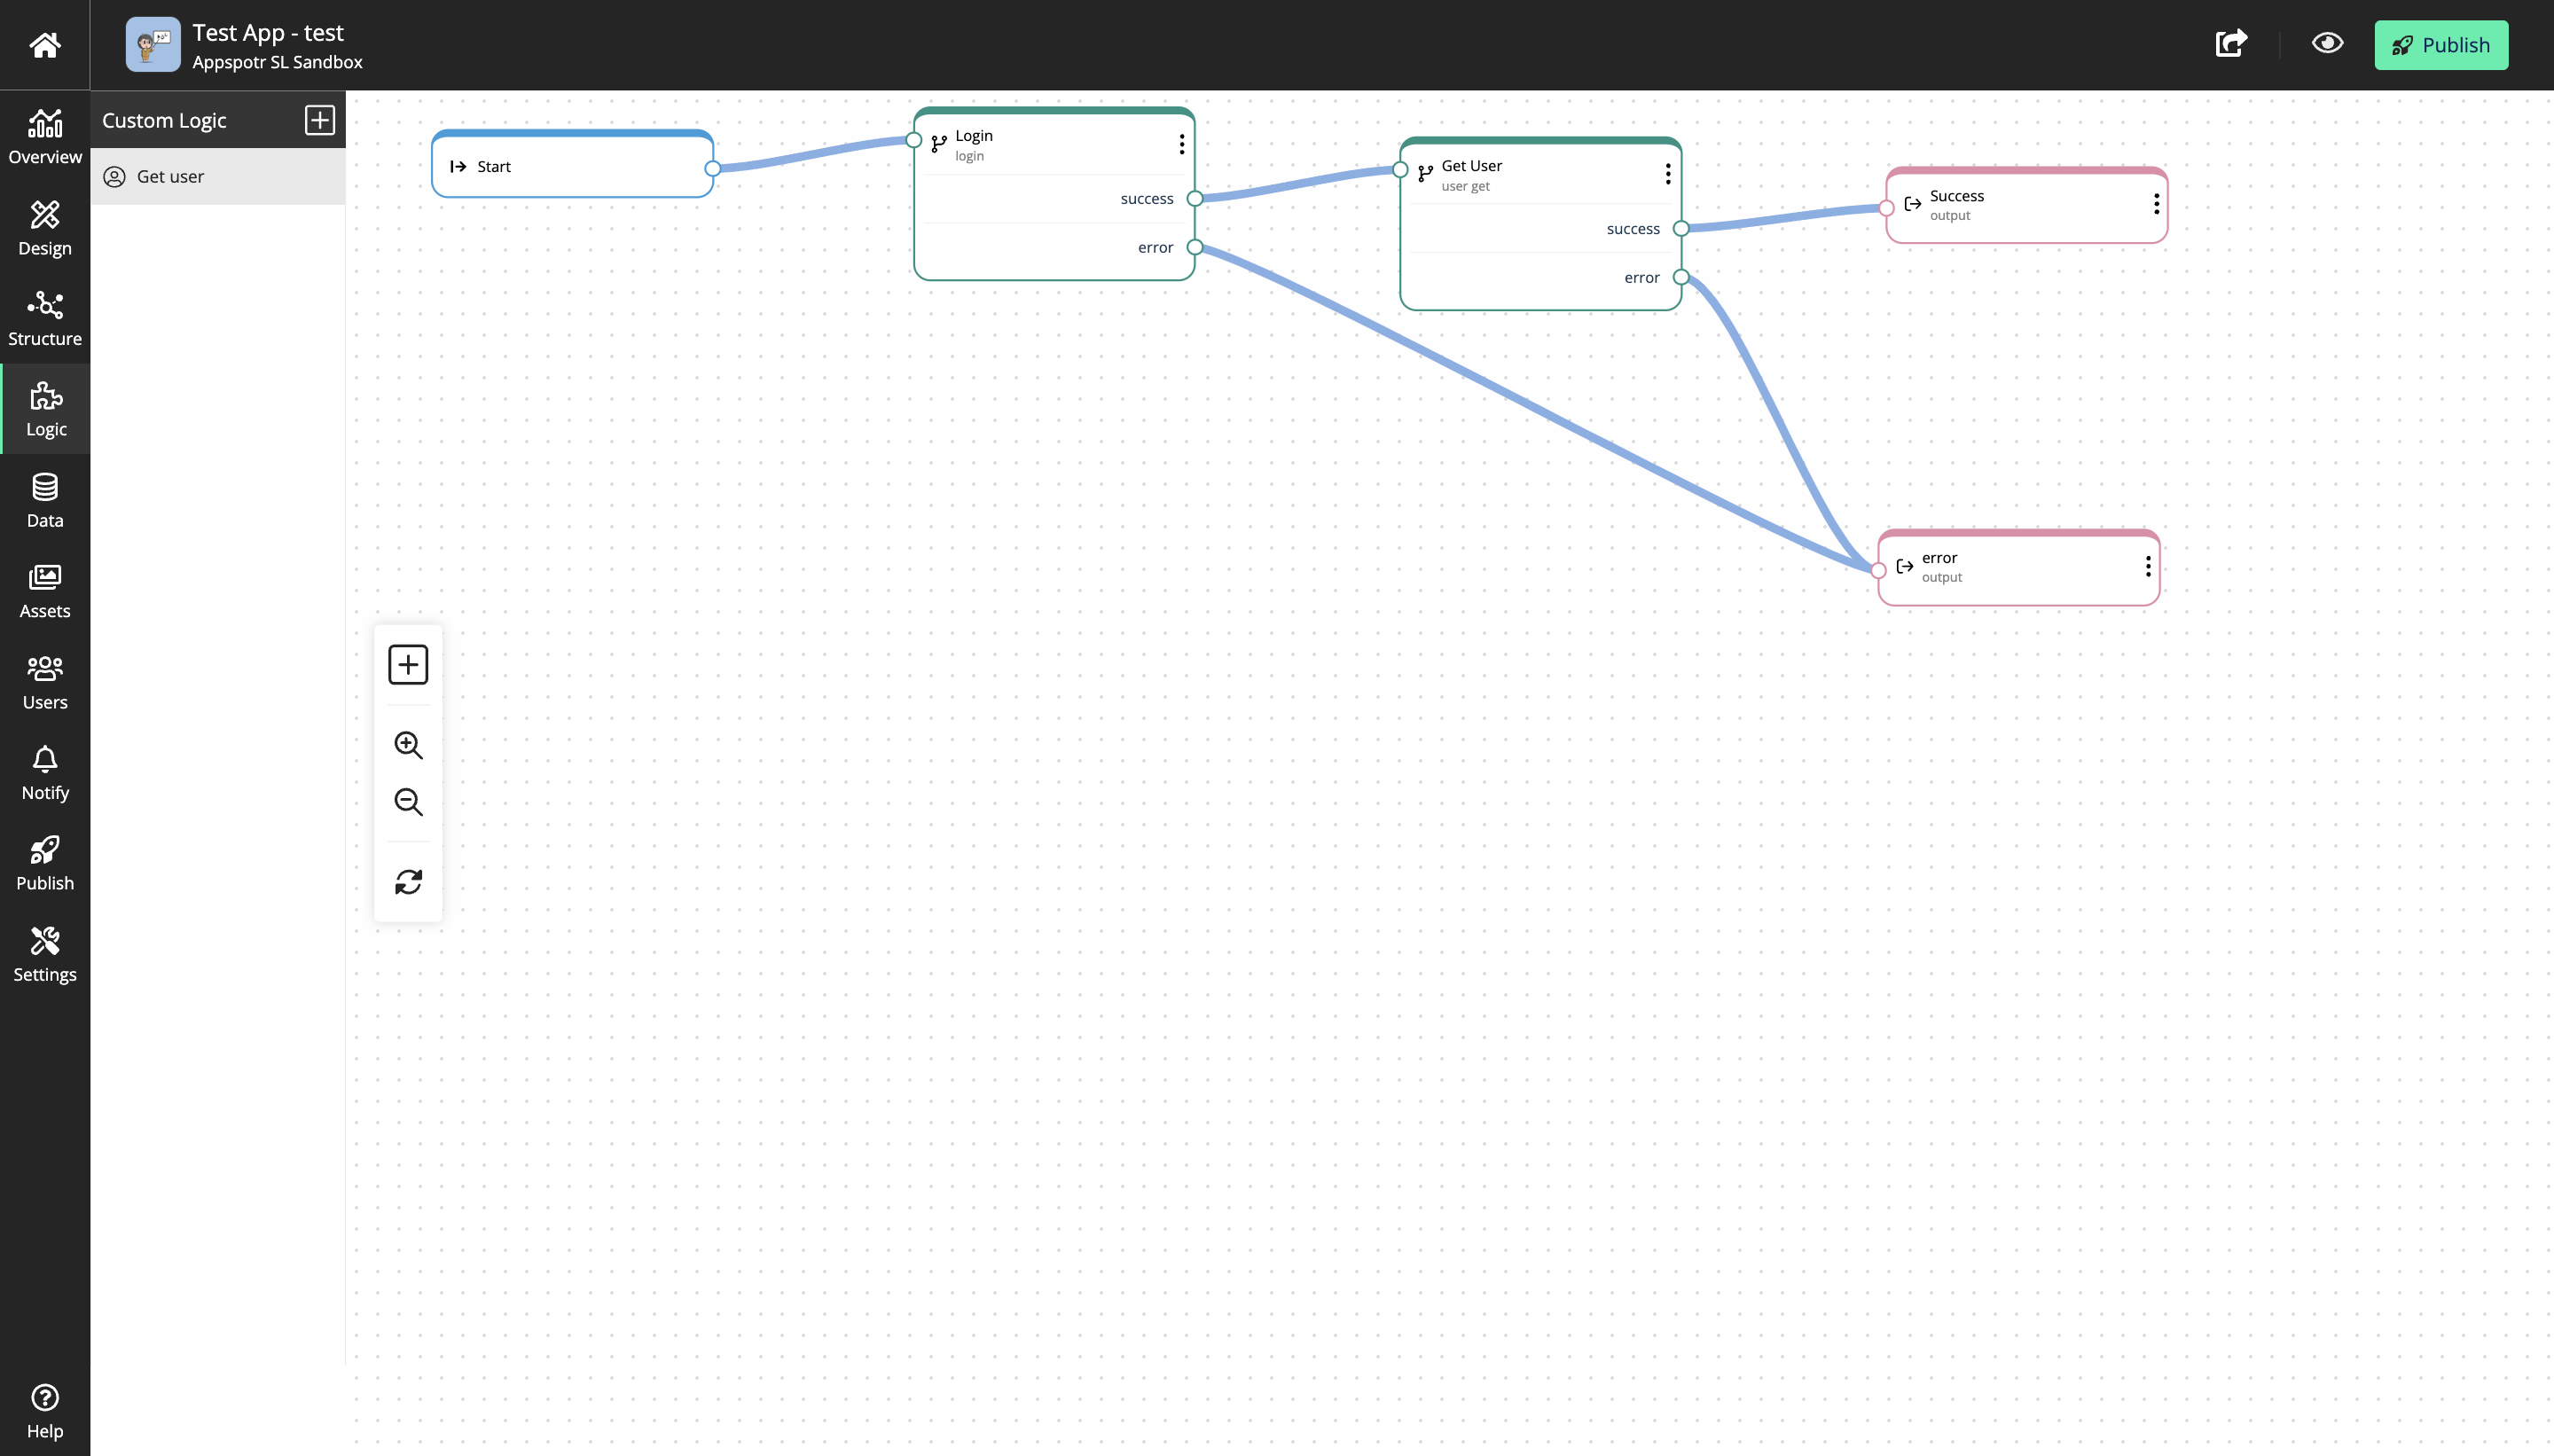
For this guide, we’ll be adding a Login logic patch and a Get User logic patch to continue further.
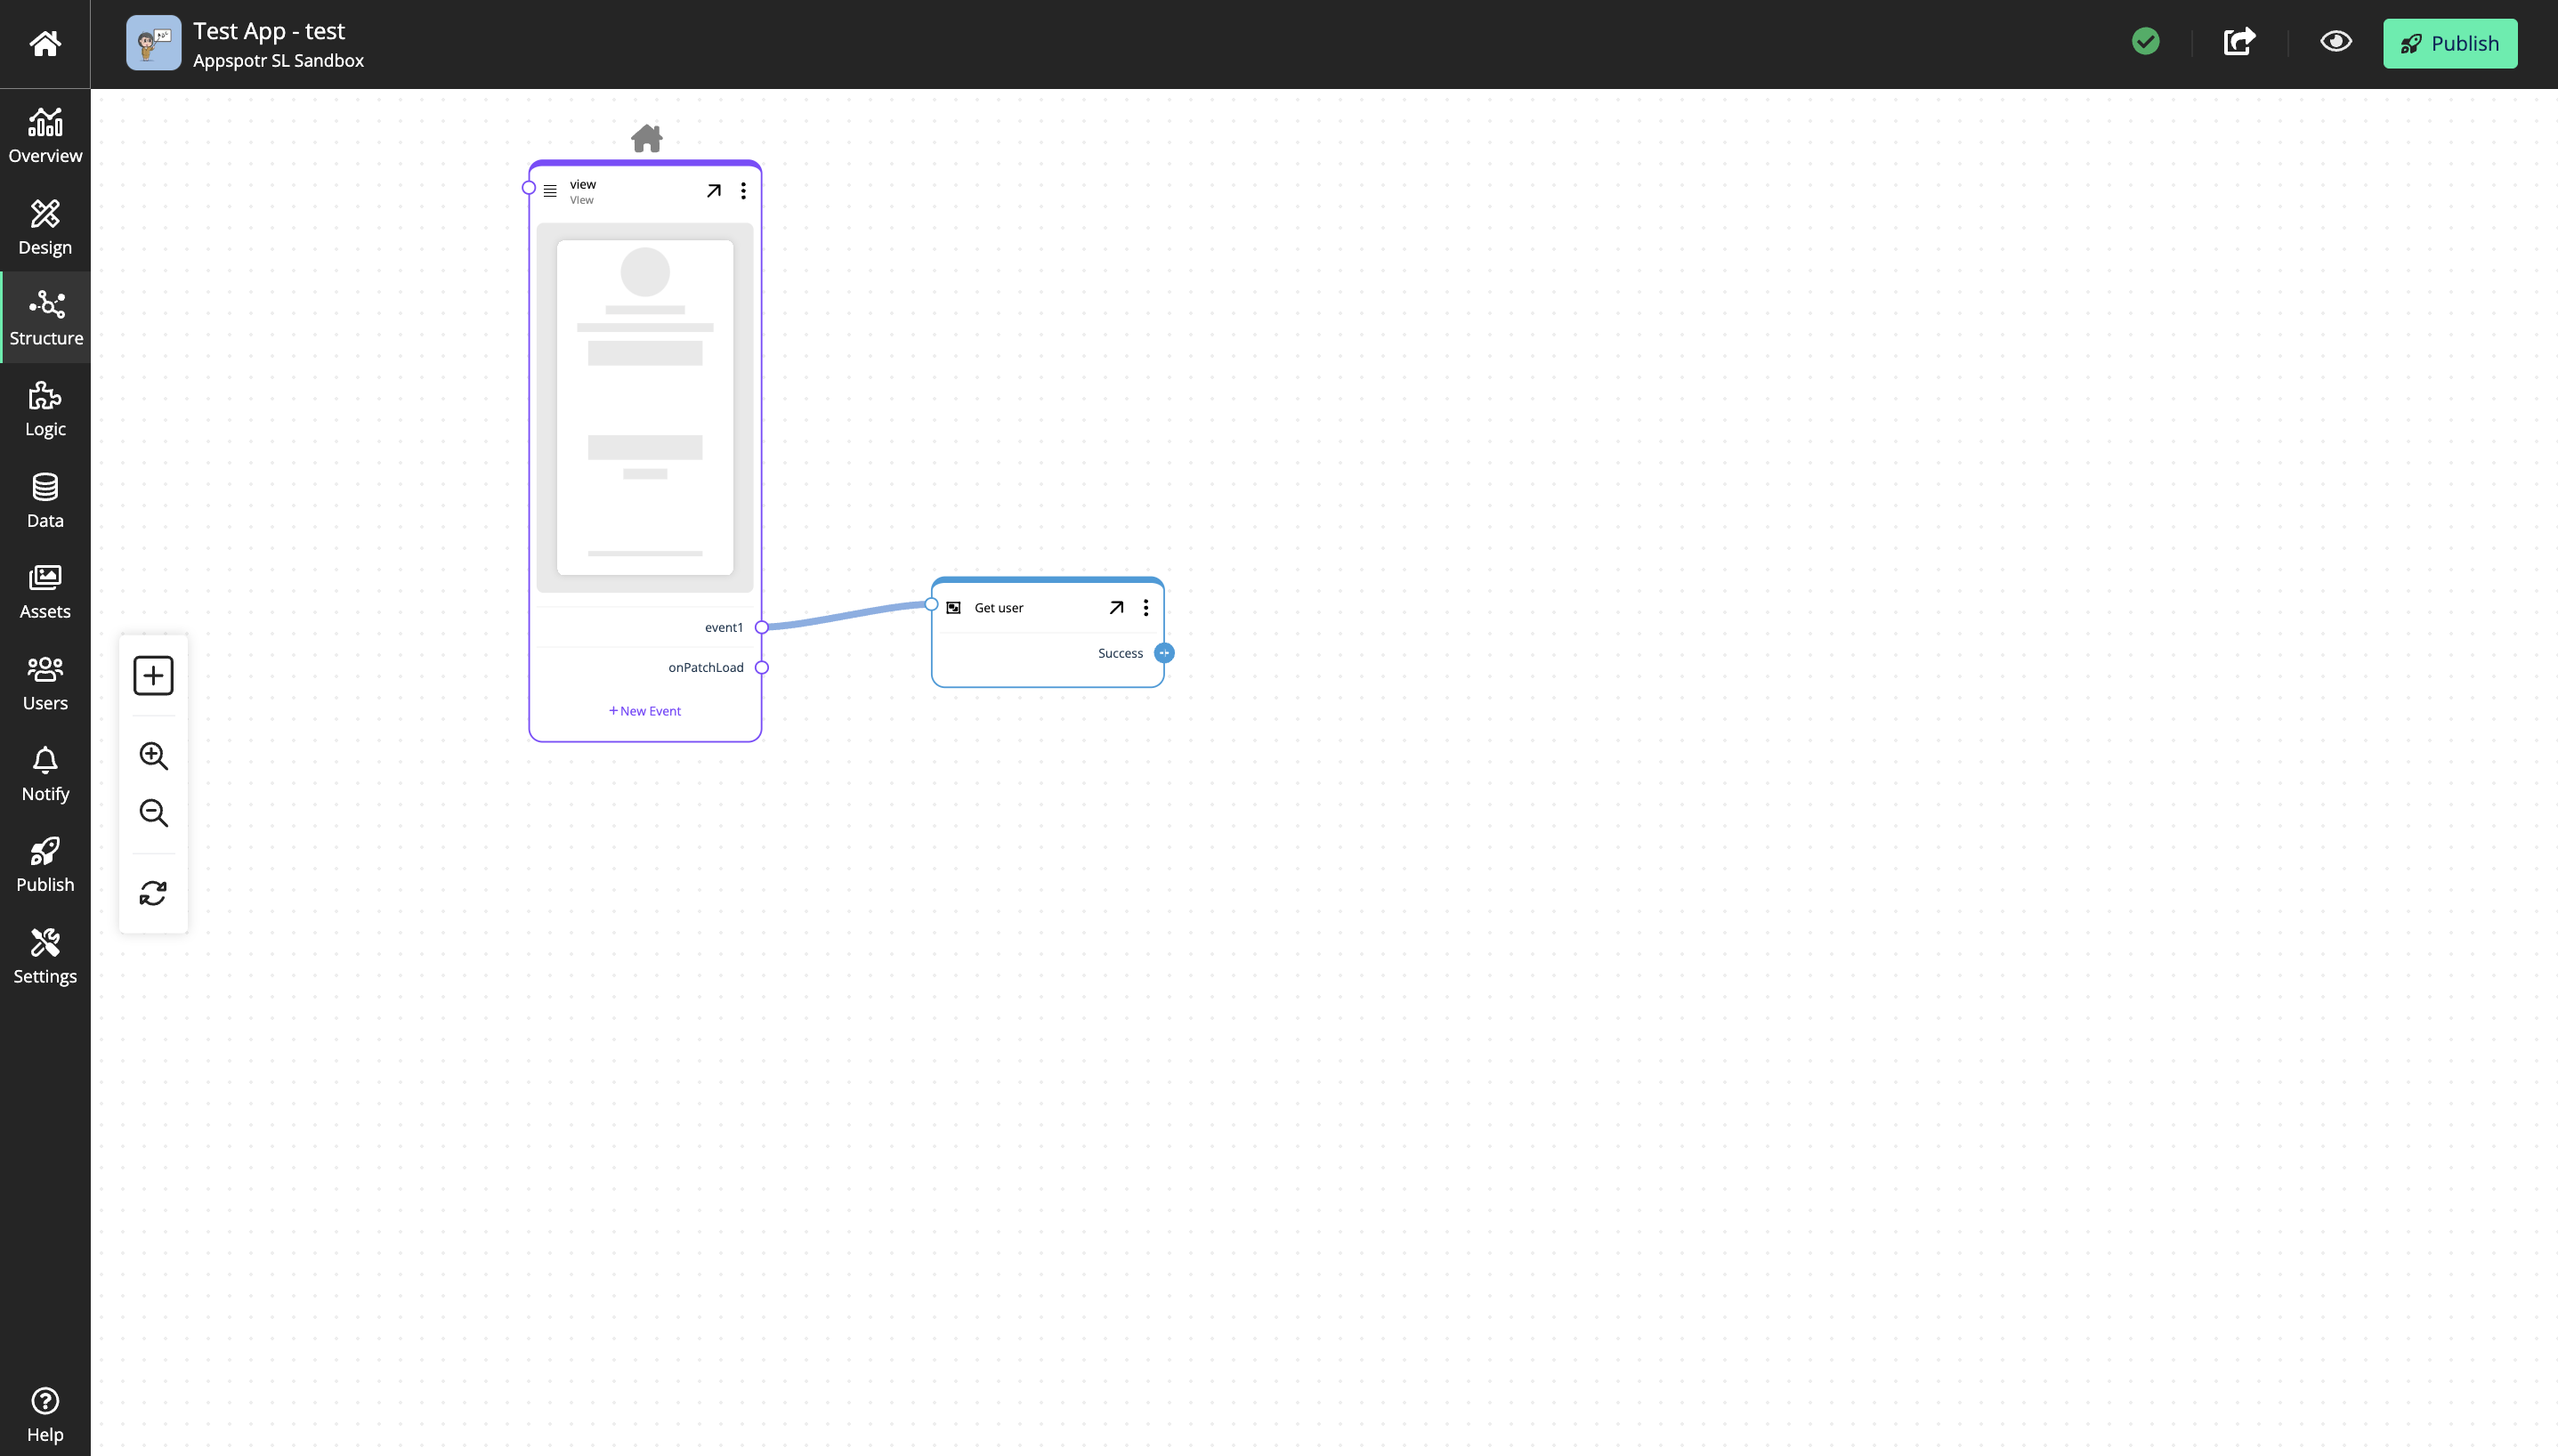
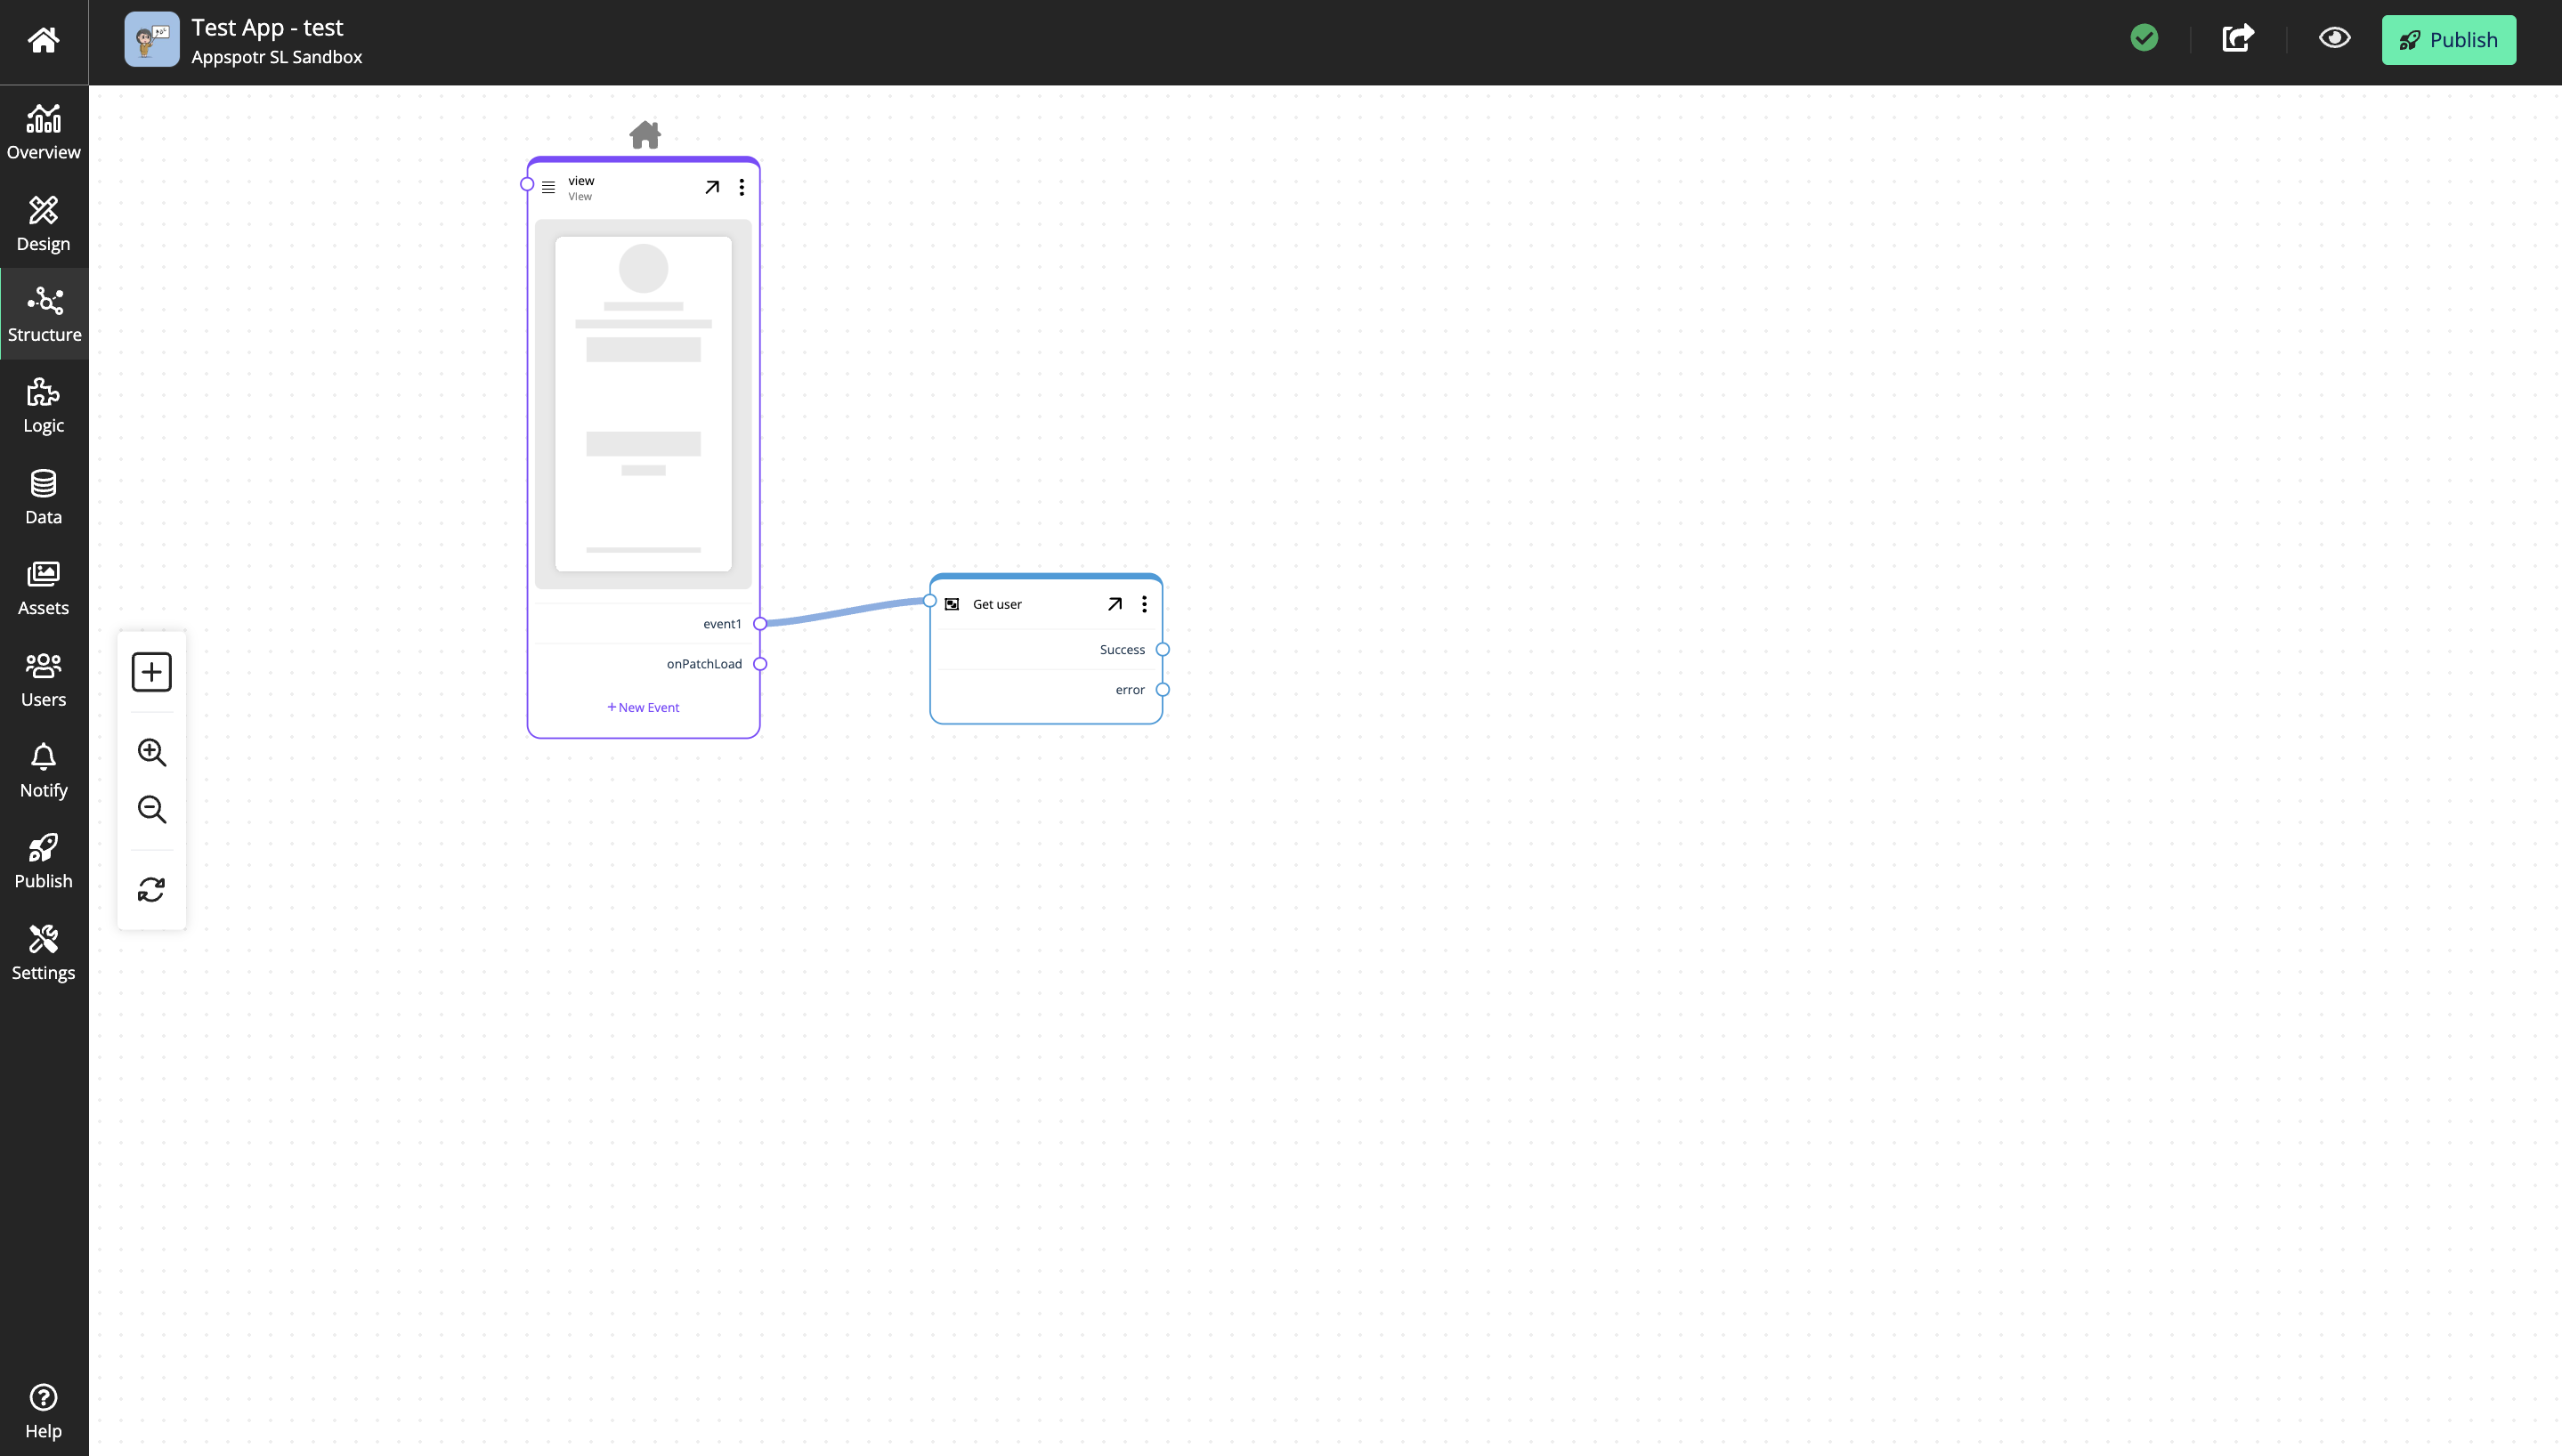
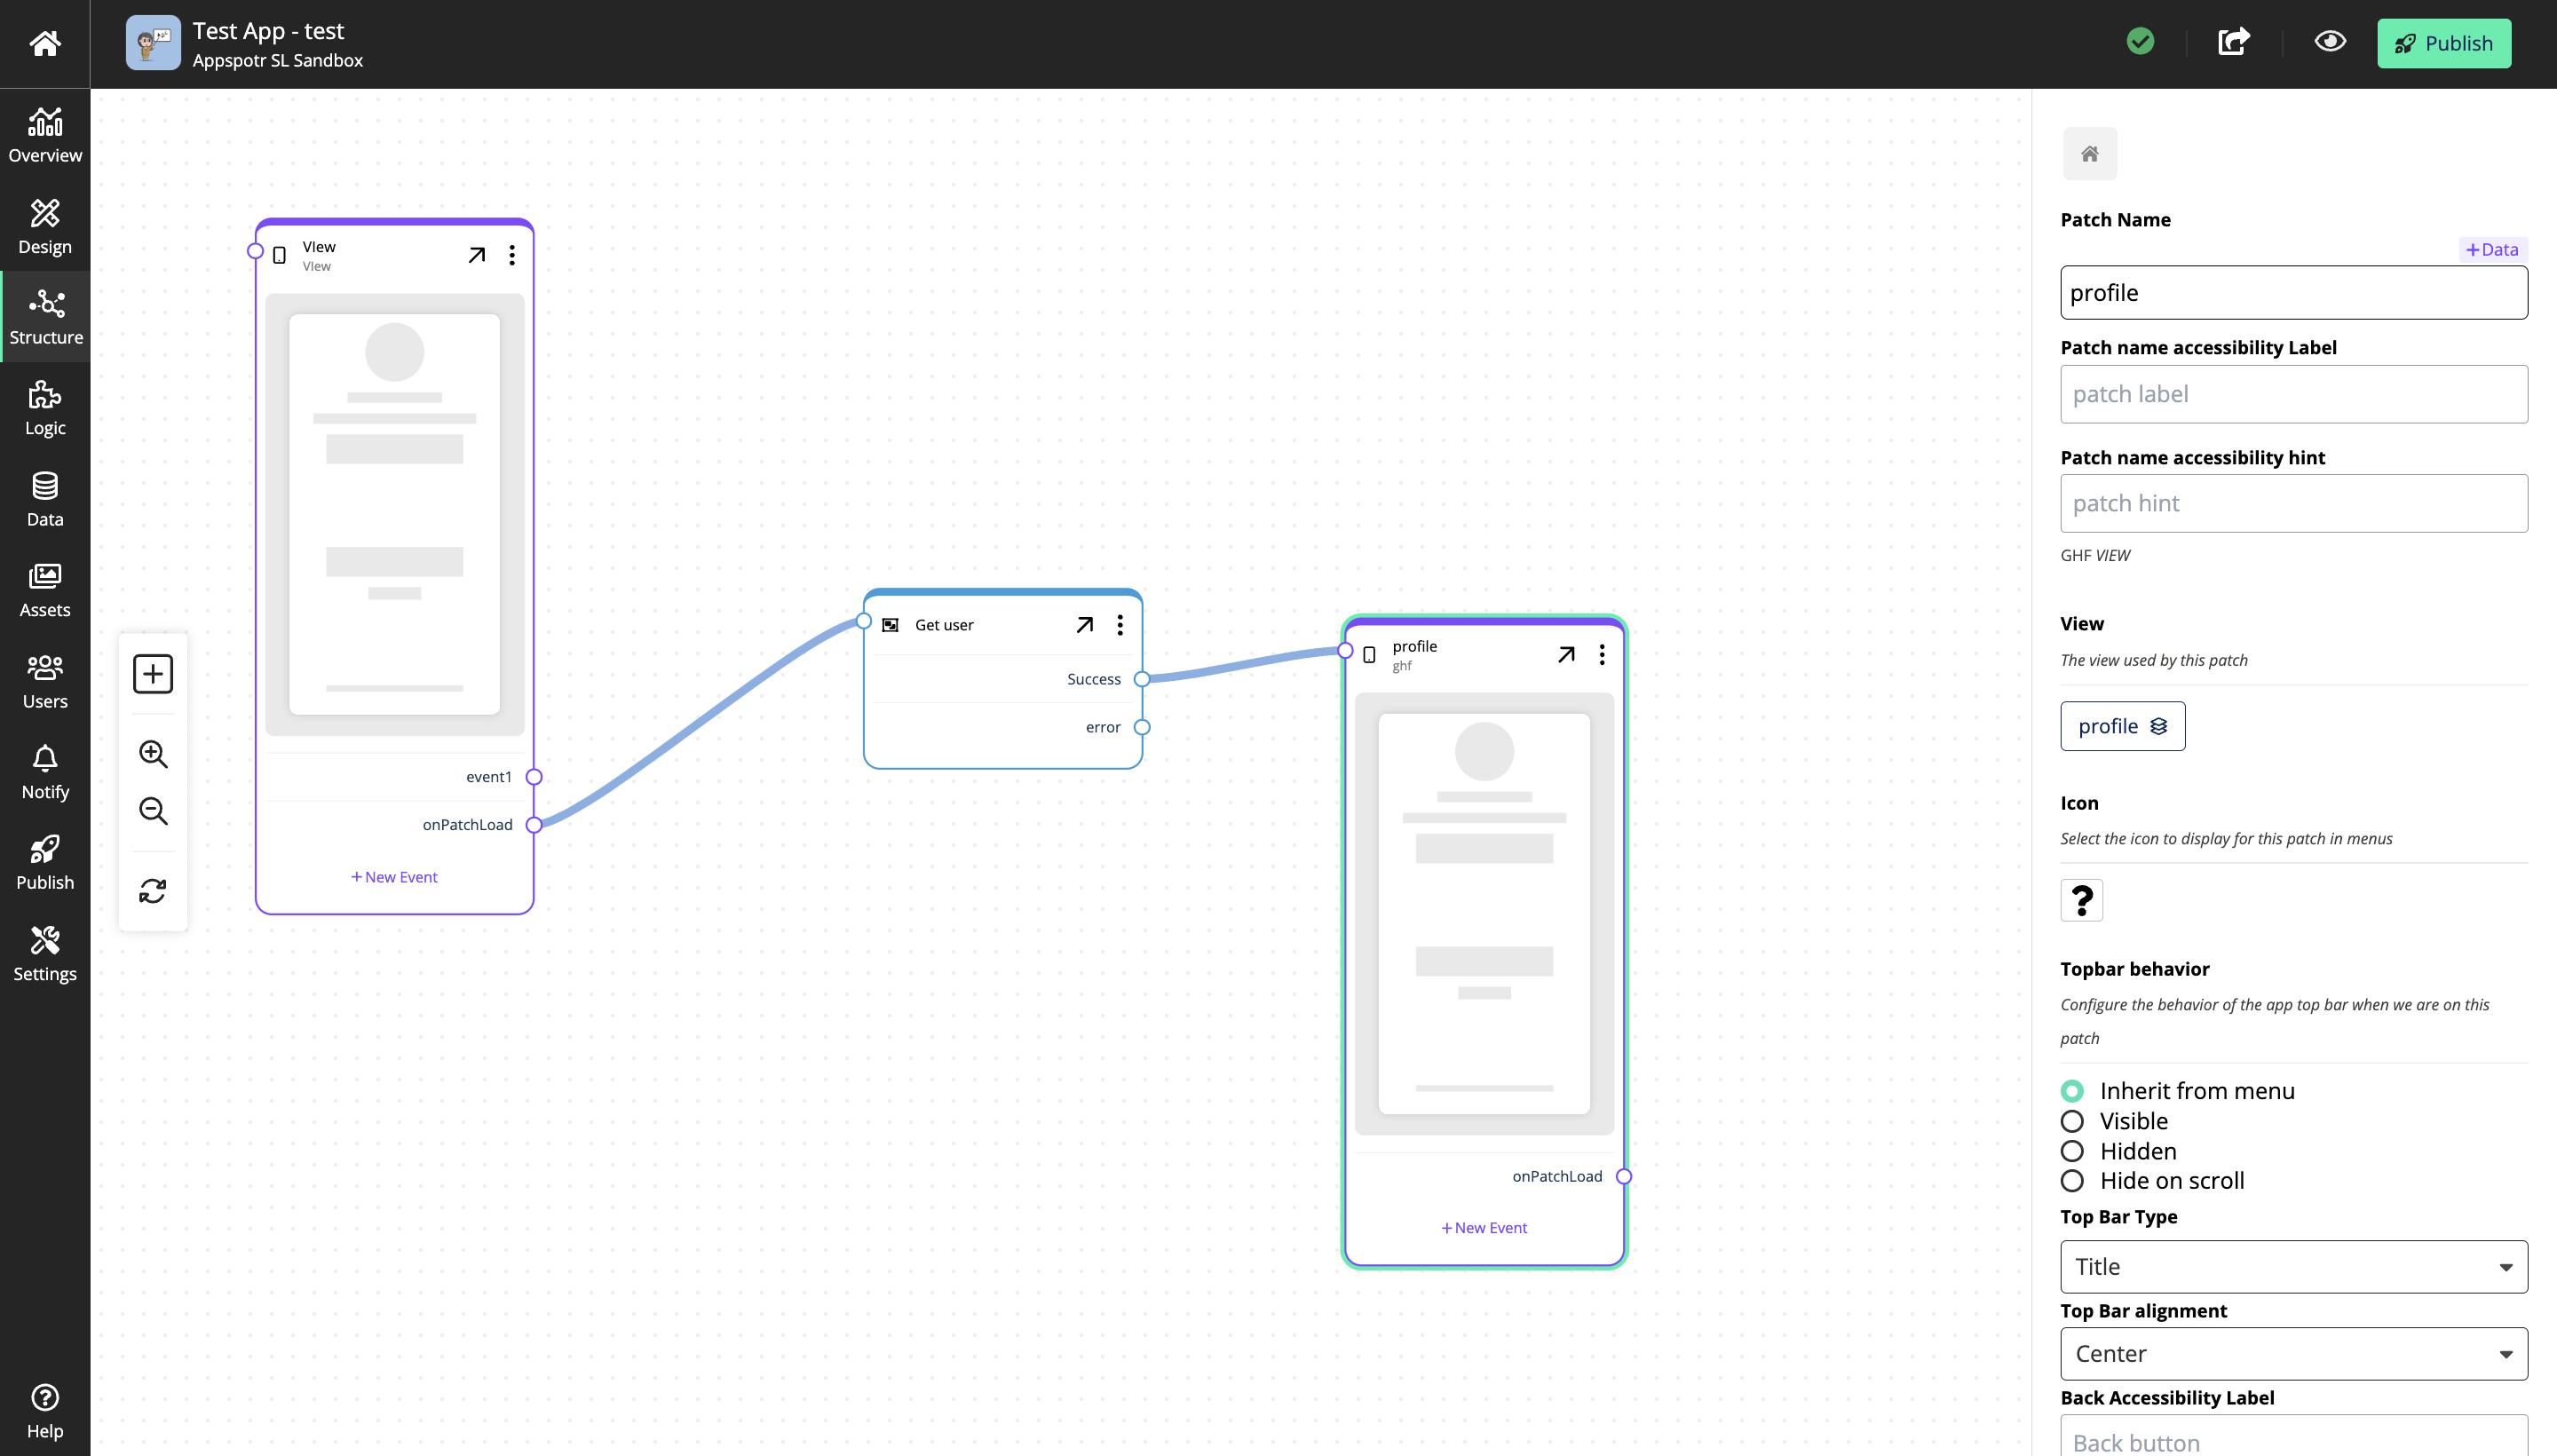
Open the Structure Builder and add a view.
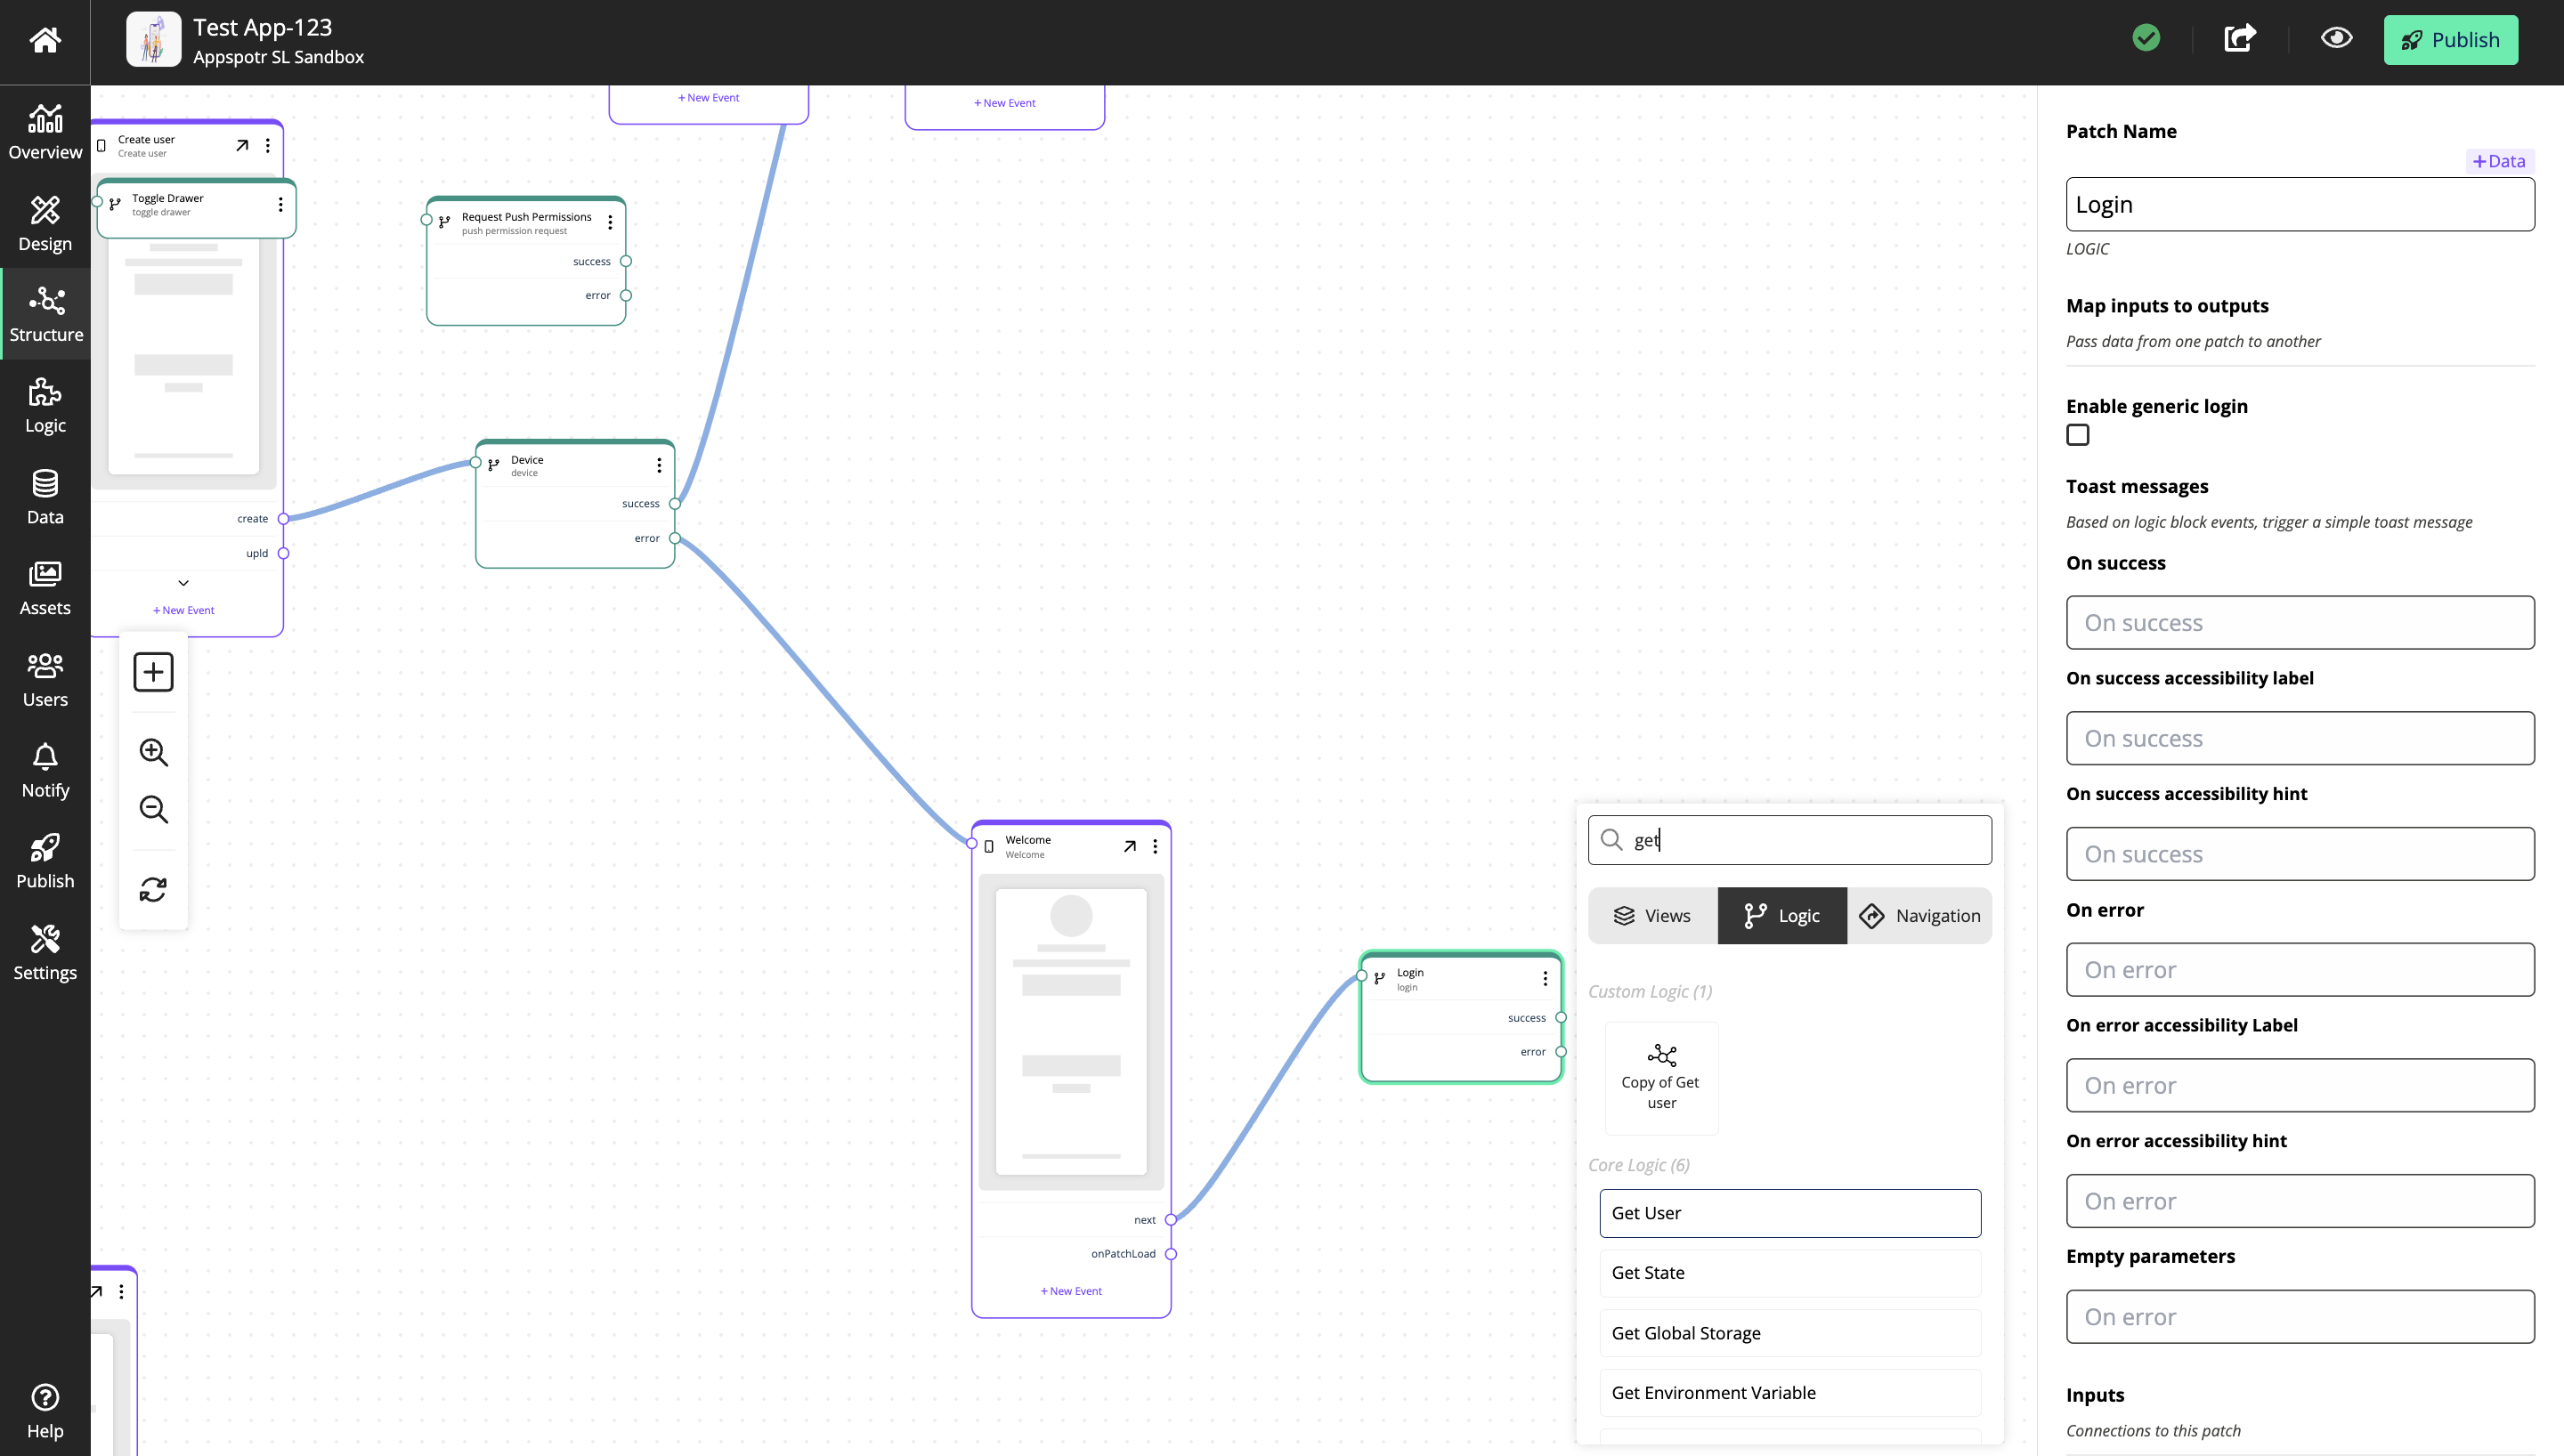
When you click on add event you will be able to see the custom logic that you created earlier, under Logic > Custom Logic
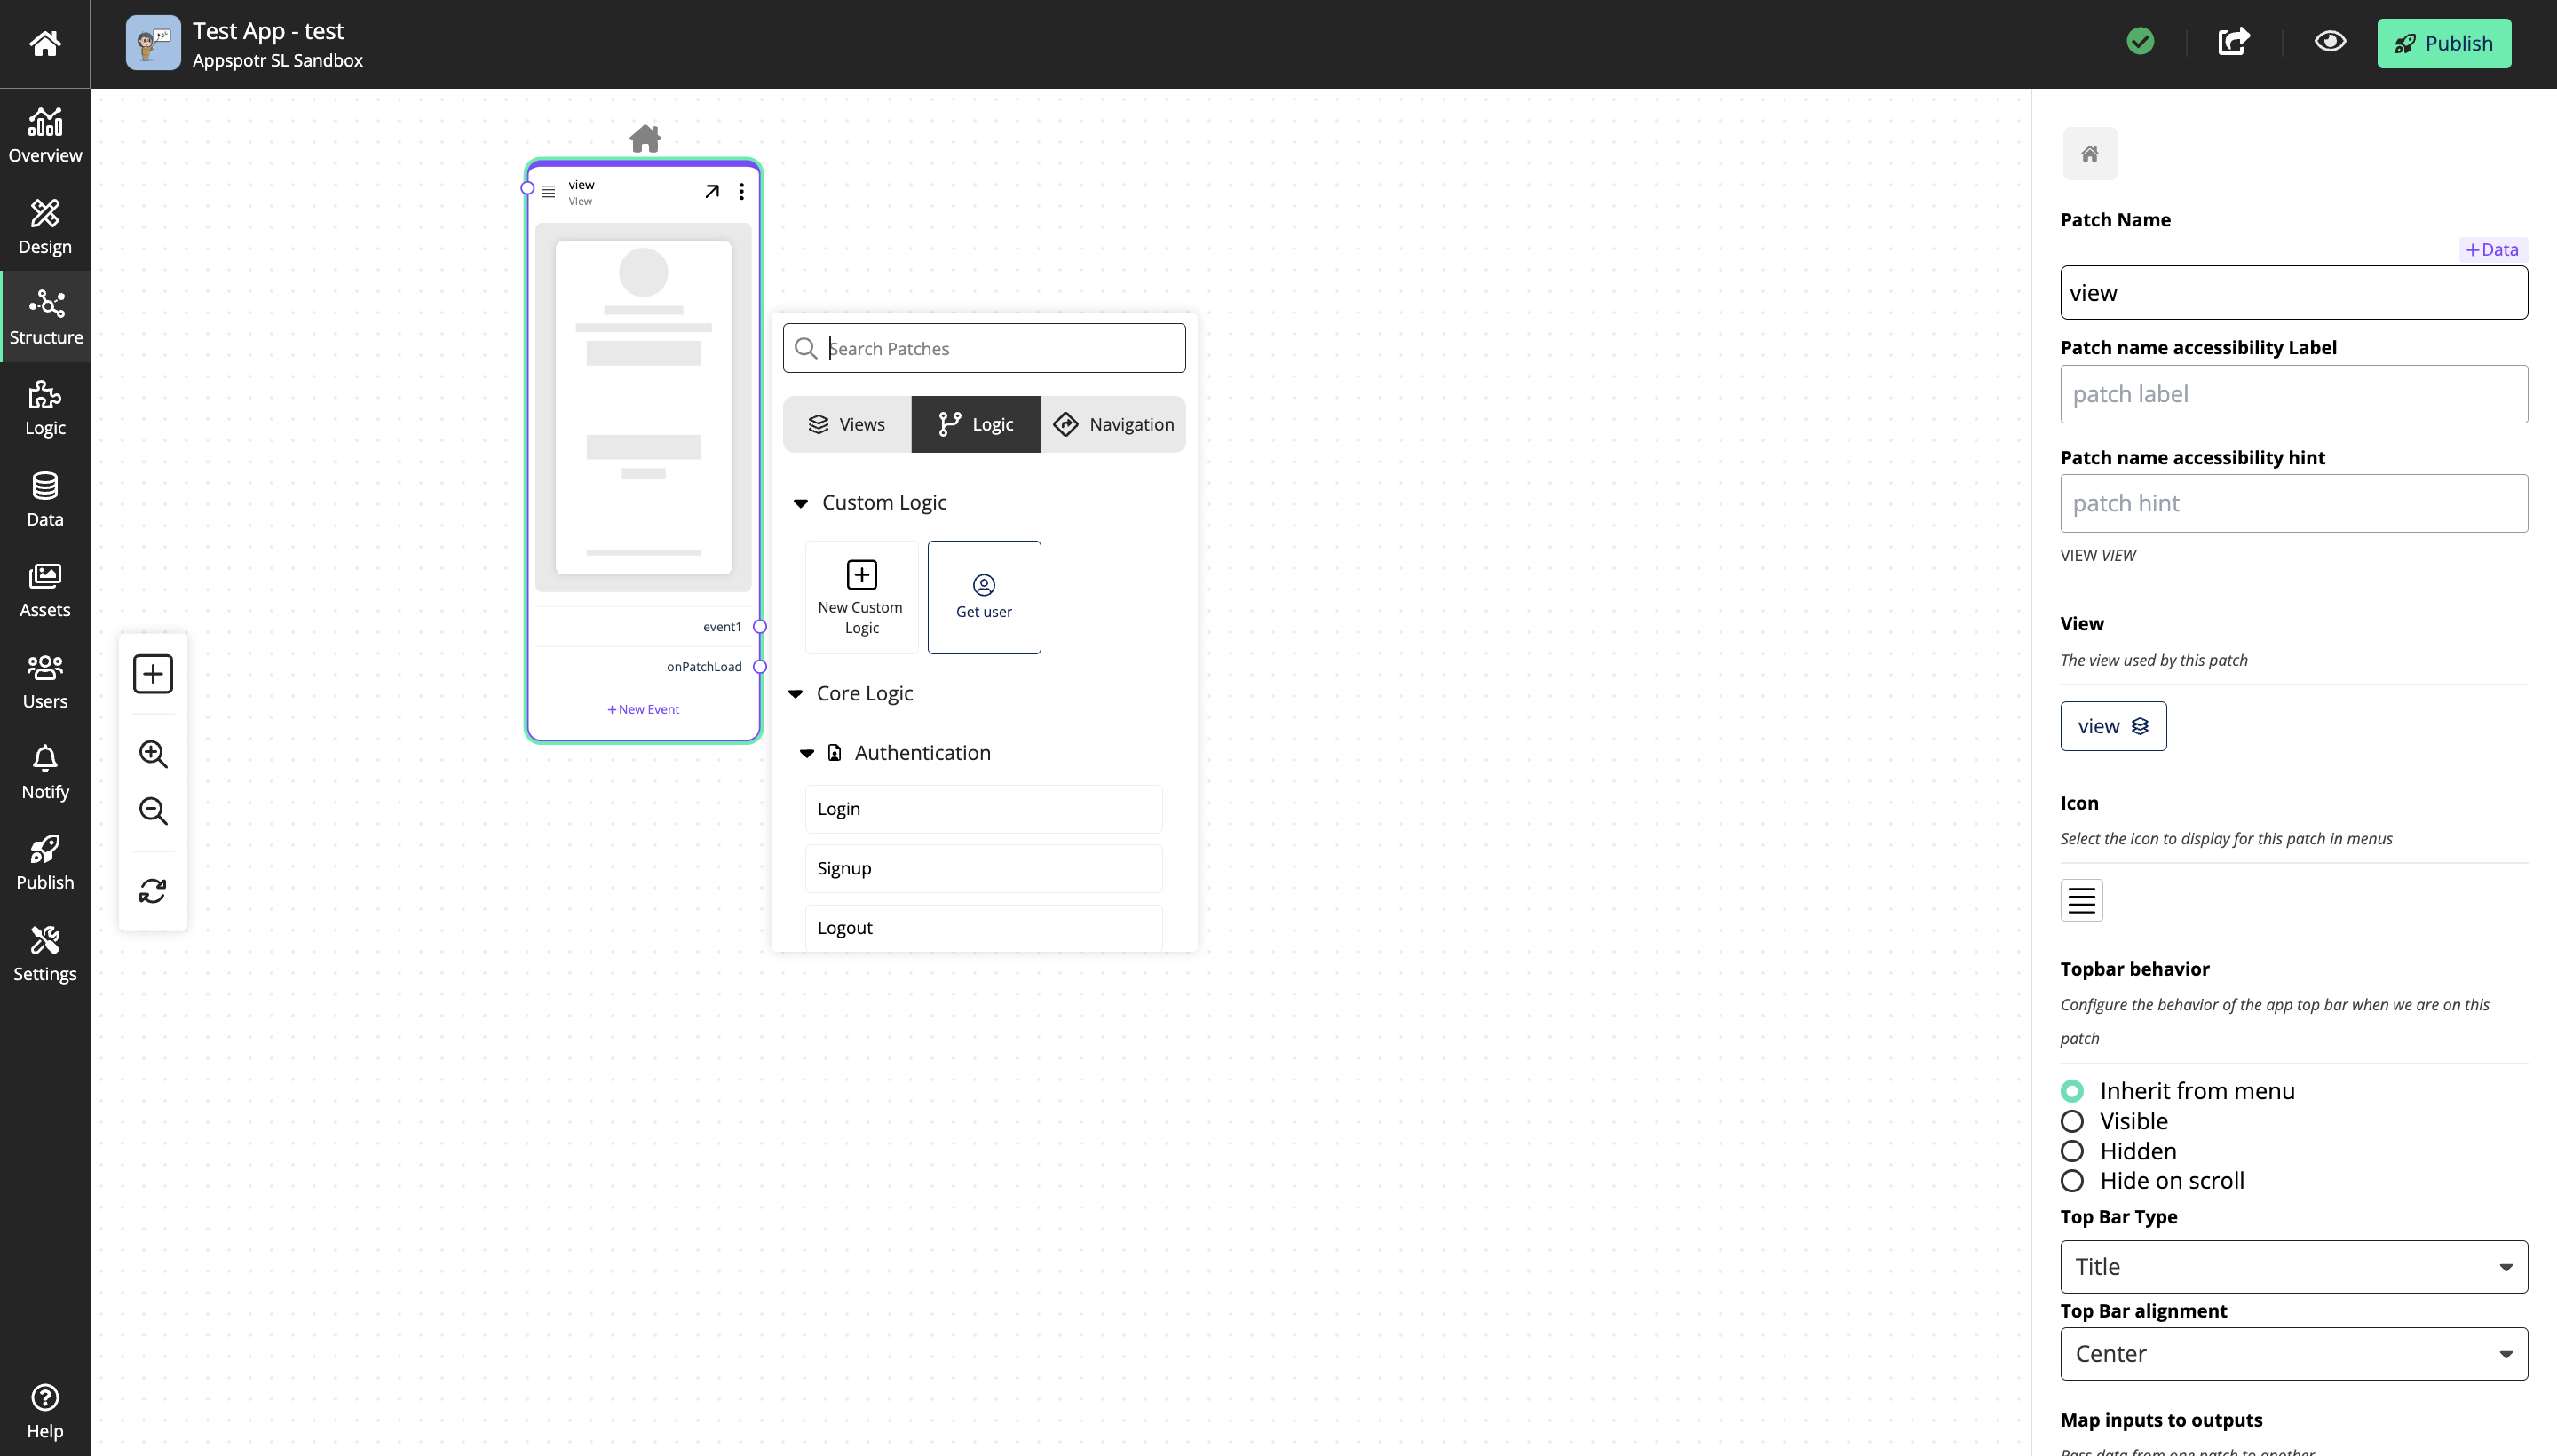
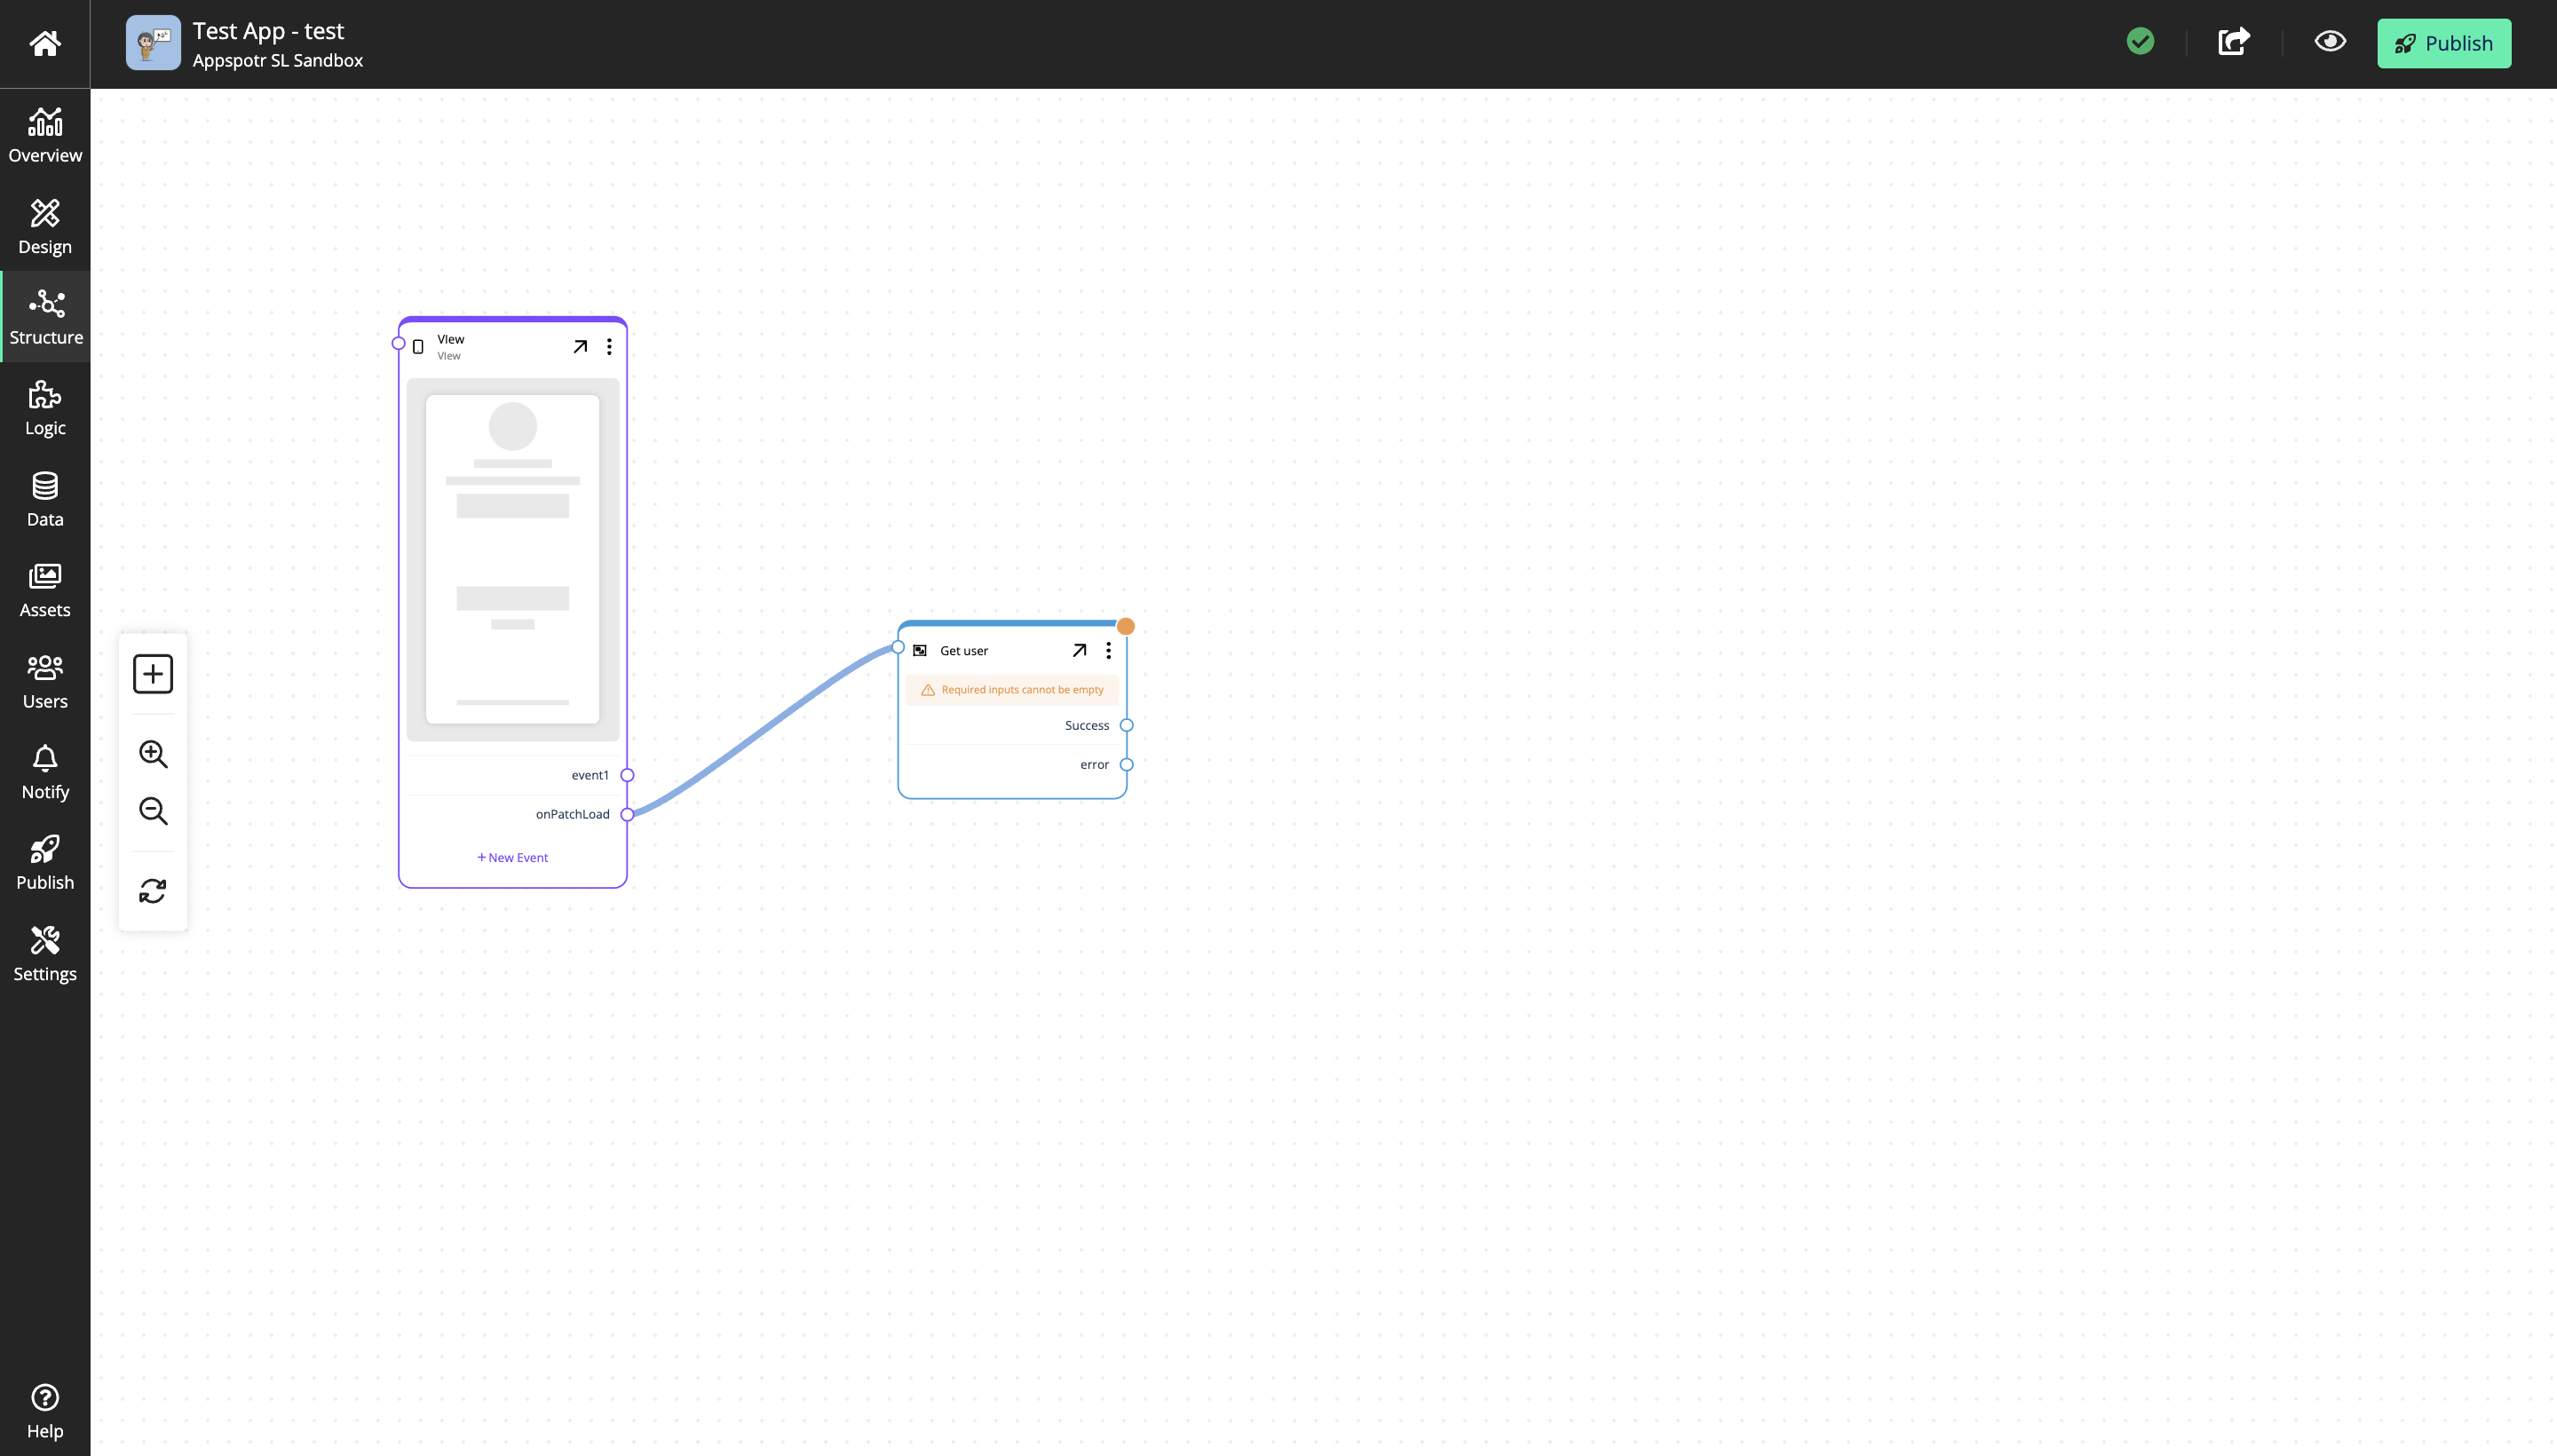
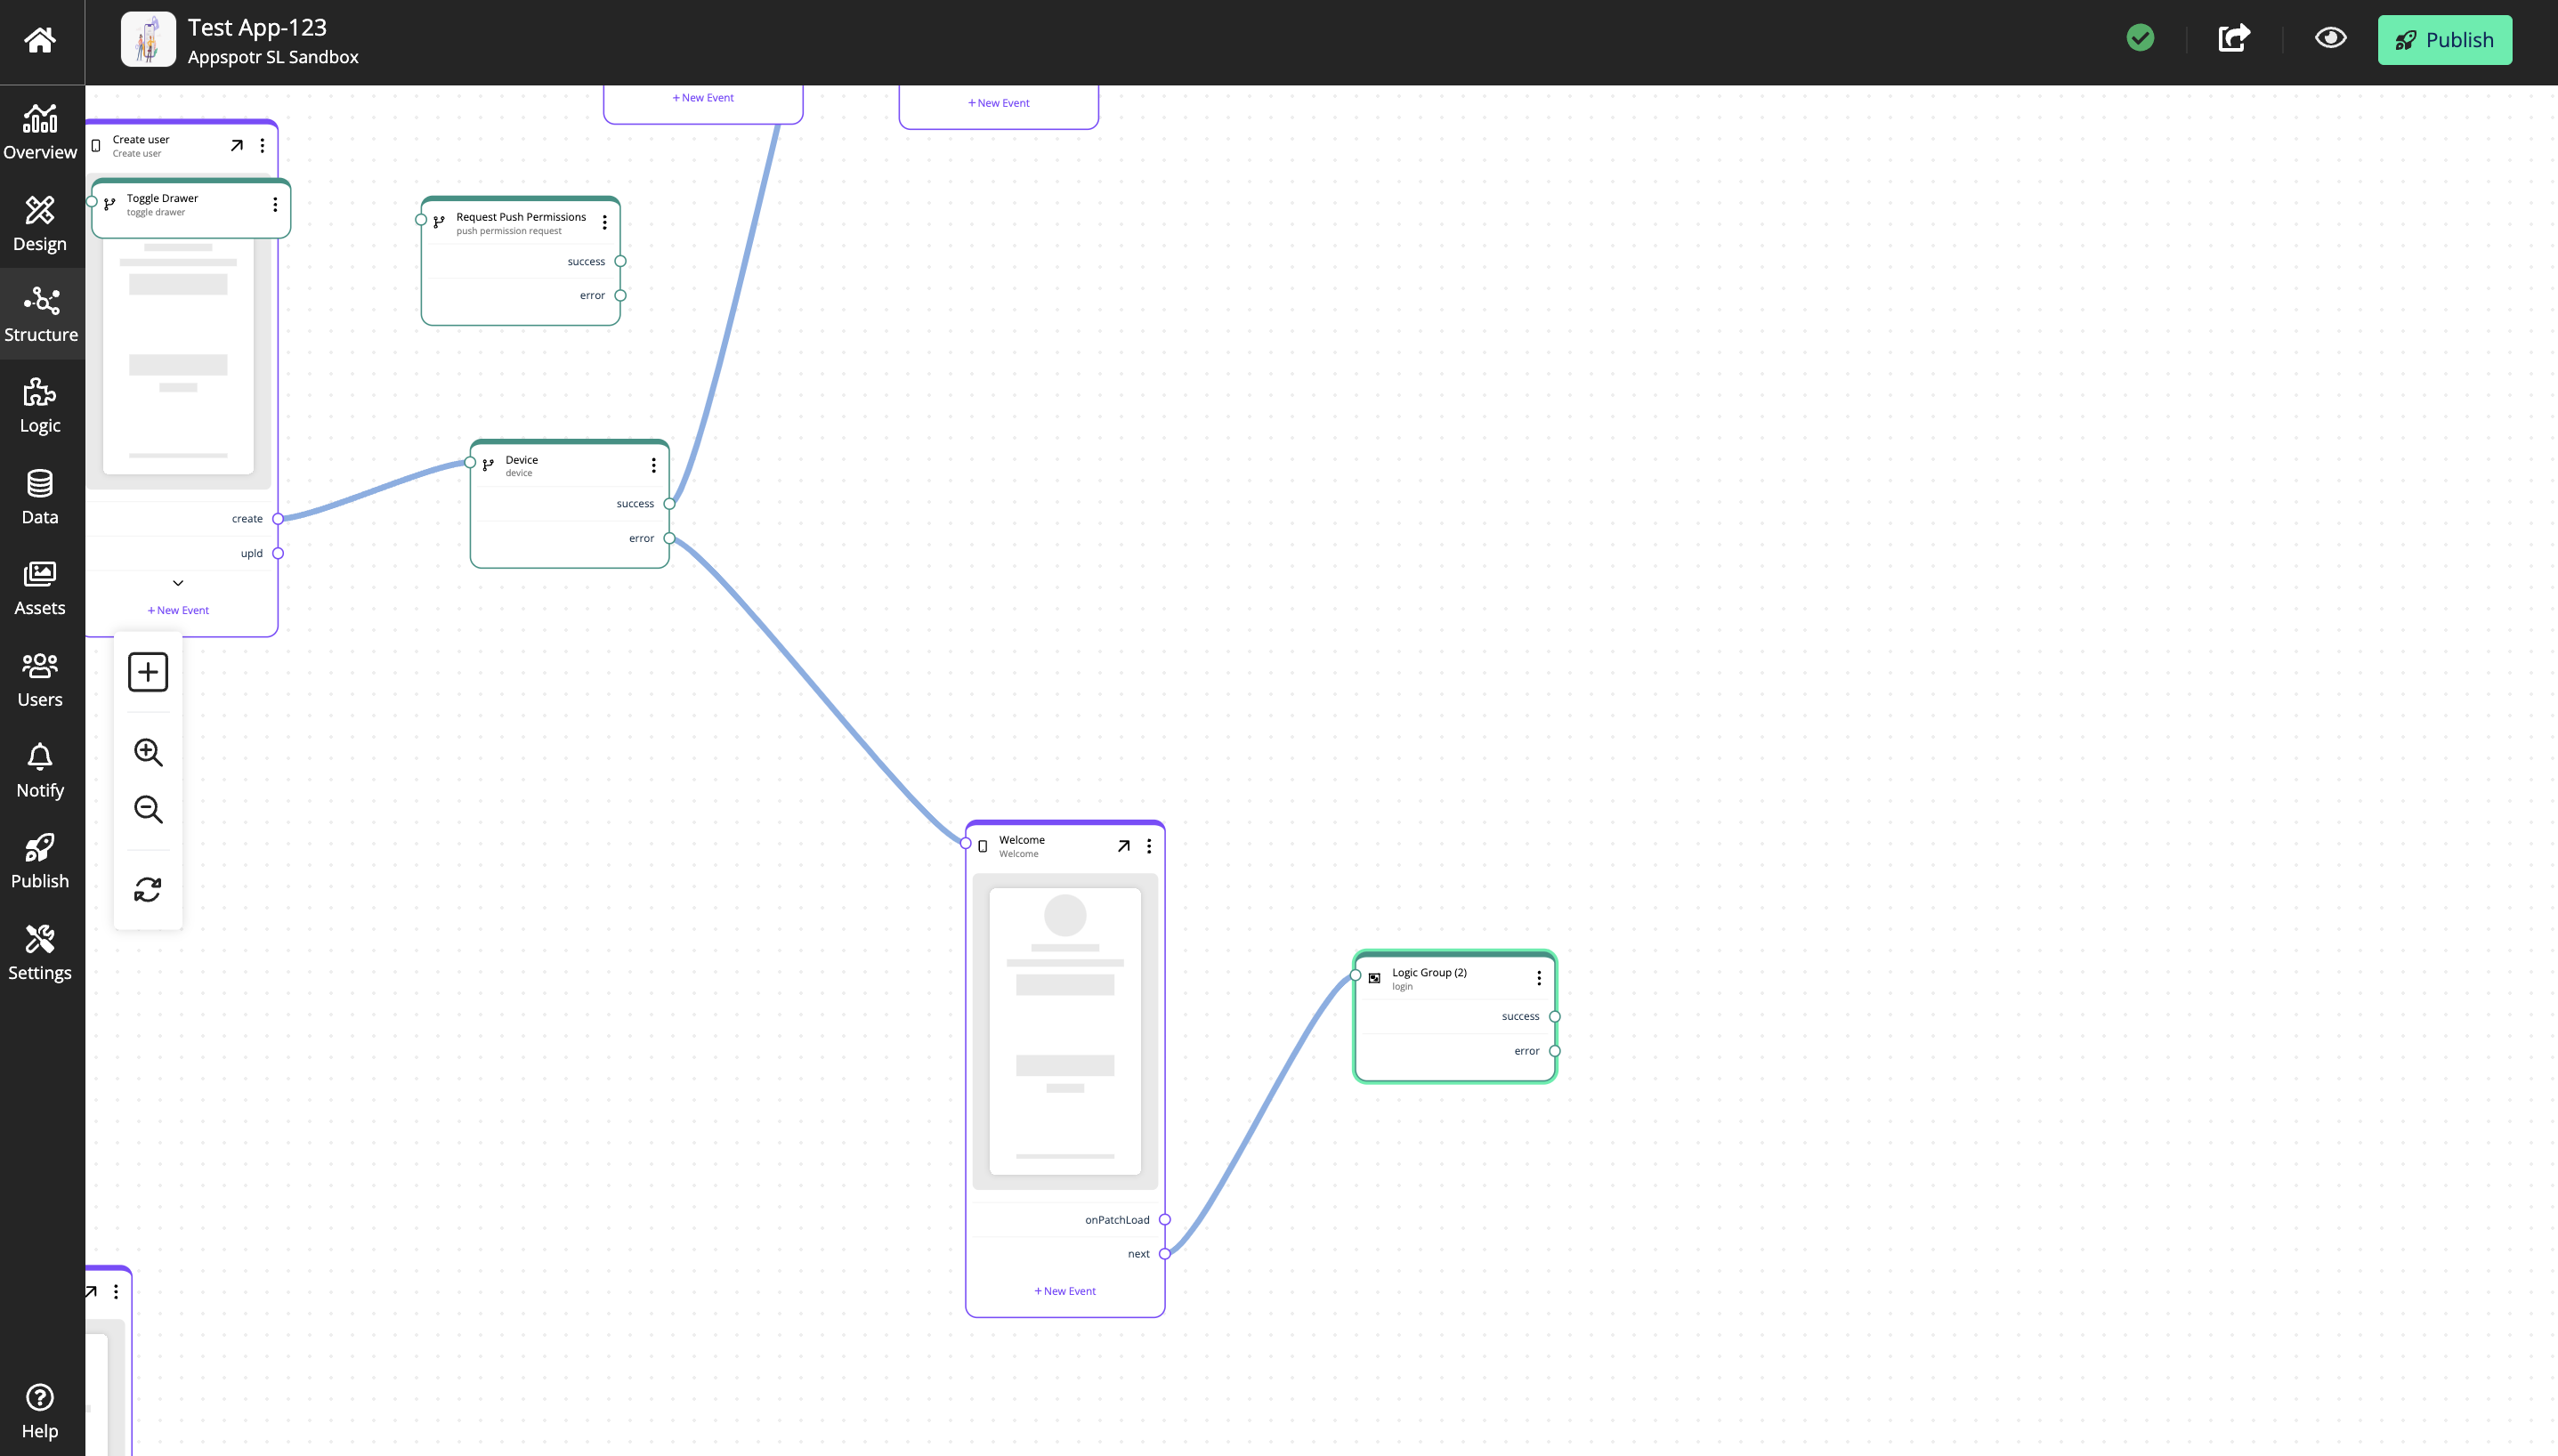
And when you click on it too add the custom logic, it will appear on the canvas as same as in the Logics, color coded in blue.
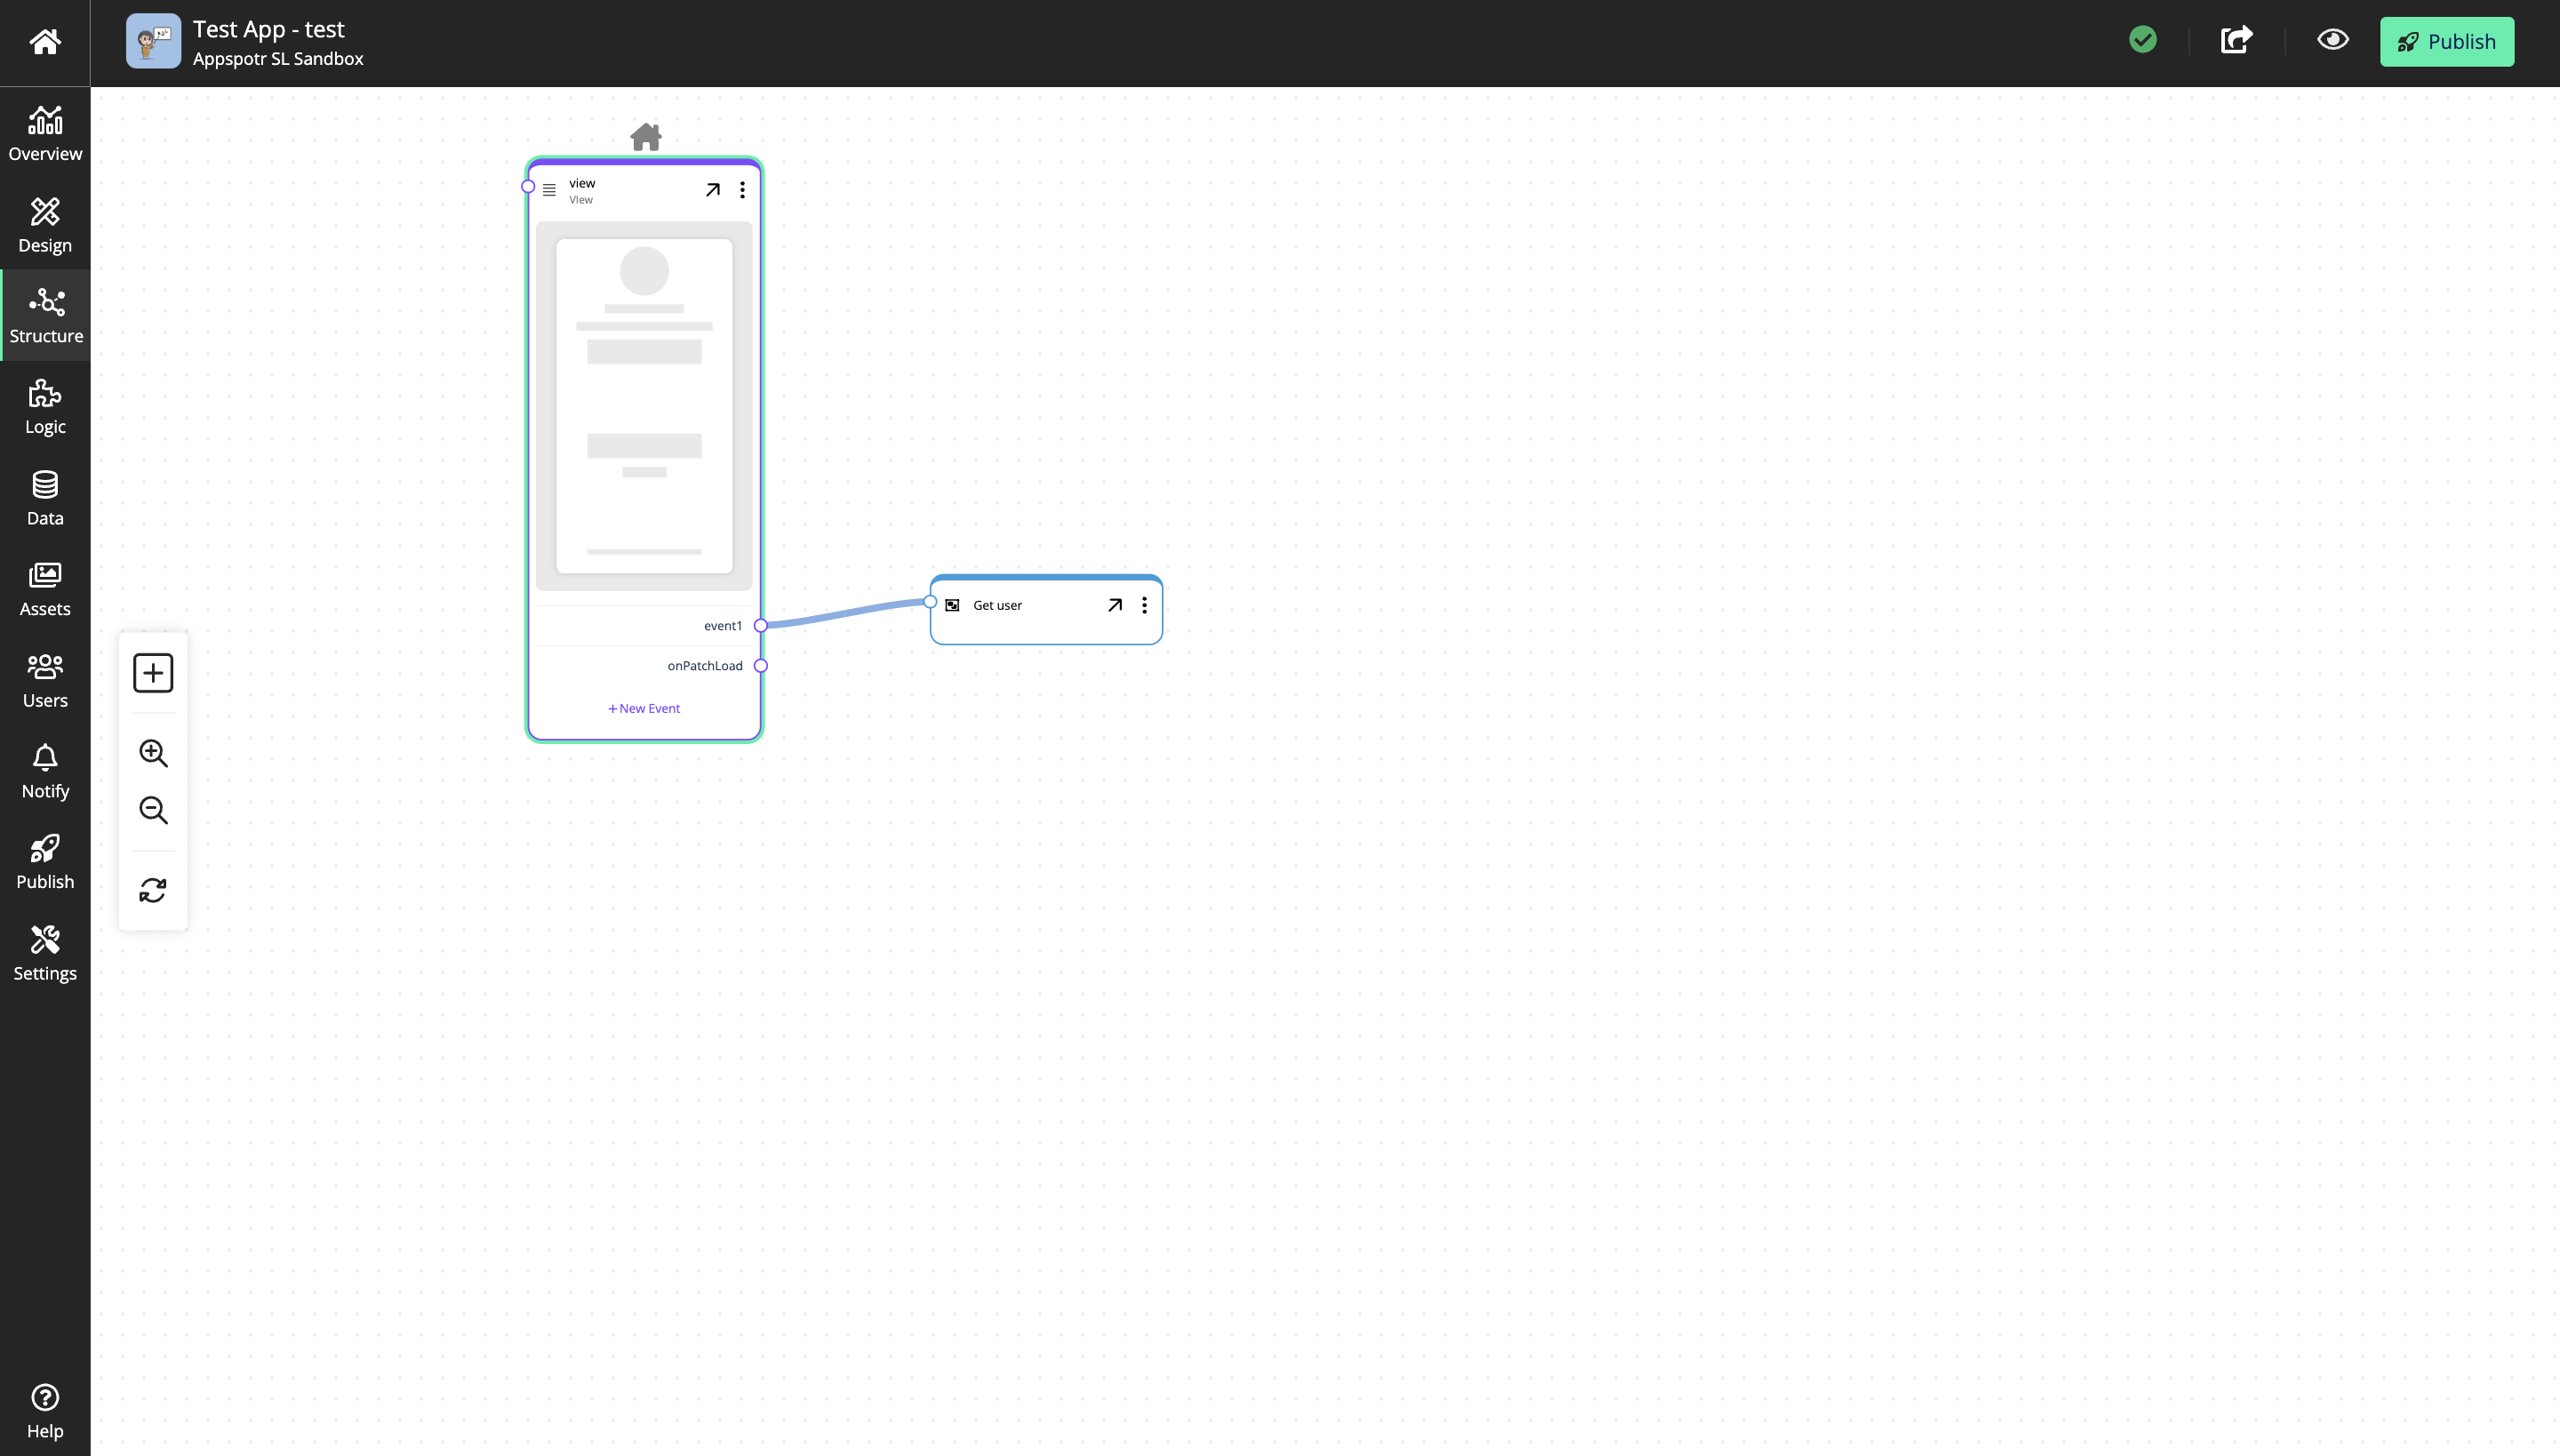
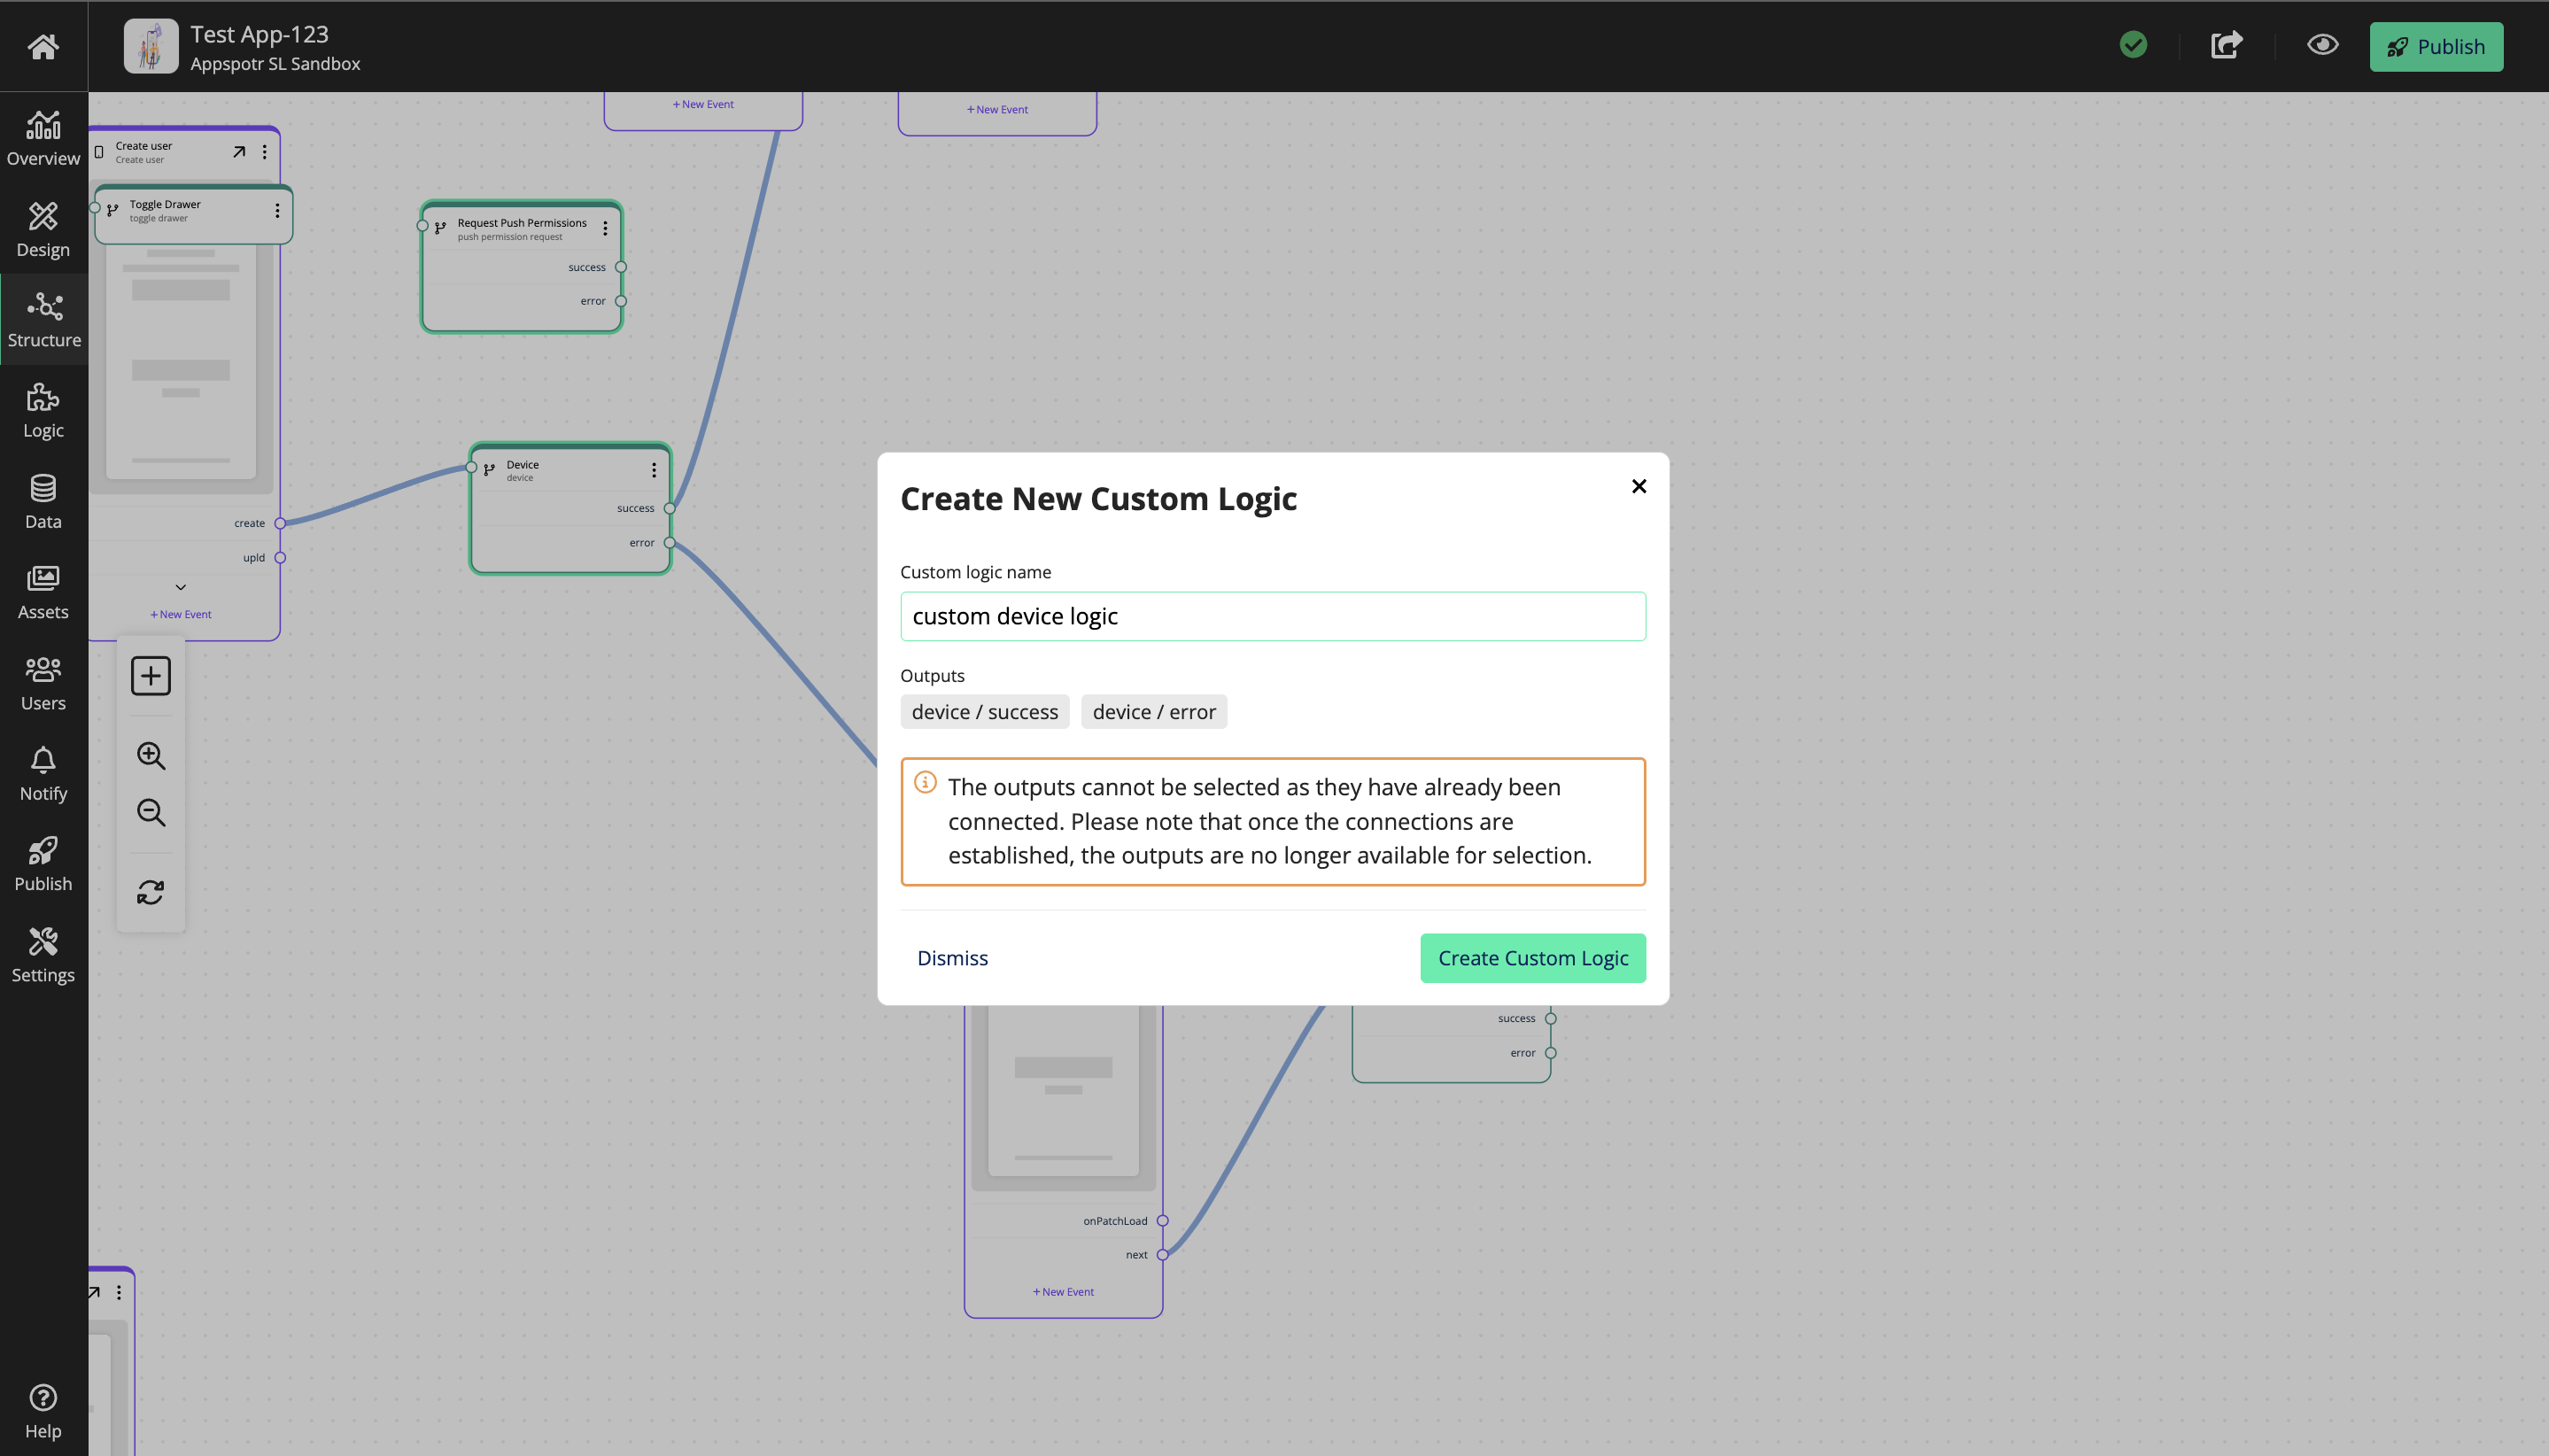
But there is no output box. That’s because we have not defined output ports earlier in Custom Logic building step. The flexibility that’s provided here is that you can manually configure the output ports in logic.
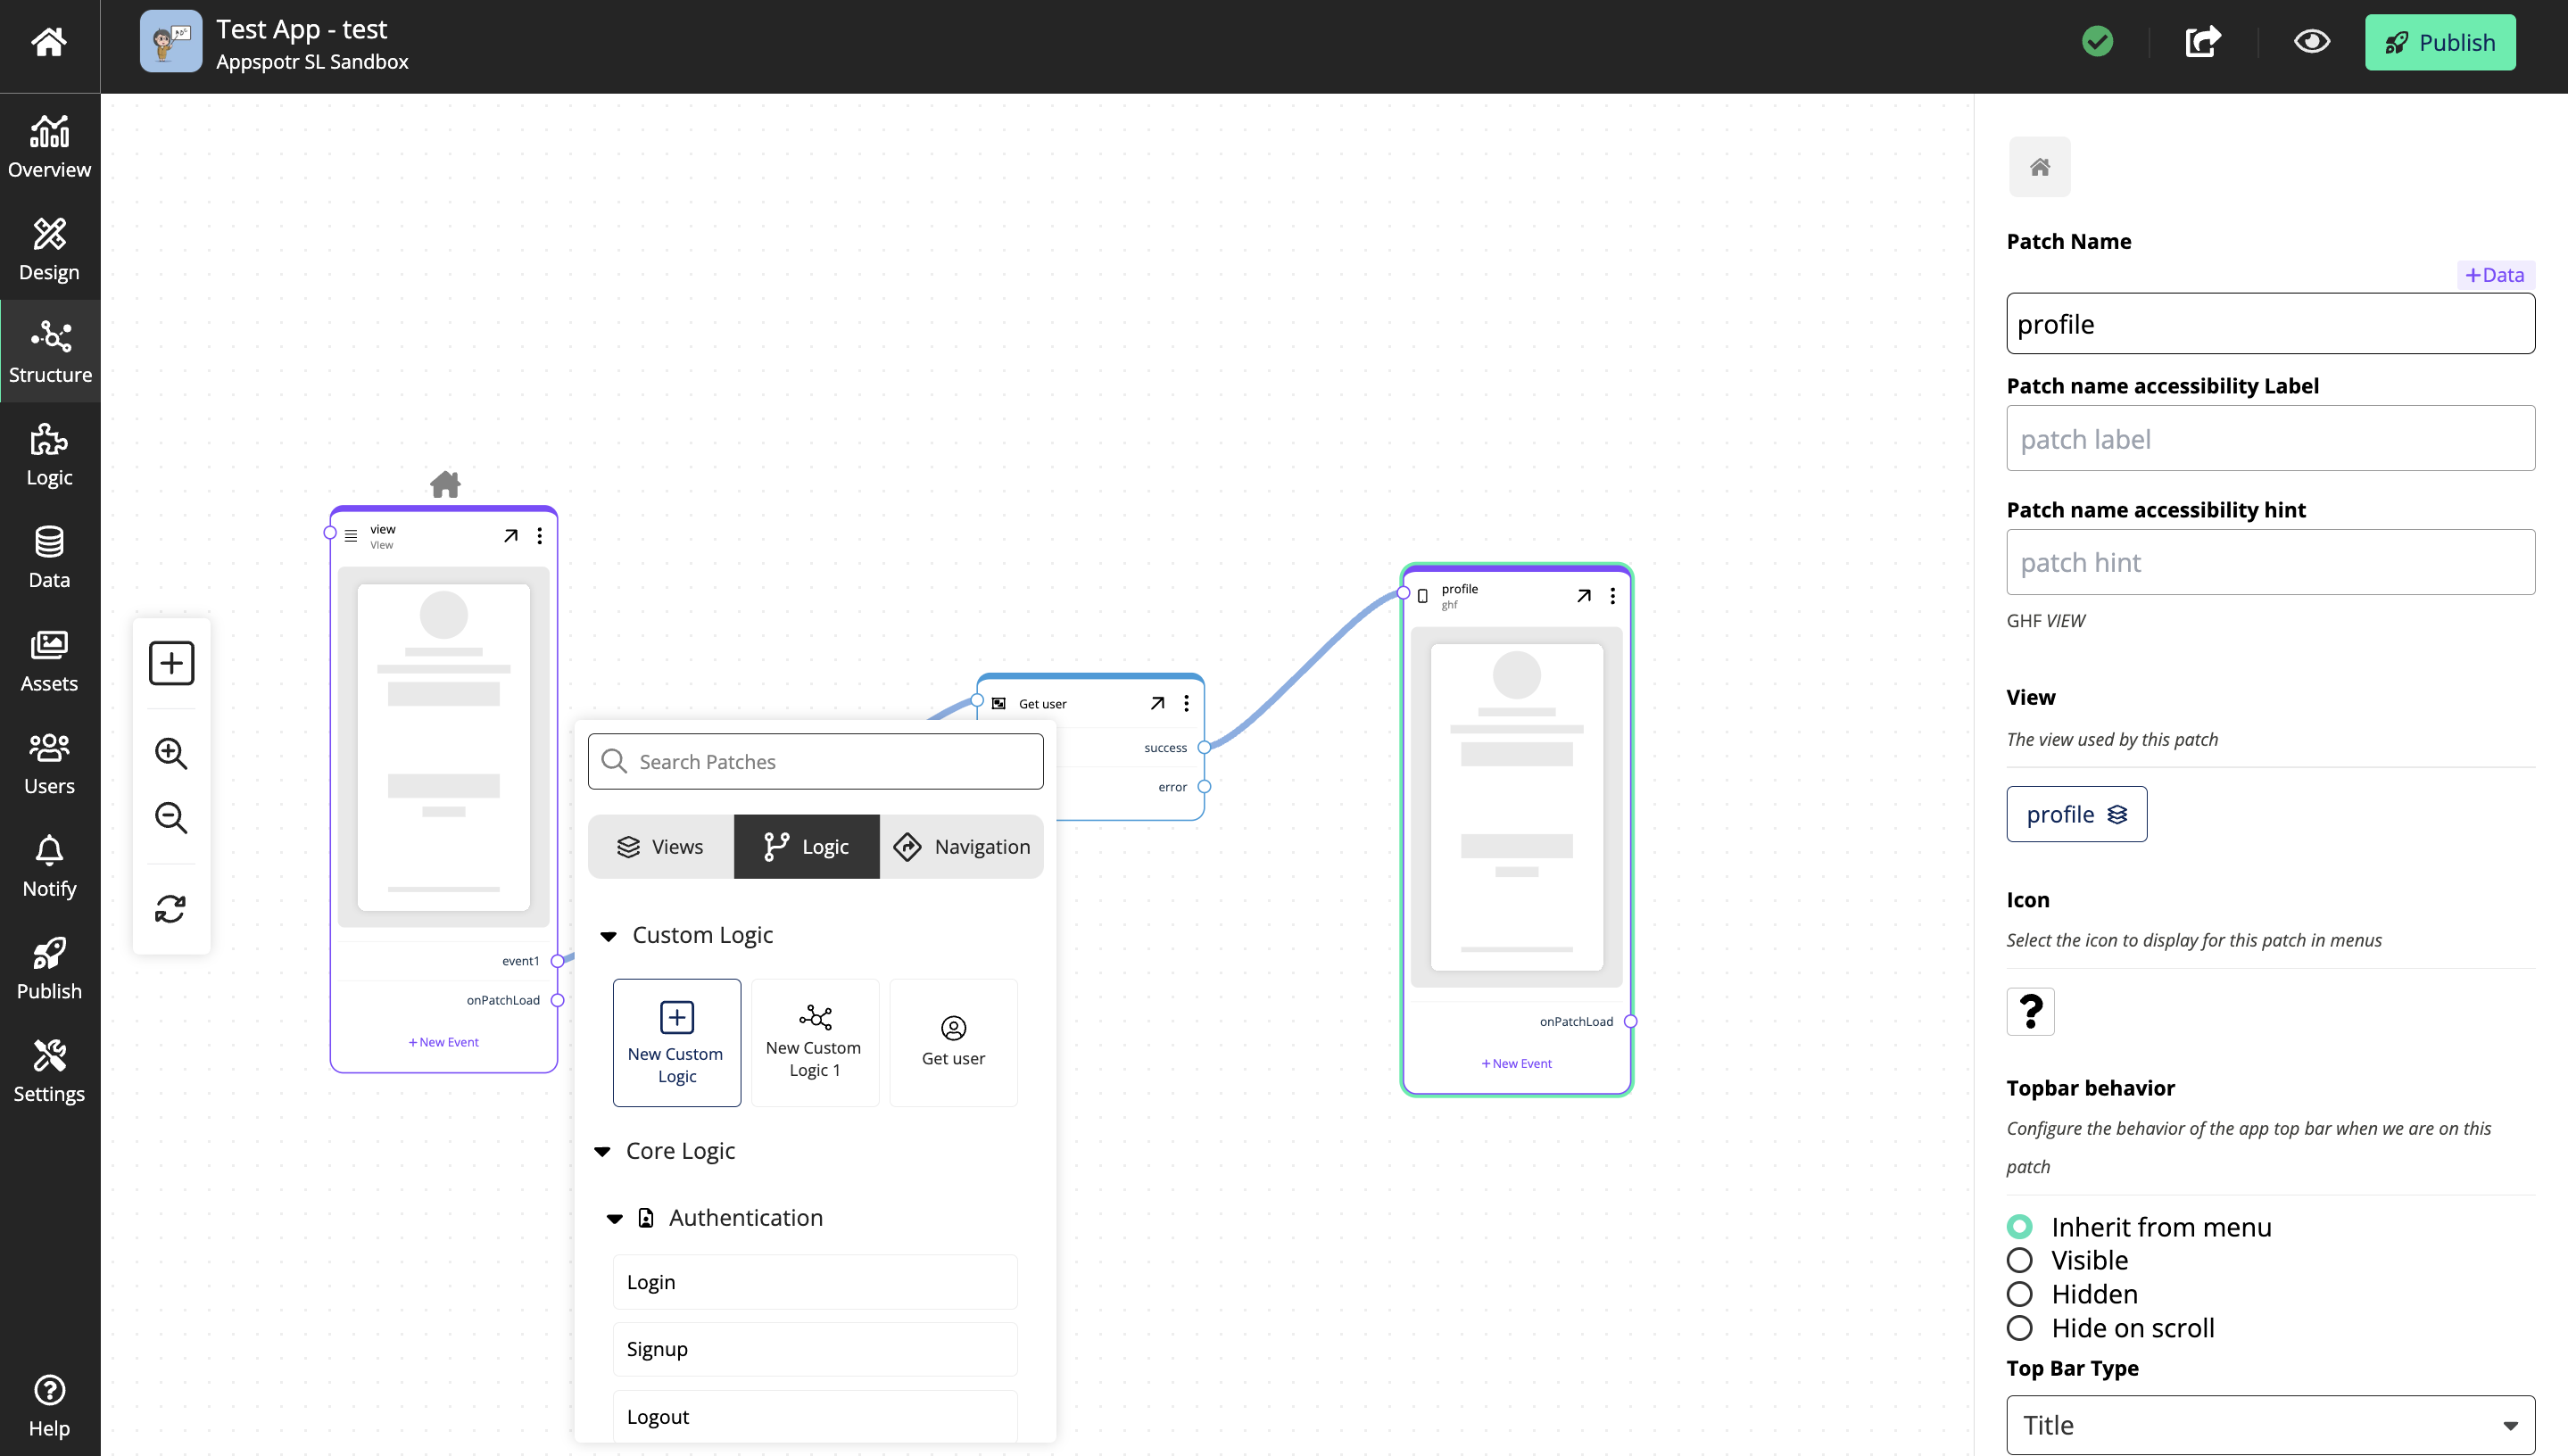
To see an example let’s go back to Logic…
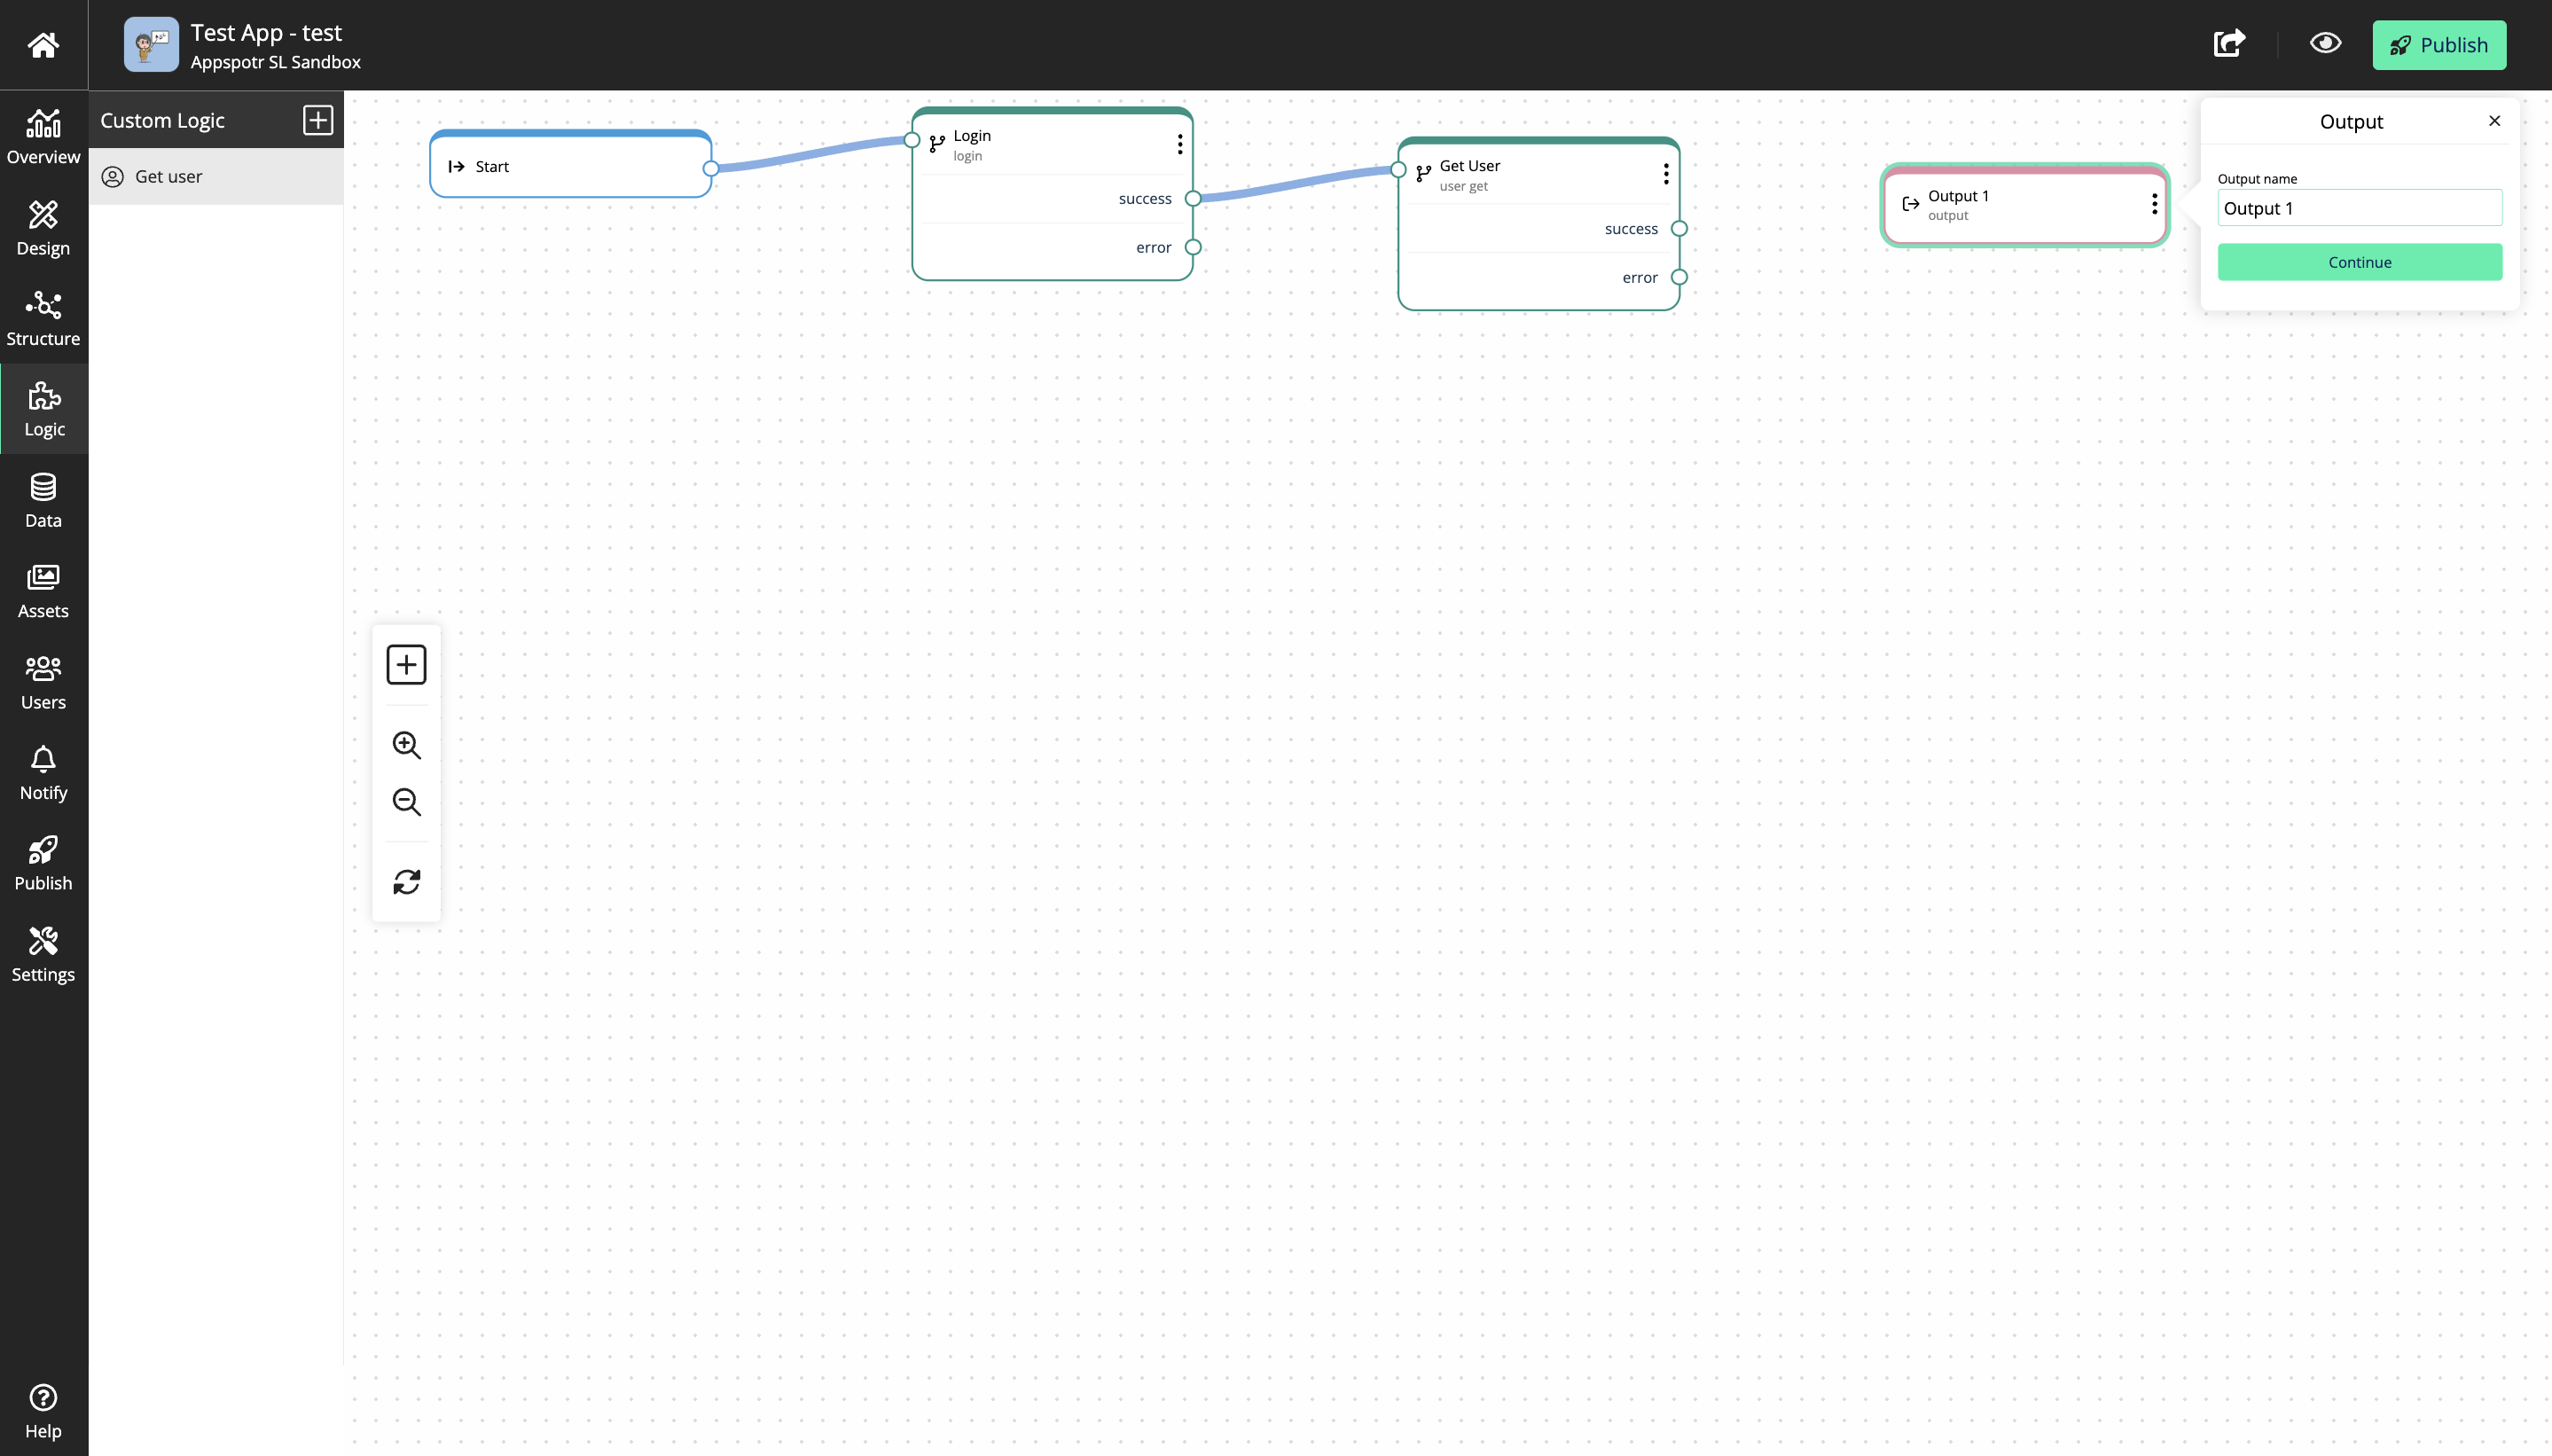
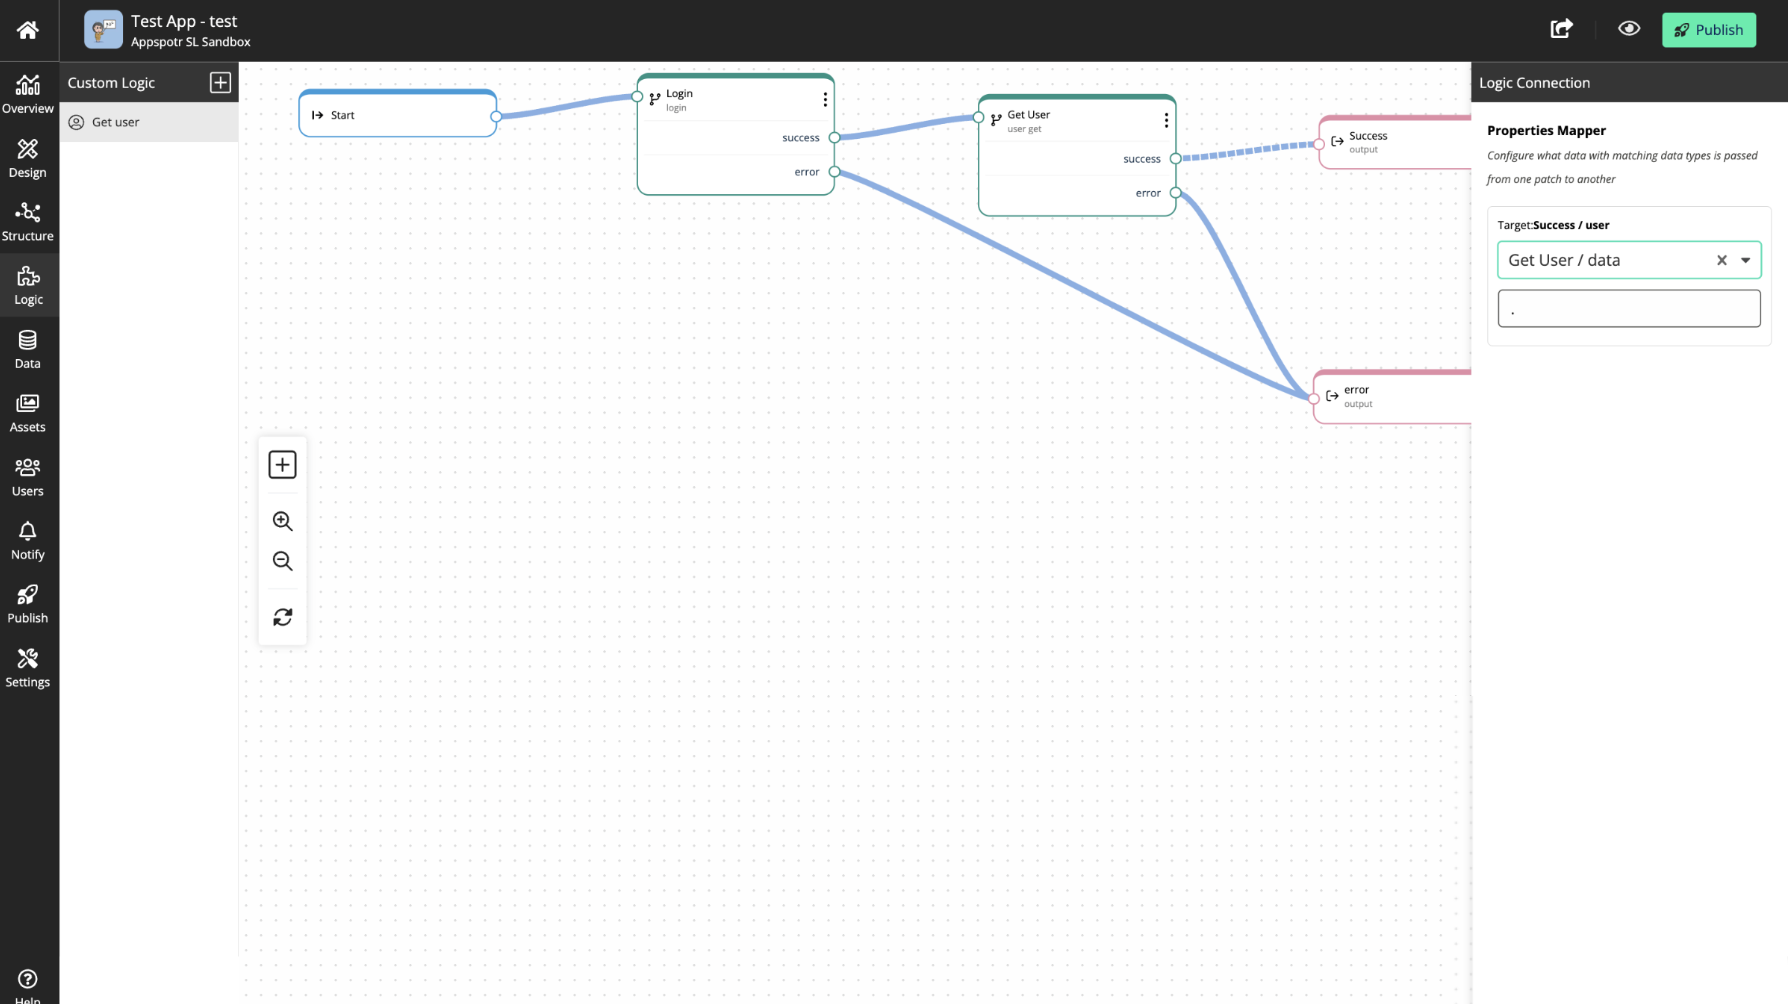
When it comes to the Get User patch, you can see these 6 pre defined outputs and the option to Add a custom output.
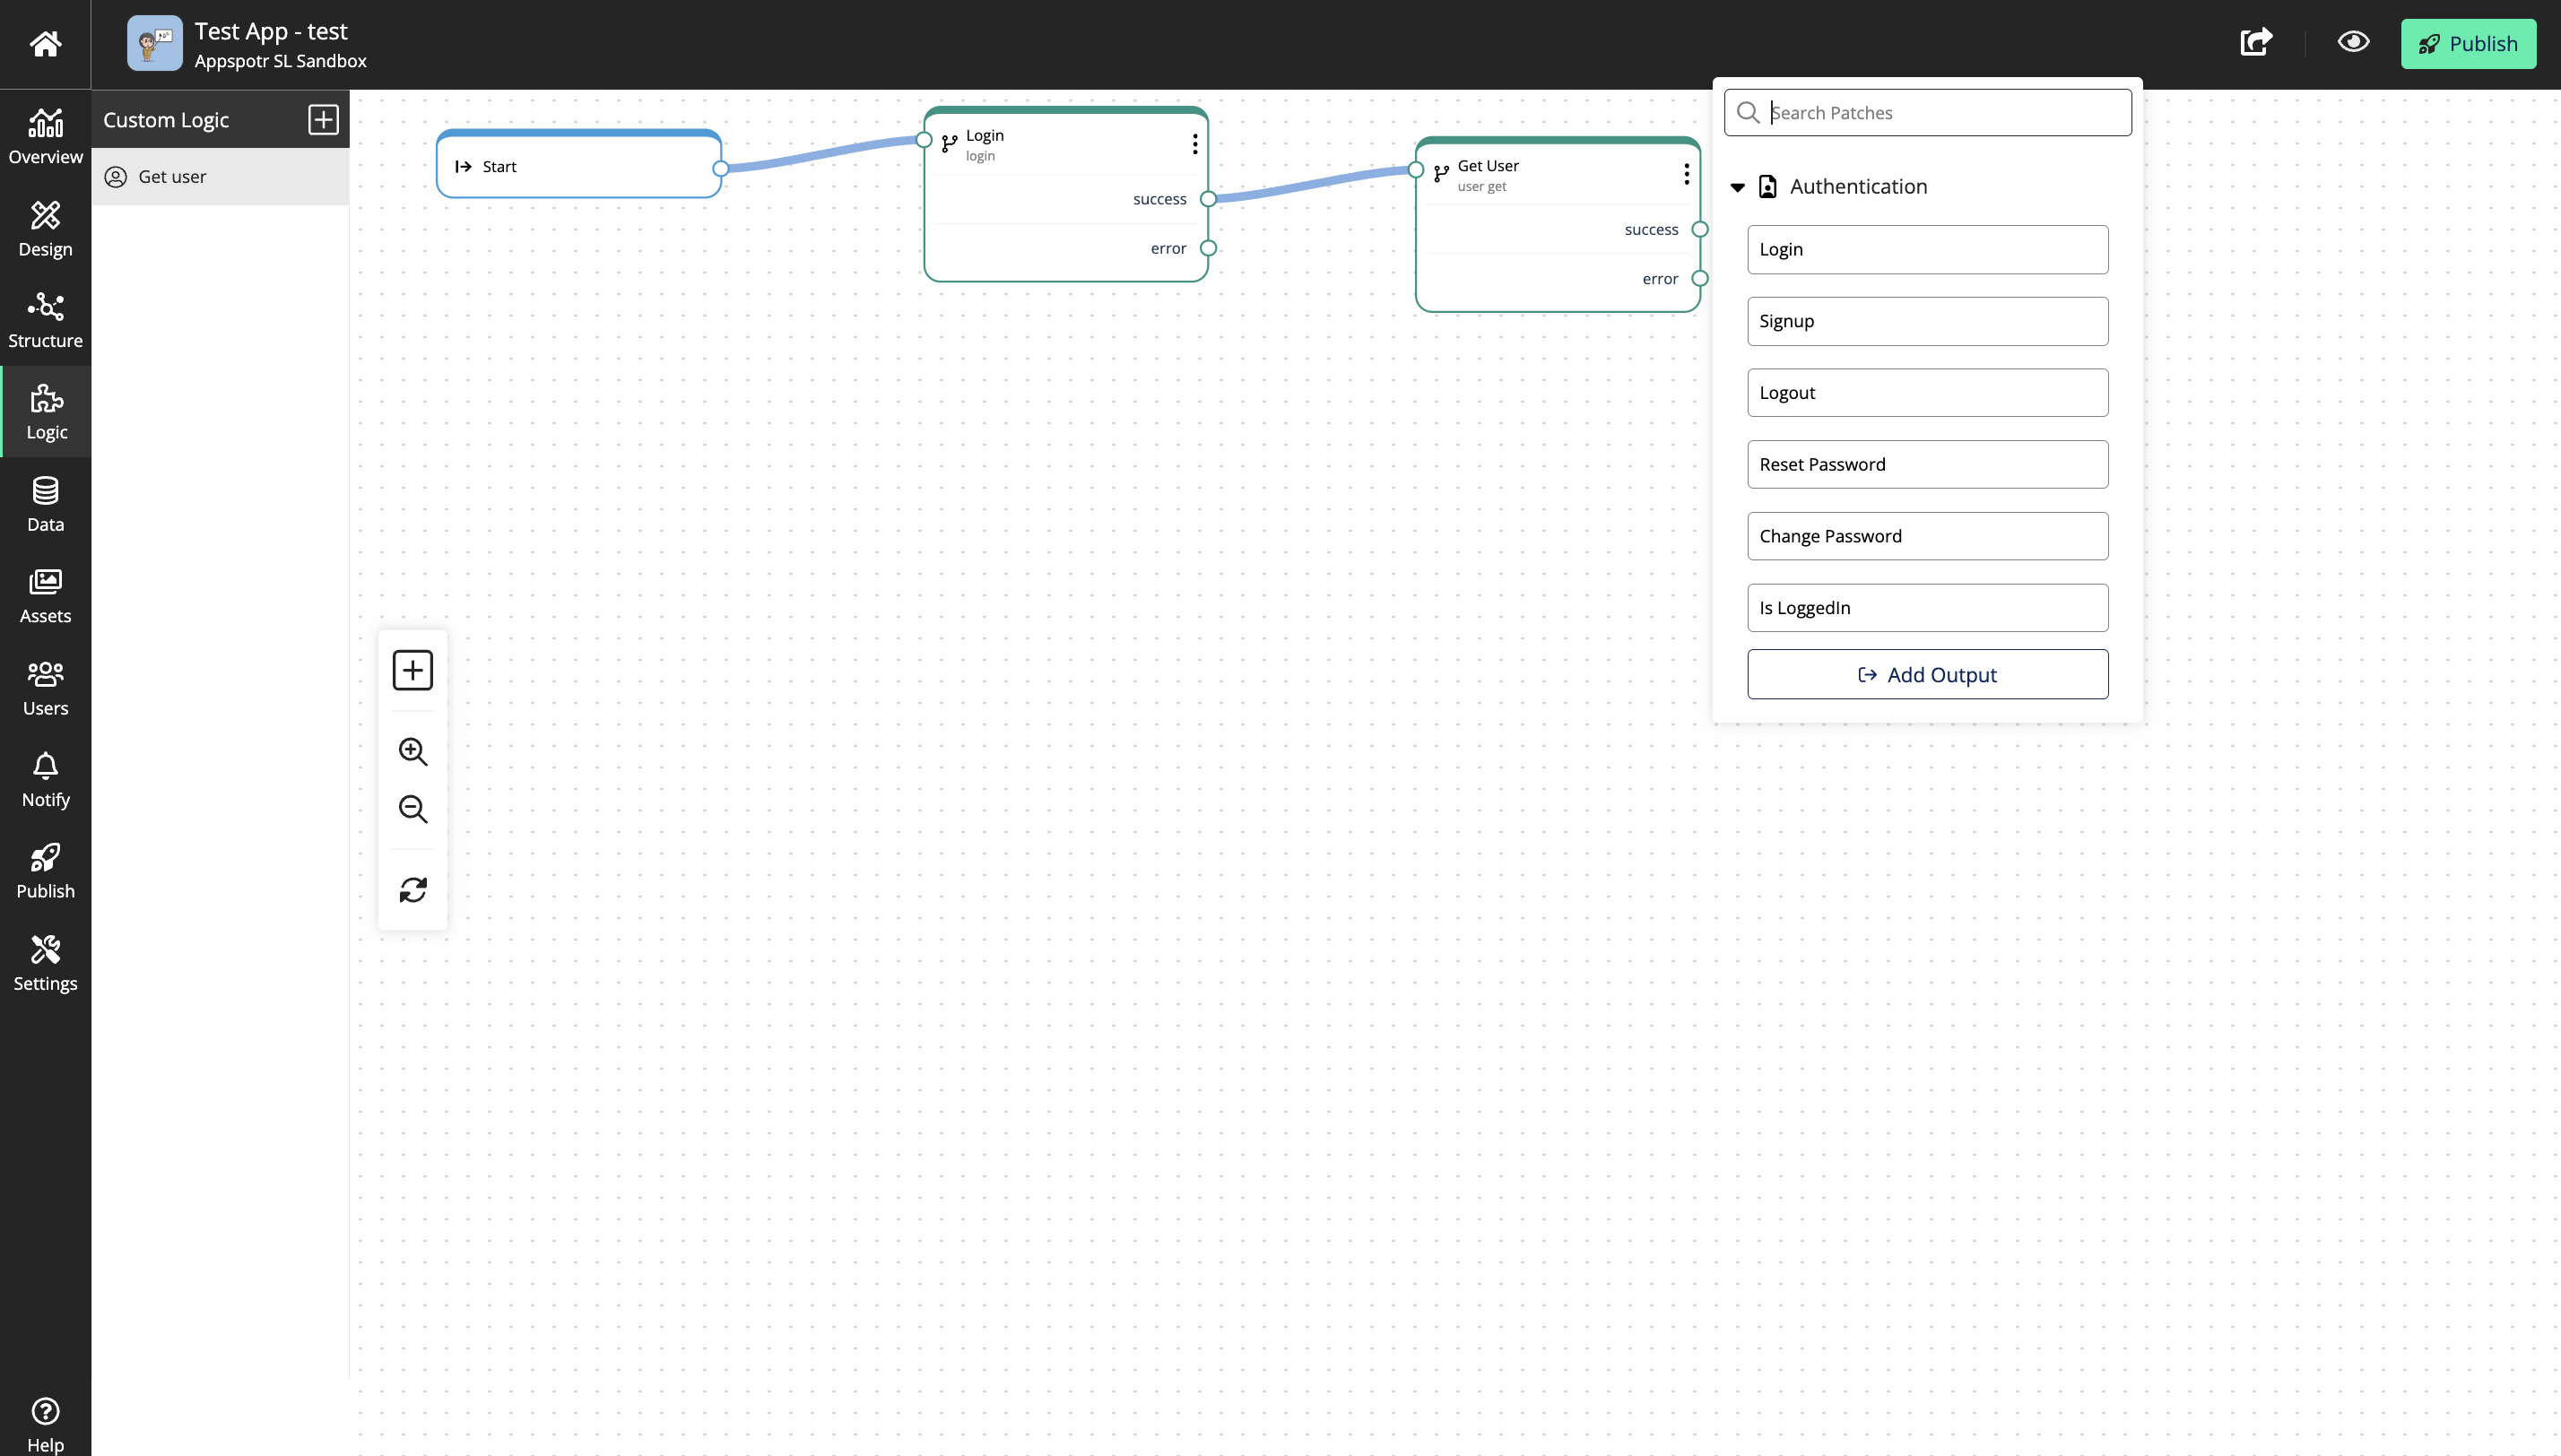
We’ll create a custom Output named ‘Success’
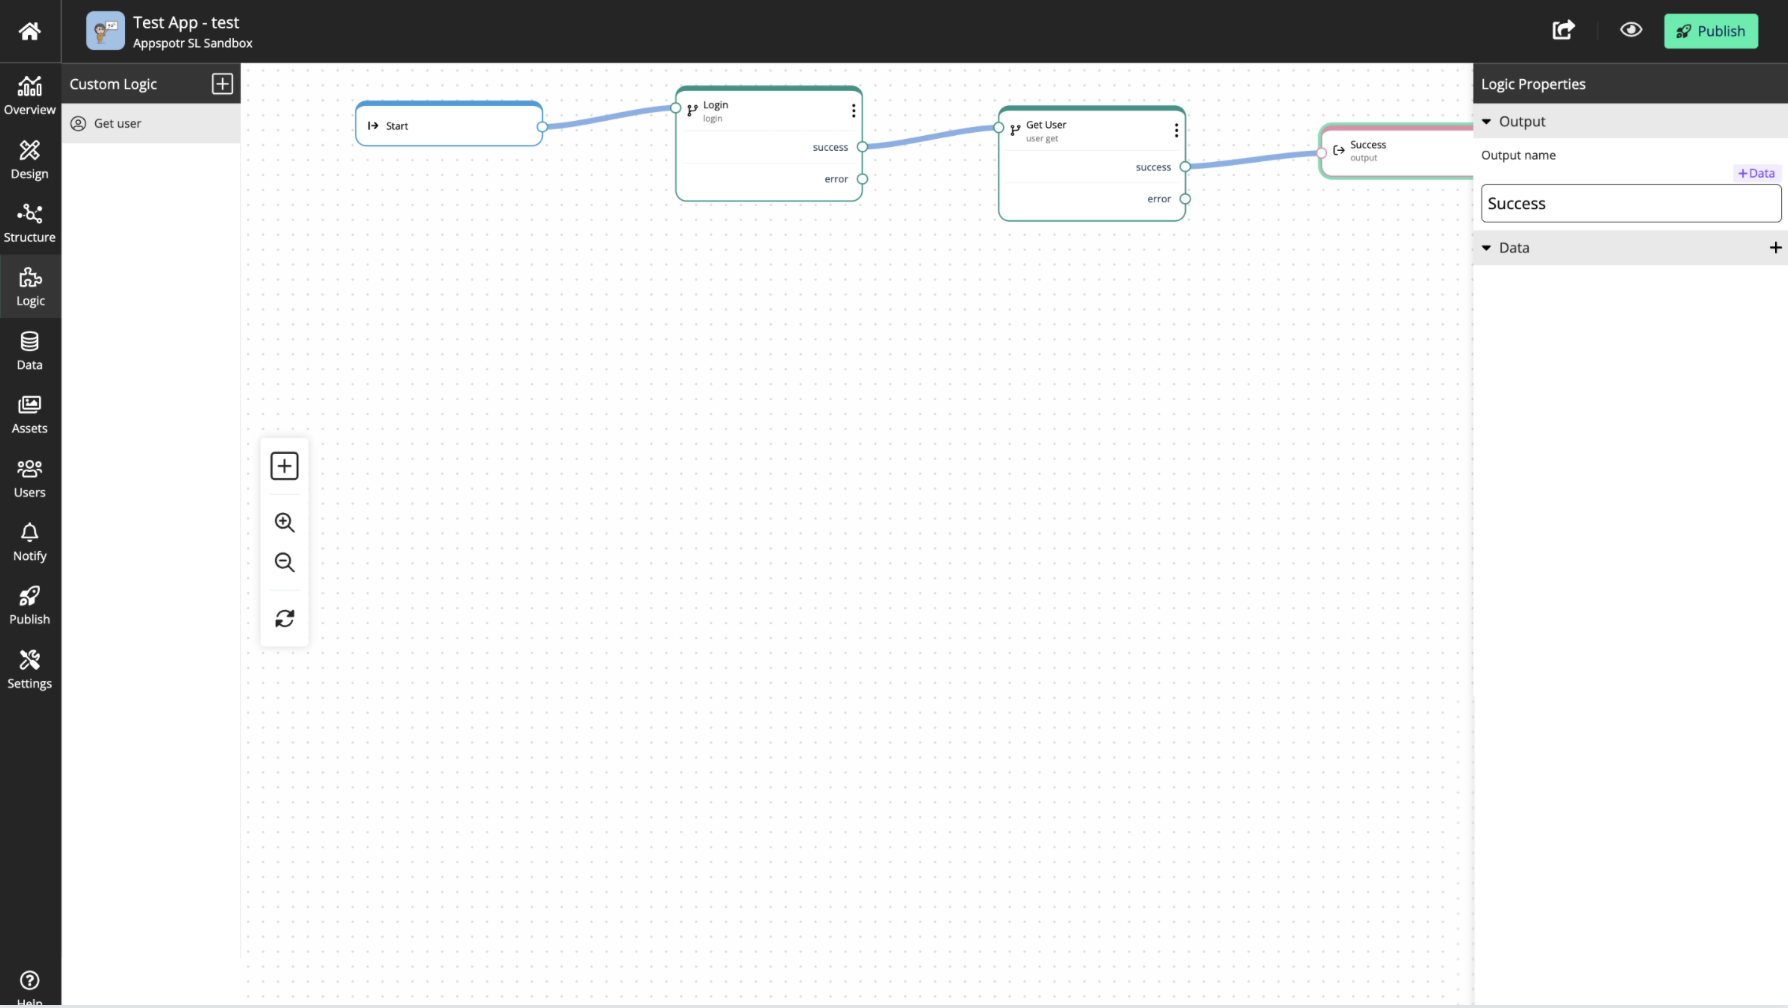
And now you go back to the Structure builder, you will be able to see that this output has been added there.
Same way, instead of defining 2 error outputs, you can define 1 error output so that also will be displayed on the structure builder.
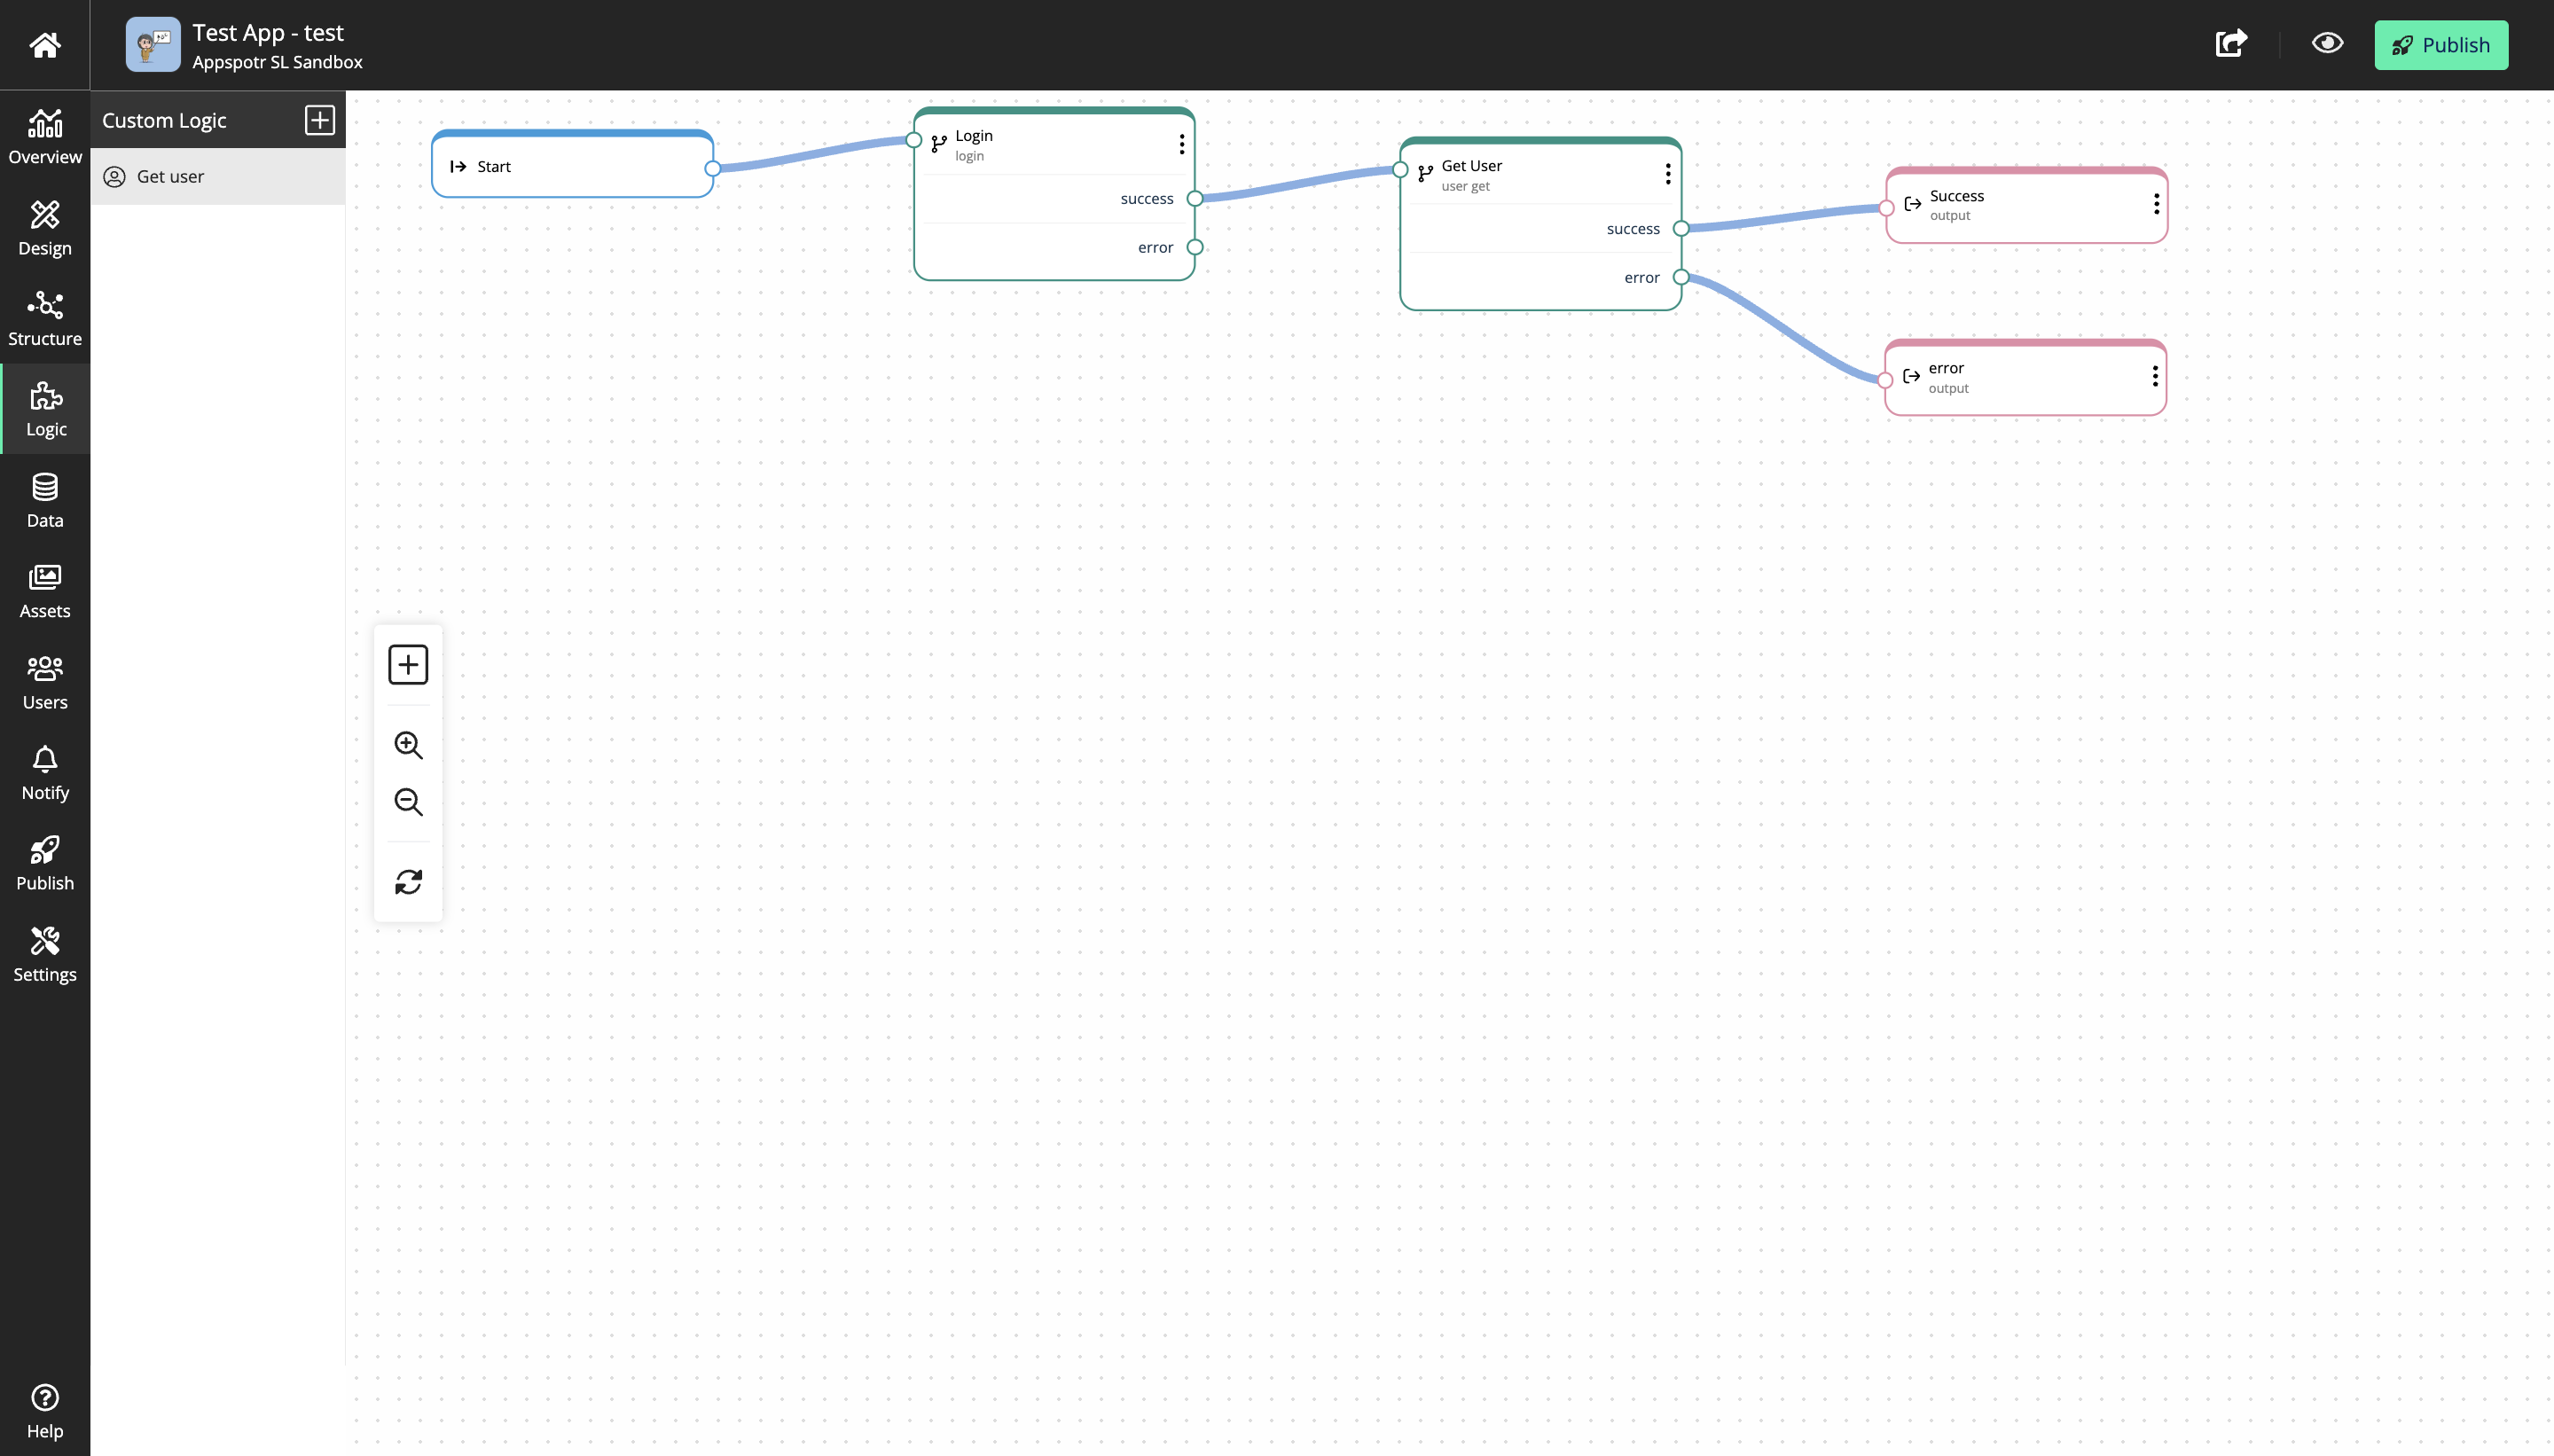
And for a specific output you can connect multiple outputs from logic patches like below. That way you can create a combined output.
Defining inputs
Now if you click on the custom logic on the Structure Builder you will not be able to define the input parameters there.

To do that, you will have to go to the Logic builder:
And then by clicking on the start patch you can define your own inputs for this logic blocks.
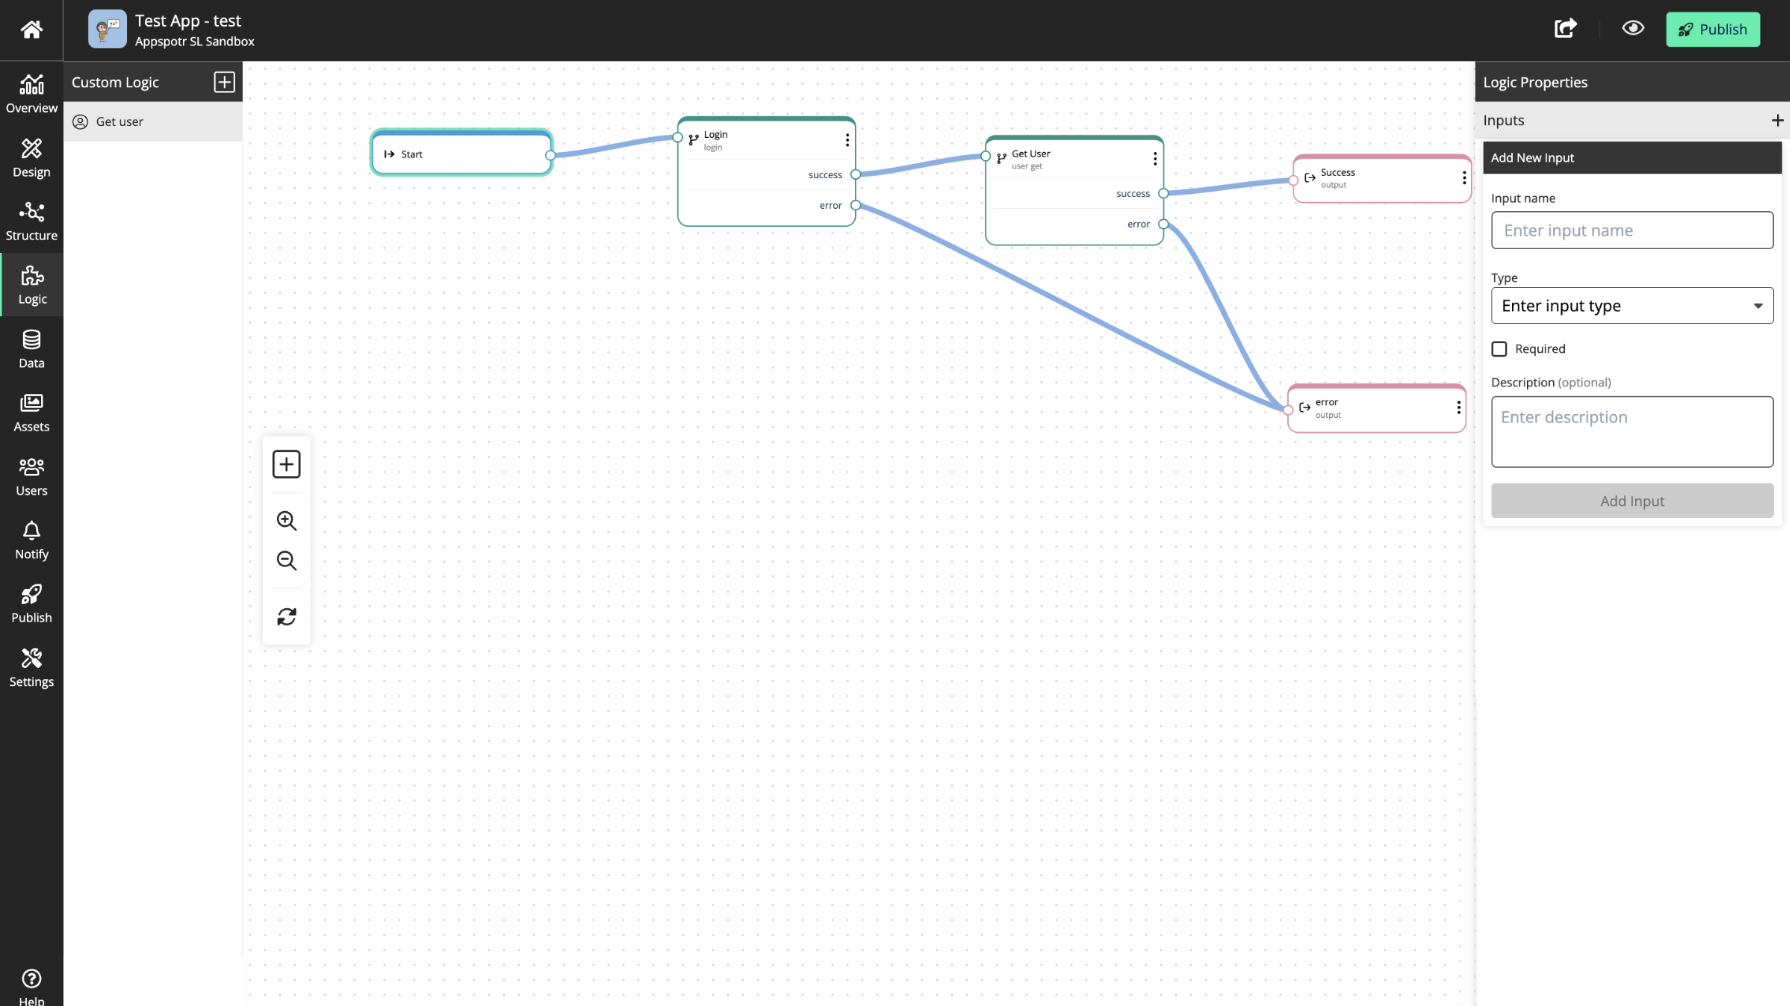
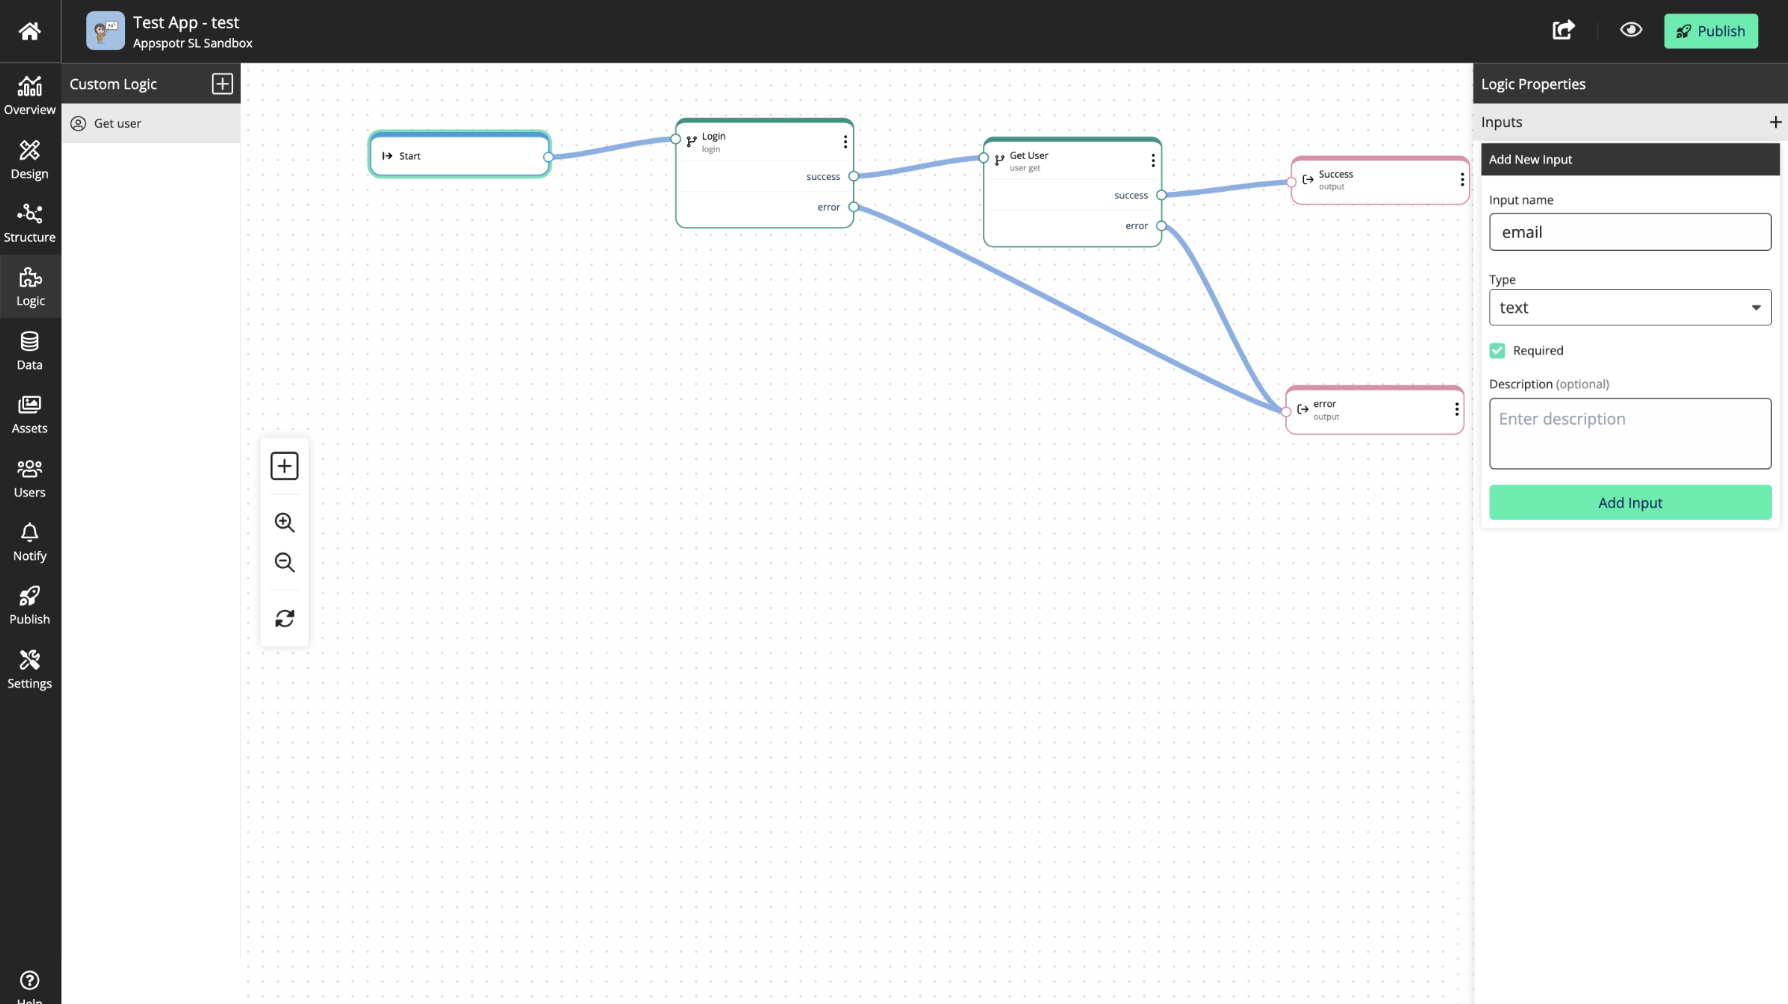
Once you click on Add Input, you’ll be able to view the input under the inputs.
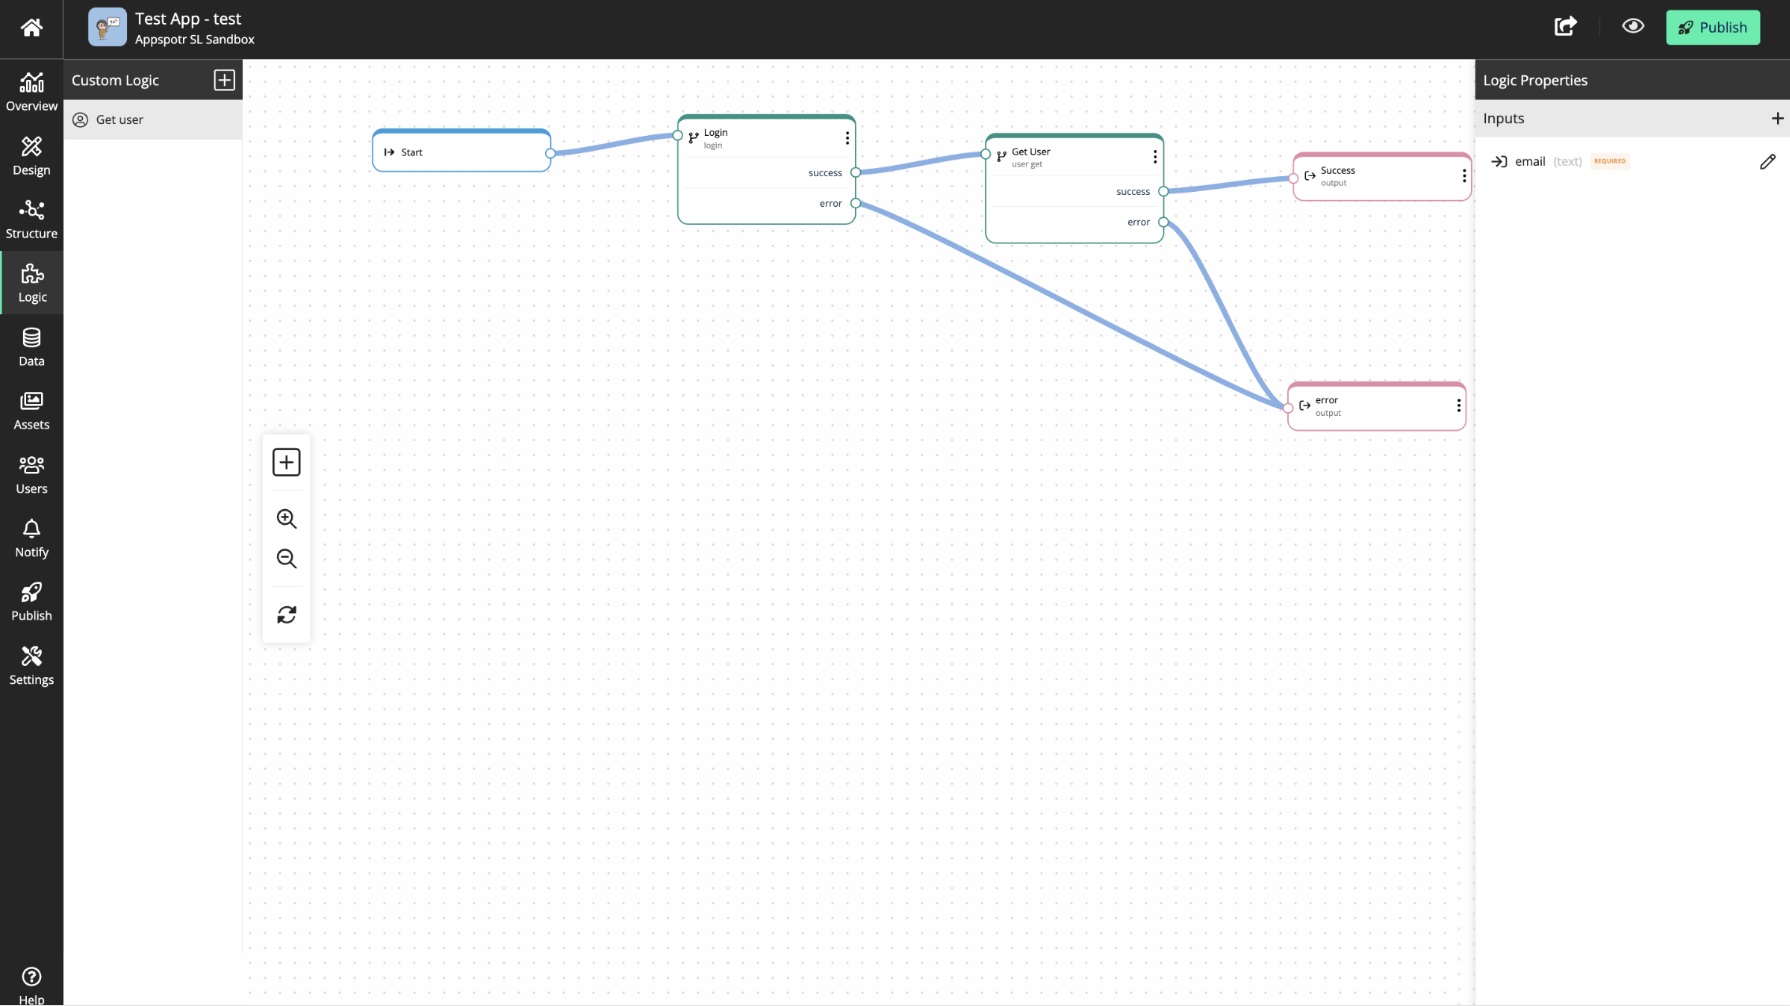
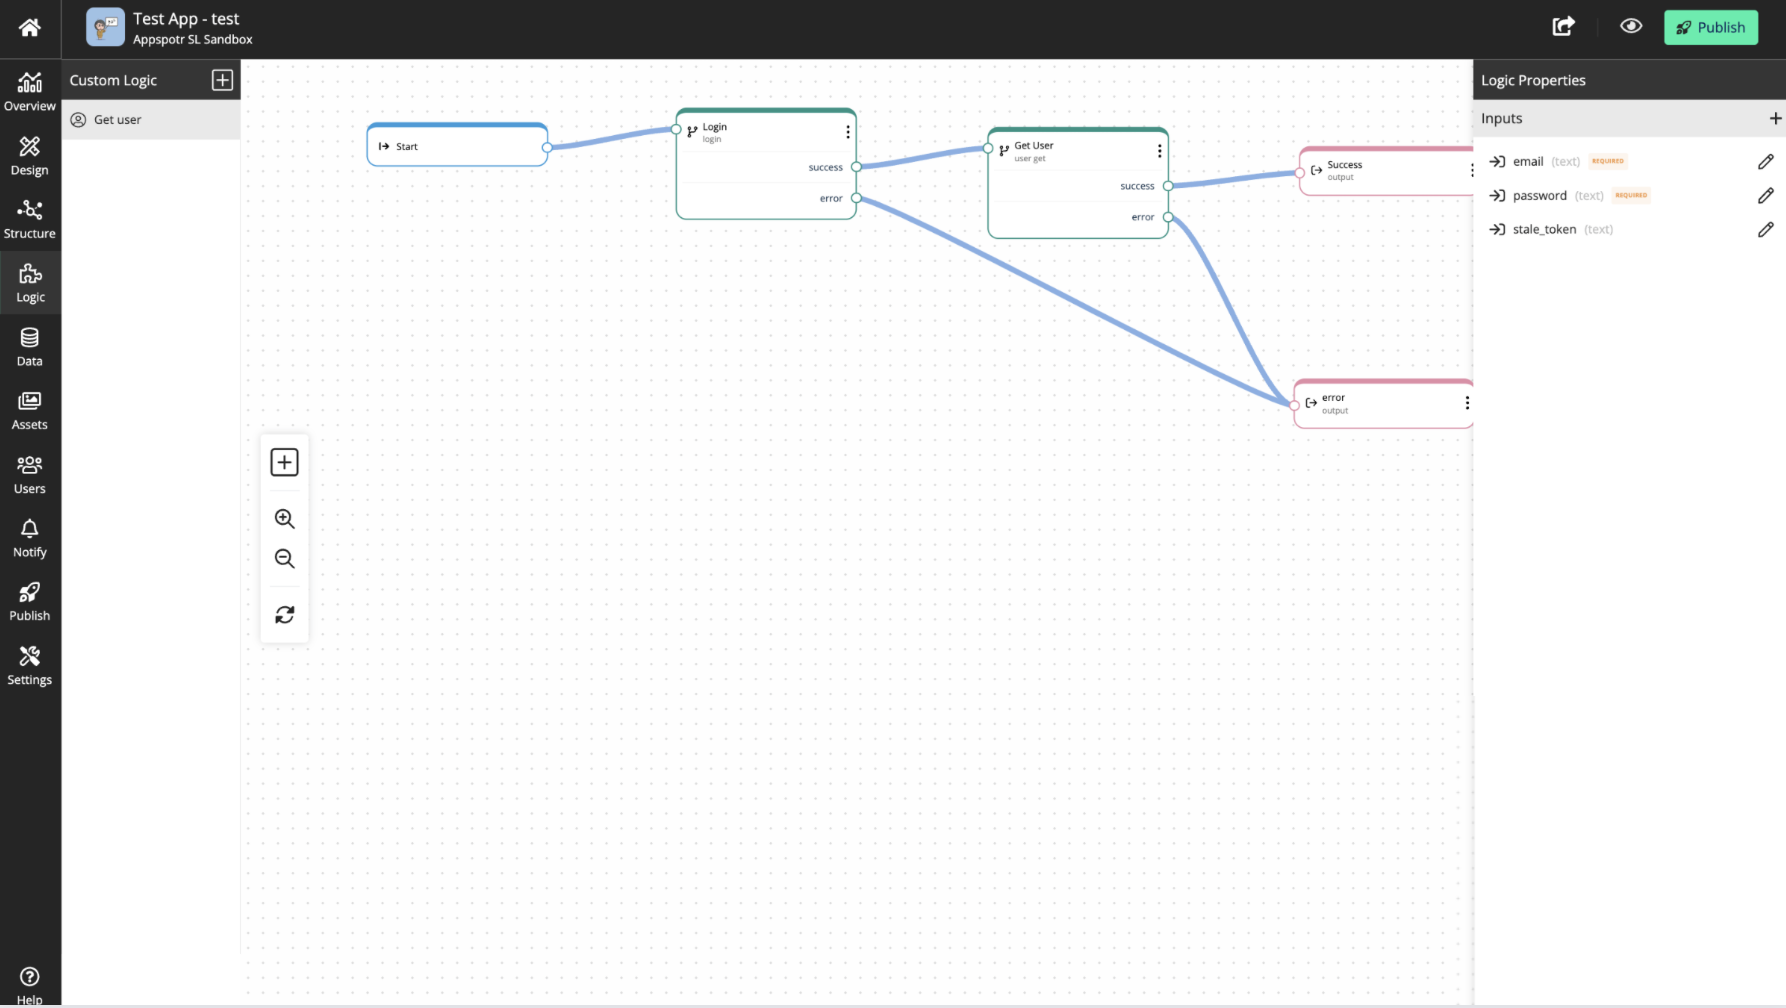
Just like that you can keep adding required inputs to the Logic.
Here we have defined 3 new input parameters.
Now if you go back to Structure Builder, you will be able to see a notice on the custom logic saying that ‘Required inputs cannot be empty’. And that’s because we marked two inputs as ‘required’ when defining them.
When you click on the connection you will be able to see the input parameters that we defined under the custom logic.
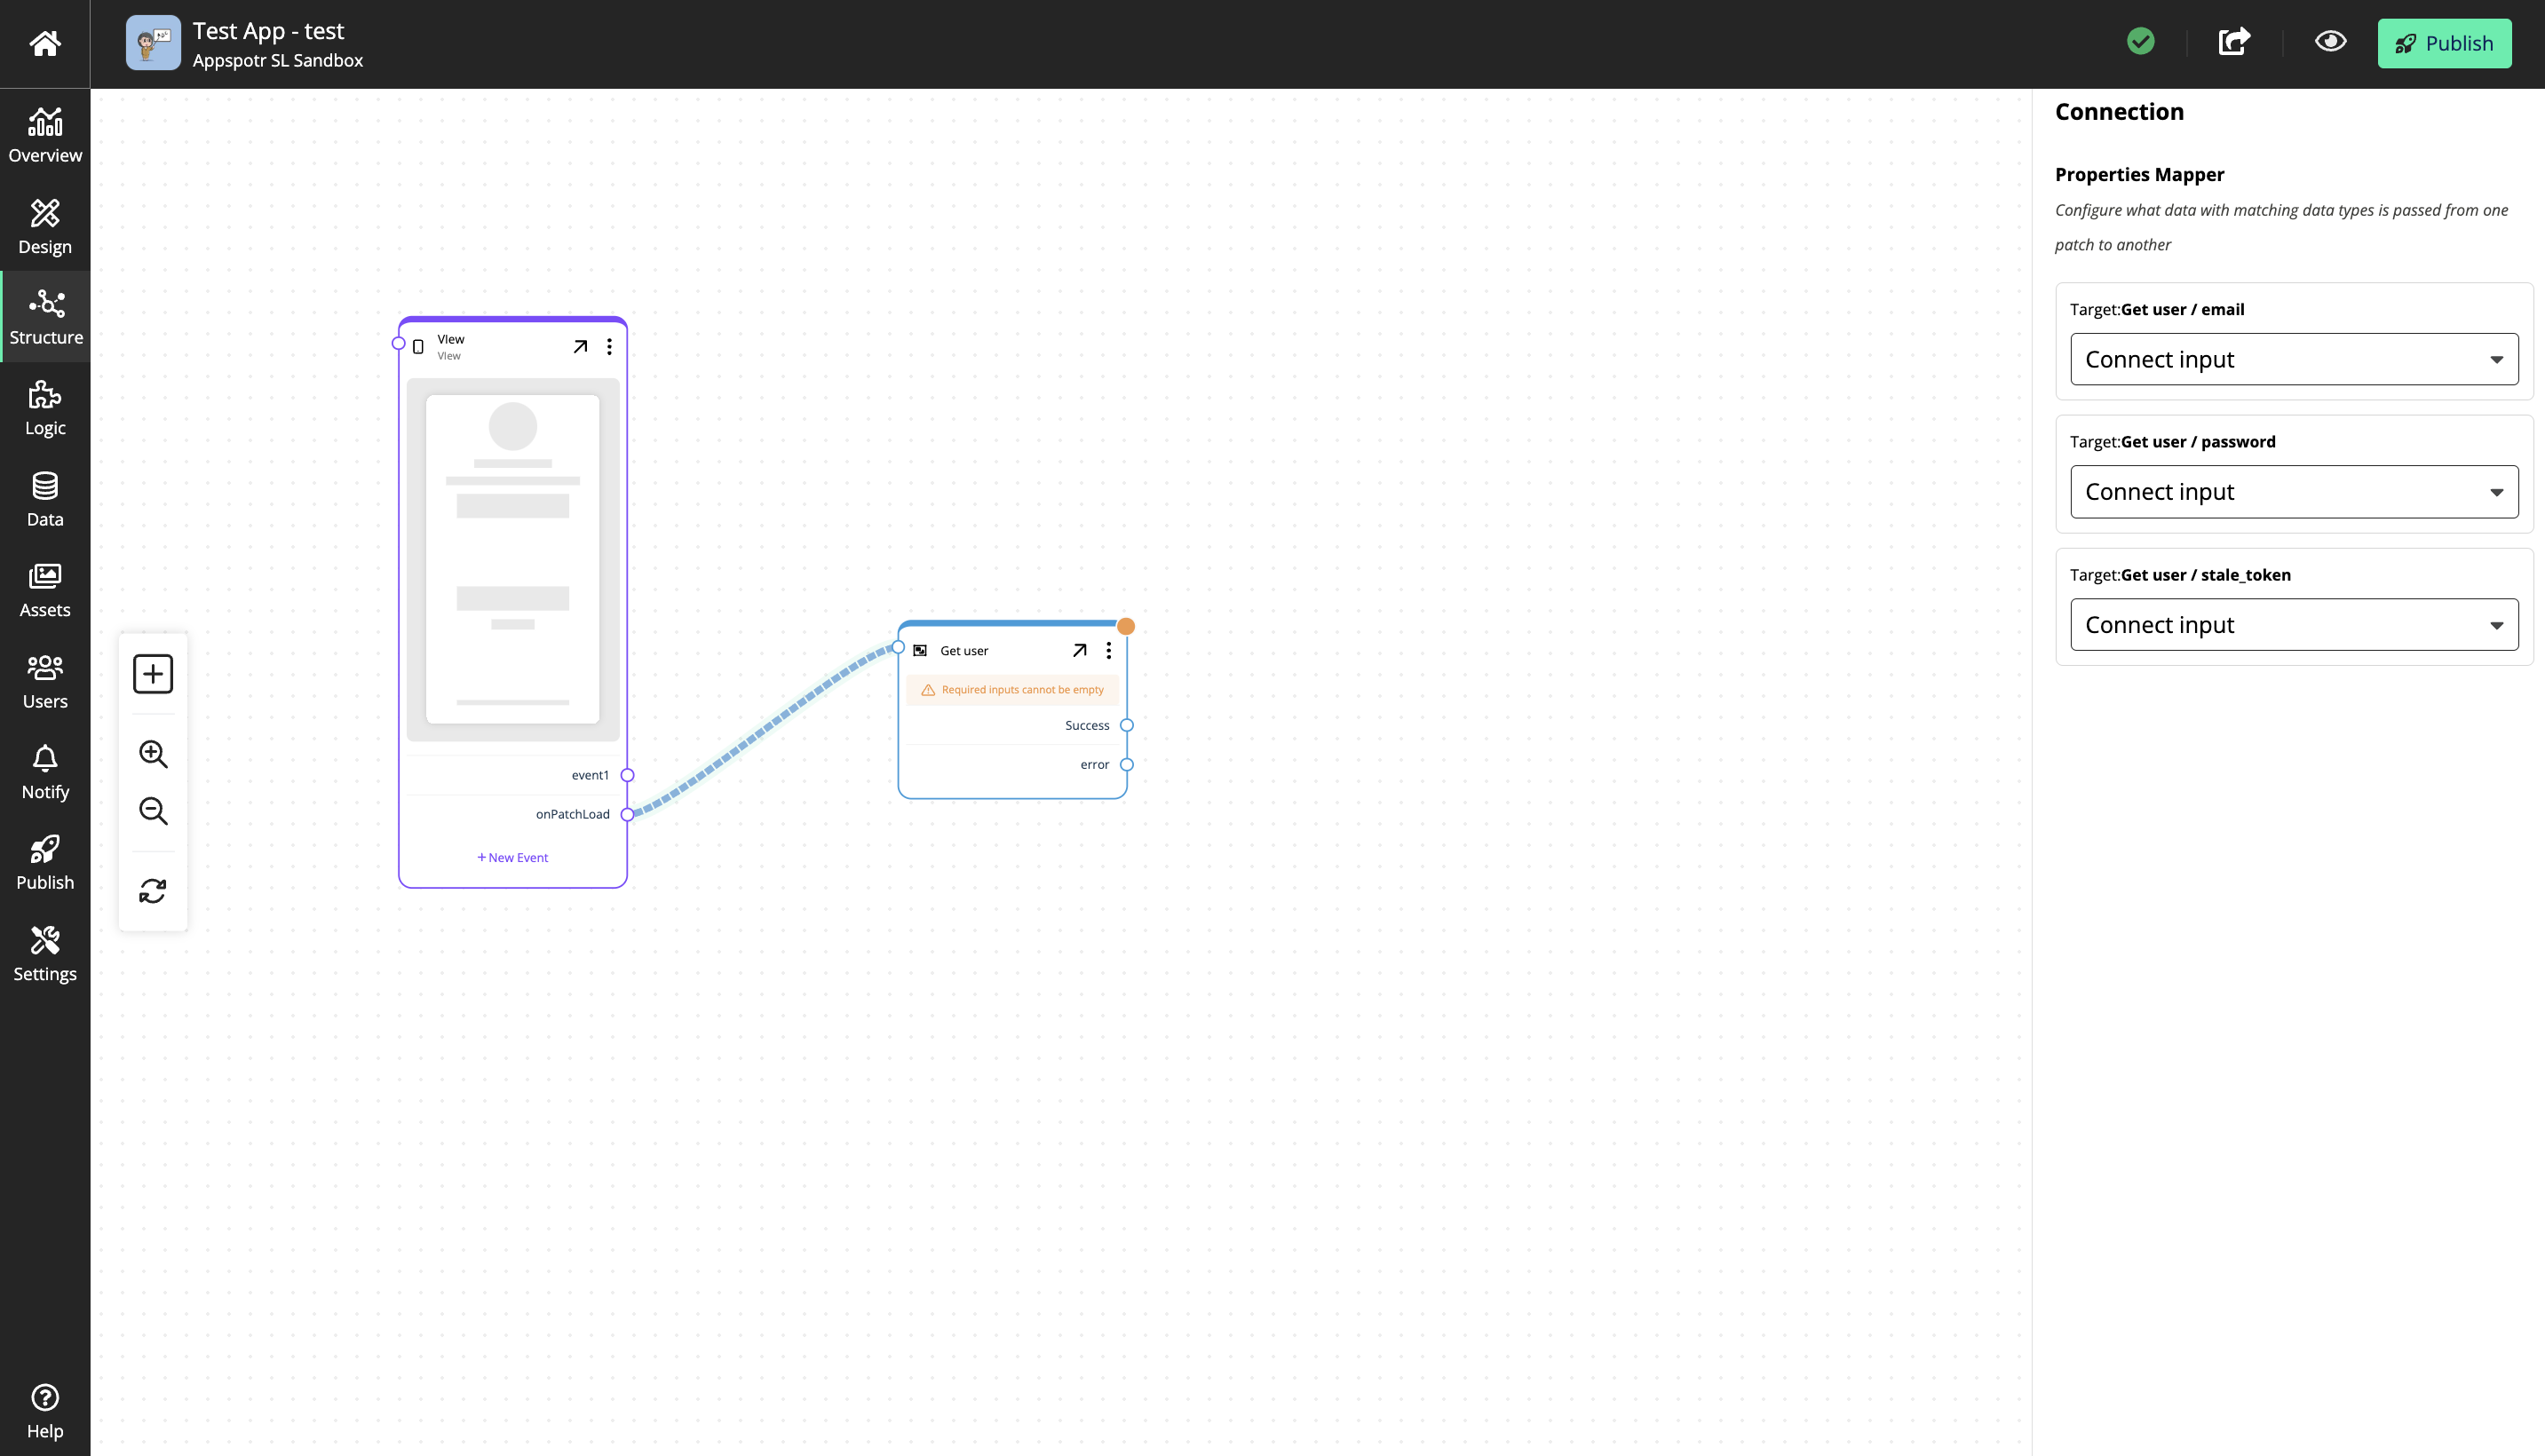
And when you fill in the parameters the notice will disappear.
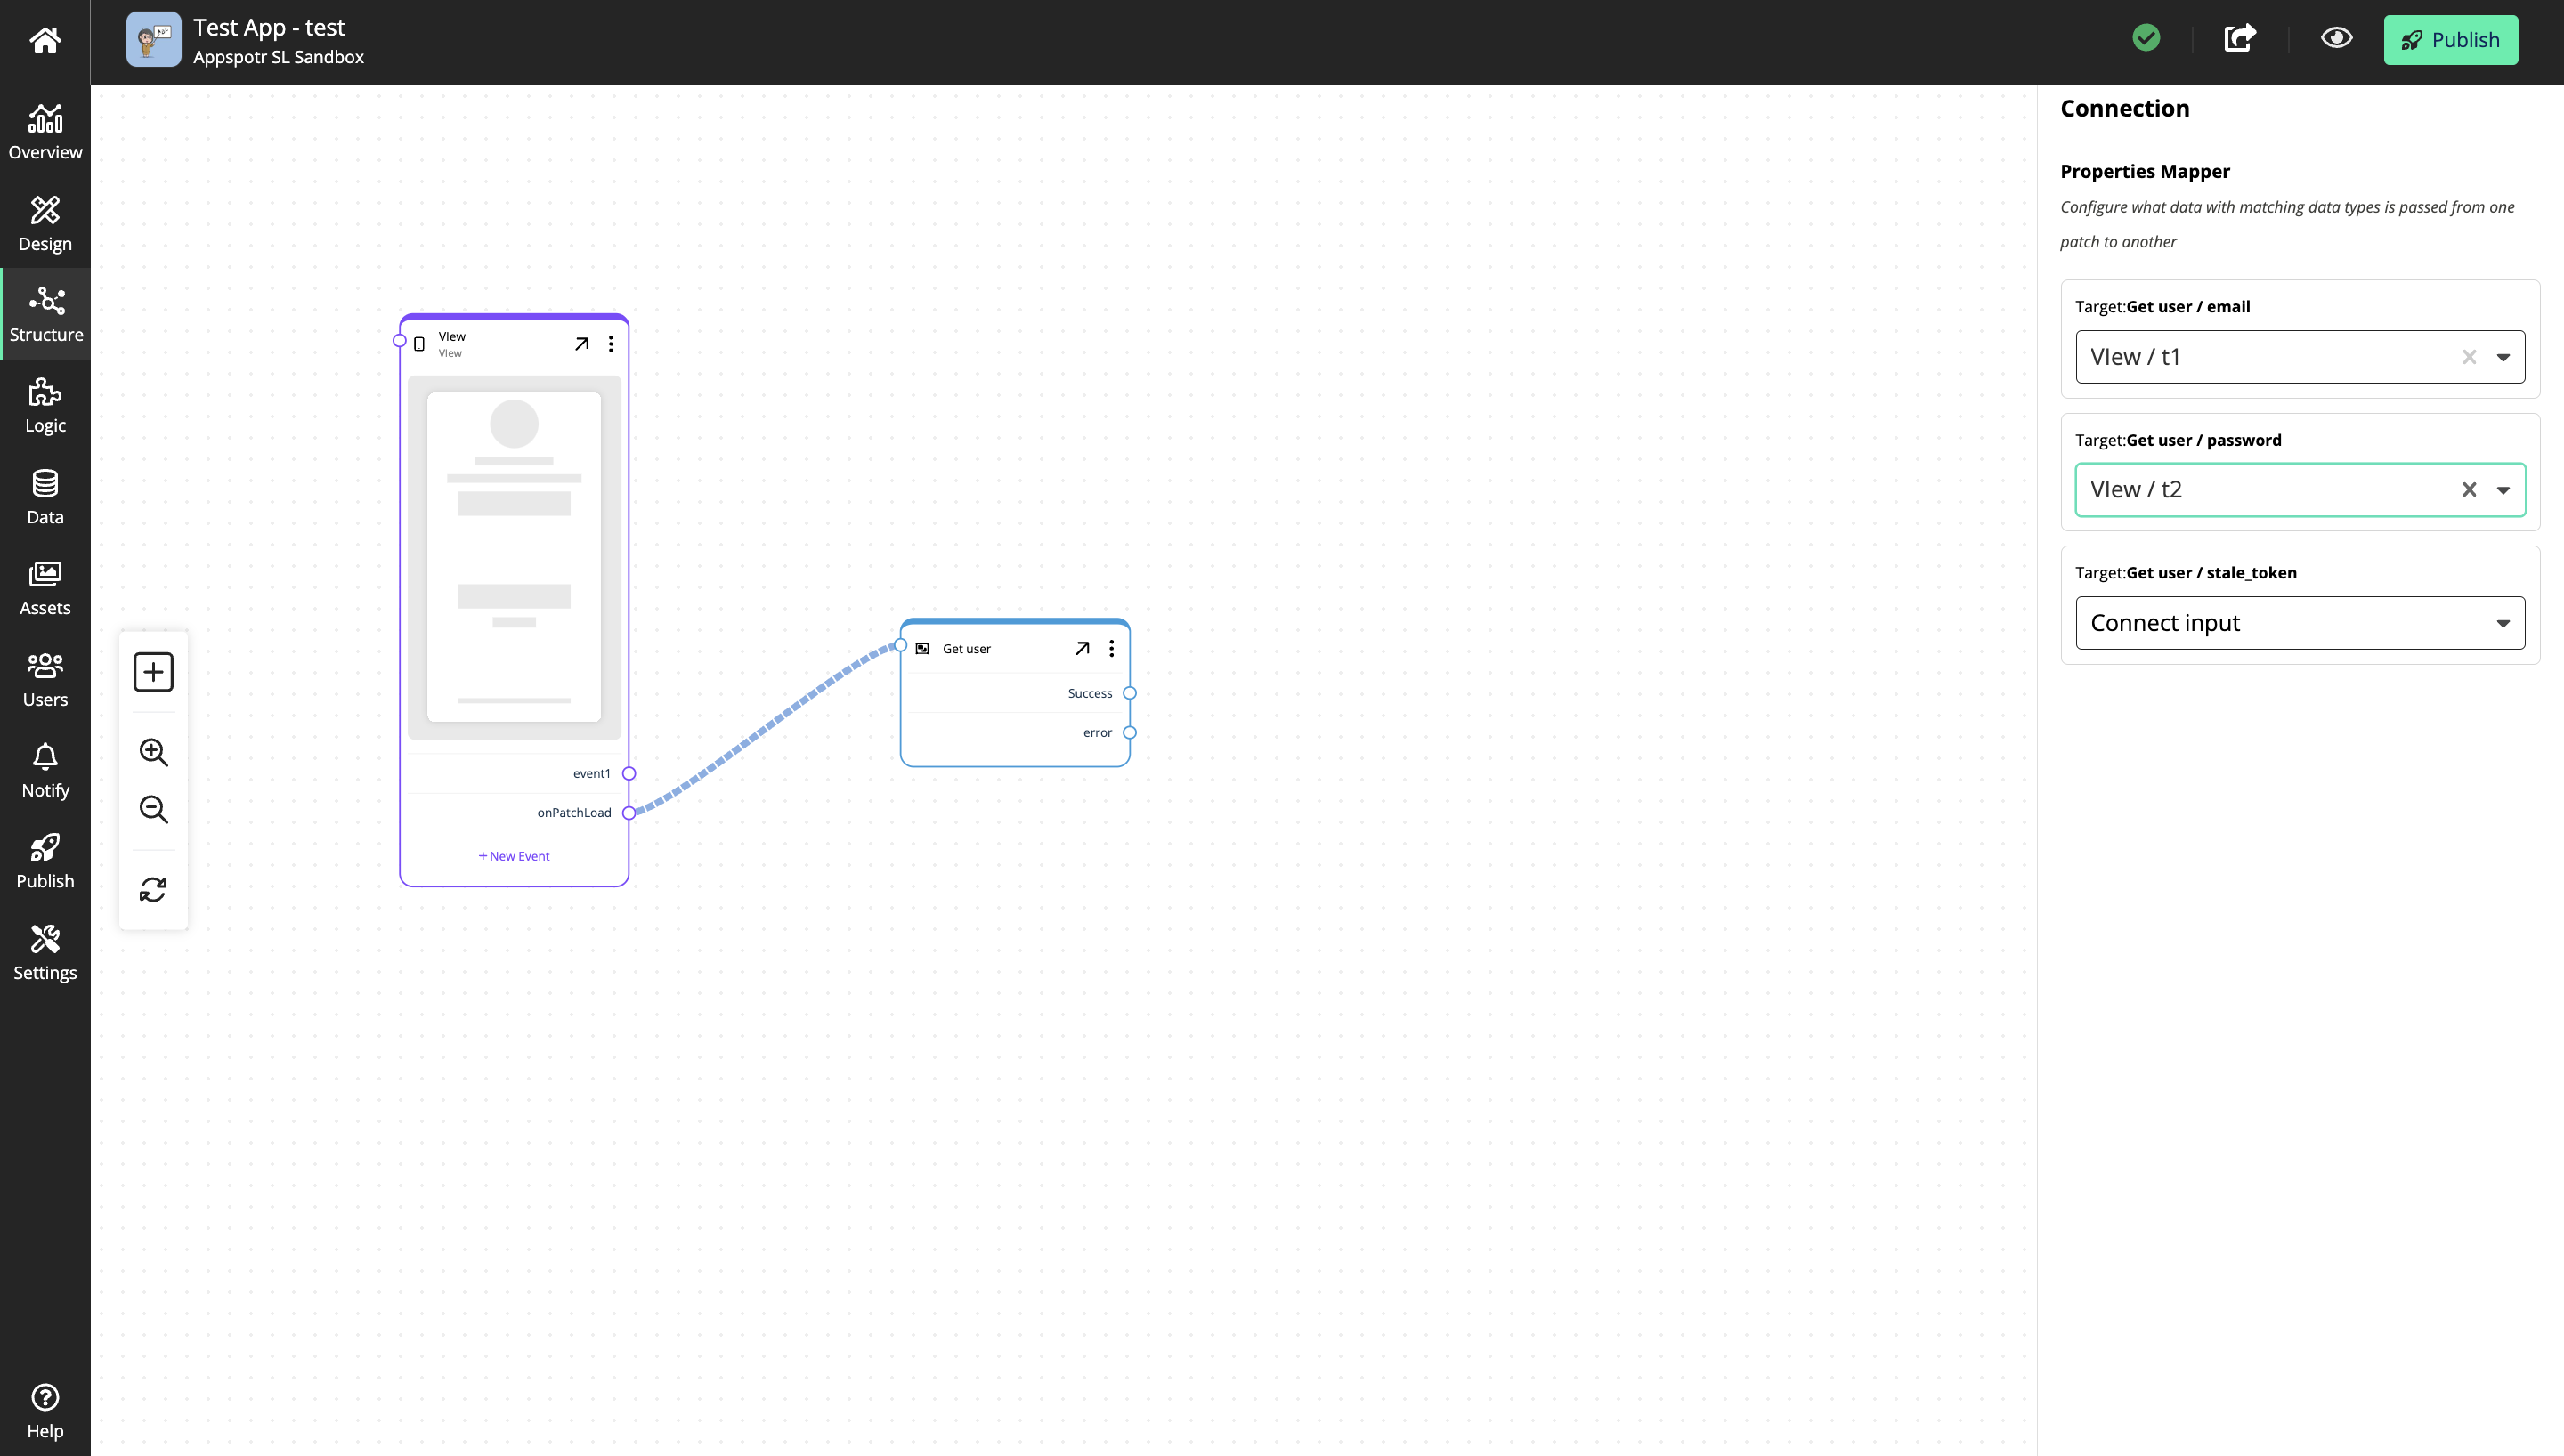
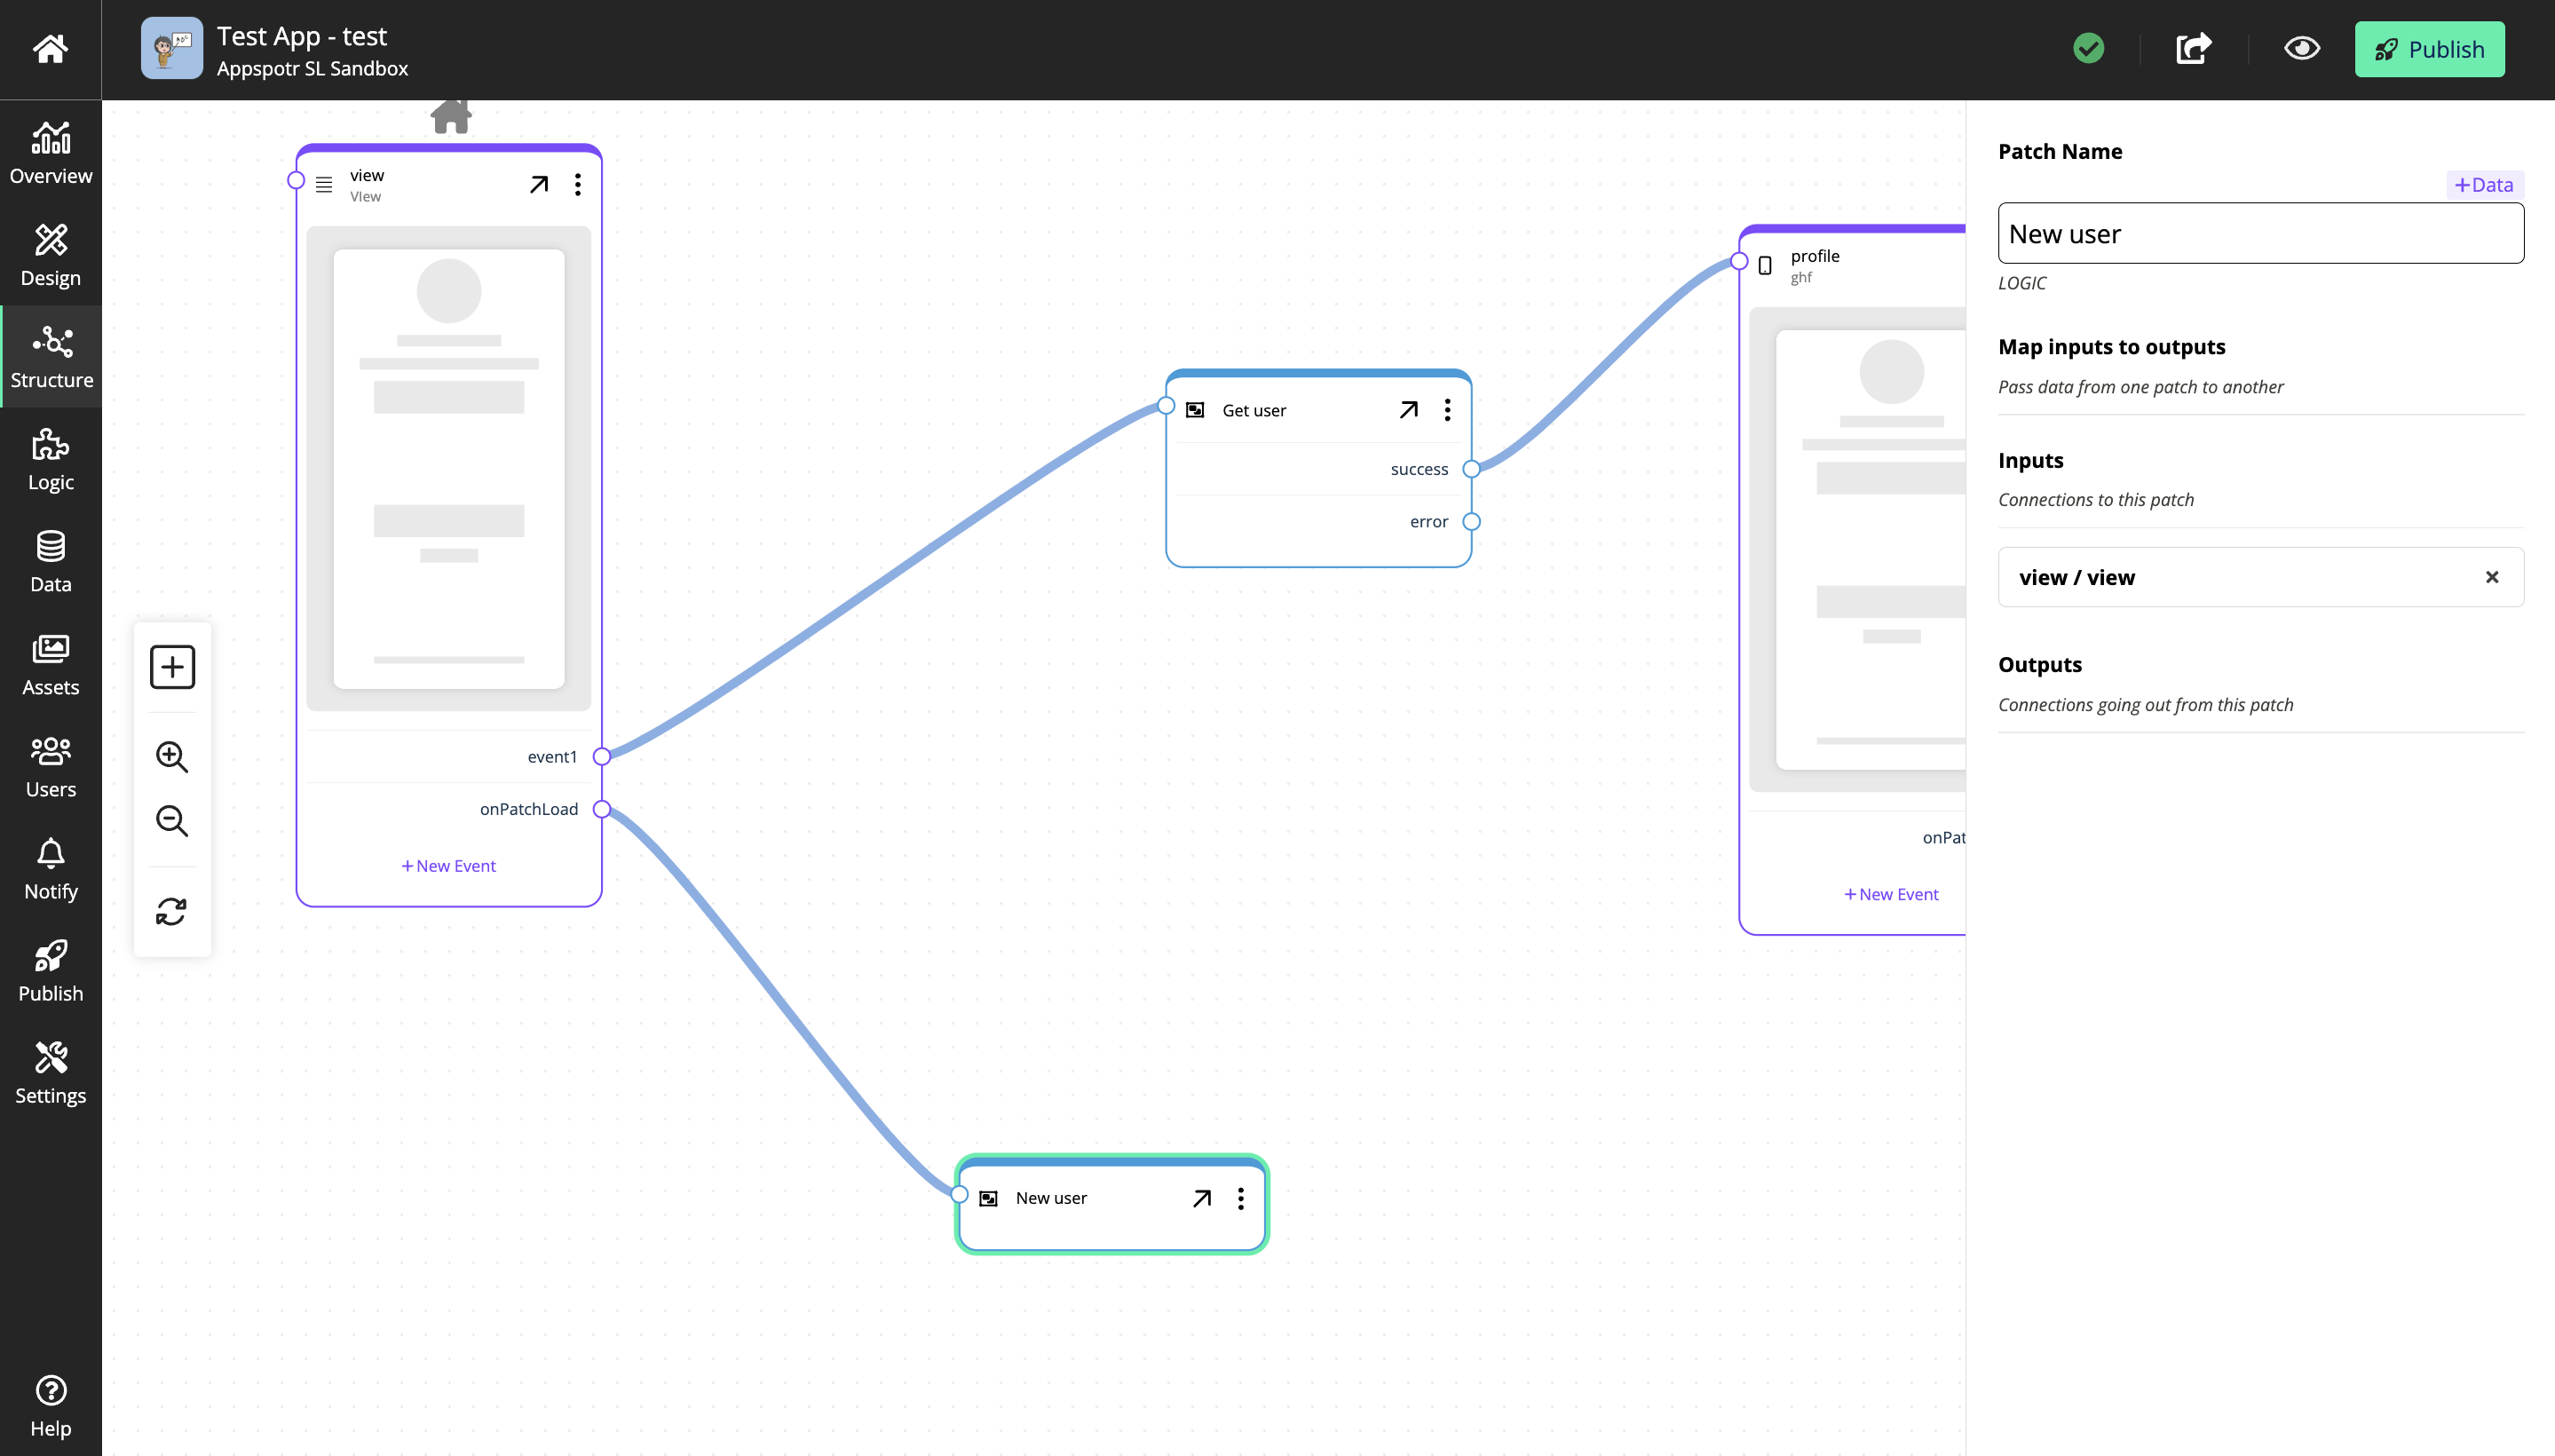
Once you define the parameters in Structure Builder, you can pass those parameters to the relevant logic blocks on the Logic canvas by clicking on the connection between them.

Defining outputs
Just like we defined the input parameters we can also define the output parameters through the custom logic.
Assume that as the output here, we need to pass the user.

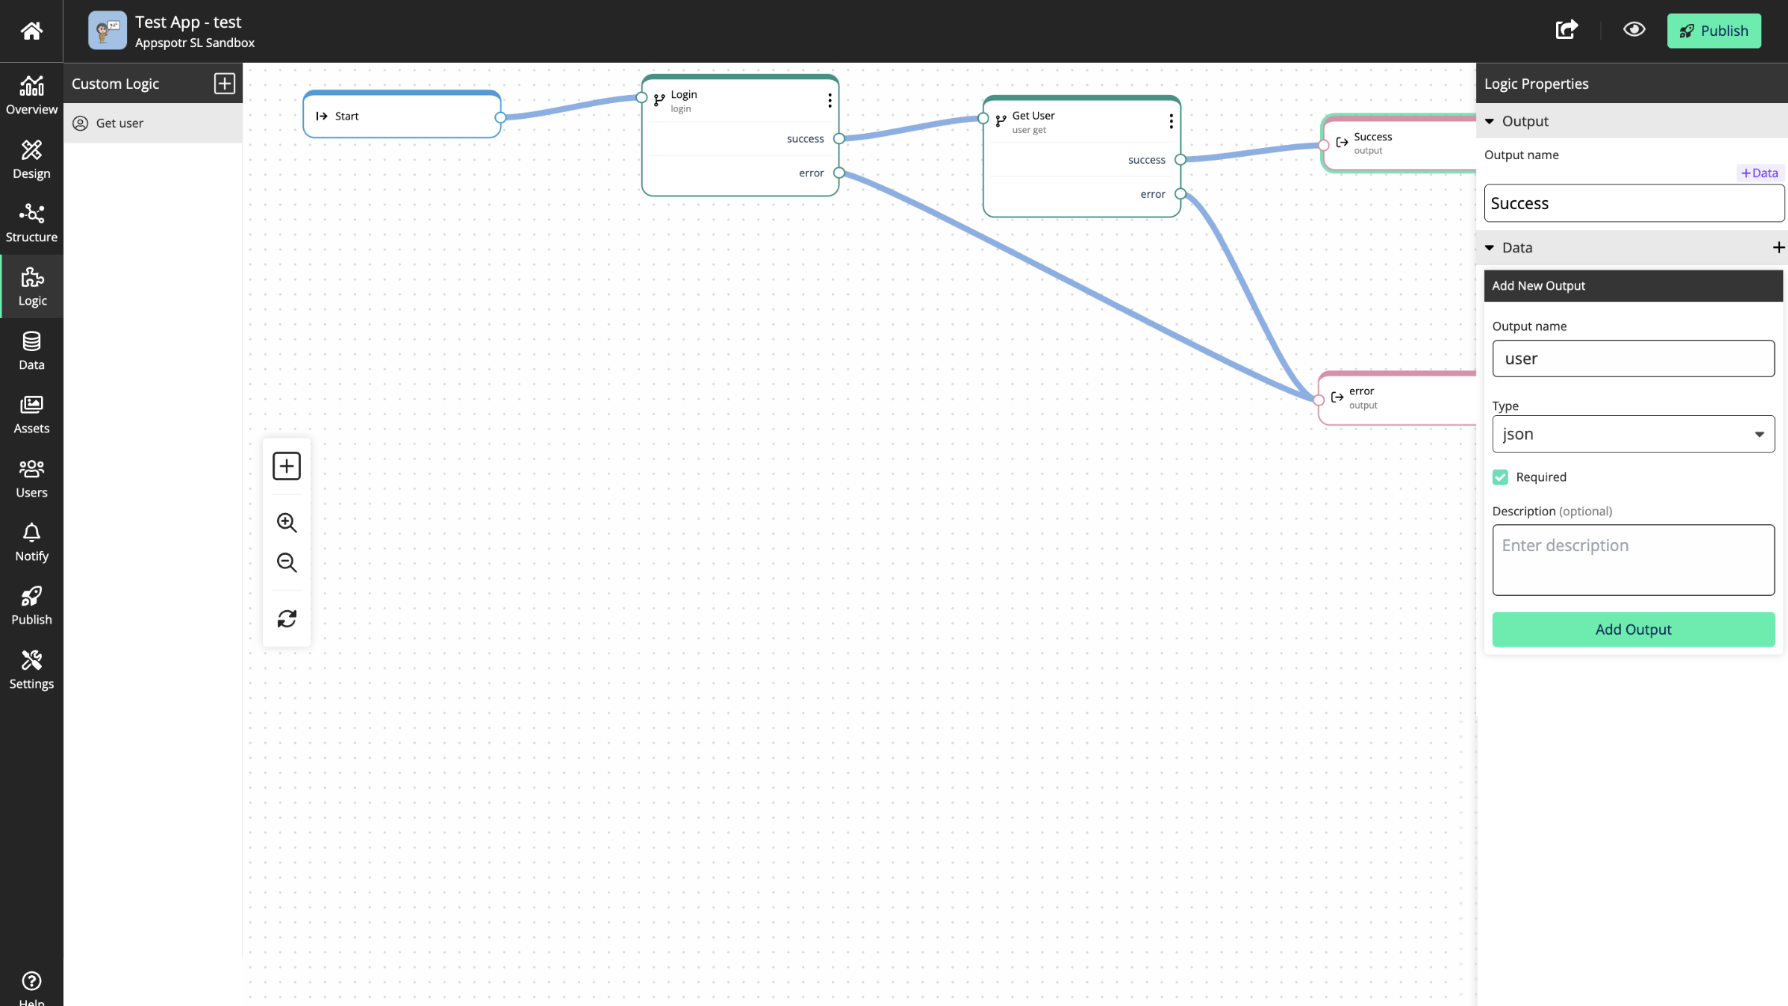
You can add the parameter data and click on Add Output.
And by clicking on the connection, you can map it as well, so the output is passed. And it will be exposed to the structure builder.
And go back to Structure builder and add an output to the custom logic
When you click on the connection, you will be able to pass the user that is defined earlier as an output.
Second way to create custom logic
This process starts on the Structure Builder
Here you can create the custom logic by clicking on + patch > Logic menu > + custom logic
Then you can name the custom logic and follow the same steps followed during the 1st method.
Third way to create custom logic
This process starts on the Structure Builder
Here you can start with creating a View patch and then connecting logic patches to it.
When you keep adding the logic patches, they will connect automatically and be converted into one custom logic which you can rename by right clicking on it.
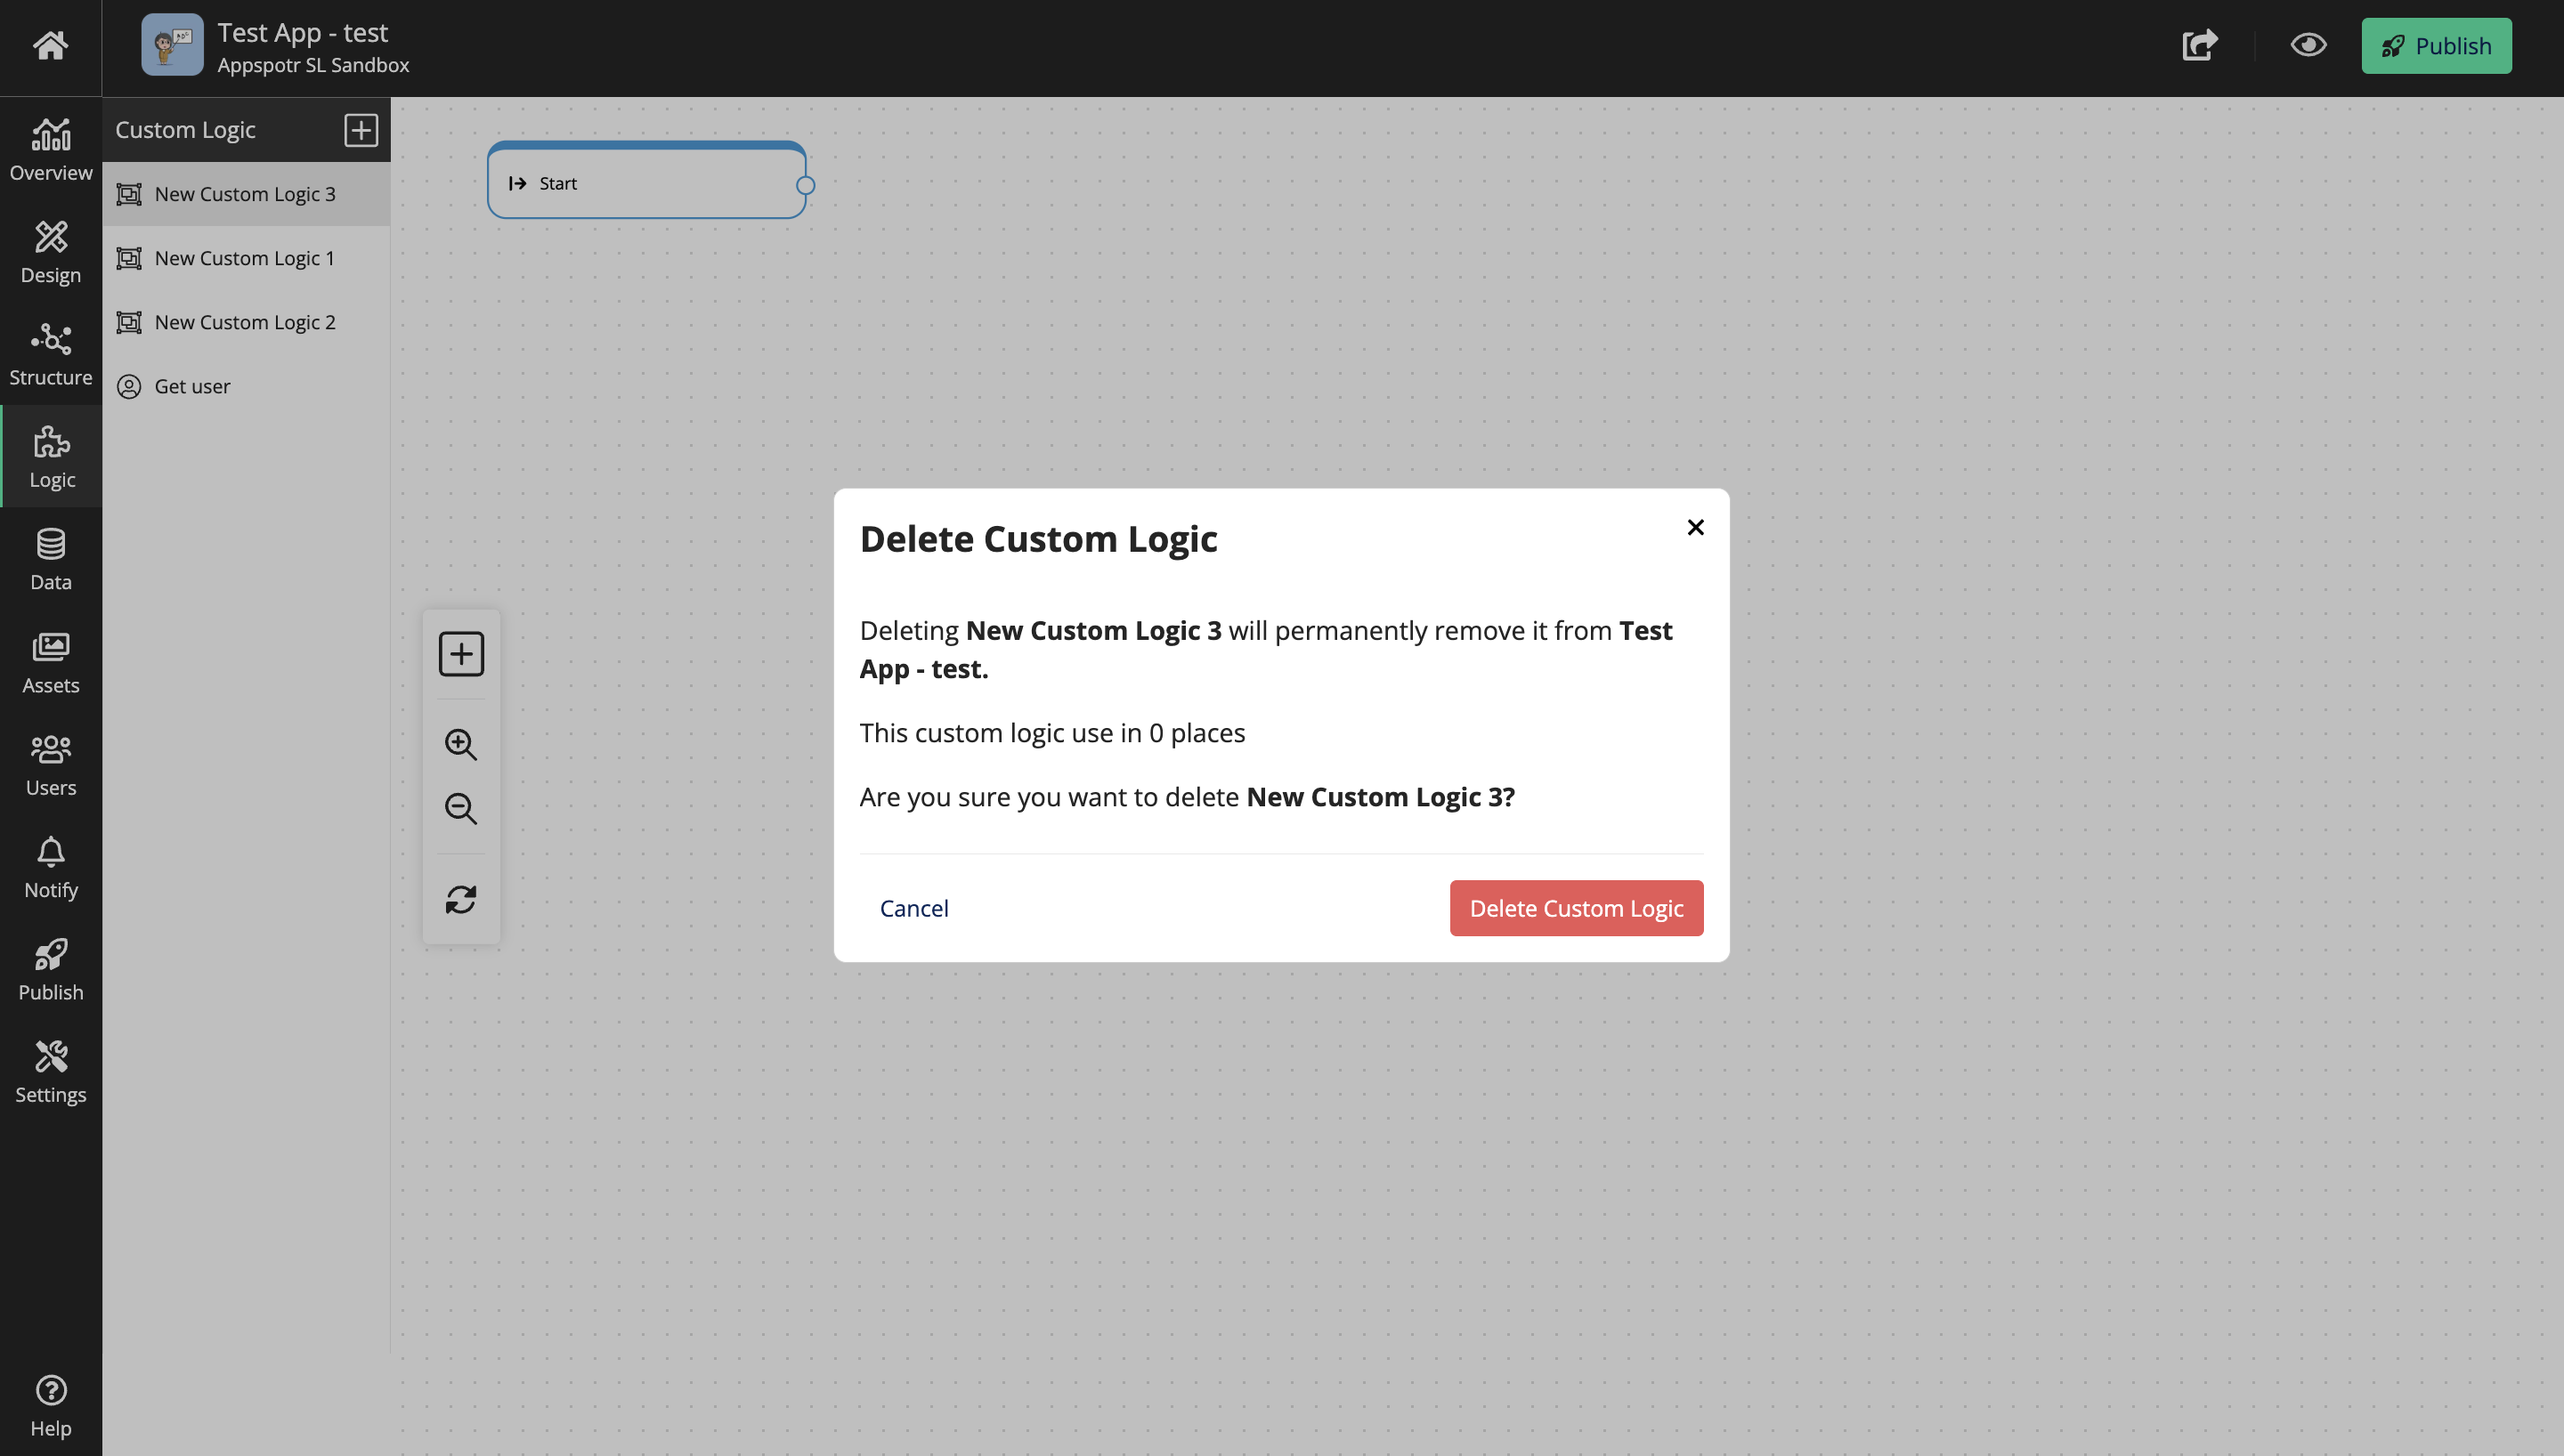
Deleting a custom logic
To delete a custom logic, you have to go to Logic menu and click on the delete button on the relevant custom logic.
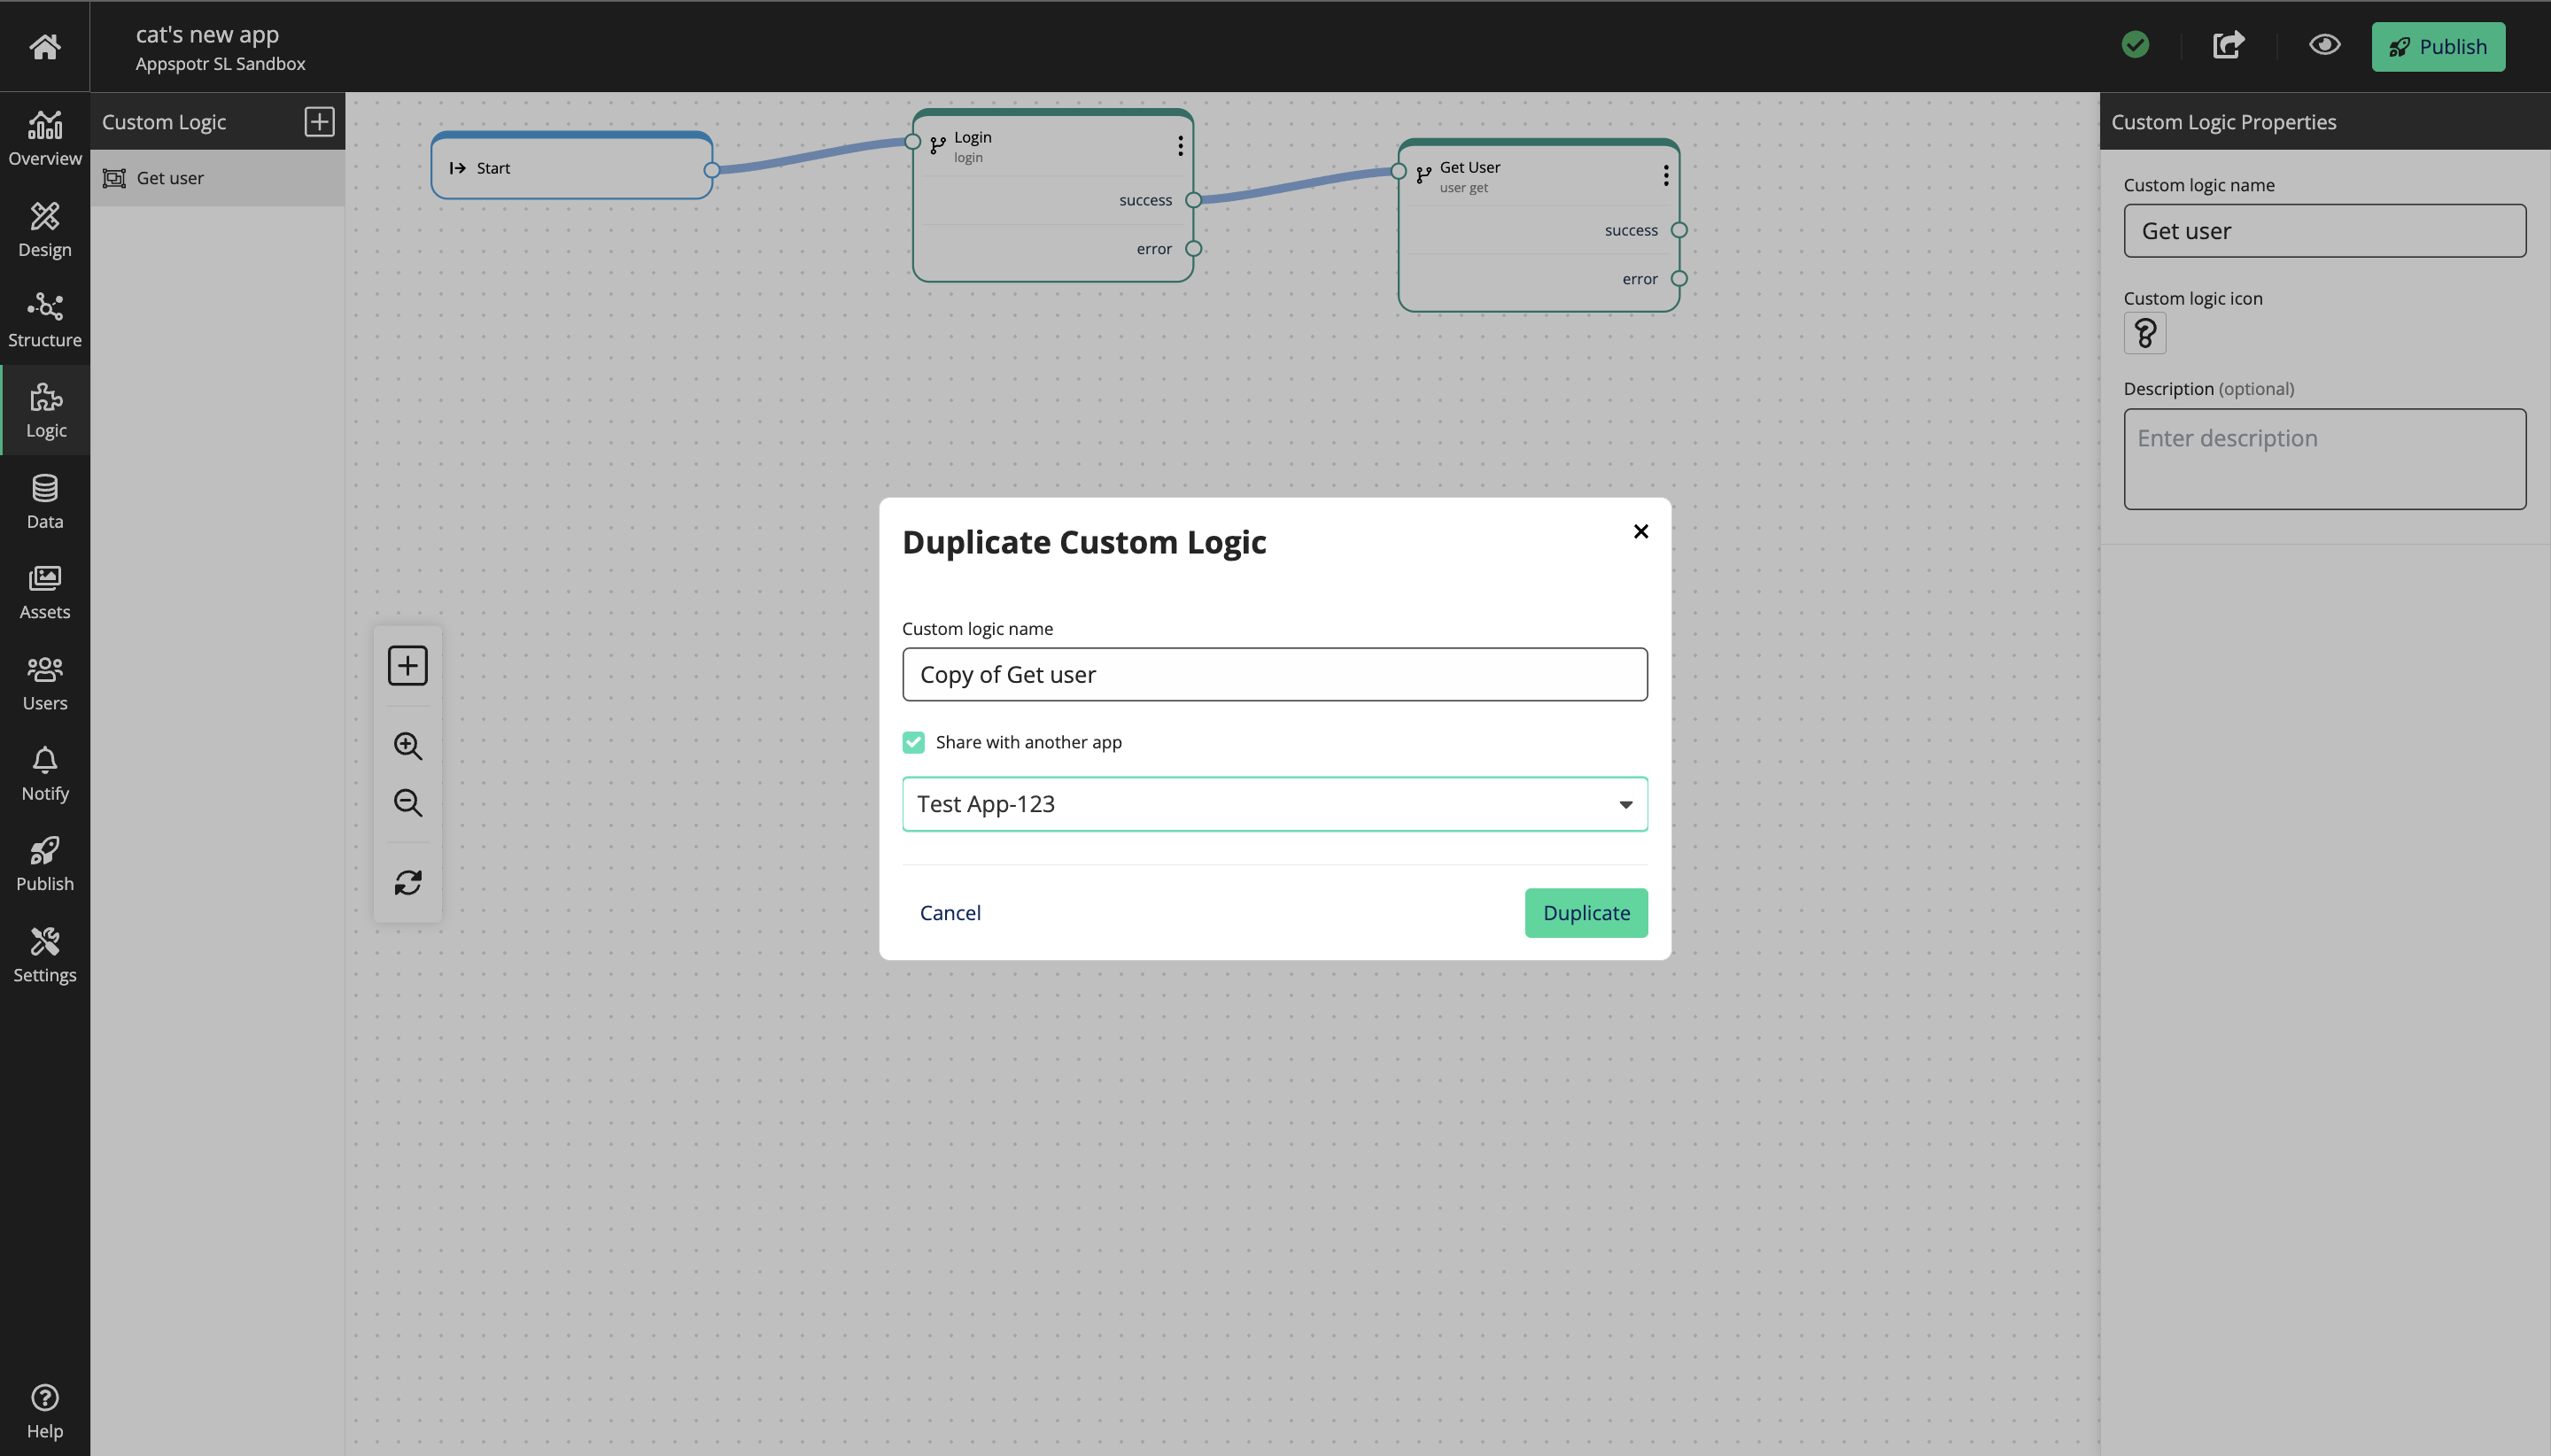
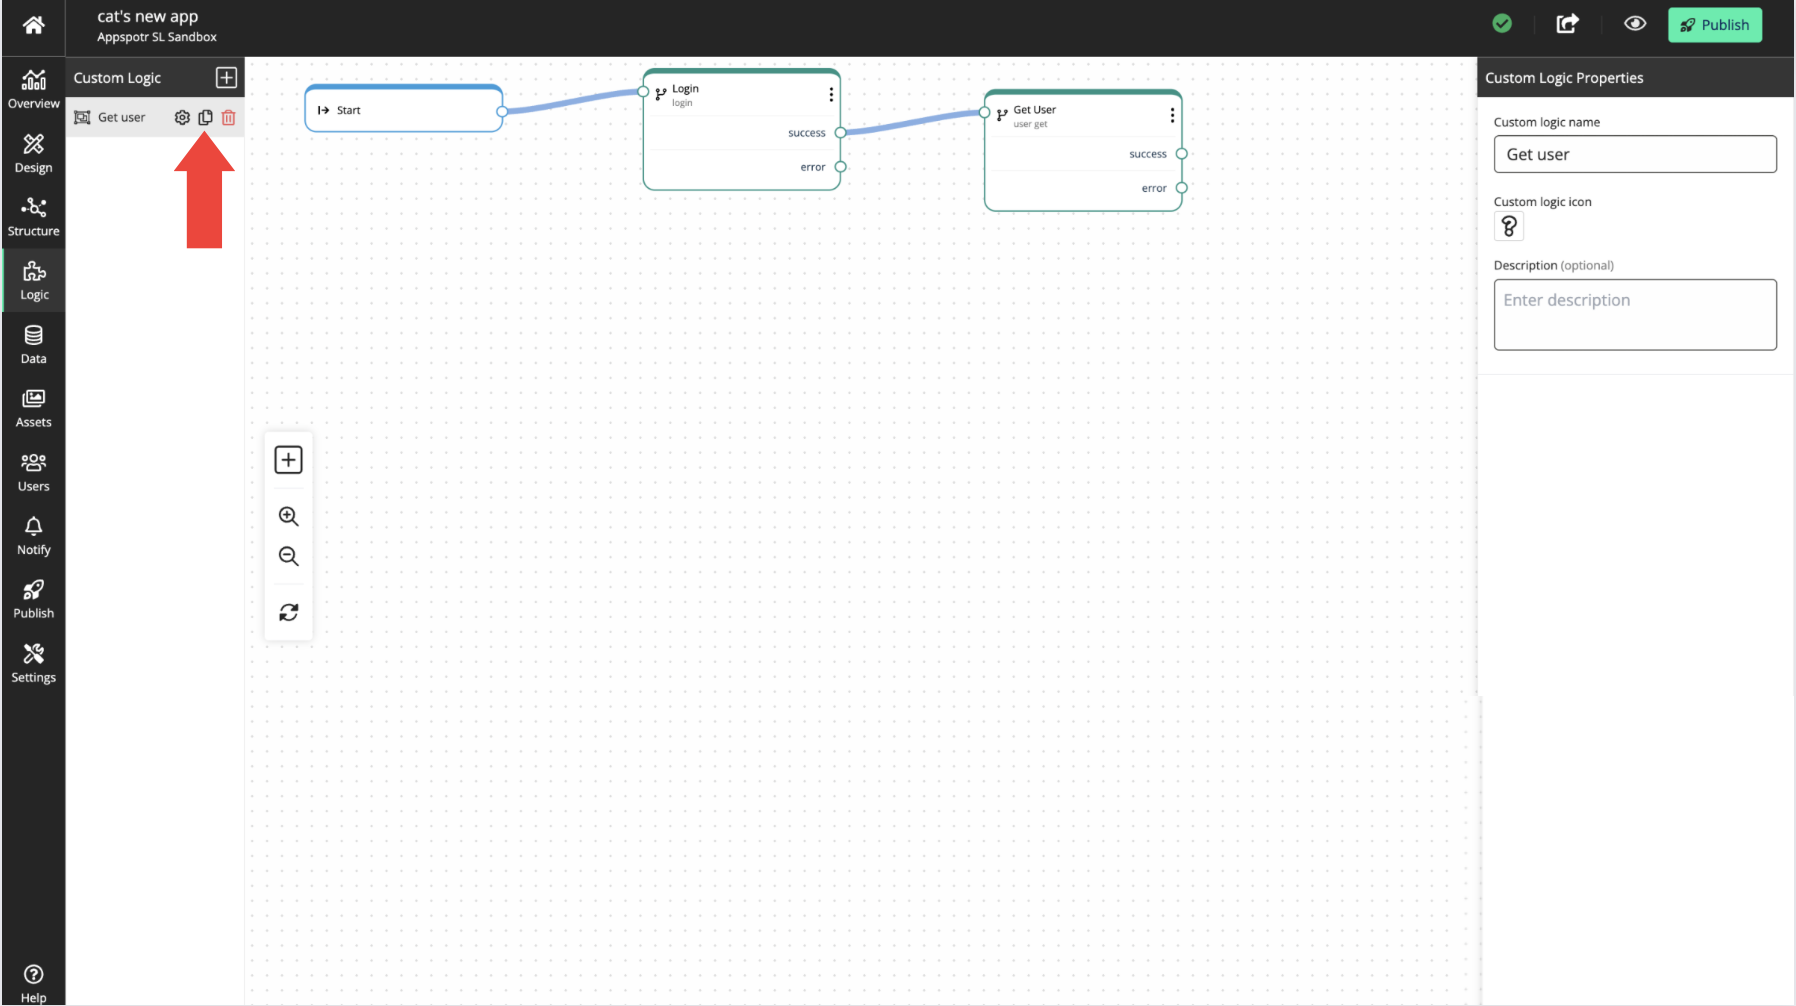
Duplicating Custom Logic
Once you have created a custom logic, you can duplicate it and use it for other apps too.
Click on the Copy icon of the relevant Custom Logic
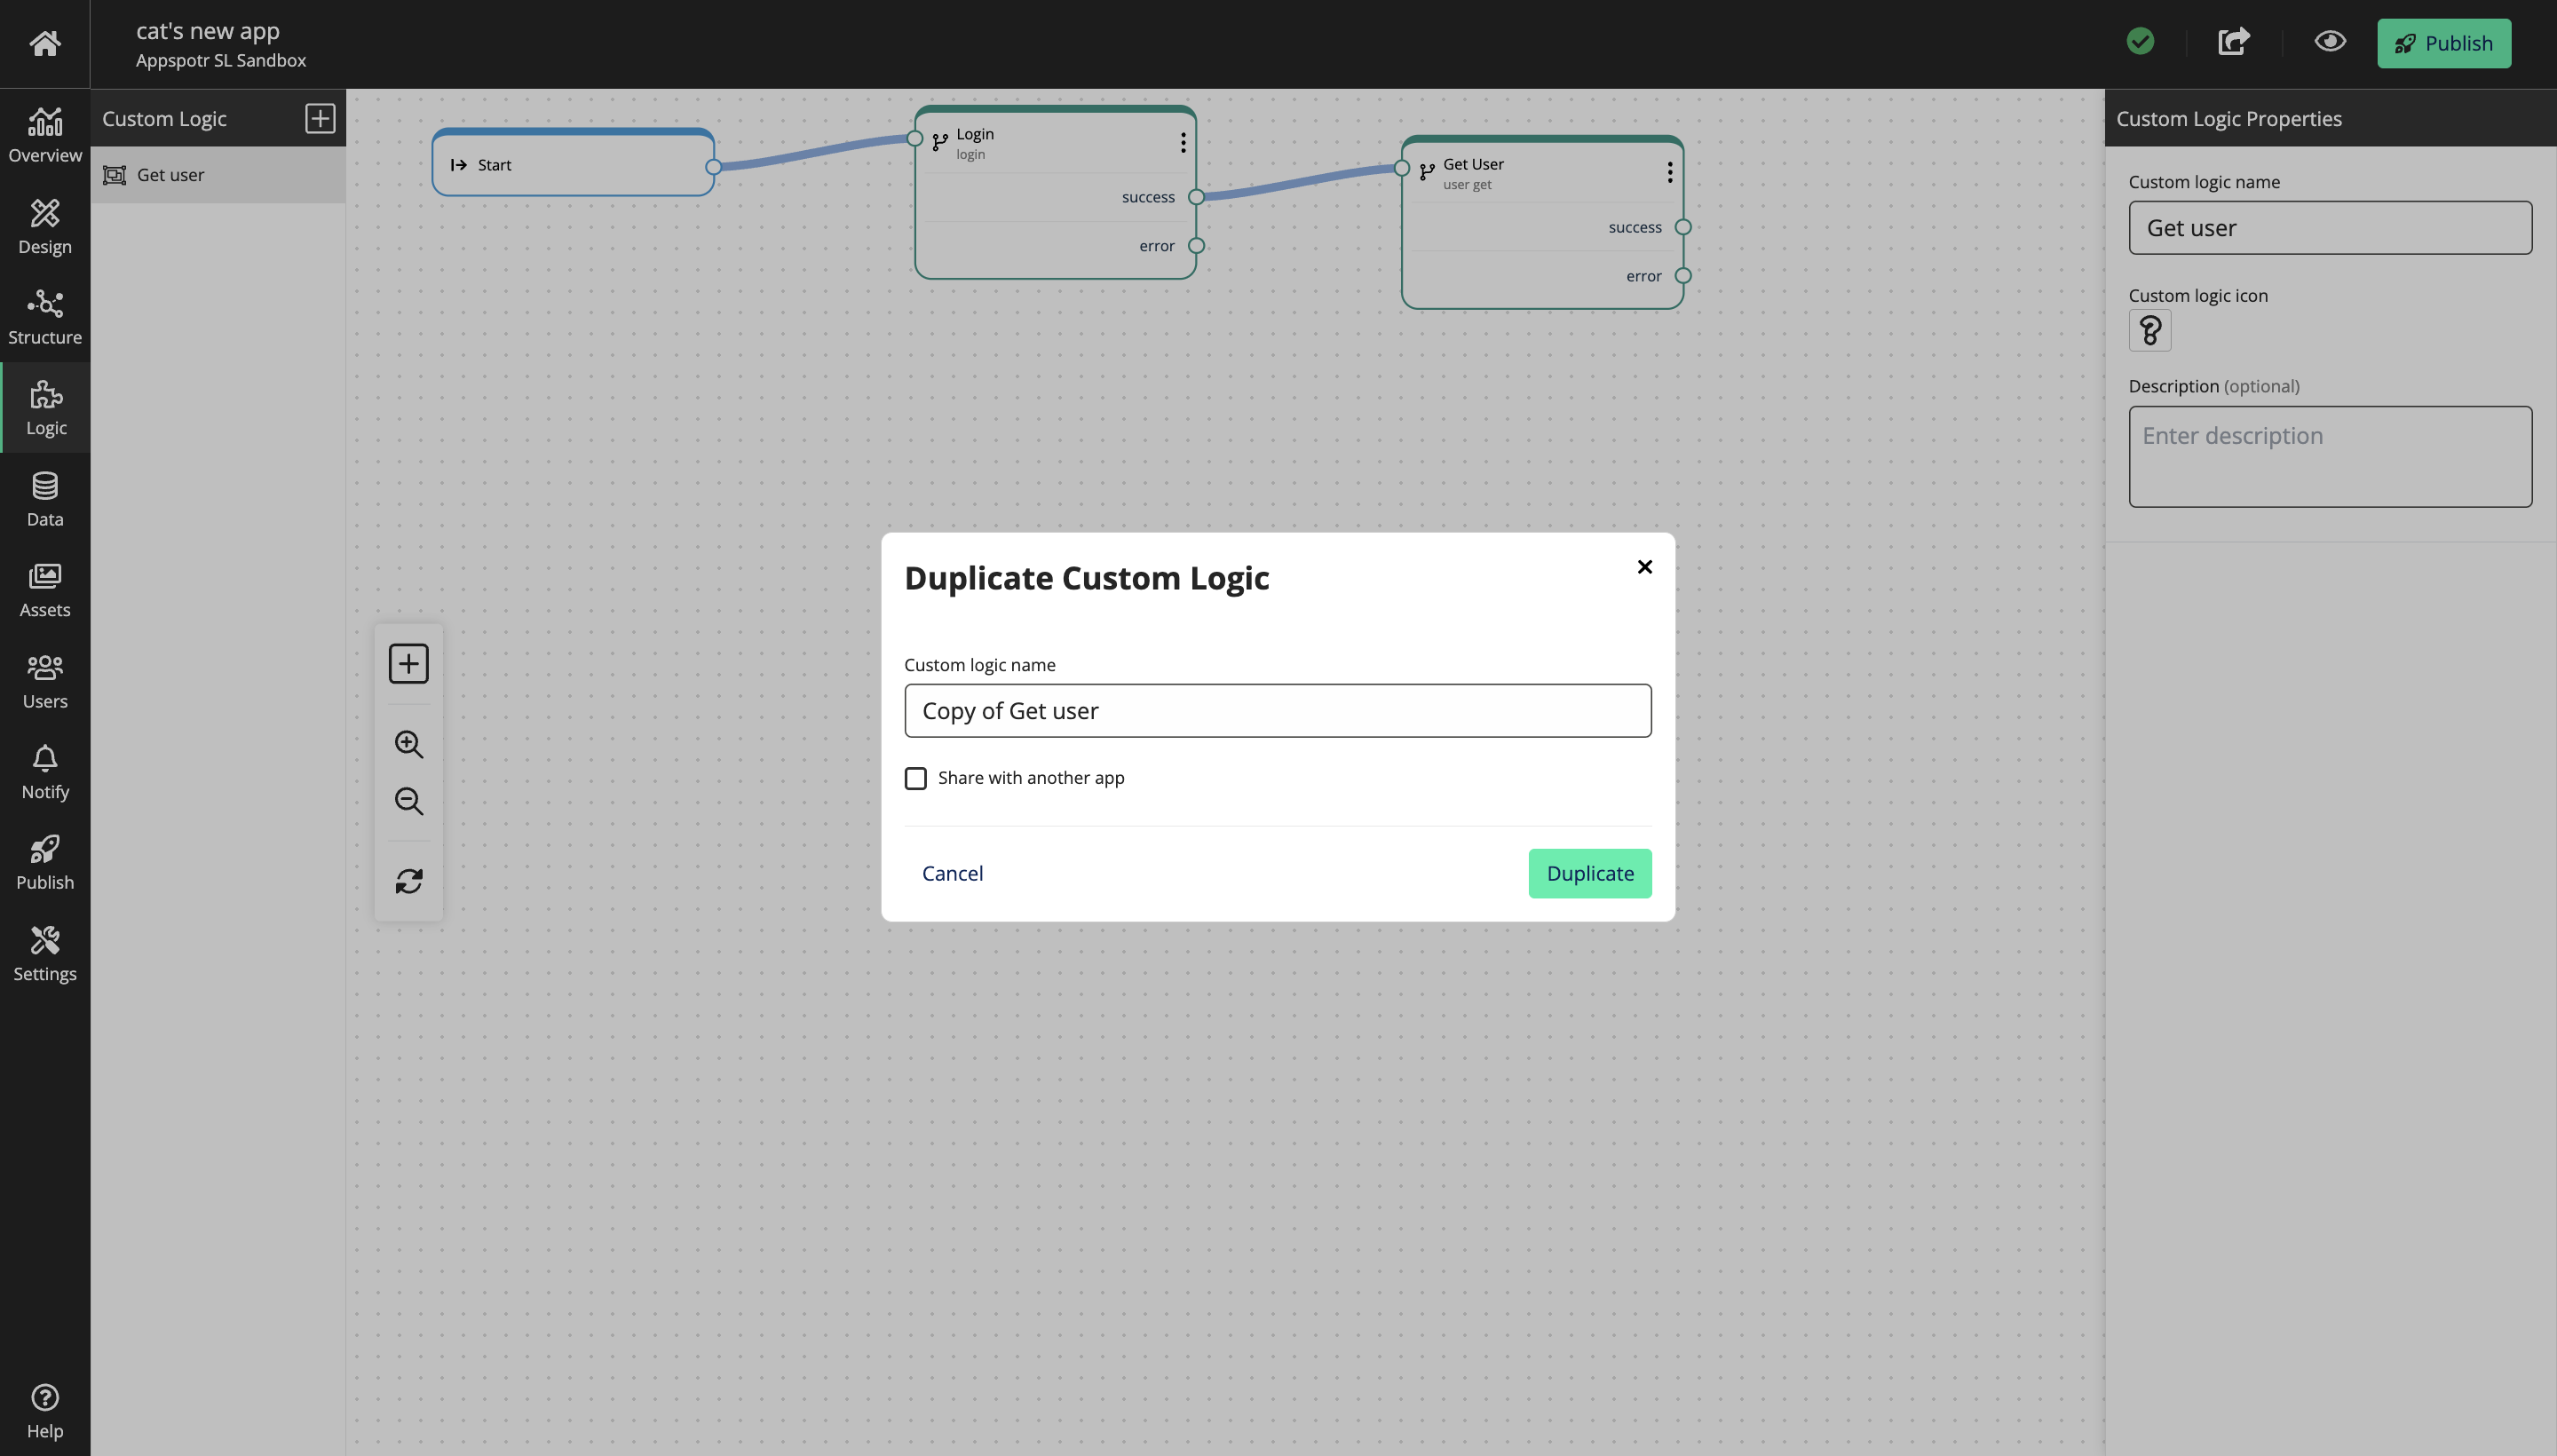
You can rename it if you want to.
To share the duplicated Custom Logic with other apps that belongs to you, check the ‘Share with another app’ check box.
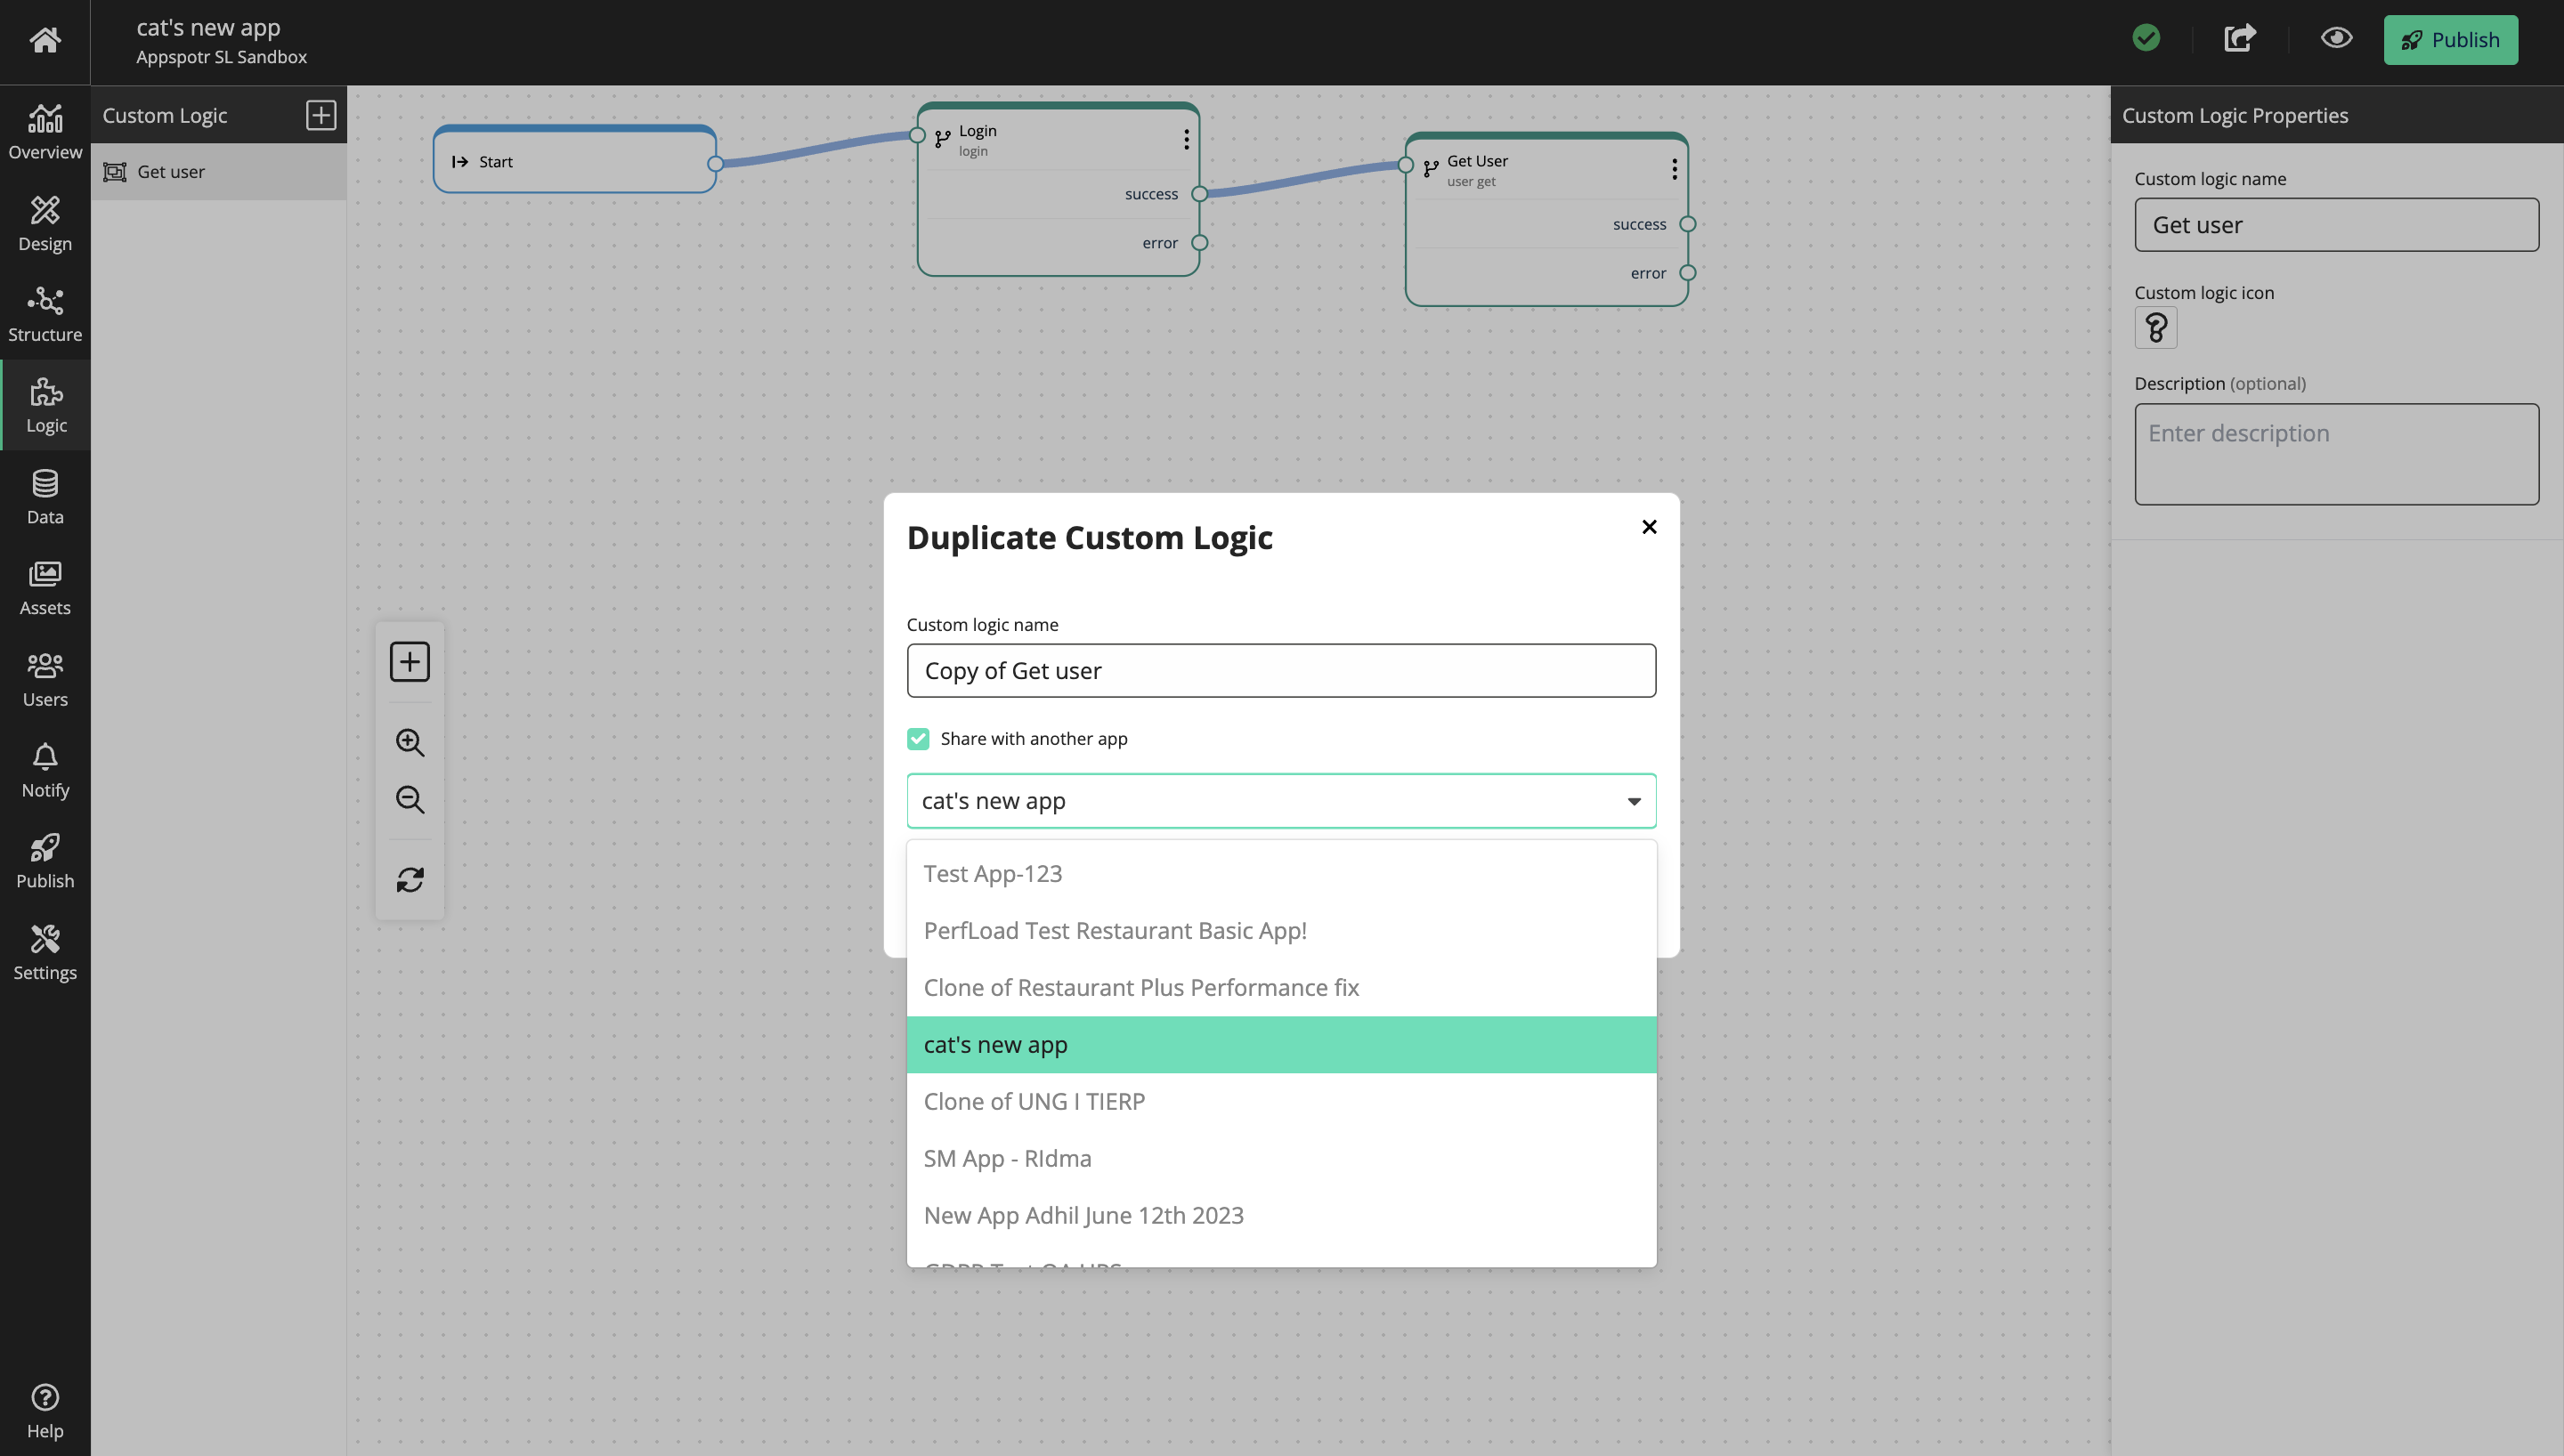
Here you will get to pick the app that you want to share this duplicated Custom Logic and click on Duplicate.
And now when you open to the Logic tab of the app you selected, the duplicated custom logic will be displayed under the Custom Logic.